In this tutorial, we’re going to look at how to set up a guest network VLAN on Unifi.
There are many reasons to set up a guest network, but the main one is that the traffic will be segregated from your other devices. Traditionally, devices that are connected to the same network will be able to see each other.
From a best practices standpoint, setting up a guest network is a great way to solve this problem and ensure that the people who are connecting to your Guest WiFi will not be able to access your personal devices. There are other benefits as well, like bandwidth profiles which will allow you to set up maximum download/upload speeds, but the main benefit is network segregation.
We will look at two different options on how to set up a guest network VLAN on Unifi. The first option technically doesn’t utilize a VLAN, but it’s significantly easier, so I’m going to include it. Both processes are completed using the Unifi Controller!
How to Set Up a Guest Network VLAN on Unifi
As mentioned above, this first option will allow your Unifi Controller to manage the network segregation.
Configuring a Guest Hotspot
This method will allow the Unifi device to do the hard work, meaning that the same subnet is used for all devices. However, devices that are connected to your guest network will be isolated from other devices. This means that they will not be able to connect anywhere else.
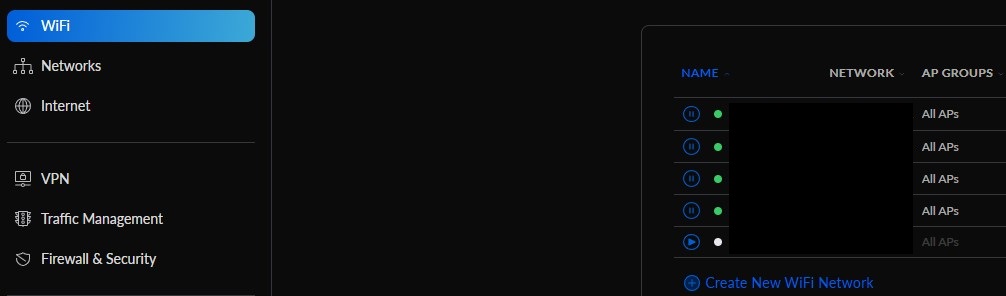
1. Open the Unifi Controller and select the Settings Gear Icon.
2. Select WiFi and then select Create New WiFi Network.
3. Enter a Name and Password, select your network, then select Manual.
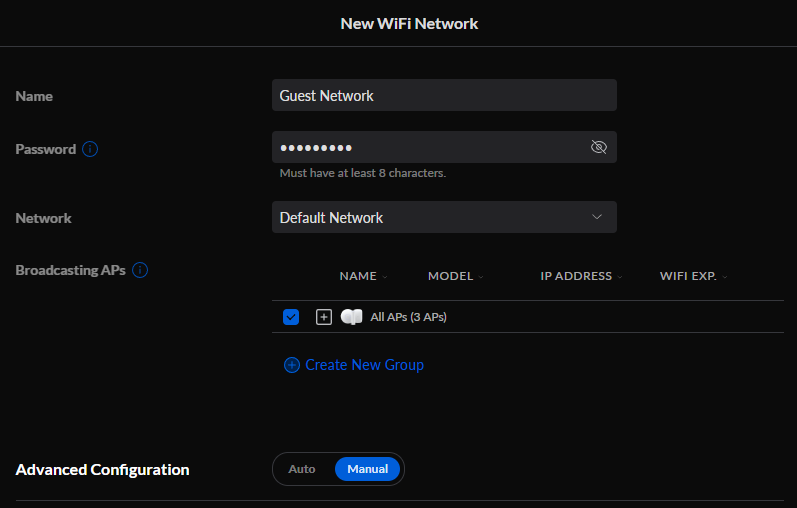
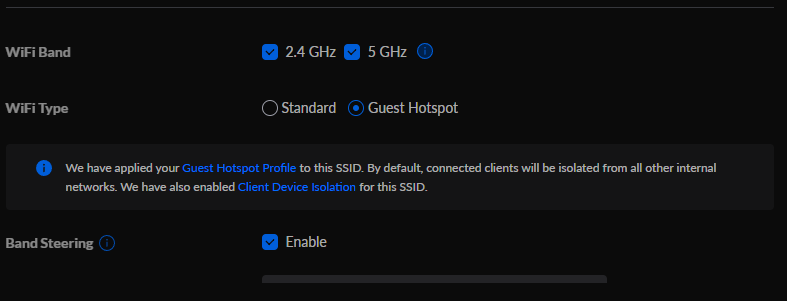
4. Change the WiFi Type to Guest Hotspot. Please keep in mind that this will isolate all clients and while they will technically be on the same subnet as the other devices on your network, they will not be able to access anything.

5. You can modify any of the other settings that you’d like. When you’re done, select Add WiFi Network at the bottom to add the new network.
As mentioned above, all devices connected to the guest network will be isolated from one another. This means that they won’t be able to see each other, and they also won’t be able to see any devices on the same subnet, even though they are technically on the same subnet.
At this point, there is no further configuration. However, I do want to point out that you can configure a bandwidth profile if you’d like (explained further down in this tutorial).
Configuring a Separate Subnet
The process above showed how to set up a guest network on Unifi, however, this process will look at how to set up a guest network VLAN in Unifi.
If you are using Unifi Switches and Access Points only, there might be further VLAN configuration on your router that you must complete first!
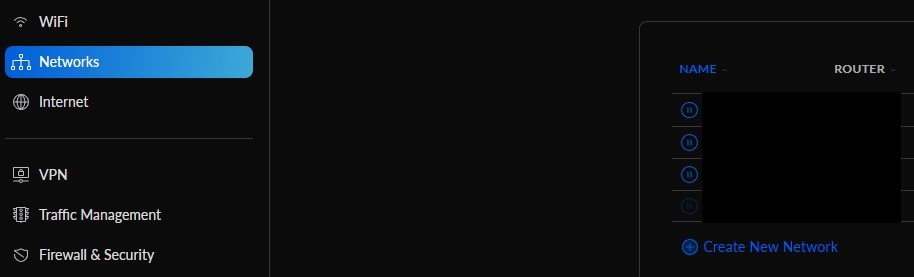
1. Open the Unifi Controller and select Settings (gear icon).
2. Select Networks and then Create New Network.
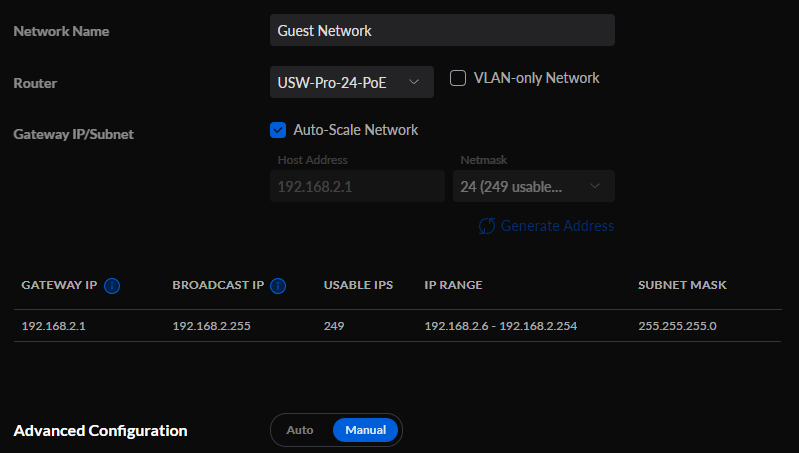
3. Enter a Network Name, select your Router (if necessary), and uncheck Auto-Scale Network if you’d like to modify the IP subnet used. Then select Manual under Advanced Configuration.
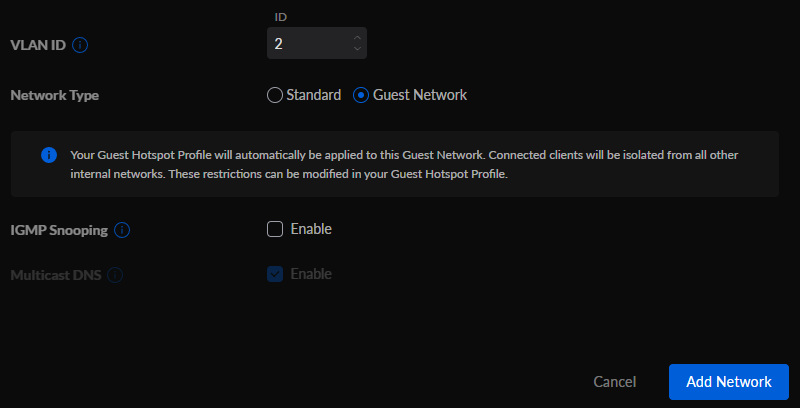
4. Set a VLAN ID and then change the Network Type to Guest Network so that this network will be isolated from other internal networks. You can then select Add Network to create the network.
5. Select WiFi and then select Create New WiFi Network.
3. Enter a Name and Password, select the network you created above, then select Manual.

4. Set the WiFi Type as Guest Hotspot so that no devices on the guest network can communicate with each other, then save the network.
5. Your guest network is now set up! If you try and access any other devices while on this network, the traffic will be blocked. However, your guests will be able to access and browse the internet. They will also be on a separate subnet (in our case, 192.168.2.X).
Limiting Upload/Download Speeds with a Bandwidth Profile
If you’d like to set up your guest network so that it has a maximum download and upload speed, you can easily do that by following the instructions below.
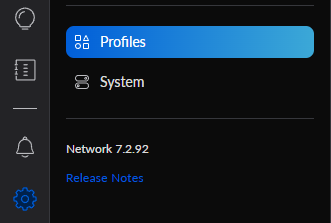
1. Select Settings, then Profiles.
2. Under Bandwidth Profile, select Create New Bandwidth Profile.

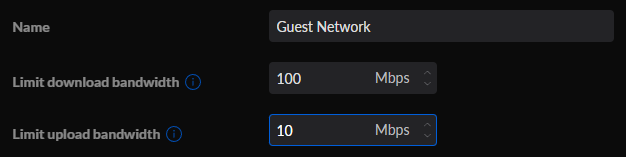
3. Create a Name, then set the maximum download and upload speeds. When you’re done, Apply Changes.
NOTE: The maximum download and upload speed you can use is 100 Mbps.
4. Navigate back to your Guest WiFi Network (WiFi > Select your Guest Network), then under Bandwidth Profile, select the new Guest Network bandwidth profile we just created.

5. The bandwidth will now be capped at the maximum specified!
Conclusion & Final Thoughts: Configuring a Guest Network in UniFi
This tutorial looked at how to set up a guest network VLAN on Unifi. Technically, both options are extremely similar thanks to Unifi’s Guest Hotspot feature. As long as this option is enabled, the guest network will not be able to access any other devices, whether it’s on the same subnet or a different subnet. However, some users prefer using a separate subnet for their guest network, which is why we looked at that options as well.