Today we are going to look at how to setup PhotoPrism on a Synology NAS using Docker.
PhotoPrism is a tool that you can run inside of Docker that will manage your photo collection. The setup of the container is relatively straightforward, but it’s a pretty powerful photo management solution that was recently upgraded with a ton of new features (including facial recognition).
It has a lot of similar features that Synology Photos has, but it’s missing a few that some users might find important. For example, as of right now, there’s no mobile application. This is relatively important to a lot of people, as the Synology Photos mobile application will automatically back up newly taken photos. Some workarounds allow you to use other applications to “sync” the newly taken photos to a folder on your Synology NAS. Overall, I’d classify this as more of a “workaround” than actual functionality.
1. How to Setup PhotoPrism on a Synology NAS
1. Ensure that Docker is installed.
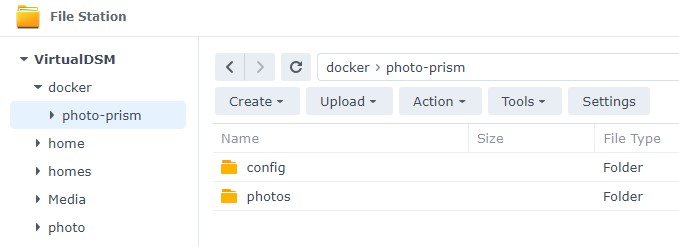
2. Create a subfolder under the Docker folder named photo-prism. Inside of there, create two subfolders – config and photos.
3. In a later step, we will take a look at how to map different photo directories to PhotoPrism. However, if you don’t currently have a folder that’s storing your photos, copy your photos into the photos folder. This is what PhotoPrism will read when the tool is launched.
4. Launch Docker and inside of the Registry, download the latest photoprism/photoprism image. The image is large, so it will take a little while to download.

5. When the image is finished downloading, double-click it to create a new container. Give the container a Name and select Advanced Settings.
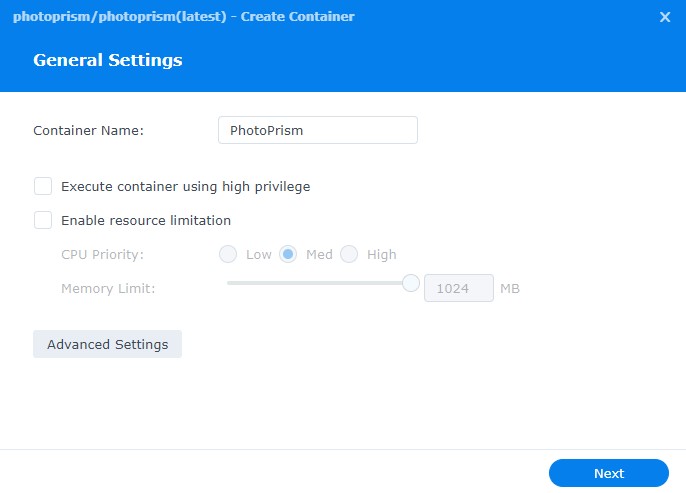
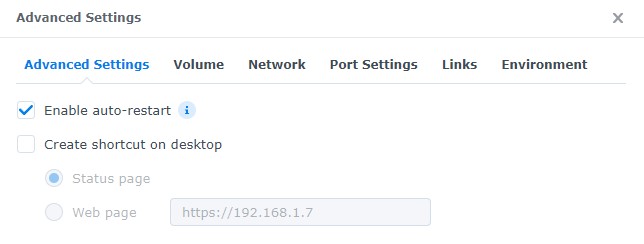
6. Check off Enable auto-restart. This will automatically start the container.
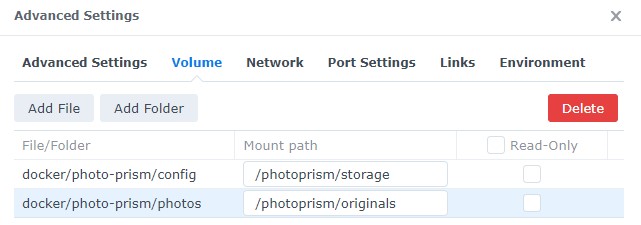
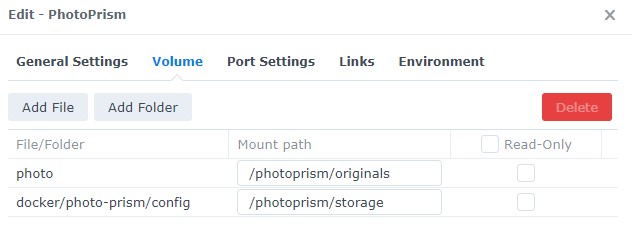
7. In the Volume section, create two volume mappings as shown in the screenshot below. The first will map our config folder to the /photoprism/storage mount path. Our second will map our photos folder to the /photoprism/originals mount path.
Please skip to the Synology Photos Integration step below if you’re interested in using the Synology Photos mobile application with PhotoPrism.
8. In the Port Settings, change the Local Port from Auto to 8080.

9. In the Environment Variables section, create a new environment variable called PHOTOPRISM_ADMIN_PASSWORD and add the value as whatever password you’d like to use on the webpage.

10. Select Apply and create the container. Give the container a few minutes to create, then access the webpage using your Synology NAS’s IP address and port 8080.
http://SYNOLOGY_NAS_IP:8080
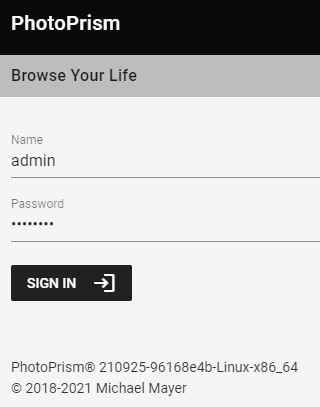
11. Log in with the username admin and the password you created in the environment variables.
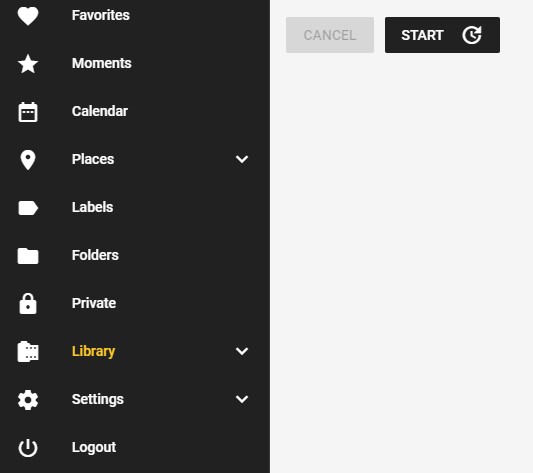
12. After you’re logged in, select Library, then Start. This will start to index your photos and you should see them start to appear. It’s going to take a little while to index all of your photos as it’s dependent on size. If you’re going to be indexing thousands of photos, give it some time to crawl all of the info in. Please note that facial recognition will not start until all photos have been indexed.
13. At this point, PhotoPrism is set up!
2. Synology Photos Integration
Following the instructions below, you can utilize Synology’s default photo folder (which is the Shared Space in Synology Photos) as the folder that PhotoPrism will read. The benefit that this provides is you can set up your mobile device to automatically back up newly taken photos to the Shared Space. With this “workaround”, you can use the Synology Photos mobile application to automatically back up newly taken photos to the Shared Space, then have PhotoPrism read that folder. There are other solutions you can use to move photos, but this appears to work relatively well.
I want to be clear that this is not something that I can guarantee will work. I have tested it myself and it DOES work for me, but due to the nature of how people use Synology Photos (and the permission structure), I can’t say that this will work for everyone. Please keep that in mind if you’d like to implement this.
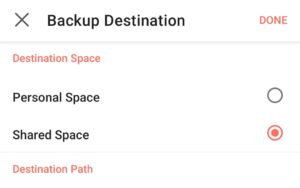
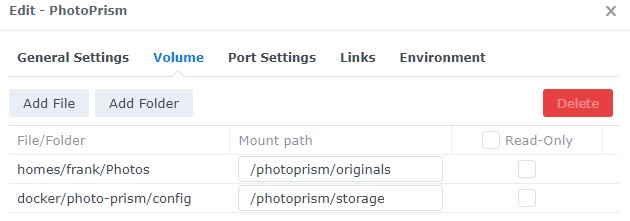
In the Volume section, you will change the “photos” folder that we created to be the default photo folder automatically created by Synology. At this point, you can perform an index (following the steps above in PhotoPrism) and it will slowly crawl in the media you have in your photo folder.
At this point, with the mobile Synology Photos application, you will be able to automatically back up newly taken photos. PLEASE BE AWARE THAT THESE PHOTOS WILL BE VISIBLE IN THE SYNOLOGY SHARED SPACE BY ALL USERS. DO NOT UTILIZE THIS METHOD IF PRIVACY IS A CONCERN.
If privacy is a concern, you can change the mobile application to back up to your Personal Space and then link the Volume to that location.
The downside to this is that if you’re using PhotoPrism as a family, we are only mapping one user’s home folder to our Docker container, so each phone would have to be signed in to that account. If you want to map multiple home folders (for individual users), you probably should just use the Shared Space as shown above. With that said, I’m sure there are situations that I’m not thinking of, so this is an option as well.
3. Conclusion & Final Thoughts on PhotoPrism
This tutorial showed how to setup PhotoPrism on a Synology NAS using Docker. PhotoPrism is a legitimate solution for a lot of people now that facial recognition is working. It still requires an initial set up and some users might be unhappy with some of the functionality, but overall, this is a legitimate Synology Photos contender.
I just want to be clear that the indexing can take a long time. If you are someone who has hundreds of thousands of photos, we might be talking weeks instead of days. As indexing will greatly depend on the NAS device and the total number of images, it’s difficult for me to give you a rough estimate for how long everything will take, but don’t get discouraged if you aren’t seeing immediate progress. This is something that’s best to set up and check on after a few days (if you have many photos).
Thank you for reading the tutorial. If you have any questions, feel free to leave them in the comments!