I’ve been running Docker on Proxmox for a while now, most recently on my two-node custom-built Proxmox Cluster using Proxmox VE 9.1. Before that, I ran it on a Synology NAS, a Raspberry Pi, TrueNAS, Unraid, and just about everything else you can think of. This is still my favorite way to do it. Here’s the setup.
If you’re not sure whether Proxmox and Docker even belong together, my Proxmox vs Docker comparison breaks that down first.
VM or LXC for Docker in Proxmox?
This comes up constantly, so let me answer it. The short answer is to use a VM.
Running Docker inside an LXC container does use fewer resources. LXC containers start faster, share the host kernel, and only consume what they actually need, so if your container sits doing nothing, it’s not holding onto memory. On the other hand, a VM reserves a fixed block of RAM. If I allocate 4GB to a VM, that 4GB is used whether the VM needs it or not.
With that said, the Proxmox team recommends that you use a VM rather than LXC specifically for Docker. The reason is isolation. A VM has its own kernel, so if something goes wrong inside the container environment, it’s contained there. With an LXC, Docker containers share the host kernel, which reduces the security boundary.
Here’s the thing, though…an LXC works. I’ve run Docker in an LXC container and never had a problem with it, but for most people, setting up a VM is the right approach. The security benefit is big, backups are simpler, and the resource overhead isn’t as bad as it sounds once you’re running more than a few containers.
For a more detailed breakdown of how these two options compare in Proxmox specifically, see my article on Proxmox Containers (LXC) vs. Virtual Machines.
Install the OS on a Virtual Machine
This tutorial uses Ubuntu Server 24.04. You can use another distro (as the commands below will work on any Debian-based distro), but Ubuntu is what the official Docker documentation targets and what I’d recommend if you’re starting fresh.
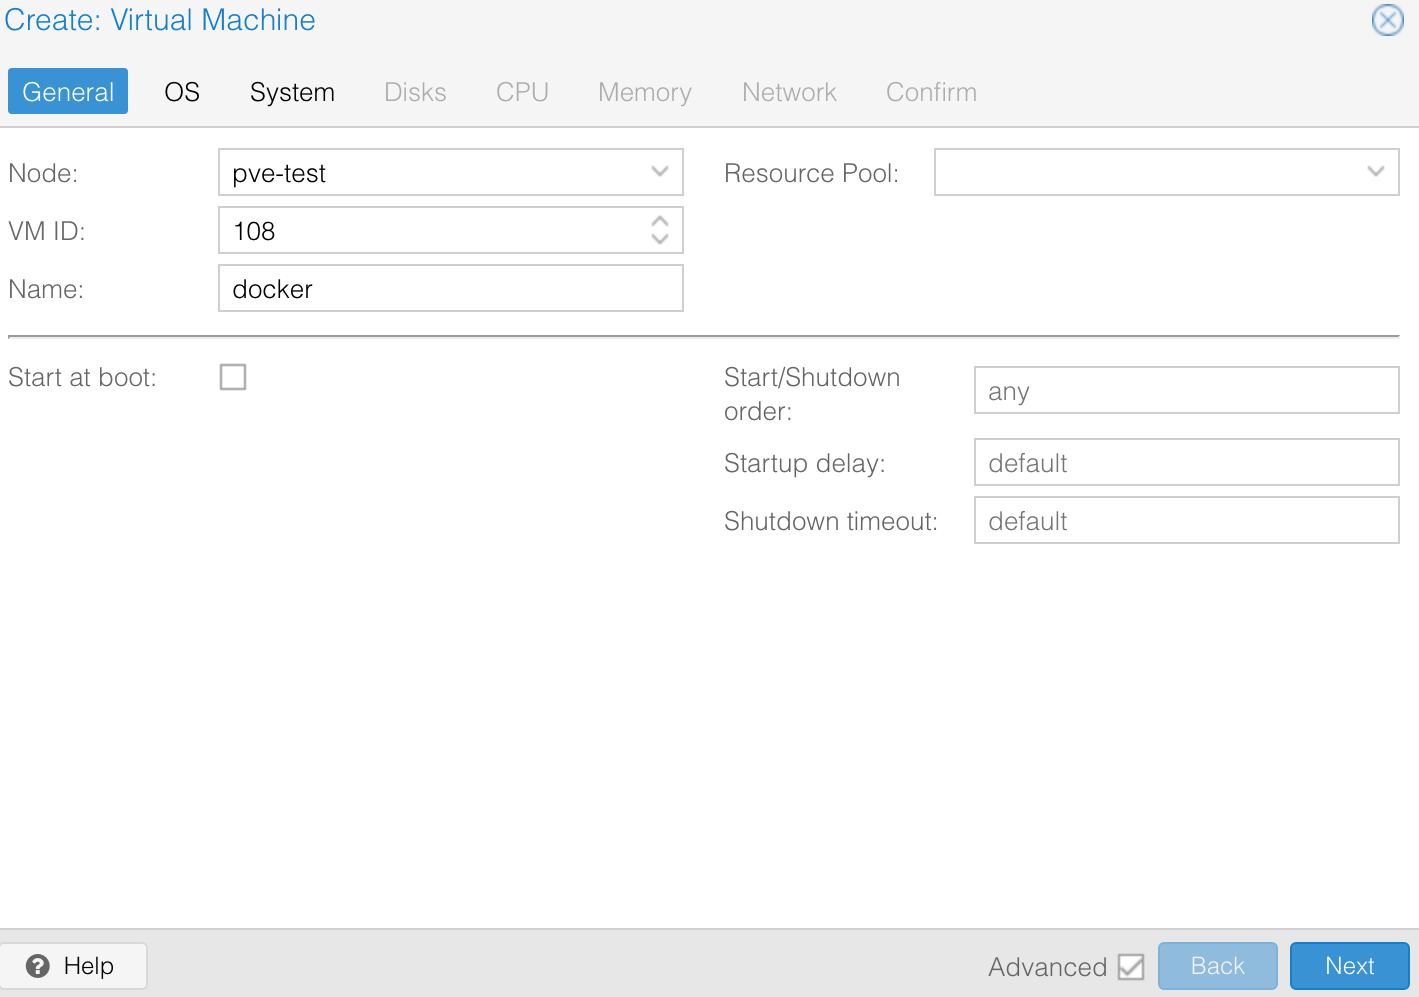
1. Create the VM in Proxmox.
Select Create VM, give it a name, and click Next.
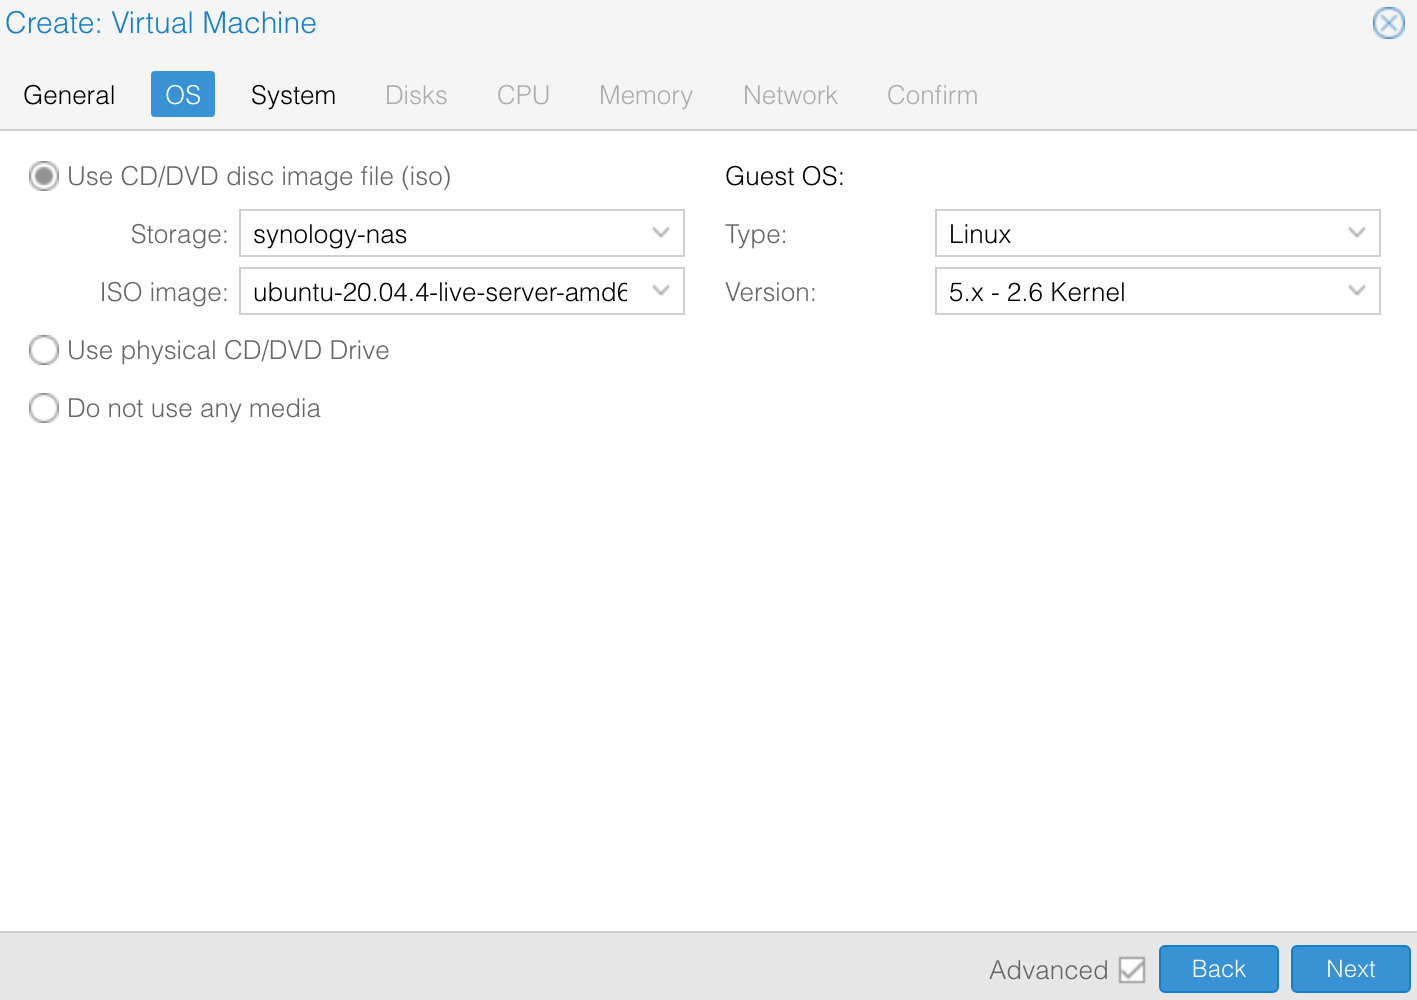
2. Select the OS ISO.
Choose your storage location and select the Ubuntu Server 24.04 ISO image, then click Next.
3. Configure System, Disk, CPU, Memory, and Network.
Set these based on what you’re planning to run. For a general-purpose Docker host, 2-4 vCPUs, 4GB RAM, and a 32GB disk are a good starting point. Increase this if you’re running memory-heavy containers.
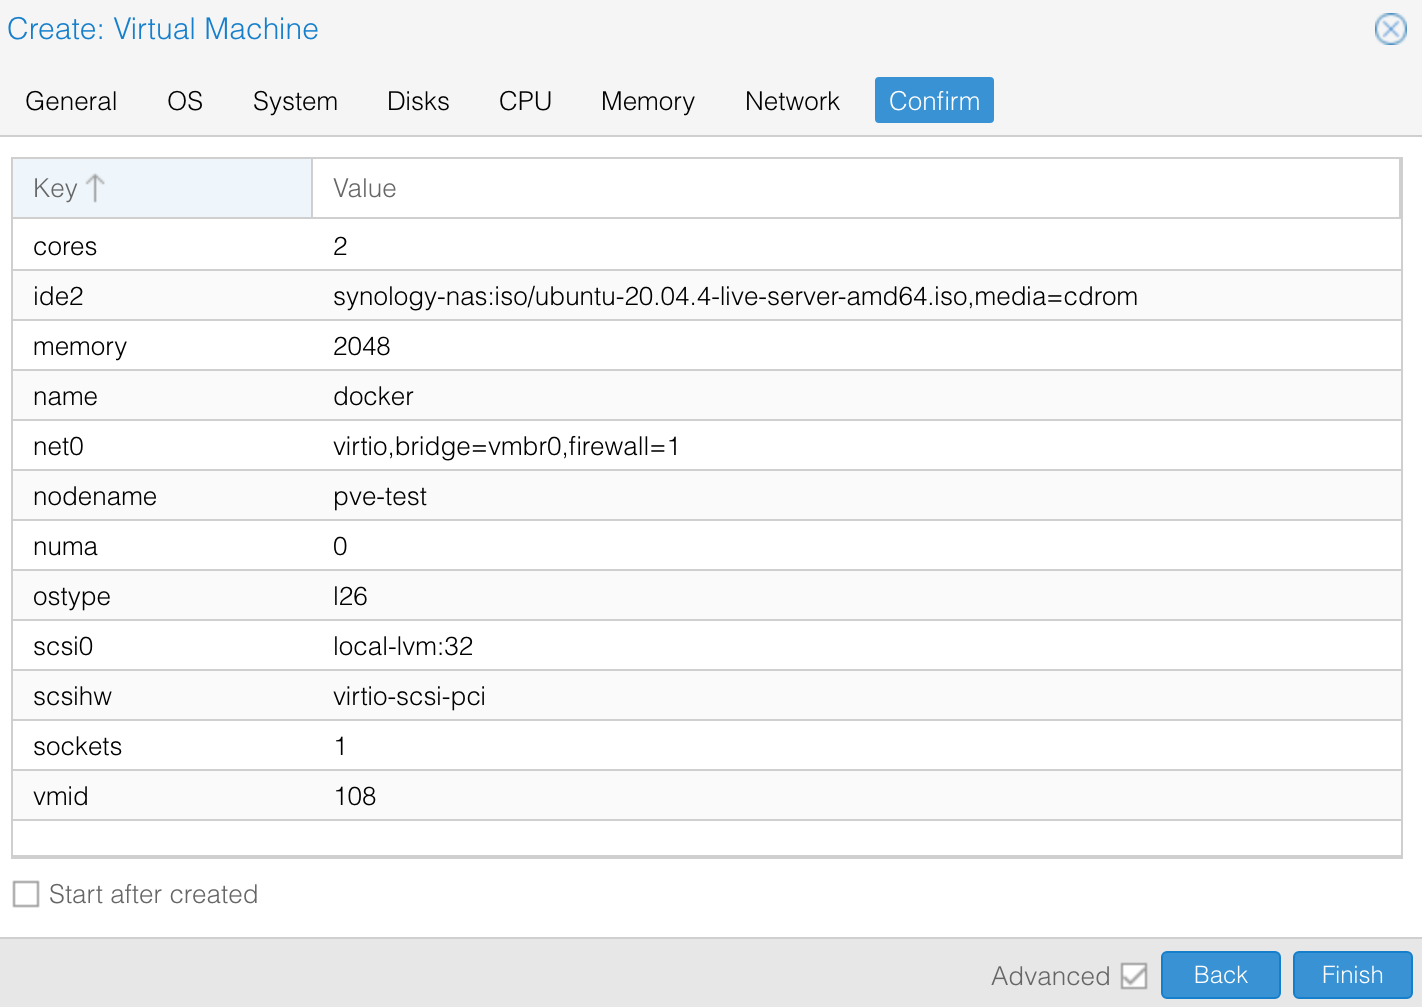
4. Confirm and create the VM.
Review the summary screen and click Finish. Proxmox will create the VM.
5. Install Ubuntu Server.
Start the VM and run through the installation process. Set your username, password, hostname, and enable OpenSSH Server when prompted. Once that’s done, move on to Docker.
If you want to get a GPU running on this VM down the line (as there are a lot of Docker Containers that can benefit from a GPU), my GPU passthrough on Proxmox guide covers that setup.
Install Docker and Portainer on Ubuntu
1. Log in and update the system.
Log in with the account you created during the Ubuntu install and run:
sudo apt update && sudo apt upgrade -y2. Add the Docker repository.
These commands are taken directly from the official Docker documentation and set up the prerequisite packages and GPG key before installing.
sudo apt-get update
sudo apt-get install ca-certificates curl
sudo install -m 0755 -d /etc/apt/keyrings
sudo curl -fsSL https://download.docker.com/linux/ubuntu/gpg -o /etc/apt/keyrings/docker.asc
sudo chmod a+r /etc/apt/keyrings/docker.asc
Then add the Docker apt repository:
echo \
  "deb [arch=$(dpkg --print-architecture) signed-by=/etc/apt/keyrings/docker.asc] https://download.docker.com/linux/ubuntu \
  $(. /etc/os-release && echo "$VERSION_CODENAME") stable" | \
  sudo tee /etc/apt/sources.list.d/docker.list > /dev/null
Update again:
sudo apt-get update3. Install Docker.
sudo apt-get install docker-ce docker-ce-cli containerd.io docker-buildx-plugin docker-compose-pluginDocker is now installed and ready to use from the command line.
4. Install Portainer (optional).
If you want a web UI for managing containers, Portainer is the best choice in my experience. If you want to learn more about this specific step, my Portainer on Ubuntu guide has a full walkthrough.
sudo docker run -d -p 8000:8000 -p 9443:9443 --name portainer --restart=always -v /var/run/docker.sock:/var/run/docker.sock -v portainer_data:/data portainer/portainer-ce:latest
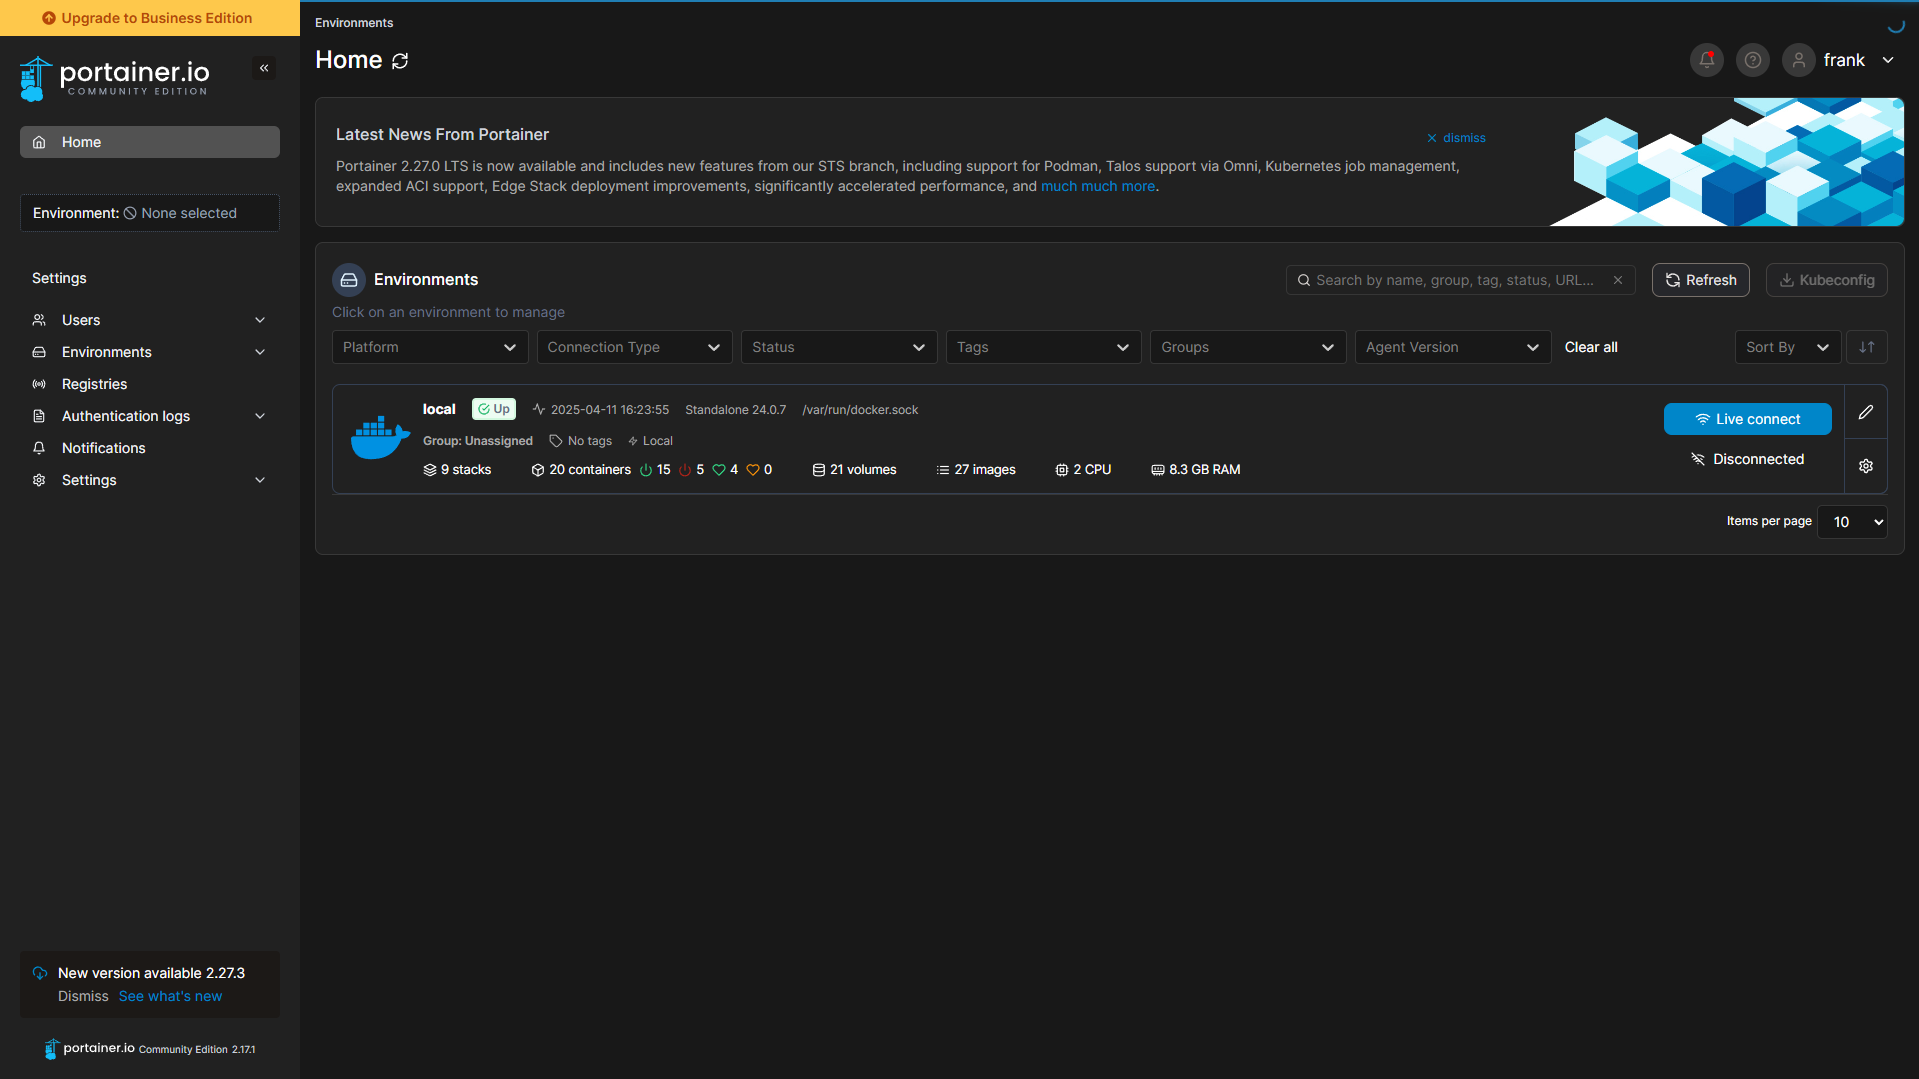
5. Access Portainer.
Once the container is running, open a browser and go to:
http://[VM_IP]:9000
https://[VM_IP]:9443
Create your admin account, and you should be able to sign in.
From here, you can deploy containers through the Portainer UI. If you want to keep things up to date as your container list grows, learn how to update Docker containers via Portainer.
A Few Things Worth Knowing
Backups are straightforward. One of the reasons I prefer Docker on a Proxmox VM over Docker on a NAS is that you can snapshot or back up the entire VM in Proxmox and get a complete, point-in-time copy of your containers and data. That’s harder to do cleanly on a NAS OS (as generally, you’d have to take a snapshot if your NAS supports it, but even that can be messy).
Networking can go further. Once you have Docker running, you may want containers to live on their own IP addresses on your network. My article on setting up a Macvlan network on Docker explains how to give containers their own IP address on a separate VLAN.
This is the exact setup that I’m running today, and it’s the process I’d recommend to anyone starting out.