GPU passthrough on Proxmox lets you map a physical PCIe GPU directly to a virtual machine, so it runs with near-native performance inside that VM. To do it, you enable IOMMU in your BIOS and bootloader, load the VFIO kernel modules, and then assign the GPU to a VM as a PCI device.
This process works on Proxmox VE 8.x [VERIFY: confirm applies to your installed version]. The steps are the same whether you’re using an NVIDIA, AMD, or Intel discrete GPU — the driver installation inside the VM is where things diverge.
Prerequisites for GPU Passthrough on Proxmox
Before touching any config files, make sure you have the following in place. Skipping any of these is the most common reason GPU passthrough fails.
What you need:
- IOMMU enabled in BIOS (look for “VT-d” on Intel or “AMD-Vi” on AMD)
- A CPU with IOMMU support — virtually all modern Intel and AMD desktop/server CPUs qualify, but confirm yours does
- Proxmox VE 8.x or 9.x — newer versions handle PCIe passthrough more reliably than older ones
- Ideally, a CPU with integrated graphics, so the host retains display output after the GPU is passed through
A few honest caveats:
- Passing a GPU through to a VM and seeing it listed in Device Manager does not mean it’s working. You need drivers to install cleanly and GPU activity to show before it’s confirmed.
- Some hardware setups require a GPU ROM file. In rare cases, that ROM file also needs to be patched. This tutorial covers the common path — if you hit ROM issues, treat them as a separate troubleshooting step.
- IOMMU grouping is entirely motherboard-dependent. You might get perfectly isolated groups, or your GPU might be grouped with other devices and require additional steps.
- If something isn’t working, troubleshoot one variable at a time. Randomly stacking changes will make it nearly impossible to identify the actual problem.
If you’re new to Proxmox itself, check out the How to Install Proxmox VE guide first.
Setting Up GPU Passthrough on Proxmox
Step 1. Enable IOMMU in GRUB
1. Open the GRUB configuration file.
nano /etc/default/grub2. Comment out the existing CMDLINE line by adding a # in front of it:
#GRUB_CMDLINE_LINUX_DEFAULT="quiet"3. Add a new CMDLINE line based on your CPU vendor.
| CPU Vendor | GRUB Line |
|---|---|
| AMD | GRUB_CMDLINE_LINUX_DEFAULT="quiet amd_iommu=on iommu=pt" |
| Intel | GRUB_CMDLINE_LINUX_DEFAULT="quiet intel_iommu=on iommu=pt" |
The iommu=pt flag enables passthrough mode, which improves performance.
AMD example:
GRUB_CMDLINE_LINUX_DEFAULT="quiet amd_iommu=on iommu=pt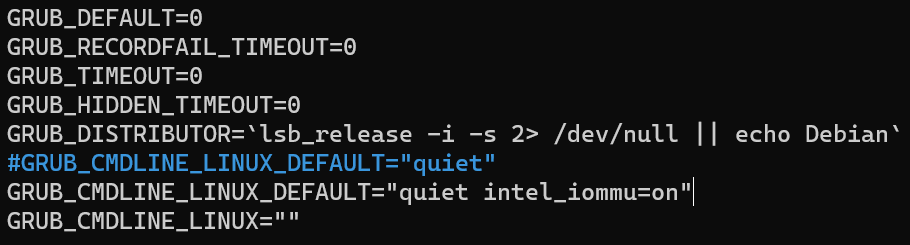
4. Save the file, then update GRUB.
update-grub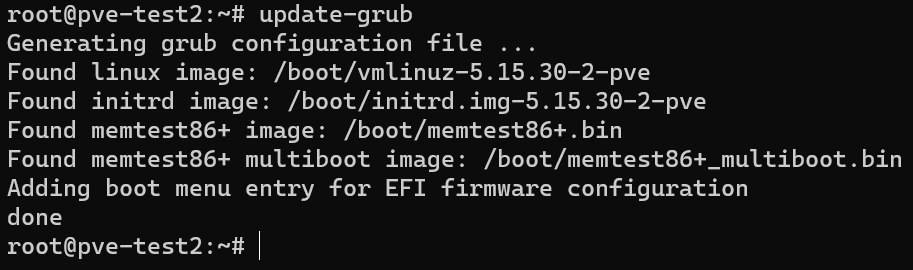
Step 2. Load the VFIO Kernel Modules
5. Open the modules file.
nano /etc/modulesThe file will likely be empty. Add all four lines below, then save:
vfio
vfio_iommu_type1
vfio_pci
vfio_virqfd| Module | Purpose |
|---|---|
vfio | Core Virtual Function I/O framework |
vfio_iommu_type1 | IOMMU type 1 driver for VFIO |
vfio_pci | Binds PCIe devices to VFIO instead of native drivers |
vfio_virqfd | Handles interrupt polling for VFIO devices |
6. Reboot Proxmox to apply both the GRUB changes and the new modules.
Step 3. Check IOMMU Groups
7. Identify your GPU’s IOMMU group.
Run lspci -v to list PCIe devices and find your GPU. Note the address (e.g., 01:00.0). In most setups, there will be two entries for the GPU — one for the video device and one for the audio device attached to it.

8. Check whether other devices share the group.
find /sys/kernel/iommu_groups/ -type l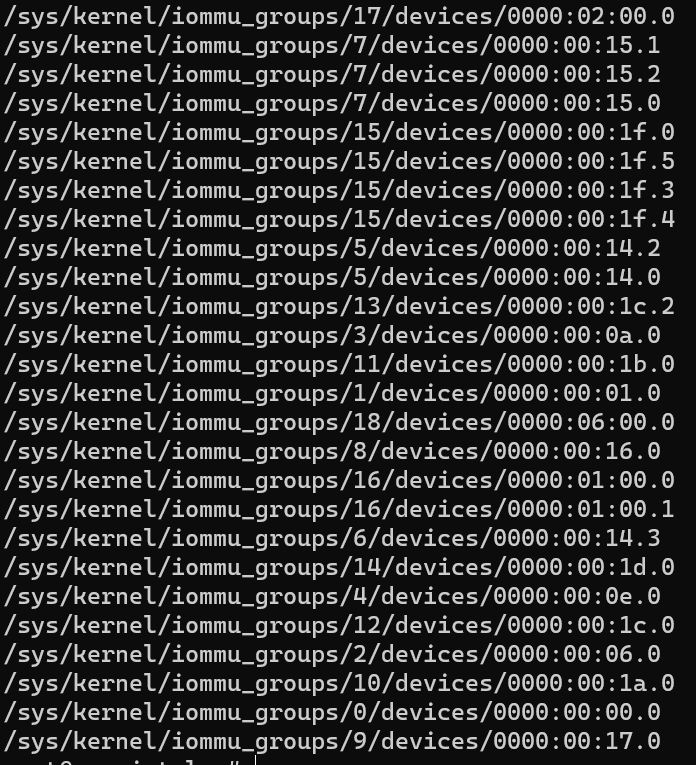
If the GPU and its audio device are in their own group with no other devices, you’re good to proceed. If other devices (a NIC, storage controller, etc.) are in the same group, you have two options:
- Add
pcie_acs_override=downstream,multifunctionto your GRUB line from Step 1 and reboot, then check again. - Or run the command below to allow unsafe interrupts and reboot:
echo "options vfio_iommu_type1 allow_unsafe_interrupts=1" > /etc/modprobe.d/iommu_unsafe_interrupts.confStep 4. Pass the GPU Through to the VM
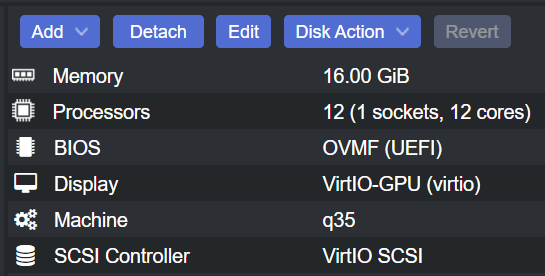
9. Configure the VM correctly before adding the GPU.
The VM must be set up with the following settings — get these right before adding the PCI device:
- Machine type: q35
- BIOS: OVMF (UEFI)
- Memory: Ballooning Device disabled
If you’re setting up a Windows VM specifically, the How to Install Windows 11 on Proxmox guide covers those steps in detail.
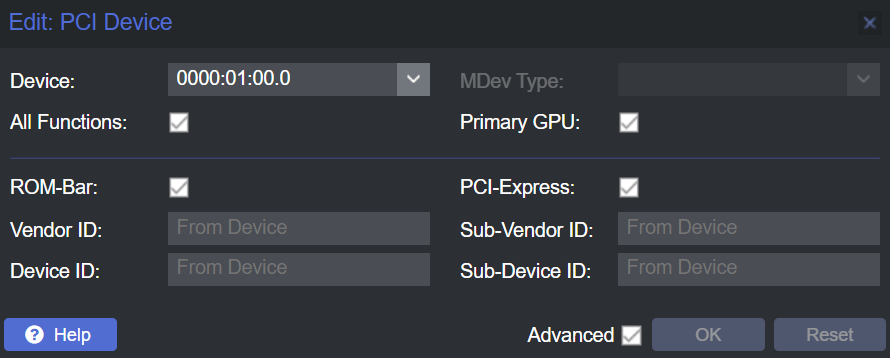
10. Add the GPU as a PCI device.
In the Proxmox web interface, go to your VM → Hardware → Add → PCI Device. Select your GPU and enable all four options:
- All Functions
- ROM-Bar
- Primary GPU
- PCI-Express
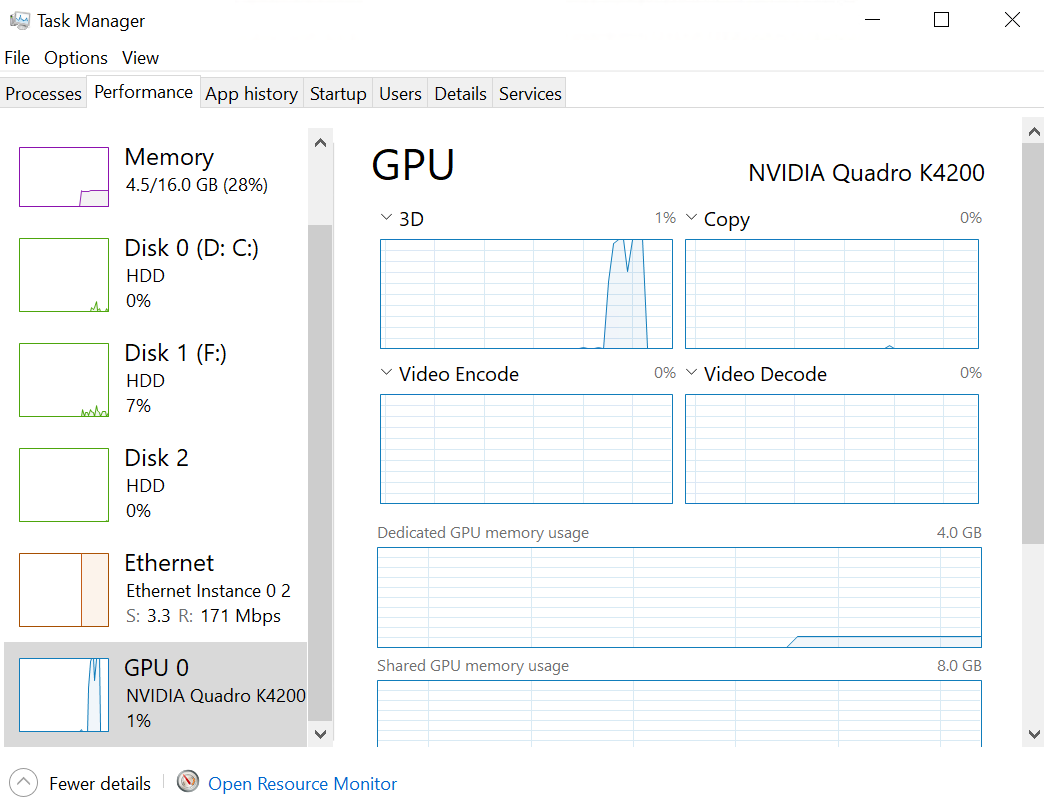
11. Start the VM and install the GPU drivers.
Once the VM boots, install the appropriate drivers for your GPU (NVIDIA, AMD, or Intel). If the drivers install cleanly and you can see GPU utilization, passthrough is working.
One important note: if you’re accessing a Windows VM remotely, make sure RDP is enabled before you pass through the GPU, since the virtual display adapter may become unavailable after passthrough is active. The same principle applies to other OSes — plan your remote access method ahead of time.
GPU passthrough is just one type of device passthrough available in Proxmox. If you also need to pass through USB devices or raw disks, see How to Pass Through USB Devices in Proxmox and How to Passthrough a Disk in Proxmox.
Troubleshooting GPU Passthrough Issues
If the drivers won’t install or the GPU isn’t recognized properly inside the VM, work through these in order — don’t apply all of them at once.
Blacklist the GPU Drivers on the Host
The most common fix is making sure Proxmox itself isn’t trying to load drivers for the GPU. Create the blacklist file and add the relevant drivers:
nano /etc/modprobe.d/blacklist.confAdd whichever lines apply to your GPU:
blacklist radeon
blacklist nouveau
blacklist nvidia
Or use echo commands directly:
echo "blacklist radeon" >> /etc/modprobe.d/blacklist.conf
echo "blacklist nouveau" >> /etc/modprobe.d/blacklist.conf
echo "blacklist nvidia" >> /etc/modprobe.d/blacklist.conf
Save and reboot Proxmox, then try the VM again.

If Blacklisting Doesn’t Fix It
At this point the issue is almost certainly hardware-specific. Work through the following:
- Re-check IOMMU groups — confirm the GPU is isolated after your GRUB changes took effect.
- Check whether the host is still claiming the GPU — run
lspci -kand look at the “Kernel driver in use” field for your GPU. It should showvfio-pci, notnvidia,radeon, ornouveau. - Try adding a ROM file — some GPUs require a vBIOS ROM file to be passed through. Dump the ROM, reference it in the PCI device config, and try again.
- Check the Proxmox documentation and forums — GPU passthrough problems are very hardware-specific, and the Proxmox forums have threads for the most common GPU and motherboard combinations.
If you’re running a more complex Proxmox setup, consider whether your infrastructure needs are better served by a different platform — the XCP-ng vs. Proxmox comparison covers where each hypervisor tends to work better.
Frequently Asked Questions
Does GPU passthrough work with any GPU?
Most discrete PCIe GPUs work with passthrough on Proxmox, but success is heavily hardware-dependent. NVIDIA consumer cards have historically had driver-level restrictions (the “Error 43” issue on GeForce cards in VMs), though this has become less of a problem on newer drivers.
Do I need integrated graphics for GPU passthrough to work?
You don’t strictly need it, but it makes the process significantly easier. If your CPU has integrated graphics, the host keeps a display adapter after the GPU is passed through. Without it, you’ll need to configure remote access to the host or use a second GPU as the host’s display.
What does IOMMU actually do here?
IOMMU (Input–Output Memory Management Unit) creates isolated memory address spaces for PCIe devices. This is what allows a VM to have exclusive, direct access to a physical GPU without the hypervisor being able to intercept or interfere with the I/O. Without IOMMU, GPU passthrough isn’t possible.
What is iommu=pt and should I use it?
iommu=pt enables passthrough mode, which tells the IOMMU not to translate DMA for devices that don’t need it. This generally improves performance for passed-through devices. There’s no reason not to include it unless you’re troubleshooting a specific conflict.
My GPU shows up in the VM but drivers won’t install. What do I do?
This is usually either a driver issue or the host still claiming the GPU. First, check lspci -k on the Proxmox host to confirm the GPU is bound to vfio-pci. Then make sure the blacklist file is in place and you’ve rebooted. If you’re on an NVIDIA card, look into whether you need to hide the hypervisor from the driver using cpu: host,hidden=1 in the VM config.
What is pcie_acs_override and when do I need it?
pcie_acs_override=downstream,multifunction forces Proxmox to treat PCIe devices as if they have ACS (Access Control Services) support, which allows them to be placed in separate IOMMU groups. You need this when your GPU ends up grouped with unrelated devices on kernels 5.15 and newer. It does reduce memory isolation slightly, so only use it if your groups are genuinely broken.
Can I pass through a GPU to a Linux VM instead of Windows?
Yes. The VM configuration steps (q35, OVMF, disabling ballooning) are the same. The difference is in how you install drivers inside the VM — on Linux you’ll install the appropriate GPU driver package rather than a Windows installer. Display output and driver stability will vary by distro and GPU vendor.
Will GPU passthrough work if I’m also running Home Assistant on the same Proxmox host?
It depends on whether your host has integrated graphics or a second GPU for the hypervisor. If the host can keep its own display adapter, other VMs like Home Assistant on Proxmox run independently and aren’t affected by the GPU being passed through to a different VM.
Security note: IOMMU configuration and kernel parameters affect system-level isolation. Review any changes in the context of your threat model — especially allow_unsafe_interrupts, which weakens IOMMU isolation. Security best practices in this area continue to evolve.