In this tutorial, we’re going to look at how to install OPNsense in Proxmox. OPNsense is an open-source firewall and router developed by Deciso. OPNsense is extremely powerful; many people compare it to pfSense which you can run on Proxmox as well.
The benefit of OPNsense is how user-friendly the interface is and while there are differences between OPNsense and pfSense, both tools will offer you core routing and firewall capabilities.
The links below are Amazon affiliate links which means that I earn a percentage of each sale at no cost to you. Thank you for your support.
Please keep in mind that you must purchase a network card if you don’t already have one installed in your Proxmox server (here is a reasonably priced Intel I350 NIC that works well with OPNsense). This network card will be passed to our OPNsense virtual machine and is what we’ll use as our LAN/WAN ports when looking at how to install OPNsense in Proxmox.
How to Install OPNsense in Proxmox
Before we look at how to install OPNsense in Proxmox, ensure that you have your network card installed and it’s visible in your Proxmox GUI.
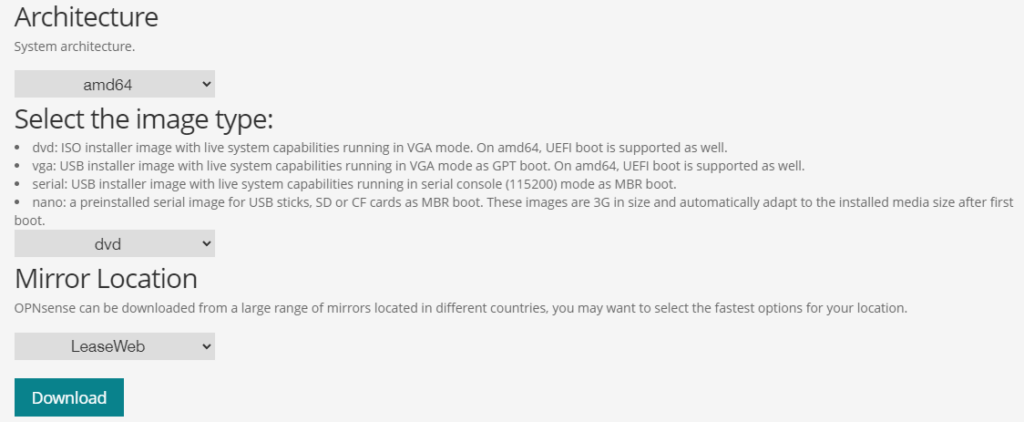
1. Download the latest amd64 and DVD ISO image for OPNsense and extract the file.
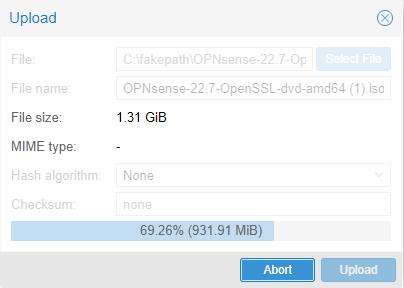
2. Upload the file you just downloaded to your Proxmox server.
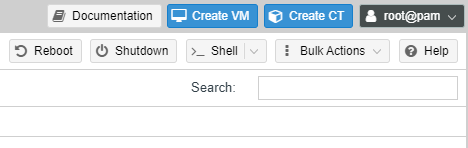
3. Select Create VM in the top right corner.
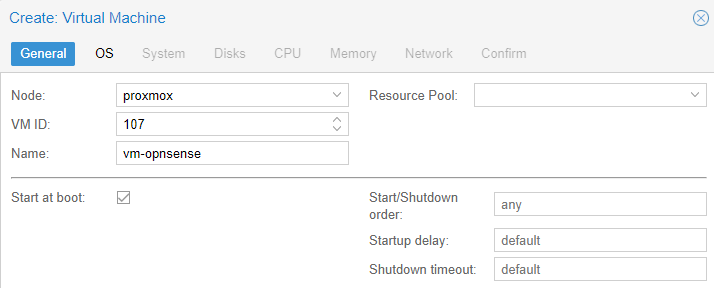
4. Give the VM a name, then check off start at boot. Select next to proceed.
5. Select the OPNsense ISO file that was uploaded to the Proxmox server.

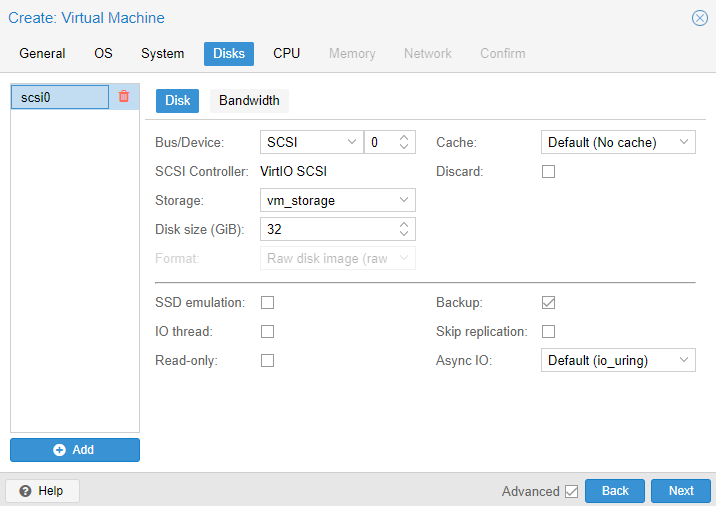
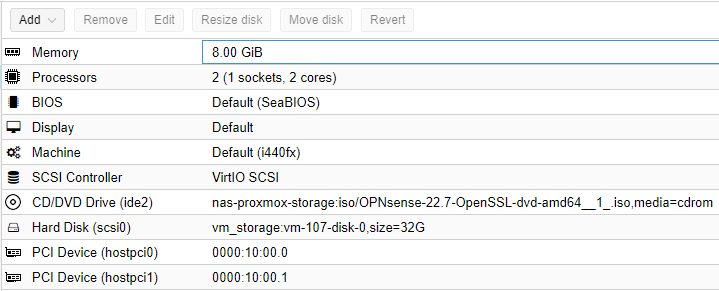
6. Skip to the disks tab and select the correct storage location, as well as the disk size that you’d like to use (40GB is recommended, but I am only using 32GB due to development server resource purposes).
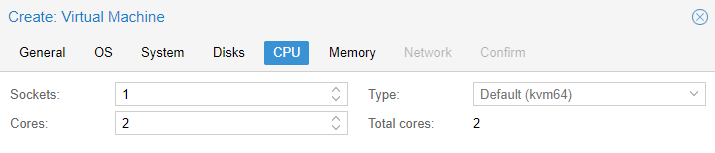
7. Set the total CPU cores that you’d like to use, then select next.
8. Set the amount of memory that you’d like to use, then select next.

9. In the network section, select no network device, then select next.

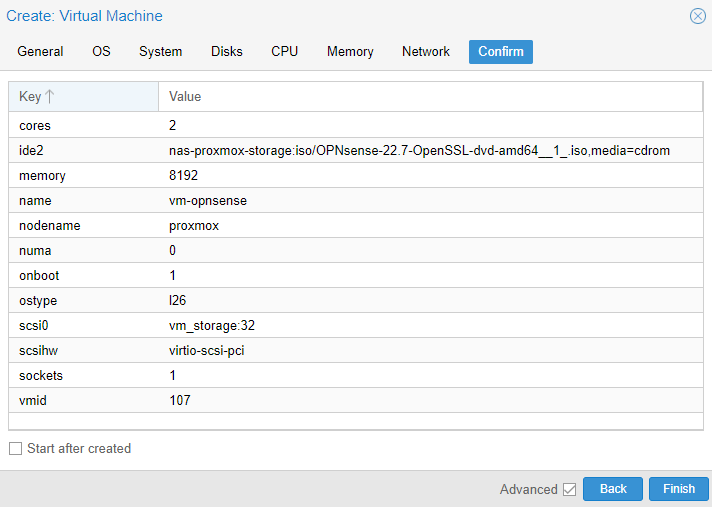
10. In the confirm section, ensure that start after created is not selected, then click finish.
11. Select the OPNsense virtual machine, select hardware, then add, and finally, PCI device.
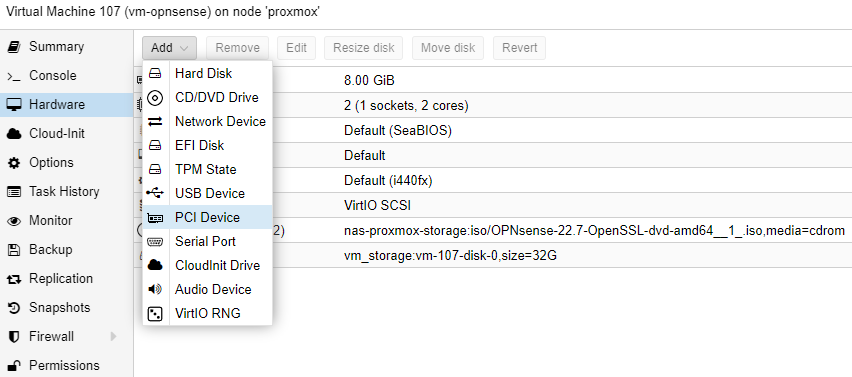
12. This step is different for everyone as it relies on the NIC that you’re using. The goal that we’re trying to accomplish is to add the NIC to our OPNsense virtual machine.
Depending on the NIC you have, you might be able to add the entire device, or you might have to add the individual ports. We will use one port for WAN (connected from the modem) and one port for LAN (connecting from the server to the Switch).
Add the NICs, then confirm that the cables are plugged in properly (Modem to one port on the NIC and the Switch will be connected to the other).
13. After everything is configured, you can start the virtual machine!

14. To be clear, OPNsense will not install by default. This means that it will run off the ISO image until you fully install it. We will have to log in with the installer user in order to install OPNsense. When you launch OPNsense, log in with the username installer and the password opnsense.

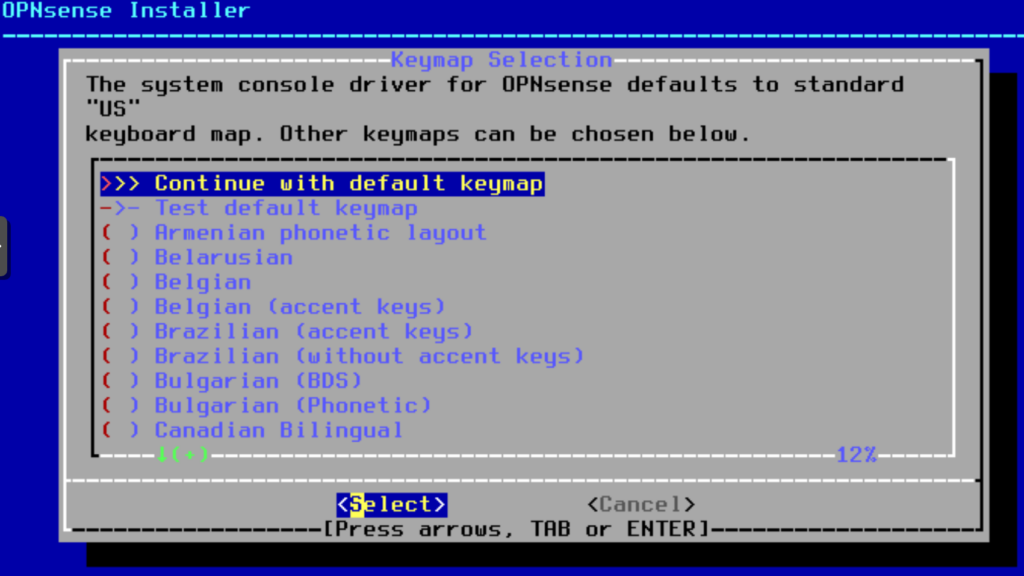
15. Press enter to continue with the default keymap.
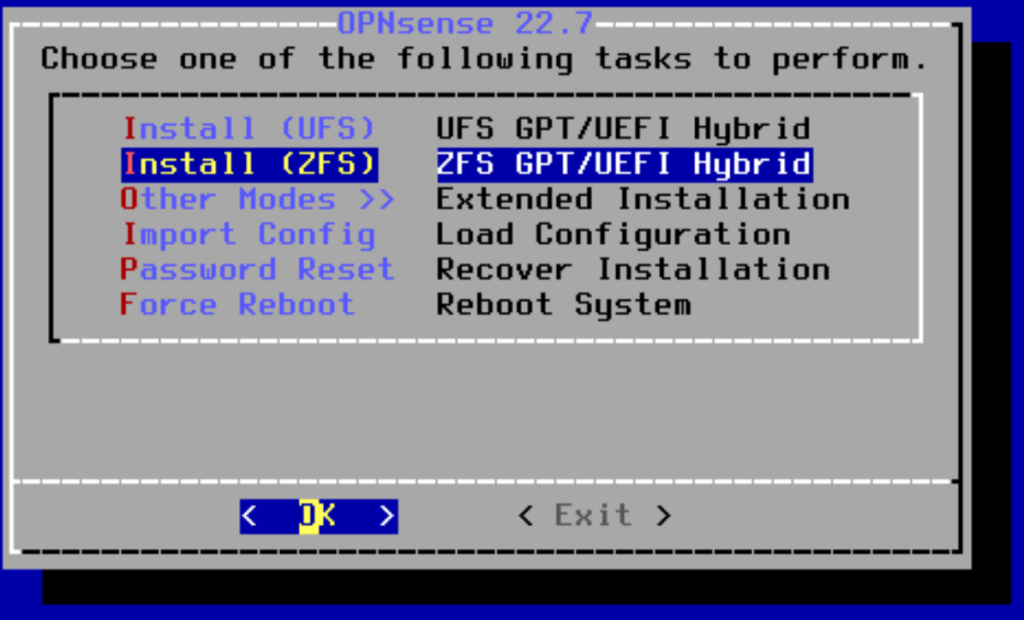
16. Select the UFS or ZFS Install. Ultimately, this is a personal decision, but I’ll be using ZFS.
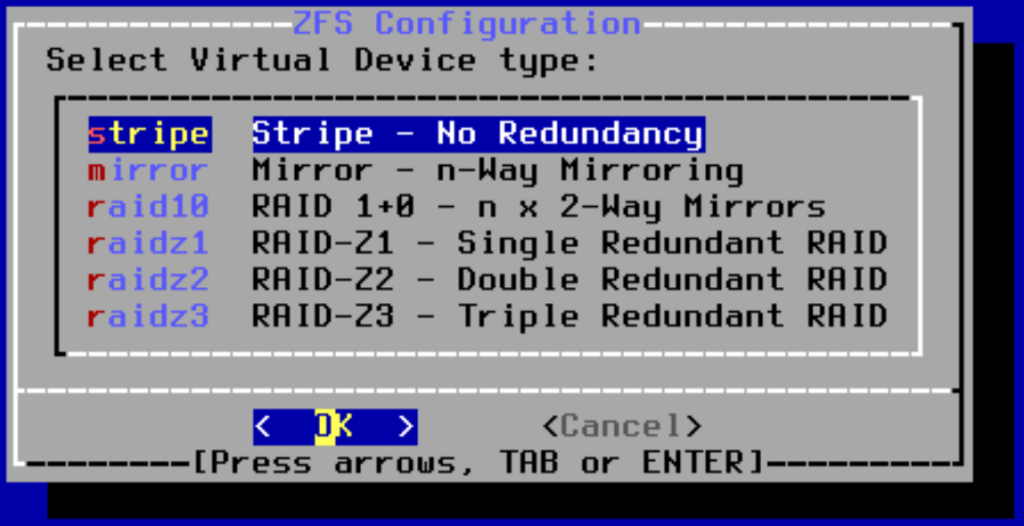
17. Select Stripe, then press enter.
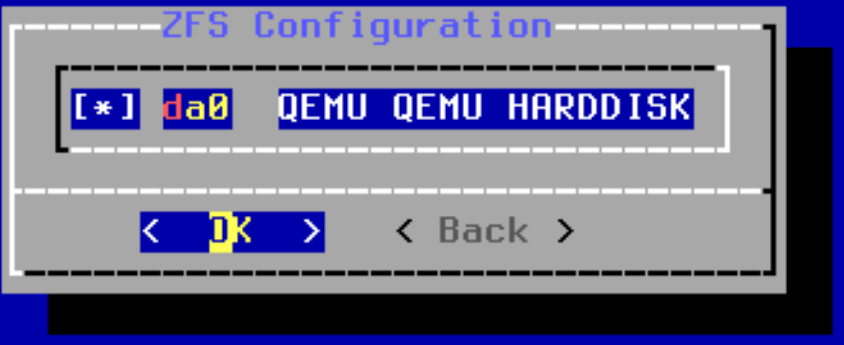
18. Select the hard drive (using the space bar), then press OK.
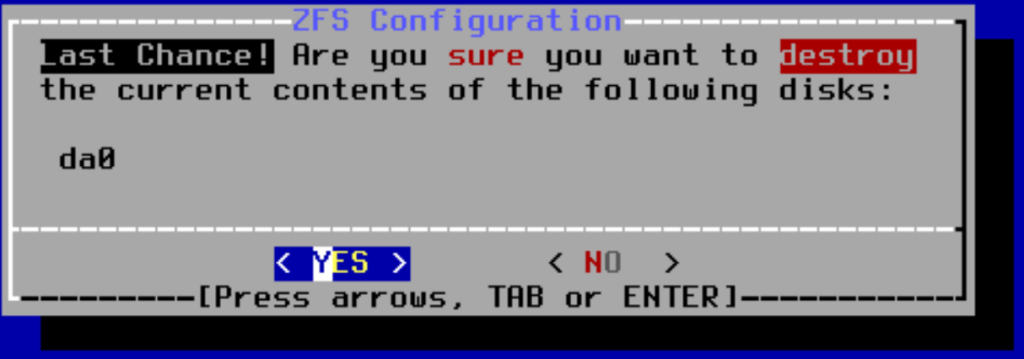
19. If you’d like to proceed, select Yes and OPNsense will install! This will install OPNsense to the Proxmox hard disk we created earlier.
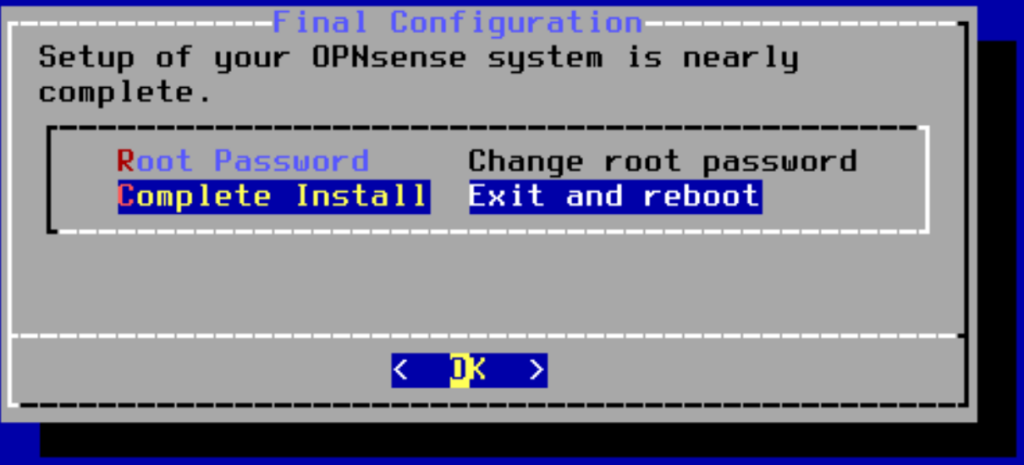
20. Select Complete Install as we will reset the root user’s password from the web GUI.
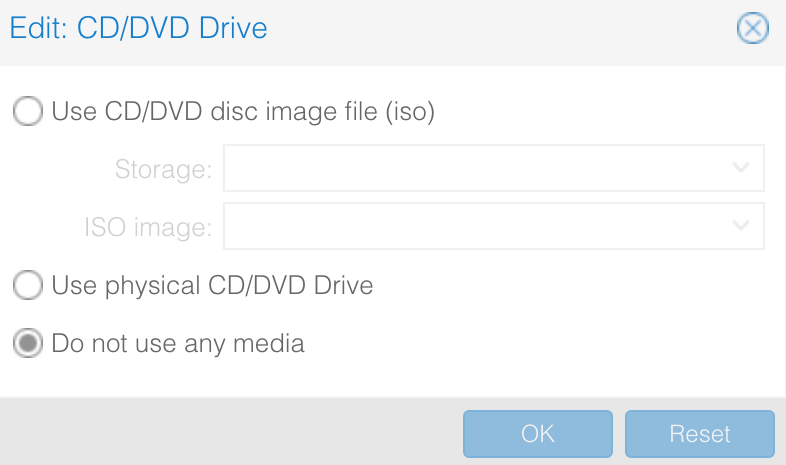
21. Unmount the ISO image (Hardware > CD/DVD Drive > Do not use any media) and OPNsense will boot from the hard drive.
Setting Up & Configuring OPNsense
Now that OPNsense has been installed in Proxmox, we are going to configure it. If you have a device connected to the same Switch, you should be able to access the web GUI of OPNsense at the IP address 192.168.1.1.
If you’d like to modify the LAN IP address subnet, you can modify it by accessing the Proxmox Console and selecting 2) Set Interface IP Address. From there, you can modify the subnet and set it to be whatever you’d like. Please keep in mind that this can be done from the web GUI as well.
OPNsense Web Portal
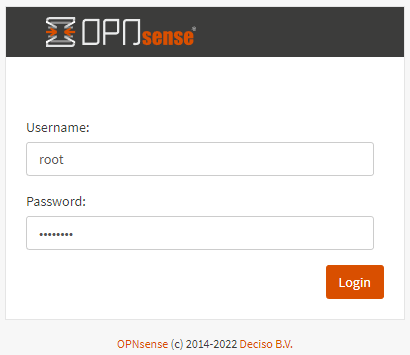
1. Login with the username root and password opnsense.
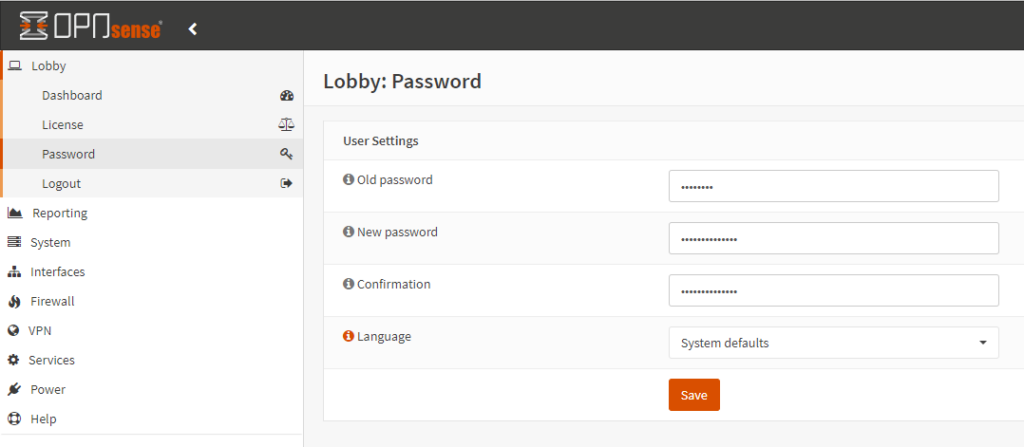
2. Change your password from the default value. Select Password, enter the old password of opnsense, then enter a new password.
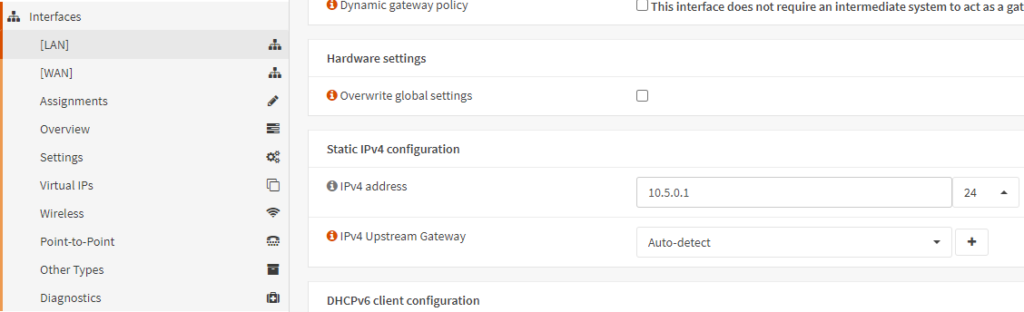
3. If you’d like to modify the LAN subnet in the web GUI, select LAN, then scroll down to Static IPv4 configuration and modify the subnet to be whatever you’d like to use.
4. At this point, the basic setup of OPNsense in Proxmox is complete. You will have to go through and set up OPNsense with all of the settings and configurations that you’d like to use, but it should be set up on Proxmox and accessible through the web GUI.
Conclusion & Final Thoughts on Installing OPNsense in Proxmox
This tutorial looked at how to install OPNsense in Proxmox. I want to be clear that while OPNsense will technically be set up at this point, you’ll have to go through and configure it to ensure that everything is set up the way that you’d prefer. There is a LOT of configuration that can be done and we will be looking at other things you can do in OPNsense in future tutorials.