How to Install Nextcloud on OpenMediaVault

  • Post author:WunderTech
  • Post published:December 1, 2022
  • Post last modified:December 1, 2022
  • Post category:OpenMediaVault
  • Reading time:8 mins read

In this tutorial, we will look at how to install Nextcloud on OpenMediaVault.

Nextcloud is an extremely popular program and is an absolutely awesome option for OpenMediaVault since there isn’t a great first-party option for this type of application. Nextcloud can be installed relatively quickly and it is extremely powerful. We will look at how to install Nextcloud on OpenMediaVault using OMV6, however, the process will be extremely similar if you’re still running OMV5.

How to Install Nextcloud on OpenMediaVault

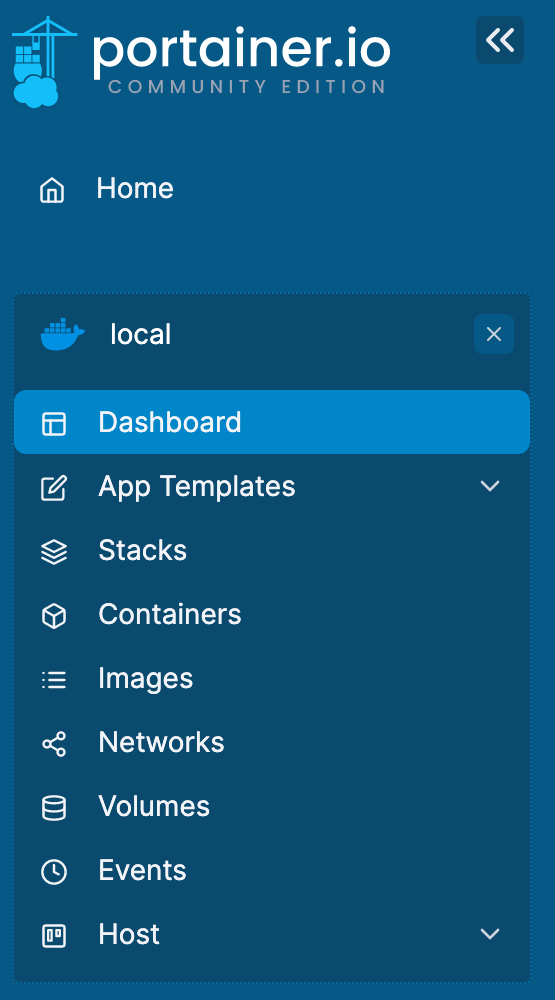
Due to how Nextcloud operates (meaning that it uses a database), it’s easiest to configure this with Portainer. In order to get Docker and Portainer running, you must install OMV-Extras, then Docker and Portainer.

Docker and Portainer are a prerequisite, so make sure you install and configure both before looking at how to install Nextcloud on OpenMediaVault.

1. Configure Portainer and navigate to the management UI.

portainer dashboard view.

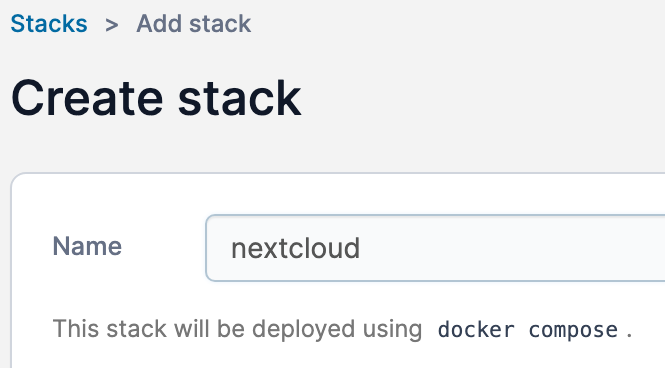
2. Select Stacks, then Add Stack to create a new stack. This is what we’ll use to create the Nextcloud container and database.

portainer stacks view.

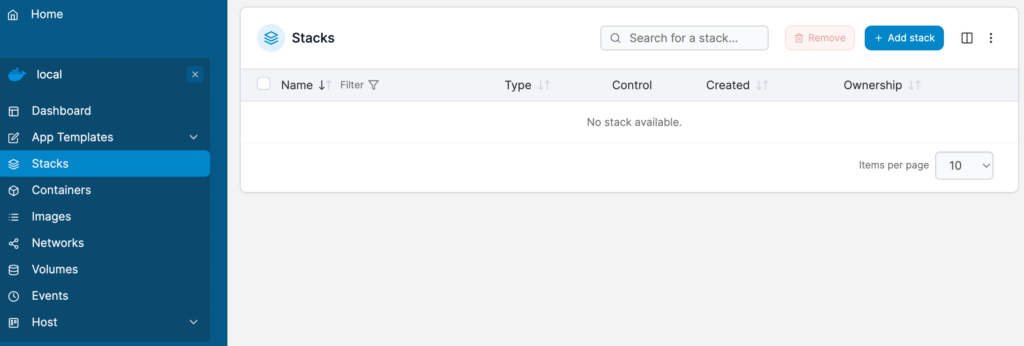
3. Create the stack and set the name as nextcloud.

how to create a stack in portainer.

4. Paste the contents below into the web editor. A few notes:

  • You can adjust the volume details if you’d like. Please keep in mind that these paths are the locations where all important Nextcloud data will be stored. If you’d like to back up or migrate this container, you must use these folders!
  • You should update the passwords below. Make sure the MYSQL_PASSWORD matches for the Database and Nextcloud container.
version: '2'

services:
  db:
    image: mariadb:10.5
    restart: always
    command: --transaction-isolation=READ-COMMITTED --binlog-format=ROW
    volumes:
      - /var/lib/docker/volumes/Nextcloud_Database:/var/lib/mysql
    environment:
      - MYSQL_ROOT_PASSWORD=password
      - MYSQL_PASSWORD=password
      - MYSQL_DATABASE=nextcloud
      - MYSQL_USER=nextcloud

  app:
    image: nextcloud
    restart: always
    ports:
      - 8080:80
    links:
      - db
    volumes:
      - /var/lib/docker/volumes/Nextcloud_Application:/var/www/html
    environment:
      - MYSQL_PASSWORD=password
      - MYSQL_DATABASE=nextcloud
      - MYSQL_USER=nextcloud
      - MYSQL_HOST=db
web editor of nextcloud stack. how to install nextcloud on openmediavault.

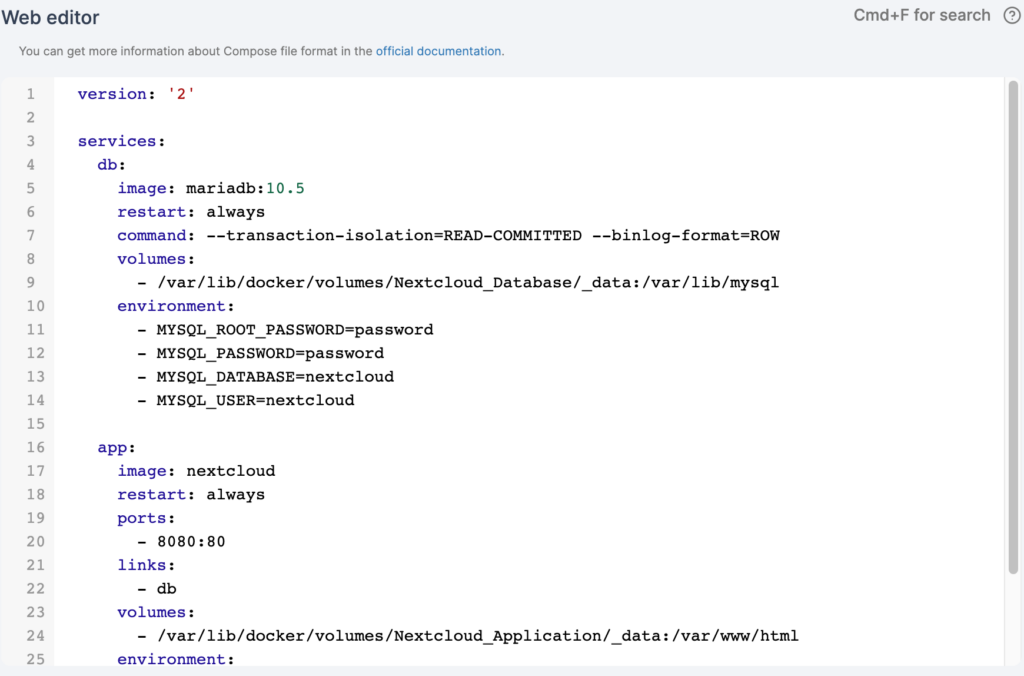
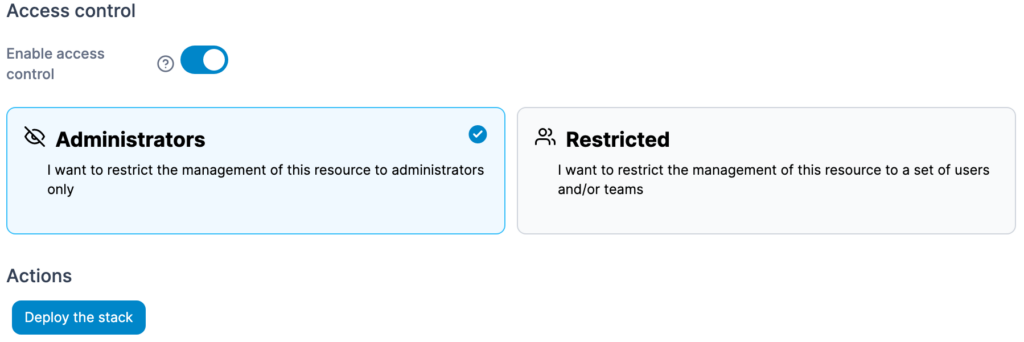
5. After all changes have been made, select Deploy the stack at the bottom to create the two containers.

portainer deploy stack button.

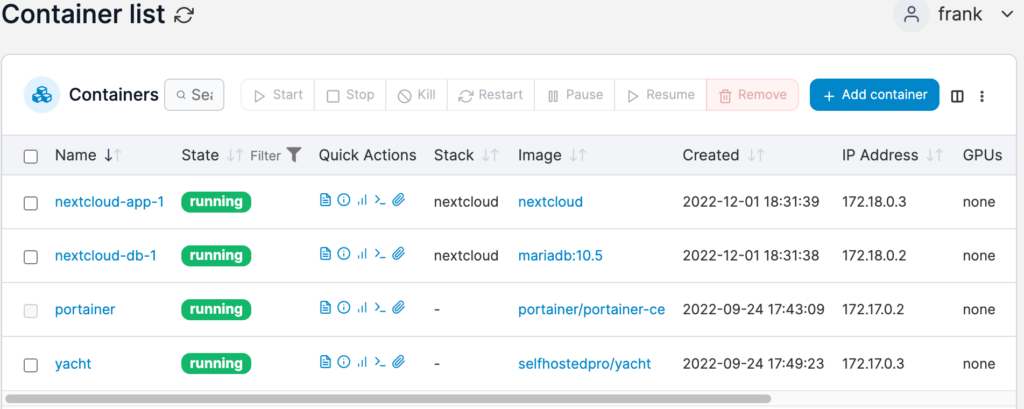
6. The container should now be created! You’ll have one for the Nextcloud container and one for the database.

portainer container list.

Nextcloud Configuration

Now that the container has been created, we can configure Nextcloud.

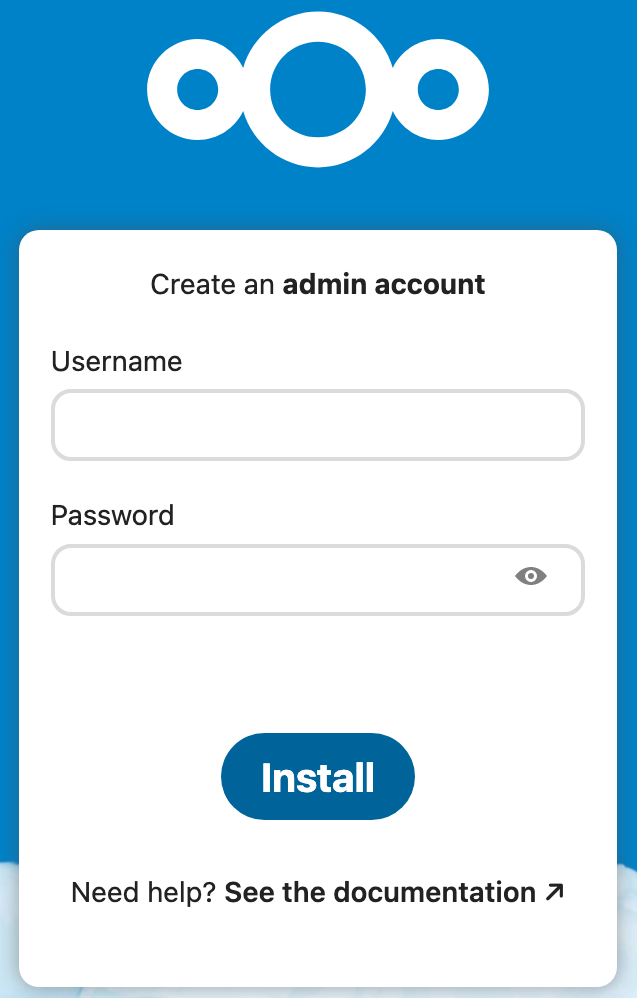
1. Navigate to your OpenMediaVault server’s IP address and port 8080. Set up a username and password at the first screen, then select Install.

http://[OPENMEDIAVAULT_IP]:8080
nextcloud install screen.

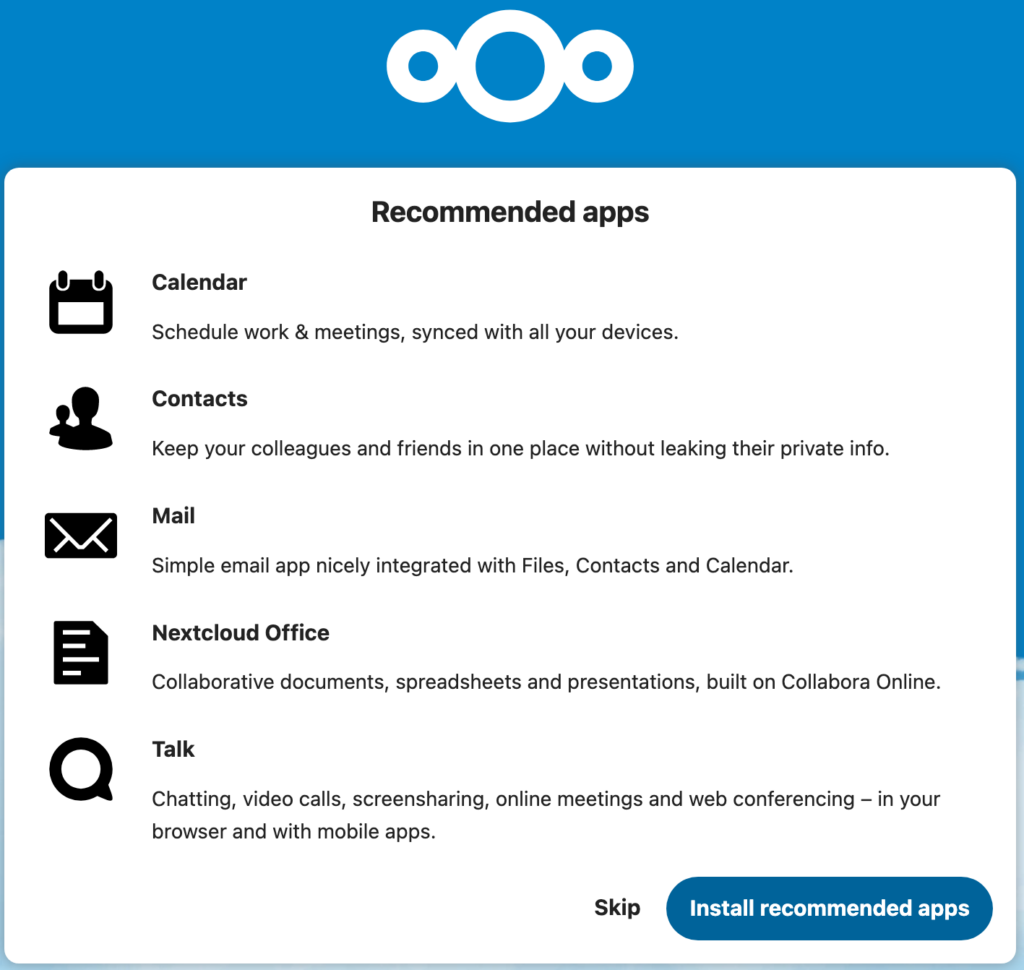
2. Install the recommended apps or skip this step. If you choose to install apps, this step will take a few minutes.

nextcloud recommended apps.

3. Nextcloud will now be ready to use!

nextcloud dashboard.

Nextcloud Remote Access

After configuring Nextcloud, one of the most important things is being able to access it remotely. While you can use it locally only, you’ll soon find that accessing it remotely is extremely helpful. There are many ways to access Nextcloud remotely, but my favorite way of accessing Nextcloud is by VPN.

If you can’t set up a VPN or need users to access your Nextcloud instance without first authenticating with a VPN, I’d suggest looking into a reverse proxy.

Conclusion: How to Install Nextcloud on OpenMediaVault

This tutorial looks at how to install Nextcloud on OpenMediaVault. The process is extremely easy with Portainer as it allows us to utilize Docker Compose. You can also utilize Docker Compose through SSH as well, but the process is a little cleaner with Portainer in my opinion.

Please ensure that the volumes configured are backed up properly as they will hold all Nextcloud data. As mentioned above, if you ever decide to move Nextcloud to a new server, the data that exists in these folders is what must be migrated.

Thanks for checking out the tutorial on how to install Nextcloud on OpenMediaVault. If you have any questions on how to install Nextcloud on OpenMediaVault, please leave them in the comments!

WunderTech

Frank is an IT professional with 13+ years experience and the creator of WunderTech. He focuses on sharing his experience with others on computer hardware, servers, software, networking, and self-hosted apps. He has a BS in Computer Information Systems and an MBA. Learn more about Frank in his bio.

This Post Has 4 Comments

  1. M

    Thanks for writing this guide, it looks great and is easy to follow. Unfortunately it gets me to the nextcloud instance landing page but when I try to install/create an admin account I get this error:

    Error while trying to create admin user: Failed to connect to the database: An exception occurred in the driver: SQLSTATE[HY000] [1130] Host ‘xxx.x.x.xx’ is not allowed to connect to this MariaDB server

    1. WunderTech

      Thanks! I haven’t seen that error and definitely didn’t experience it when I configured Nextcloud. Which type of device are you installing this on? Is the MariaDB container running properly and if not, any errors in the logs?

      1. M

        Thanks for your reply!

        I am installing it within OMV (I went and followed your guide on setting up Extras, Docker and Portainer to make sure it was not an issue in my setup) on a Lenovo M93 (Intel i3-4330T). According to the stack, the MariaDB is running but the logs do provide a few warnings so I am not sure if it is actually running properly.

        If it helps, here is a paste of my log on a fresh install I tried earlier this evening:

        2022-12-03 20:46:45+00:00 [Note] [Entrypoint]: Entrypoint script for MariaDB Server 1:10.5.18+maria~ubu2004 started.
        2022-12-03 20:46:46+00:00 [Note] [Entrypoint]: Switching to dedicated user ‘mysql’
        2022-12-03 20:46:46+00:00 [Note] [Entrypoint]: Entrypoint script for MariaDB Server 1:10.5.18+maria~ubu2004 started.
        2022-12-03 20:46:46+00:00 [Note] [Entrypoint]: MariaDB upgrade not required
        2022-12-03 20:46:46 0 [Note] mysqld (mysqld 10.5.18-MariaDB-1:10.5.18+maria~ubu2004) starting as process 1 …
        2022-12-03 20:46:46 0 [Warning] You need to use –log-bin to make –binlog-format work.
        2022-12-03 20:46:46 0 [Note] InnoDB: Uses event mutexes
        2022-12-03 20:46:46 0 [Note] InnoDB: Compressed tables use zlib 1.2.11
        2022-12-03 20:46:46 0 [Note] InnoDB: Number of pools: 1
        2022-12-03 20:46:46 0 [Note] InnoDB: Using crc32 + pclmulqdq instructions
        2022-12-03 20:46:46 0 [Note] mysqld: O_TMPFILE is not supported on /tmp (disabling future attempts)
        2022-12-03 20:46:46 0 [Note] InnoDB: Using Linux native AIO
        2022-12-03 20:46:46 0 [Note] InnoDB: Initializing buffer pool, total size = 134217728, chunk size = 134217728
        2022-12-03 20:46:46 0 [Note] InnoDB: Completed initialization of buffer pool
        2022-12-03 20:46:46 0 [Note] InnoDB: 128 rollback segments are active.
        2022-12-03 20:46:46 0 [Note] InnoDB: Creating shared tablespace for temporary tables
        2022-12-03 20:46:46 0 [Note] InnoDB: Setting file ‘./ibtmp1’ size to 12 MB. Physically writing the file full; Please wait …
        2022-12-03 20:46:46 0 [Note] InnoDB: File ‘./ibtmp1’ size is now 12 MB.
        2022-12-03 20:46:46 0 [Note] InnoDB: 10.5.18 started; log sequence number 45199; transaction id 20
        2022-12-03 20:46:46 0 [Note] Plugin ‘FEEDBACK’ is disabled.
        2022-12-03 20:46:46 0 [Note] Server socket created on IP: ‘::’.
        2022-12-03 20:46:46 0 [Note] InnoDB: Loading buffer pool(s) from /var/lib/mysql/ib_buffer_pool
        2022-12-03 20:46:46 0 [Note] InnoDB: Buffer pool(s) load completed at 221203 20:46:46
        2022-12-03 20:46:46 0 [Warning] ‘user’ entry ‘root@5c92115bc14a’ ignored in –skip-name-resolve mode.
        2022-12-03 20:46:46 0 [Warning] ‘proxies_priv’ entry ‘@% root@5c92115bc14a’ ignored in –skip-name-resolve mode.
        2022-12-03 20:46:46 0 [Note] Reading of all Master_info entries succeeded
        2022-12-03 20:46:46 0 [Note] Added new Master_info ” to hash table
        2022-12-03 20:46:46 0 [Note] mysqld: ready for connections.
        Version: ‘10.5.18-MariaDB-1:10.5.18+maria~ubu2004’ socket: ‘/run/mysqld/mysqld.sock’ port: 3306 mariadb.org binary distribution
        2022-12-03 20:47:22 3 [Warning] Aborted connection 3 to db: ‘unconnected’ user: ‘unauthenticated’ host: ‘172.18.0.3’ (This connection closed normally without authentication)
        2022-12-03 20:48:16 4 [Warning] Aborted connection 4 to db: ‘unconnected’ user: ‘unauthenticated’ host: ‘172.18.0.3’ (This connection closed normally without authentication)
        2022-12-03 20:48:39 5 [Warning] Aborted connection 5 to db: ‘unconnected’ user: ‘unauthenticated’ host: ‘172.18.0.3’ (This connection closed normally without authentication)

        1. WunderTech

          It looks like it could be an authentication issue. Can you try creating the container without any of the passwords or accounts being changed and see if it works?

Comments are closed.