OpenMediaVault Docker on OMV 8 comes from two pieces: OMV-Extras, which adds the extra plugin repository, and the openmediavault-compose plugin. The plugin installs Docker and gives you a page in the OMV web interface to create and run your containers. You install OMV-Extras once over SSH, tick the Docker repo, install the Compose plugin, point it at a few shared folders, and that’s it.
If you’ve followed an older OpenMediaVault Docker guide, the screens won’t match. When I set Docker up on a Raspberry Pi running OpenMediaVault back in 2020, omv-extras had one-click Docker, Portainer and Yacht buttons, and those were removed in 2023. OMV 7 reached end of life in June 2026, so OMV 8 “Synchrony” (Debian 13) is the only supported release as of October 2026.
Why Run Docker on OpenMediaVault?
OpenMediaVault on its own only ships a basic set of plugins. Docker runs each application in its own container, so you’re not tied to the versions that ship as OMV plugins and you can update one app without touching the others. If an experiment goes wrong, you delete the container and OMV is exactly where it was.
In my opinion, that makes Docker a required install on OpenMediaVault for most people. If you’re still deciding whether OMV is the right NAS OS in the first place, my OpenMediaVault vs. TrueNAS comparison covers that.
How to Install OMV-Extras on OpenMediaVault
You install OMV-Extras by running one script as root, and it adds the omv-extras plugin repository that openmediavault-compose and a bunch of other plugins come from. It does not install any other plugins by itself. It just makes them show up under System, then Plugins, so you can pick the ones you want.
If you installed OMV with the install script, you can skip this section. The scripted install (any single-board computer like a Raspberry Pi, or an AMD64 machine installed by script) puts OMV-Extras on by default. That was already the case on my Raspberry Pi install back in 2020. An AMD64 install from the ISO only gets the basic set of plugins and needs the steps below.
You can run the script over SSH (the omv-extras wiki’s preferred route, and the one used below), on the console, or as a one-off task under System, then Scheduled Tasks.
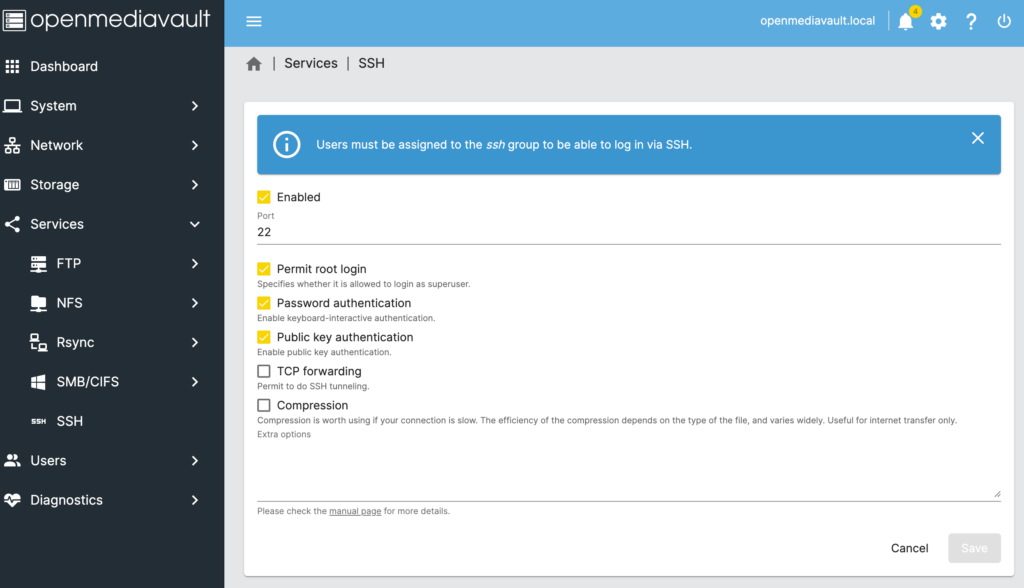
1. Open the OpenMediaVault web interface, select Services, then SSH, enable SSH with root login allowed, and select Save. Then select Apply in the pending-changes banner at the top of the page. OMV asks for this after most settings, so apply whenever that banner shows up.
2. Open a terminal (or PuTTY on Windows) and SSH into your OpenMediaVault server as root, using the root password you set during the install.
ssh root@[OpenMediaVault_IP]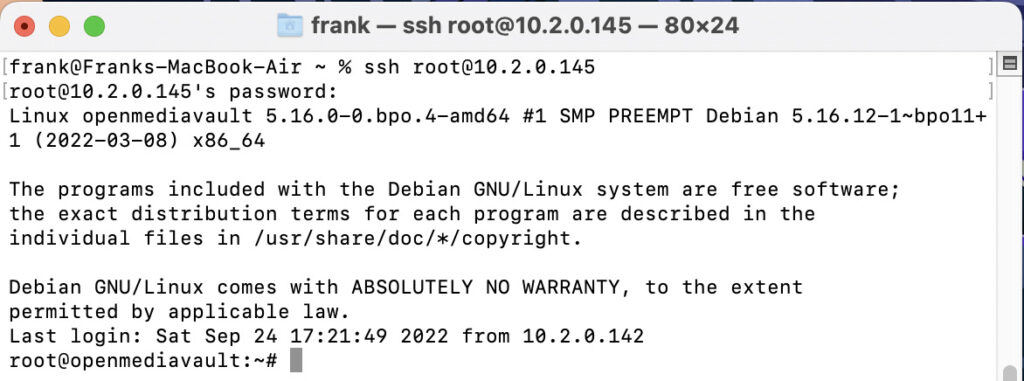
3. Run the command below to install OMV-Extras. It downloads the install script from the OpenMediaVault-Plugin-Developers repository on GitHub and runs it as root.
wget -O - https://github.com/OpenMediaVault-Plugin-Developers/packages/raw/master/install | bashIf you’re logged in as a regular user with sudo rights rather than root, use this form of the same command instead (the password prompt may not appear, so type your password and press Enter).
sudo wget -O - https://github.com/OpenMediaVault-Plugin-Developers/packages/raw/master/install | sudo bash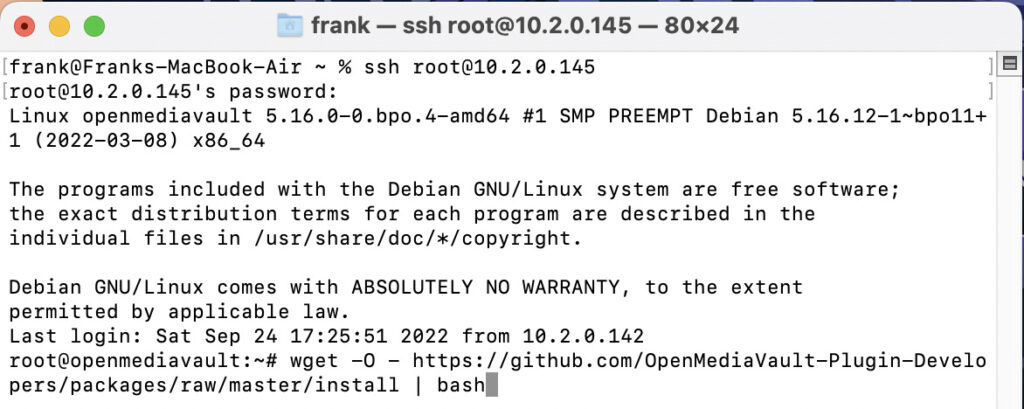
4. Log back into the OpenMediaVault web interface. You’ll now have an omv-extras entry under System. If it doesn’t show up, reboot the server.
Root login over SSH is only needed for this install, so you can turn it back off under Services, then SSH, once OMV-Extras is in. Security advice changes over time, and nothing here is guaranteed to keep your server safe.
How to Install Docker on OpenMediaVault 8
To install Docker on OMV, you use the openmediavault-compose plugin. It installs Docker CE from Docker’s own repository and depends on OMV-Extras, so the section above comes first. Once it’s in, you create and run your OMV Docker containers, and schedule backups of their data, from Services, then Compose.
Enable the Docker Repo and Install the Compose Plugin
1. In the OpenMediaVault web interface, select System, then omv-extras, tick Docker repo, and select Save.
2. Select System, then Plugins, then the magnifying-glass icon (Check for new plugins). Find openmediavault-compose, select it and install it.
The Compose plugin also installs openmediavault-sharerootfs as a dependency. Leave it alone, because uninstalling it removes the Compose plugin with it.
The plugin stores everything in OMV shared folders, so create those first on a data drive rather than the drive OMV boots from. Never put Docker on a USB flash drive running OMV. The omv-extras wiki also recommends EXT4 for the docker folder, keeping it out of mergerfs pools, and never NTFS for Docker data.
3. If the data drive has no file system yet, create and mount an EXT4 one under Storage, then File Systems. Then select Storage, then Shared Folders, and create the four folders in the table below.
4. Select Services, then Compose, and finally, Settings. Set the Shared folder under Compose Files, Data and Backup. Under Docker config, tick Use shared folder and pick the docker folder, then select Save and apply the change.
| Folder | Where it’s set | What it holds |
|---|---|---|
| appdata | Compose Files | Copies of each compose and env file |
| data | Data | Container config and data (the examples’ CHANGE_TO_COMPOSE_DATA_PATH placeholder) |
| backup_compose | Backup | Scheduled backups of each container’s persistent data |
| docker | Docker config | Docker’s own storage, moved off the default /var/lib/docker on the OS drive |
If you’d like variables shared by every compose file (a time zone or user ID, for example), the Files tab has a global environment file for that. The OMV 8 plugin fills most of those in through placeholders now, though.
Run Your First Container
5. Select Services, then Compose, and finally, Files. Select Add, then Add from Example.
6. Select an example (there are 197 as of October 2026, Jellyfin among them), select the + icon, then Add, and apply the change. To change a path or port, select the file, choose Edit, then Save. Then select the file and choose Up to pull the image and start the container.
Containers you start from the command line with docker run will not be fully visible to the plugin. From here, you can install Plex on OpenMediaVault, install Nextcloud on OpenMediaVault or set up Pi-hole on OpenMediaVault.
If Docker Doesn’t Show Up
If the Compose plugin says Docker isn’t installed, apply any pending change first. If it still says so, select Enable Docker repo under Services, Compose and Settings (it ticks Docker repo in OMV-Extras for you), then select Reinstall Docker once it finishes. If OMV-Extras itself is missing from System, refresh the page and reboot before running the install command again.
How to Install Portainer on OpenMediaVault
Installing OMV Portainer is no longer a one-click omv-extras button. On OMV 8 it’s just another compose file. The example list has three versions: portainer for a normal install, portainer-agent for managing this host from a Portainer server elsewhere, and portainer-omvextras, which reuses the portainer_data volume the old one-click install created.
Do You Need Portainer With the Compose Plugin?
I’ve gone back and forth on Portainer myself. I left it in 2024, went back earlier in 2026 because the Docker manager I’d switched to hadn’t received an update in almost a year, and as of October 2026 I’m moving to Dockhand. The Compose plugin covers the basics on OMV (images, volumes and networks have their own tabs), but Portainer is really built around managing your entire Docker host, not just compose files.
A stack you create in Portainer is stored inside Portainer’s own data directory rather than the Compose plugin’s appdata folder. Stacks created elsewhere show up in Portainer with limited control, so create stacks in one tool, not both. The Compose plugin added an import from Portainer in April 2026 (openmediavault-compose 8.1.13) if you change your mind.
For most people on OMV 8, the Compose plugin is enough on its own, since it already starts and stops your stacks and backs up their data from the OMV web interface. Portainer is worth adding if you already manage other Docker hosts with it and want this one in the same place.
Installing Portainer From the Compose Examples
1. Select Services, then Compose, and finally, Files. Select Add, then Add from Example, and choose portainer.
2. Select the + icon, then Add, and apply the change. Then select the new file and choose Up.
3. Open Portainer in a browser on port 9000 of your OMV server.
http://[OpenMediaVault_IP]:90004. New Portainer instances ask for a setup token before the first login. Copy it from the log (in Files, select the portainer file, then Tools and logs; look for the setup_token= line), then create your admin username and password.
Please note that Portainer announced on September 11, 2026 that Community Edition stays on the 2.x line (2.45 LTS) and gets security updates, bug fixes and selective back-ports of 3.x features, not 3.x itself. Once it’s running, here’s how to update a Docker container using Portainer.
Yacht, which the old omv-extras menu also installed, is still developed but is not in omv-extras or the Compose examples anymore.