In this tutorial, we are going to look at how to create an OpenVPN network interface on a Synology NAS.
The process is very straight forward, but incredibly powerful. Before you can connect, you need to ensure that you have OpenVPN setup. I have a tutorial created on how you can setup OpenVPN on a Synology NAS if you haven’t set it up yet.
The process is very straight forward, but incredibly powerful. Before you can connect, you need to ensure that you have OpenVPN setup. I have a tutorial created on how you can setup OpenVPN on a Synology NAS if you haven’t set it up yet.
1. Instructions – Synology NAS OpenVPN Network Interface
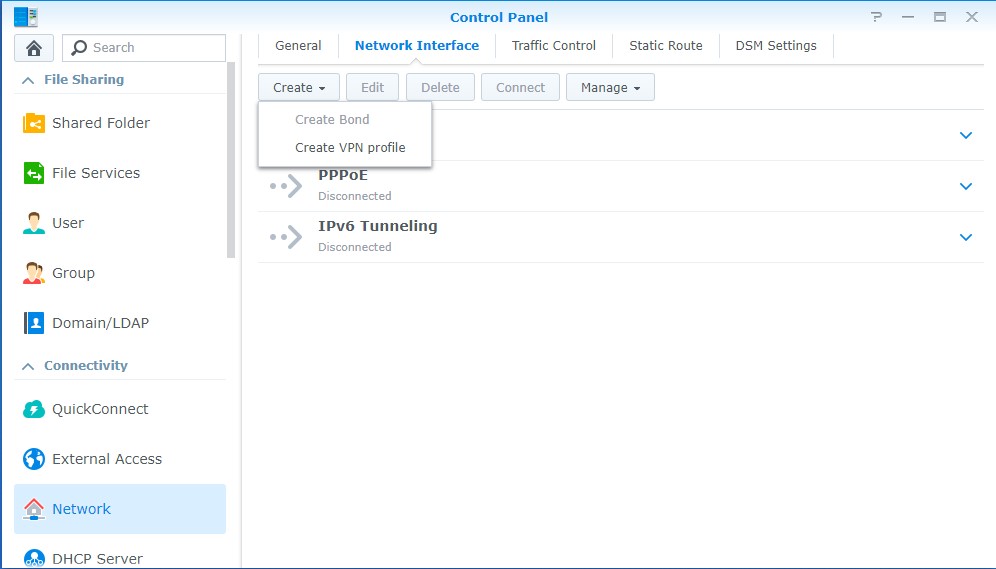
1. Open the Control Panel, select Network, and then Network Interface. Select Create, then Create VPN Profile.
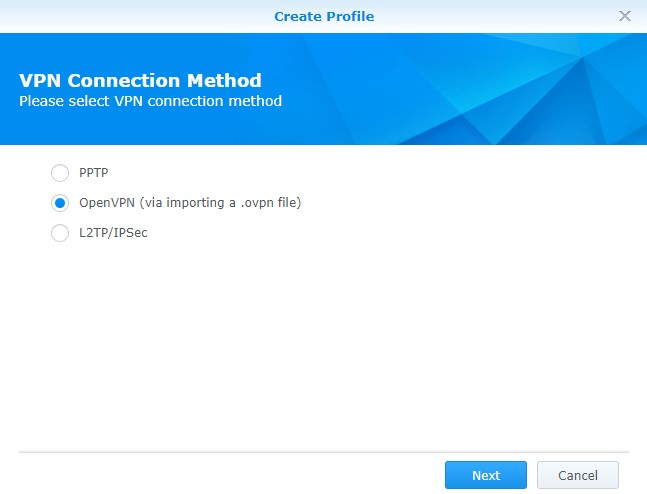
2. Select OpenVPN and select Next.
3. Open the .ovpn file that you will be using and add the line below. This will allow us to troubleshoot at later steps if we run into issues.
log-append /var/log/OpenVPN.log
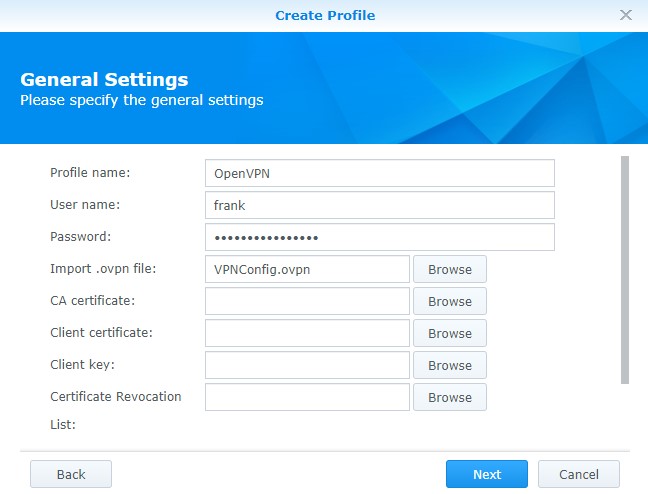
4. At this screen, we need to configure a few different settings. Enter a Profile Name, Username, Password, and the .ovpn file that you are using from your VPN Server. NOTE: Not everyone following this tutorial will have set up OpenVPN on a Synology NAS. If you have a certificate or client key, you will need to add those as well.
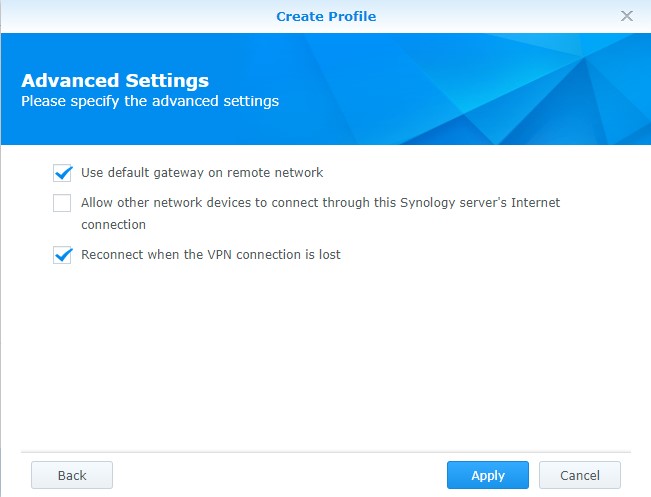
5. The next section will determine how you’d like to connect. I select Use default gateway on remote network and Reconnect when the VPN connection is lost. I have no use for the other setting (Allow other network devices to connect through this Synology server’s internet connection), but if you have a reason for that, you can select it. Select Apply.
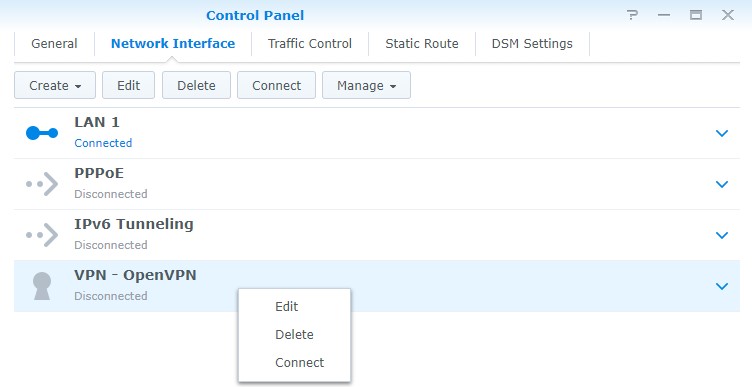
6. The VPN connection is now setup! To connect, right-click on the VPN profile and select Connect.
2. Troubleshooting – Synology NAS OpenVPN Network Interface
It’s very difficult to determine what’s wrong if the OpenVPN connection doesn’t work. The way that we can validate what’s happening is by creating a log file and viewing the contents of that log file. The log file will be in the location that we created above.
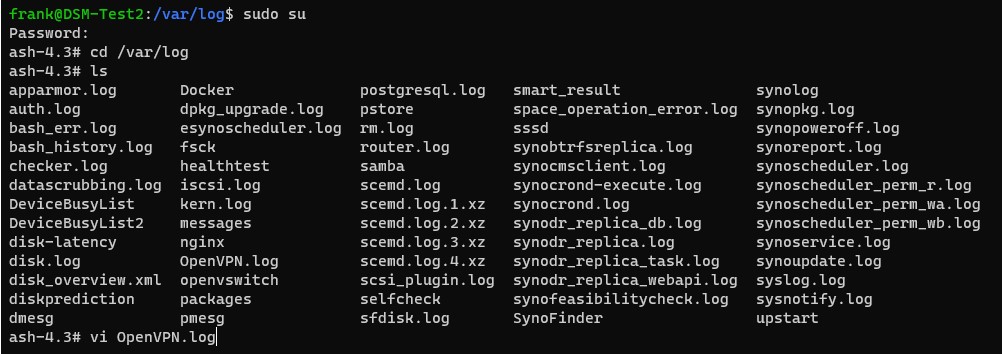
1. SSH into your Synology NAS and navigate to the log file. NOTE: you will need to be superuser to view the log file.
sudo su
cd /var/log
vi OpenVPN.log
2. Use the PgDn key on your keyboard to scroll to the bottom of the log. You will hopefully get some clarity on what exactly is going wrong. When I entered the wrong password, the error below is what I received.

3. Fix the error and try and connect!
3. Remote Backup
The majority of people will use this for off-site backups as it’s very easy to set up. If you intend on backing up terabytes of data, picking up a cheap DS220+ will save you money in the long run, as cloud storage prices are fairly expensive when you back up terabytes of data.
If you are interested in backing up your NAS to a remote Synology NAS, I created a tutorial on how you can do that.
4. Conclusion
Static route setup: by default, your local NAS will not be able to connect to your remote NAS as they are on different subnets (reverse should work). In order to get this to work, you will need to create a static route in your router.
Setting up OpenVPN is the real challenge here, as we are simply using that configuration file to connect our remote NAS to our OpenVPN server. Use the troubleshooting log to look through any errors that occur and you should be good to go! One step I recommend is creating a static IP address for your OpenVPN users. This will make it easy to connect to your off-site NAS as you’ll always know what the IP address is.
Thanks for reading the tutorial. If you have any questions, please leave them in the comments!

