Today we are going to look at how to setup Jellyfin on a Raspberry Pi.
Jellyfin is a Plex alternative and it’s a great tool that easily allows you to stream content to various devices. I already created a tutorial on how to install Jellyfin on a Synology NAS, but today we are going to look at how to install Jellyfin on a Raspberry Pi.
A few things before we get started:
- You should use a Raspberry Pi 4 if you intend on setting this up.
- If you intend on transcoding, you probably need to get a more powerful device. You’re free to try it out, but you might not get the performance you’re looking for.
This is a great option for people who don’t have a NAS device and don’t want to leave a PC running 24/7. The process will utilize an external hard drive because if you have a NAS or network resource that you’re connecting to, you should probably look into hosting Jellyfin on that. This makes for a great, lightweight media server that you can keep running 24/7.
How to Setup Jellyfin on a Raspberry Pi
1. First, we will create a directory where the external hard drive can mount when our Raspberry Pi is booted.
sudo mkdir /mnt/media
2. Run the command below to get the list of hard drives that we have attached to our Raspberry Pi.
sudo fdisk -l
3. Find your external hard drive in this list. Run the command below and copy the UUID of the external hard drive.
sudo blkid

4. Run this command to edit the fstab file.
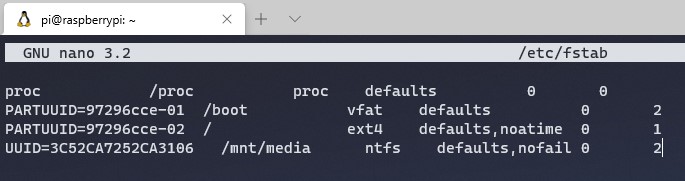
sudo nano /etc/fstab
5. Enter in the line exactly as shown (add your UUID and drive type) below and write out the file by pressing CTRL + O when complete. NOTE: You must “tab” between each block of text (each space below). It is also important to note that the “nofail” parameter allows you to boot the Raspberry Pi without the external hard drive attached – if this doesn’t exist, your Raspberry Pi will throw an error when the external hard drive is not connected and won’t boot.
UUID=[the UUID of your external hard drive] /mnt/media [drive type] defaults,nofail 0 2
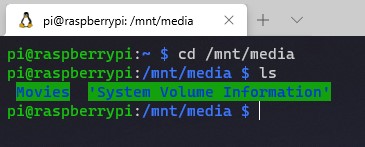
6. Reboot your Raspberry Pi. When it boots back up, navigate to the folder that we mounted using the commands below and you should see your external hard drives files.
cd /mnt/media
7. Installing Jellyfin on a Raspberry Pi is very straight forward. Run the commands below, in order, and Jellyfin will be installed.
sudo apt install apt-transport-https
wget -O - https://repo.jellyfin.org/jellyfin_team.gpg.key | sudo apt-key add -
echo "deb [arch=$( dpkg --print-architecture )] https://repo.jellyfin.org/$( awk -F'=' '/^ID=/{ print $NF }' /etc/os-release ) $( awk -F'=' '/^VERSION_CODENAME=/{ print $NF }' /etc/os-release ) main" | sudo tee /etc/apt/sources.list.d/jellyfin.list
sudo apt update
sudo apt install jellyfin
8. Navigate to the IP address of your Raspberry Pi and port 8096 to access Jellyfin.
http://[RASPBERRY_PI_IP]:8096
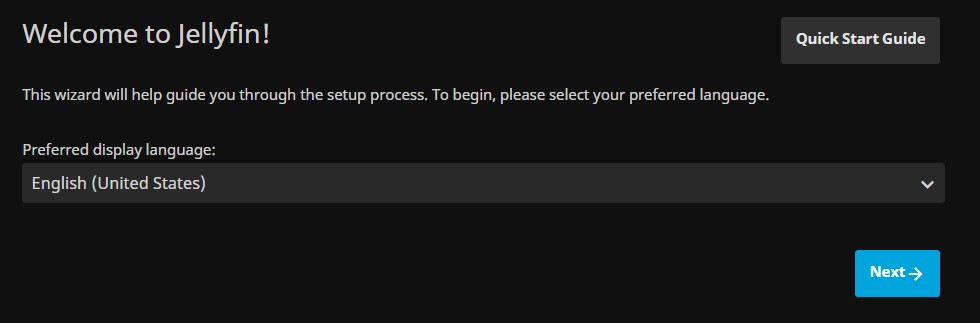
9. You will be brought to the default Jellyfin page. Pick your language and select Next.
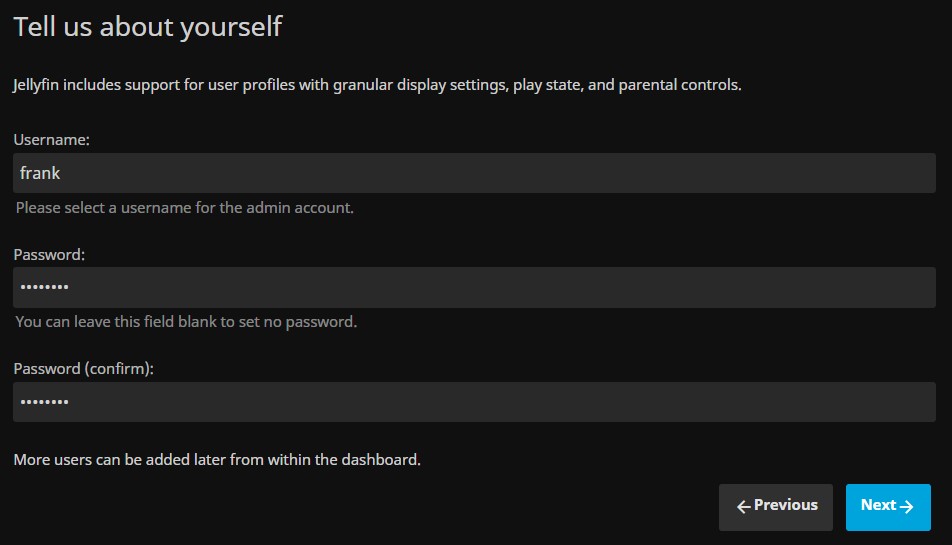
10. Enter a username and password and select Next.
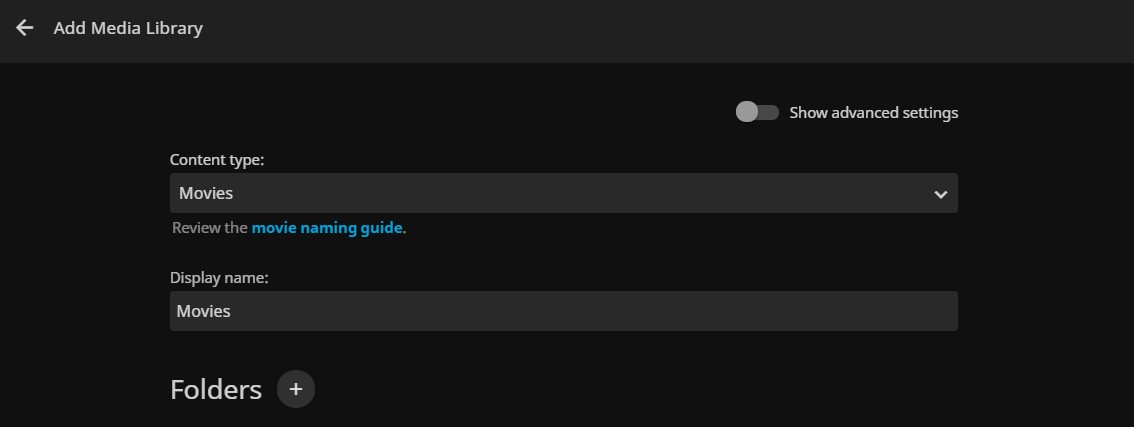
11. You will now need to enter your media libraries. Select Add Media Library, enter the content type and then add a new folder.
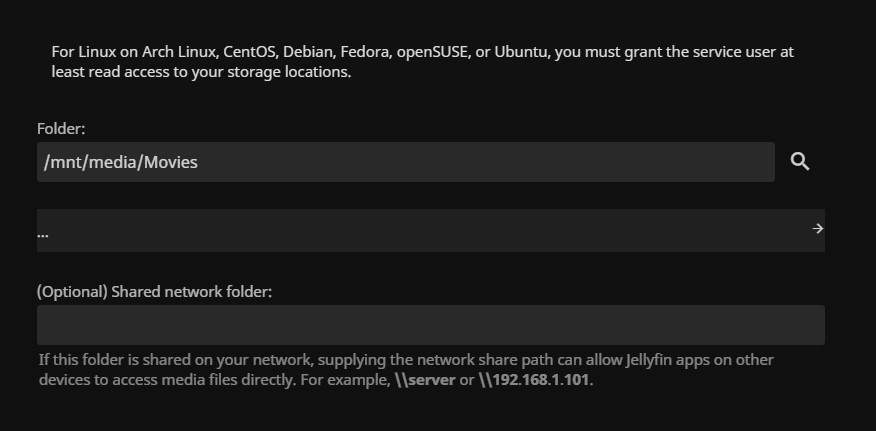
12. In this section, you will need to select the folder that you mounted earlier. Make sure you pick the folder that is related to the content type you selected in the previous step!
13. Do steps 11 and 12 for all media types that you have and then select Next.
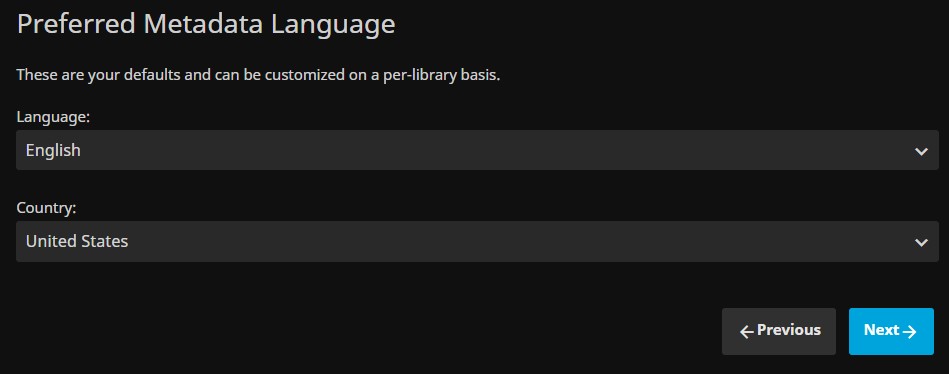
14. Select your preferred metadata settings and select Next.
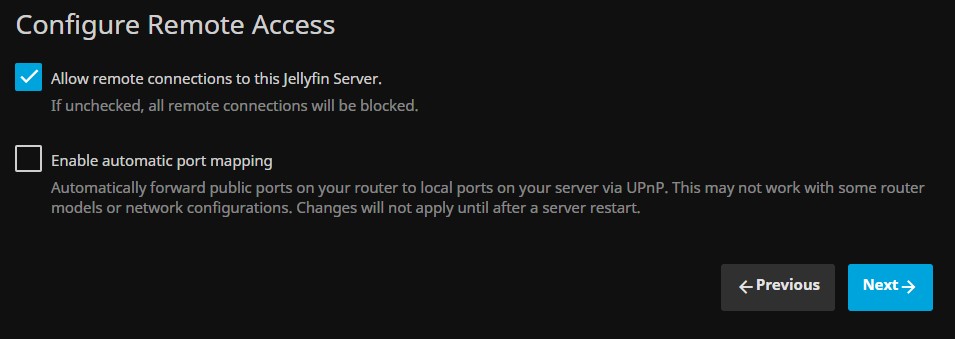
15. Configure your remote access settings. I highly suggest that you keep the second UPnP option deselected, as UPnP is an overall security risk. If you’d like to access your data remotely, I suggest that you open the port directly on your router (using a reverse proxy manager like nginx proxy manager would be even better) as opposed to using UPnP.
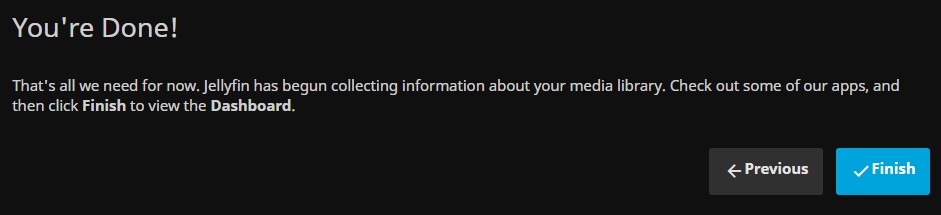
16. Select Finish. The setup process is now complete and your data will now sync! If you’d like to modify some of the admin settings, select Settings and then Dashboard under the admin section. There are a bunch of settings that can be changed here.
Conclusion
This tutorial showed how to setup Jellyfin on a Raspberry Pi. Jellyfin on a Raspberry Pi is awesome for people who don’t have a NAS or device running 24/7. It’s lightweight, has a bunch of great applications for your devices, and just works. It’s also pretty cool to have this all running on a Raspberry Pi.
Thanks for reading the tutorial. If you have any questions, please leave them in the comments!