I’ve been running an OpenVPN server on my Synology NAS for a few years now, and it’s one of the more useful things you can configure if you want remote access to your home network without relying on QuickConnect or punching unnecessary holes in your firewall. This guide covers the full setup on my Synology DS925+ running DSM 7.3. It covers installing the VPN Server package, port forwarding, editing the config file, and connecting from a client device.
If you’d prefer to follow along visually, I cover the full setup in a video here.
One thing worth saying upfront: OpenVPN works well, but it’s not the fastest VPN protocol. If pure speed matters more than compatibility, Tailscale or WireGuard are both faster. OpenVPN’s advantage is broad client support as it runs on almost everything and doesn’t require any special kernel modules.
How to Set Up and Configure OpenVPN on a Synology NAS
Step 1: Install the VPN Server Package
Open the Package Center and install the VPN Server application.
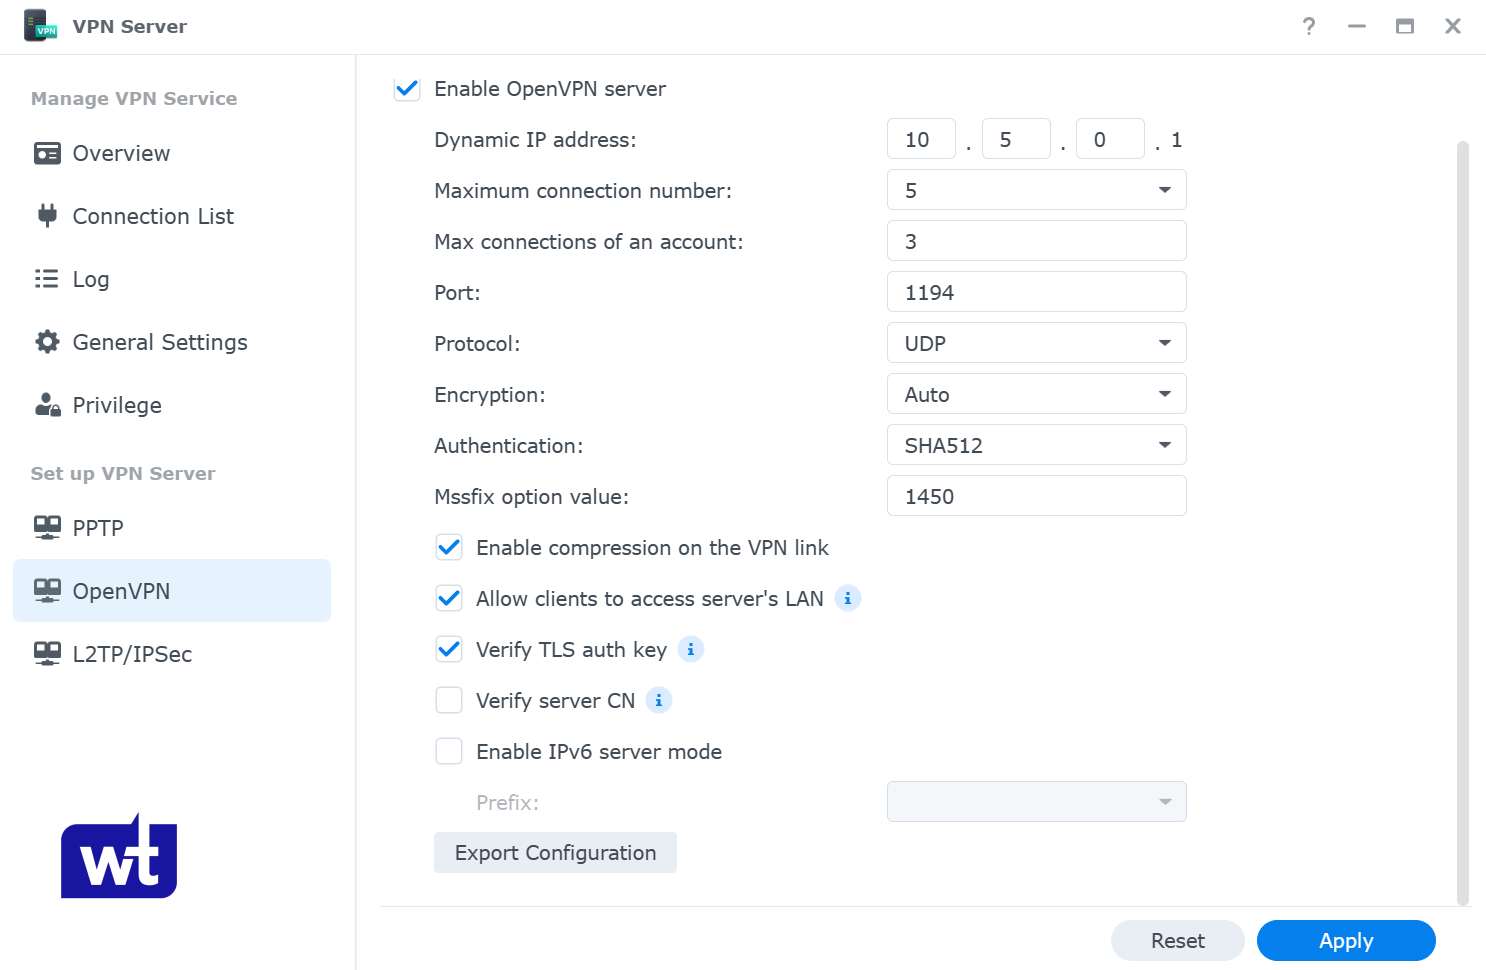
Once it’s installed, open VPN Server and navigate to the OpenVPN section.
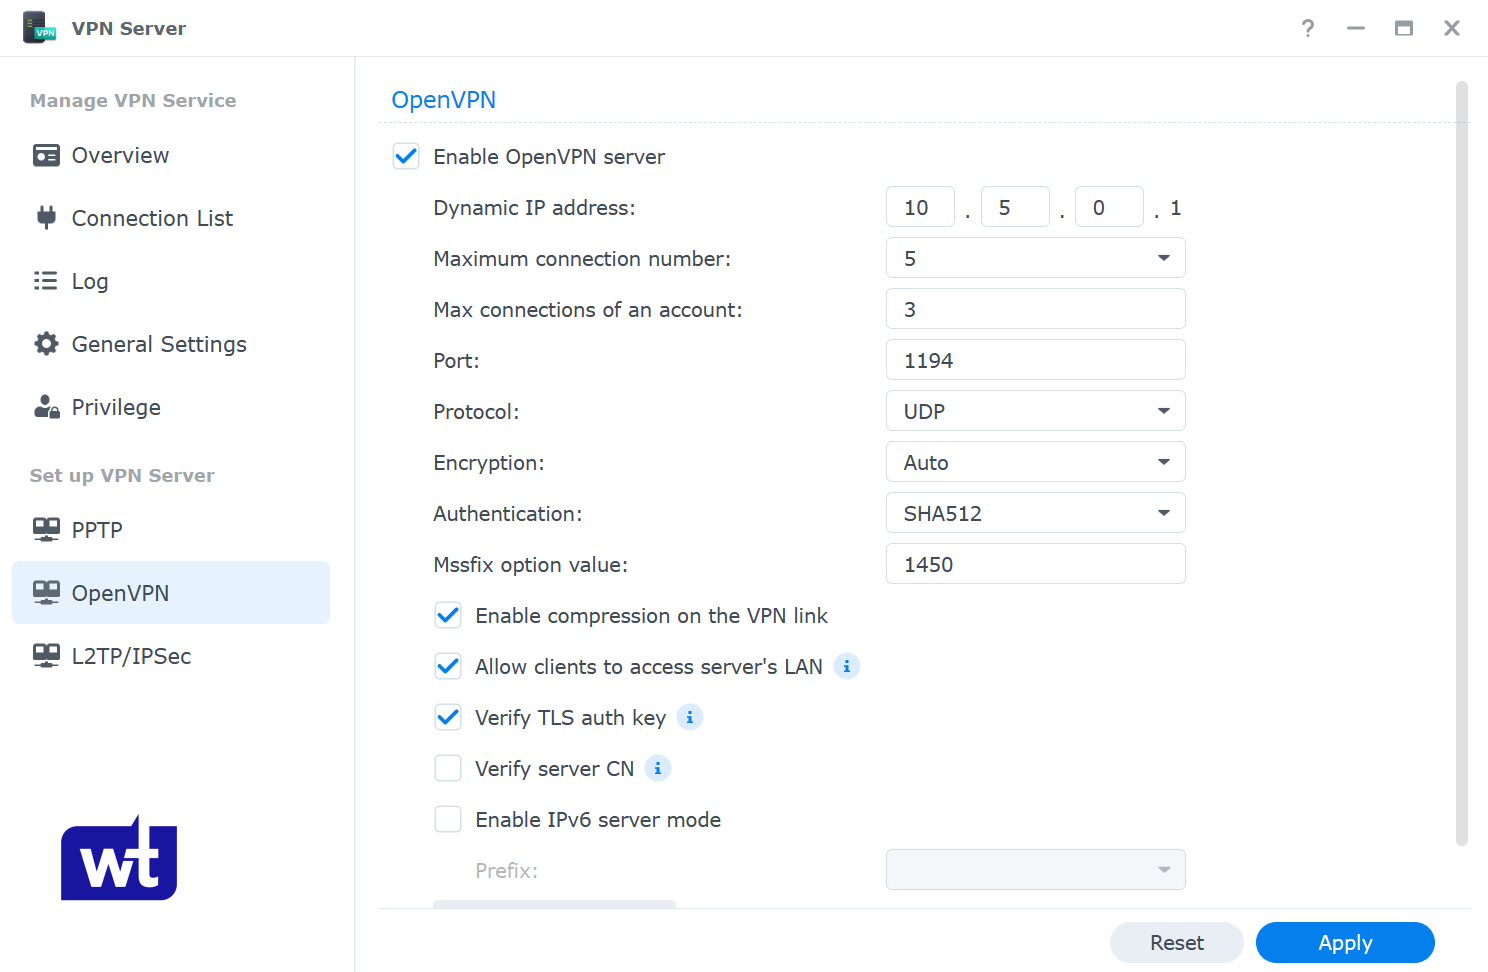
Enable OpenVPN Server. From here, set your dynamic IP address range and the maximum number of connections. The IP range is what VPN clients will get assigned when they connect, and the default is fine for most home setups.
Because the goal is accessing your NAS (and the rest of your local network) from outside your home, enable both Allow clients to access server’s LAN and Verify TLS auth key.
Next, go to the Privileges section and enable VPN access for the users you want to allow.
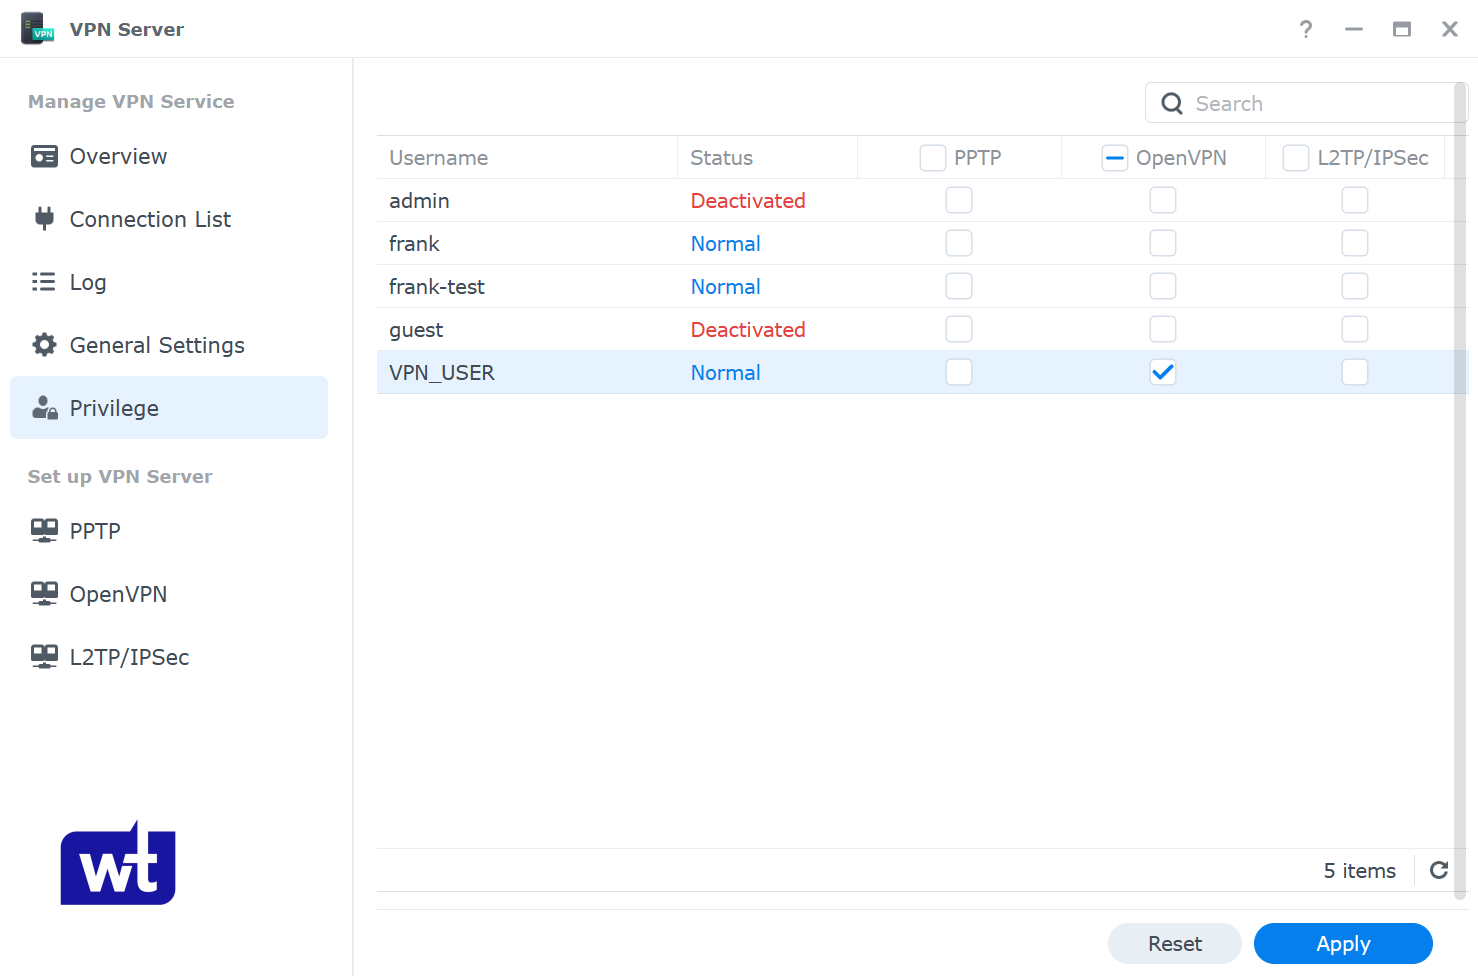
My preference is to create a separate user account that has permission to the VPN server only. That account is what I use to authenticate the tunnel. Once connected, I access the NAS and everything else using my regular NAS credentials. It’s an extra layer of separation that’s not required, but it’s a clean practice to follow for security.
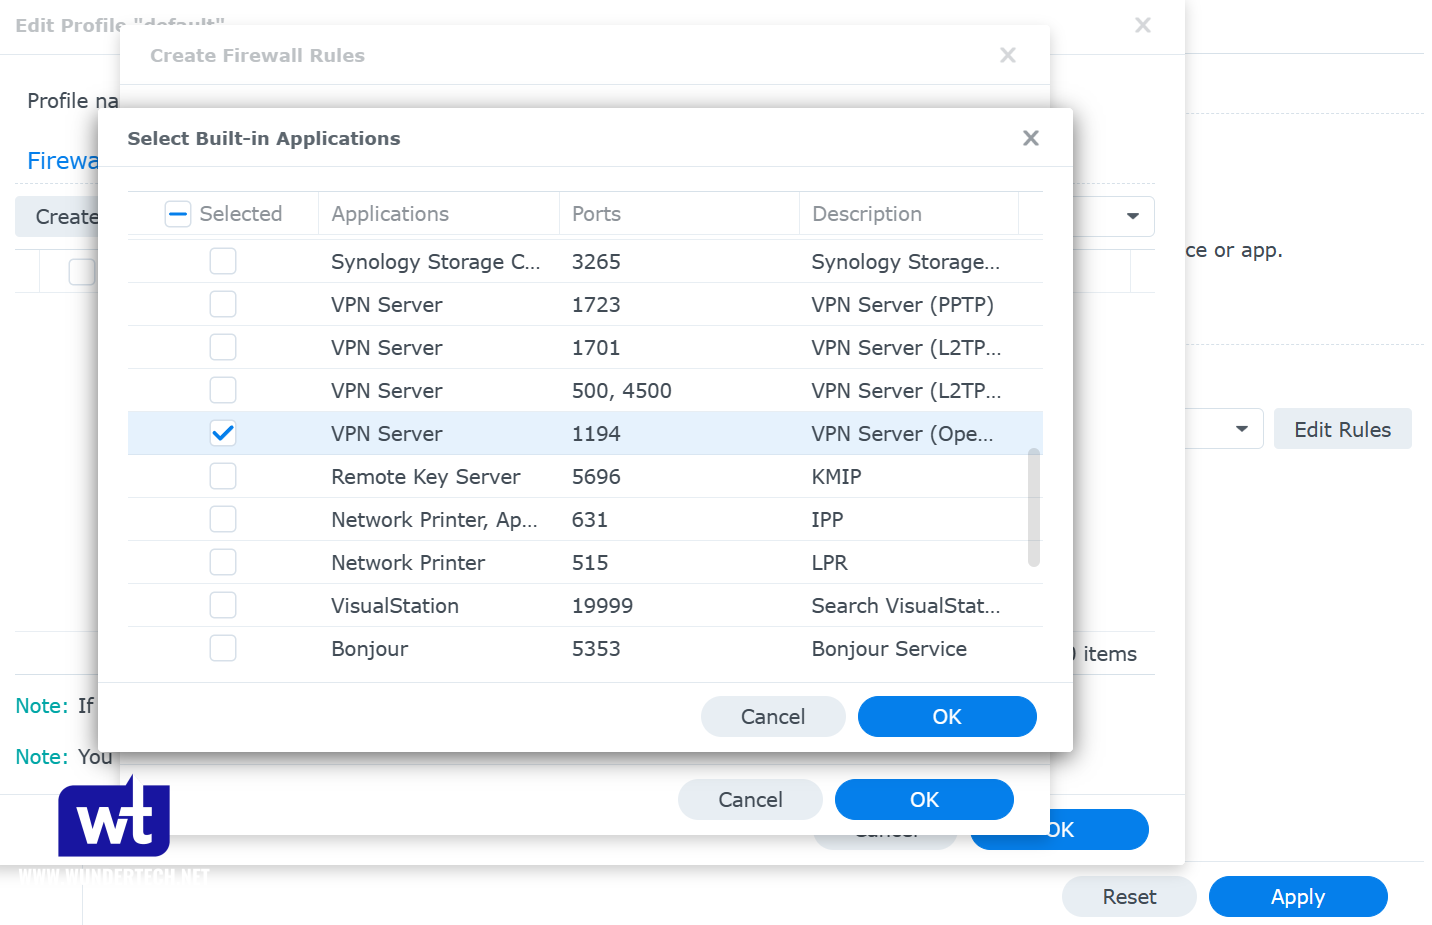
If you’re using Synology’s firewall, create an allow rule for UDP port 1194.
Step 2: Port Forward UDP Port 1194 on Your Router
For the VPN server to accept connections from outside your network, you need to port forward UDP port 1194 on your router to your Synology NAS. Port forwarding looks different on every router. The steps below are specific to your router’s admin interface, not DSM.
Before setting up port forwarding, your Synology NAS needs a static local IP address. That setup is done in our Synology NAS Setup & Configuration guide.
Create a port forwarding rule for UDP port 1194 pointing to the IP address of your Synology NAS. In the example below, the NAS IP is 192.168.1.220.

Step 3: Edit the OpenVPN Configuration File
This is the step most people leave as-is, but there are a few things you need to get right here.
Dynamic IP address (DDNS): If your ISP gives you a dynamic external IP address (which most residential connections have), you need DDNS so the config file points to a hostname rather than an IP that changes. You can follow Synology’s instructions here to configure DDNS on your NAS. There’s also a DuckDNS-based DDNS setup that works well as a free option. If your external IP is static, skip this and use the IP directly.
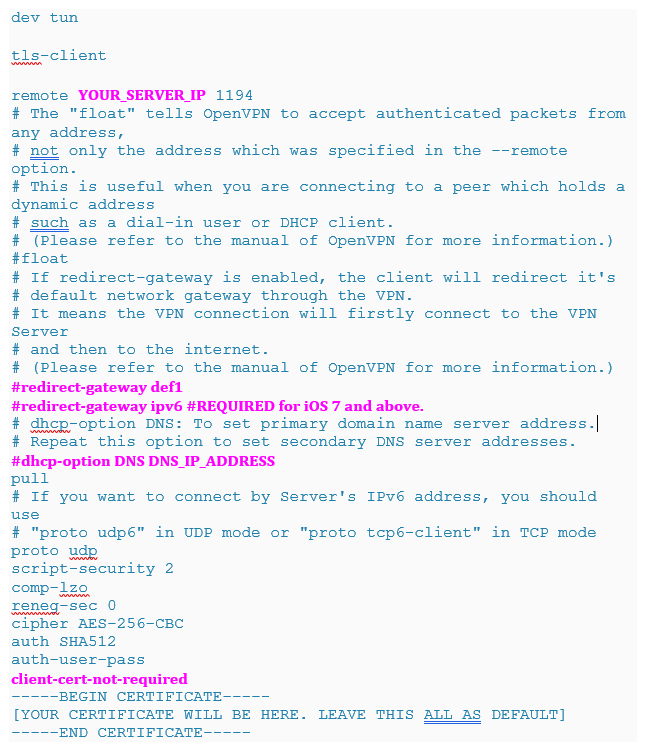
Once that’s done, open VPN Server, select OpenVPN, and click Export configuration. Extract the folder – you only need to edit the .ovpn file. Open it with any text editor.
The exported file has a certificate block at the bottom. Don’t share this file with anyone except the users who will be authenticating to your VPN.
There are four things to check in the config file:
1. YOUR_SERVER_IP: Replace this with your DDNS hostname or static external IP address.
2. redirect-gateway def1: This controls whether you’re running a full-tunnel or split-tunnel VPN. Full tunnel routes all traffic through the VPN. Split tunnel only routes traffic destined for your home network. If you’re on iOS on an iPhone, add redirect-gateway ipv6 on the line immediately below redirect-gateway def1.
3. dhcp-option: If you have a local DNS server (like Pi-hole), put its IP address here. If not, leave this line commented out.
4. client-cert-not-required: This line isn’t in the exported config by default, but add it if you’re using a current OpenVPN client. Without it, newer clients will throw an error on connect (the connection usually still works, but the error is confusing).
Save the file. I always test from my phone first since it’s easy to switch off Wi-Fi and confirm you’re on cellular. You must be on a completely separate network from your NAS when you test. Testing from the same network as your VPN server won’t work.
Connect to OpenVPN from a Client Device
Download the OpenVPN client for your device and install it.
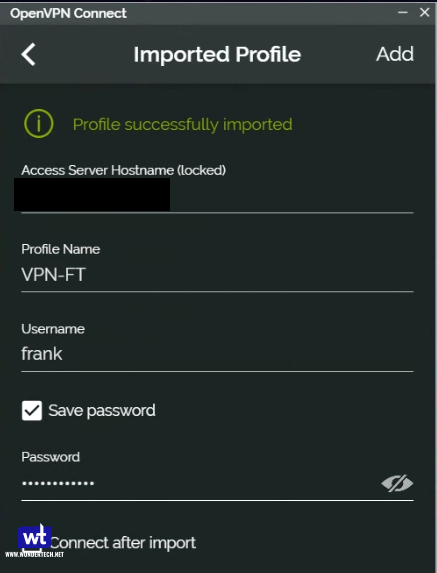
Tap the add button and choose File, then browse for the .ovpn file you edited in Step 3. Upload it, then log in with your DSM username and password (or the VPN-only user account if you created one).
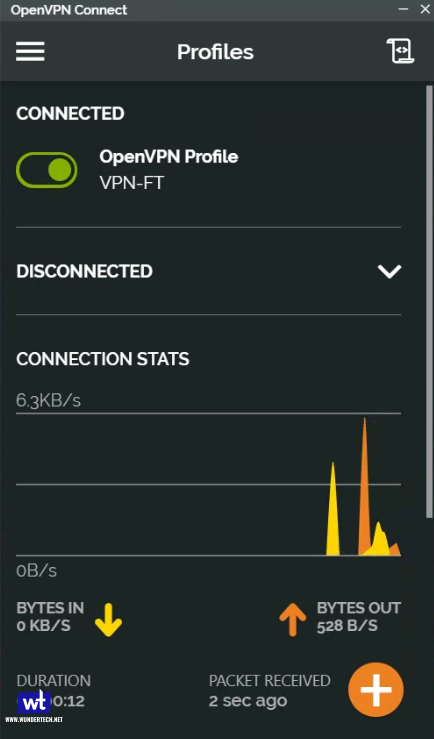
Once connected, you should be able to reach your NAS and everything else on your local network as if you were sitting at home.
OpenVPN Disclaimers
OpenVPN is reliable, but there are a few potential issues. The biggest one is that if you’re tunneling all traffic through a full-tunnel setup, your connection speed is limited by your home upload speed, and the VPN overhead on top of that can make things feel slow. It’s also slower to negotiate a connection than WireGuard or Tailscale. If you’re mainly trying to reach your NAS remotely and don’t need broad compatibility, it might make sense to check out Tailscale. It’s faster to set up and handles NAT traversal without port forwarding, but has the downside of being managed by a third-party.
With that said, OpenVPN is still a good choice if you want something self-contained, don’t want to depend on a third-party coordination service, and need client support across many devices and platforms.
If you’re interested in learning how to secure your Synology NAS (outside of secure remote access), that guide covers firewall rules, account security, and a few other settings worth enabling.