The UniFi Daily Spectrum Optimizer isn’t in Settings > WiFi anymore, so if you can’t find it, you aren’t missing anything. It was the daily job that picked a channel for each access point (Channel Optimization until Network 9.1 renamed it), and by Network 10.0 Channel AI had replaced it in AirView. Network 10.6.97 (August 2026) brought back a scheduled run, Nightly Channel AI Optimization, and this time you choose which radios it touches.
Letting UniFi optimize channels is only one part of a fast Wi-Fi network. Each setting below is current to Network 10.6.106 (September 2026) unless dated, next to what I ran on my own six-AP network in the video.
Video Tutorial on Optimizing a UniFi Wi-Fi Network
The video below goes over most of these settings on my own network. It was recorded on Network 9.0.114 (April 2025), like the UniFi screenshots below, so the Channel Optimization setting it shows is gone.
How to Optimize a UniFi Wi-Fi Network
Planning Your Wi-Fi Deployment with UniFi Design Center
Before you change a single setting, plan where your access points go. The easiest way is the UniFi Design Center, where you upload your floor plan, add your devices and see the coverage each placement gives you.
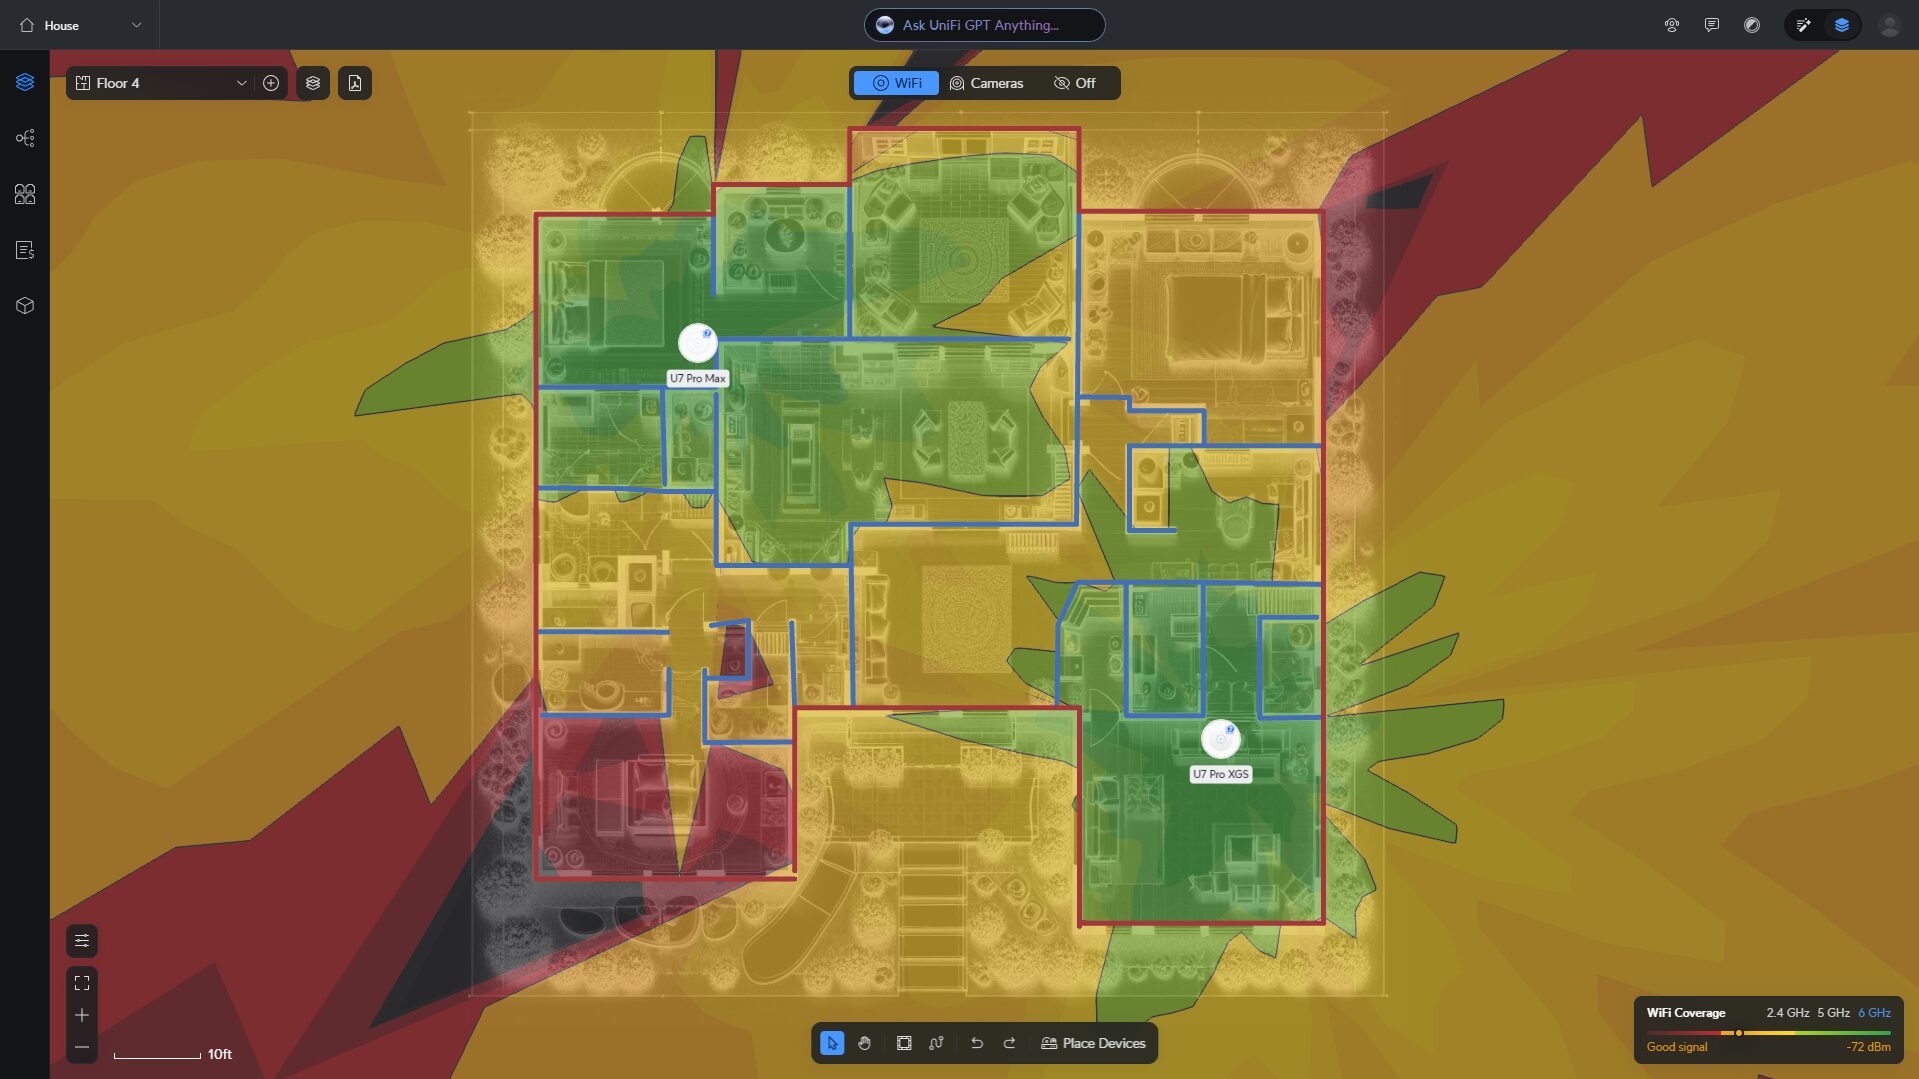
Move them around until every band covers the house, and it’ll usually become clear whether you need another access point or just a better spot for one.
SSID Configuration Strategy
If you don’t already have a segregated network with multiple VLANs, start there (my complete UniFi setup guide on YouTube shows how), and then configure UniFi firewall rules between them. Your phones and PCs might use 5 GHz or 6 GHz while some IoT devices only support 2.4 GHz, so separate SSIDs let you tune each group without breaking the other.
Every option below is in Settings > WiFi: select the SSID and set Advanced to Manual.
This still requires WPA2 (otherwise it’s greyed out). It lets one SSID put devices on different VLANs based on the password they enter.
Band Steering
Band Steering nudges (it cannot force) devices on 2.4 GHz to move to 5 GHz. Ubiquiti fully deprecated the old access point level version, so it’s an SSID setting now, on by default, and worth leaving on. My UniFi band steering configuration guide covers what it can and can’t do.
Multi-Link Operation (MLO)
MLO is a Wi-Fi 7 feature that lets a device connect across more than one band at once. It needs Network 8.2.93 or later, a Wi-Fi 7 access point on firmware 7.1.18 or newer and clients that support it. It also switches that SSID to WPA3, which may limit IoT devices. If you turn it on, keep it to your newer devices’ SSID (Network 10.2.93 and later warn if Fast Roaming is on there too).
IoT Devices
In my December 2025 configuration video (Network 10.0.161), I left the IoT SSID’s WiFi Optimization on Standard with 5 GHz on, since newer devices like a Fire TV use it. That setting’s 2.4 GHz-only IoT option was one fix if devices kept dropping. Network 10.4.57 (May 2026) reworked these IoT options, adding DTIM Interval Lock, Channel Lock and Force WiFi 4.
Roaming: Fast Roaming, BSS Transition and Handoff Suggestions
Client devices (not access points) decide when to roam, so all you can do is nudge them toward a closer access point.
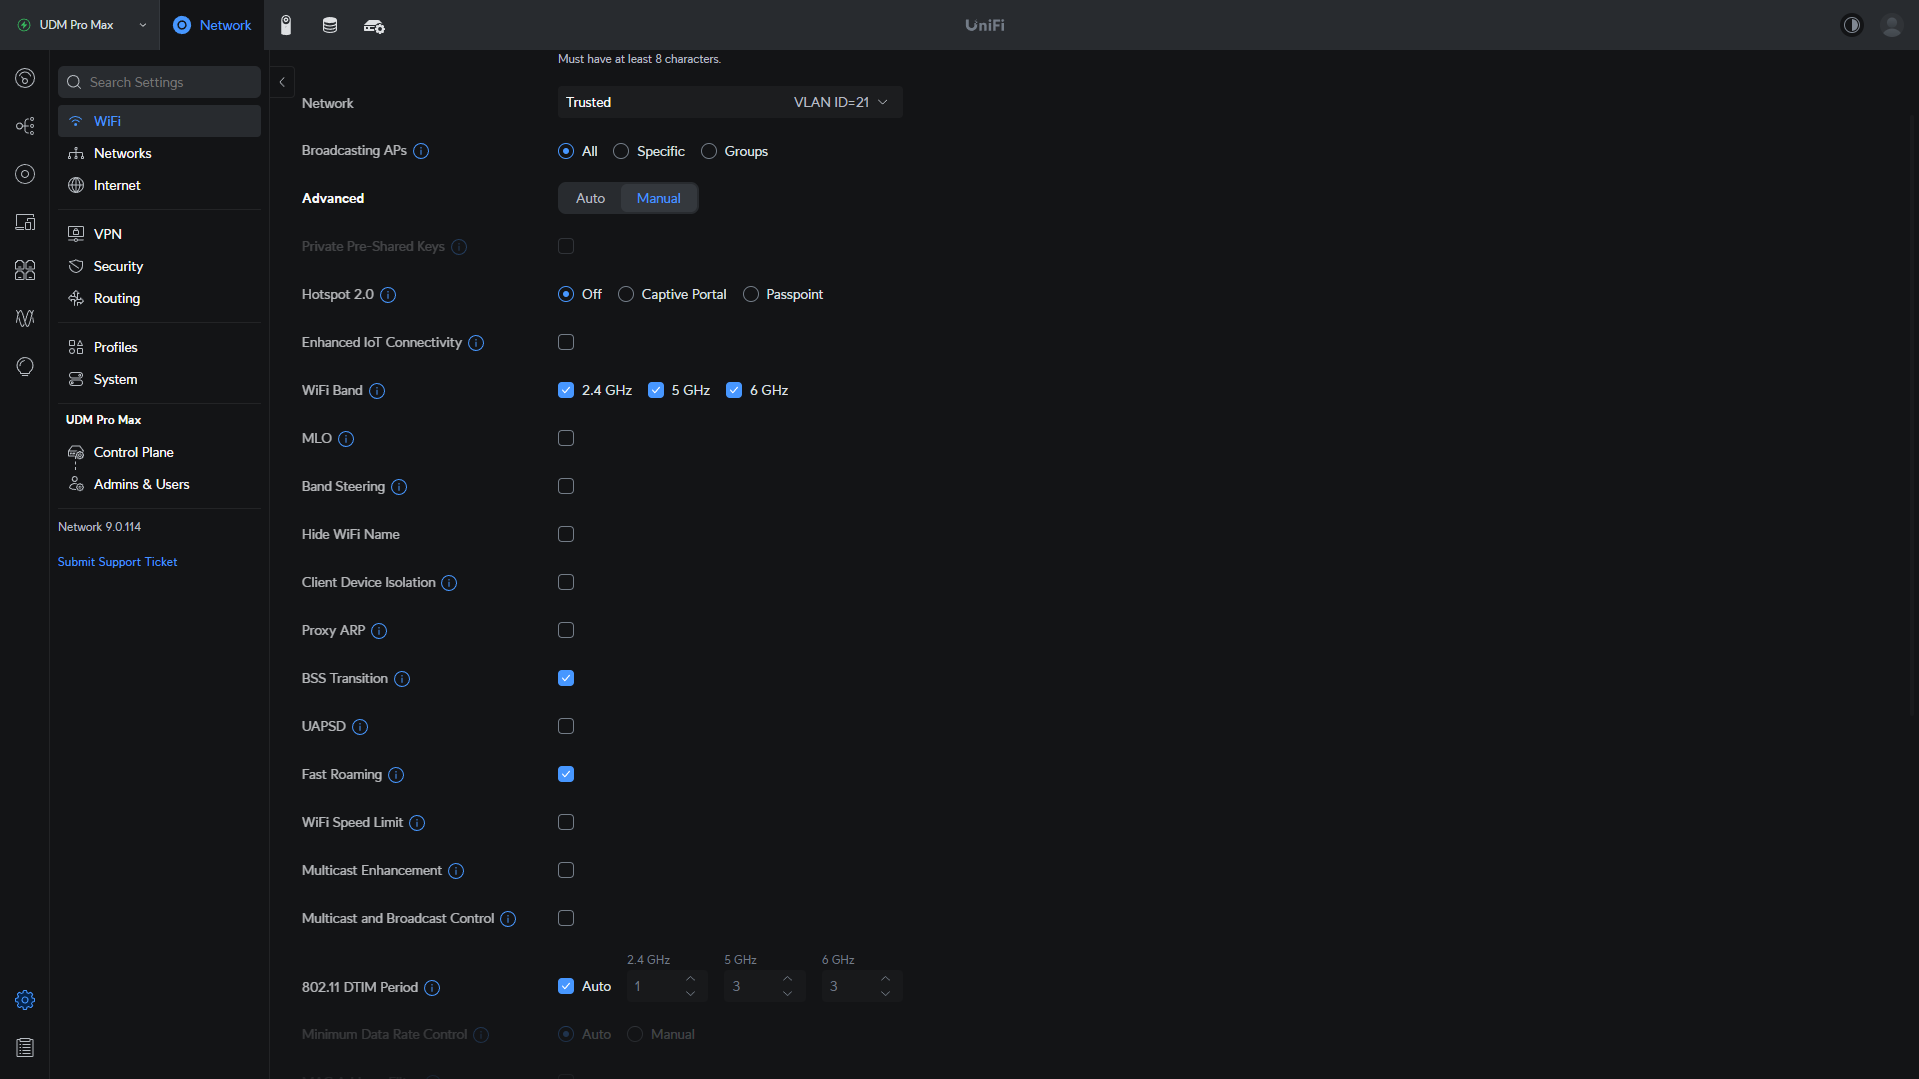
Fast Roaming (802.11r)
Fast Roaming pre-authenticates clients with your other access points, so handoffs are much faster, and Ubiquiti strongly recommends it. It needs devices that support 802.11r, though. In the video, I had it on for my newer devices’ SSID and off for IoT. It made a tremendous difference. My devices roamed before, just not nearly as fast as I’d like. If your devices don’t support it, it can cause connection issues.
BSS Transition
BSS Transition is on by default and helps devices move between access points too. Ubiquiti generally recommends leaving it enabled, and in my experience it’s safer to leave on than Fast Roaming. Very old devices may roam badly with it, so turn it off if one of those starts dropping.
Handoff Suggestions and Minimum RSSI
Roaming Assistant was renamed Handoff Suggestions (802.11v) in Network 10.4.57. It warns a device that it’ll be disconnected once its signal drops past a threshold (Ubiquiti suggests below -70 dBm), a soft kick. On Network 10.0, Roaming Assistant was a Settings > WiFi row with a Threshold (dBm) slider, and 10.4.57 lists it under WiFi Broadcast (SSID) settings. Minimum RSSI, the harder version, is a checkbox under each band in the AP’s Settings, and Ubiquiti doesn’t recommend it outside high-density deployments, since some devices refuse an AP that kicked them repeatedly. In the video, I suggested keeping Minimum RSSI disabled.
UniFi Channel Optimization
You have three ways to handle channels: set them by hand, leave them on Auto, or let Channel AI pick them. Whichever you choose, look at your radio environment first.
Radio Environment Analysis
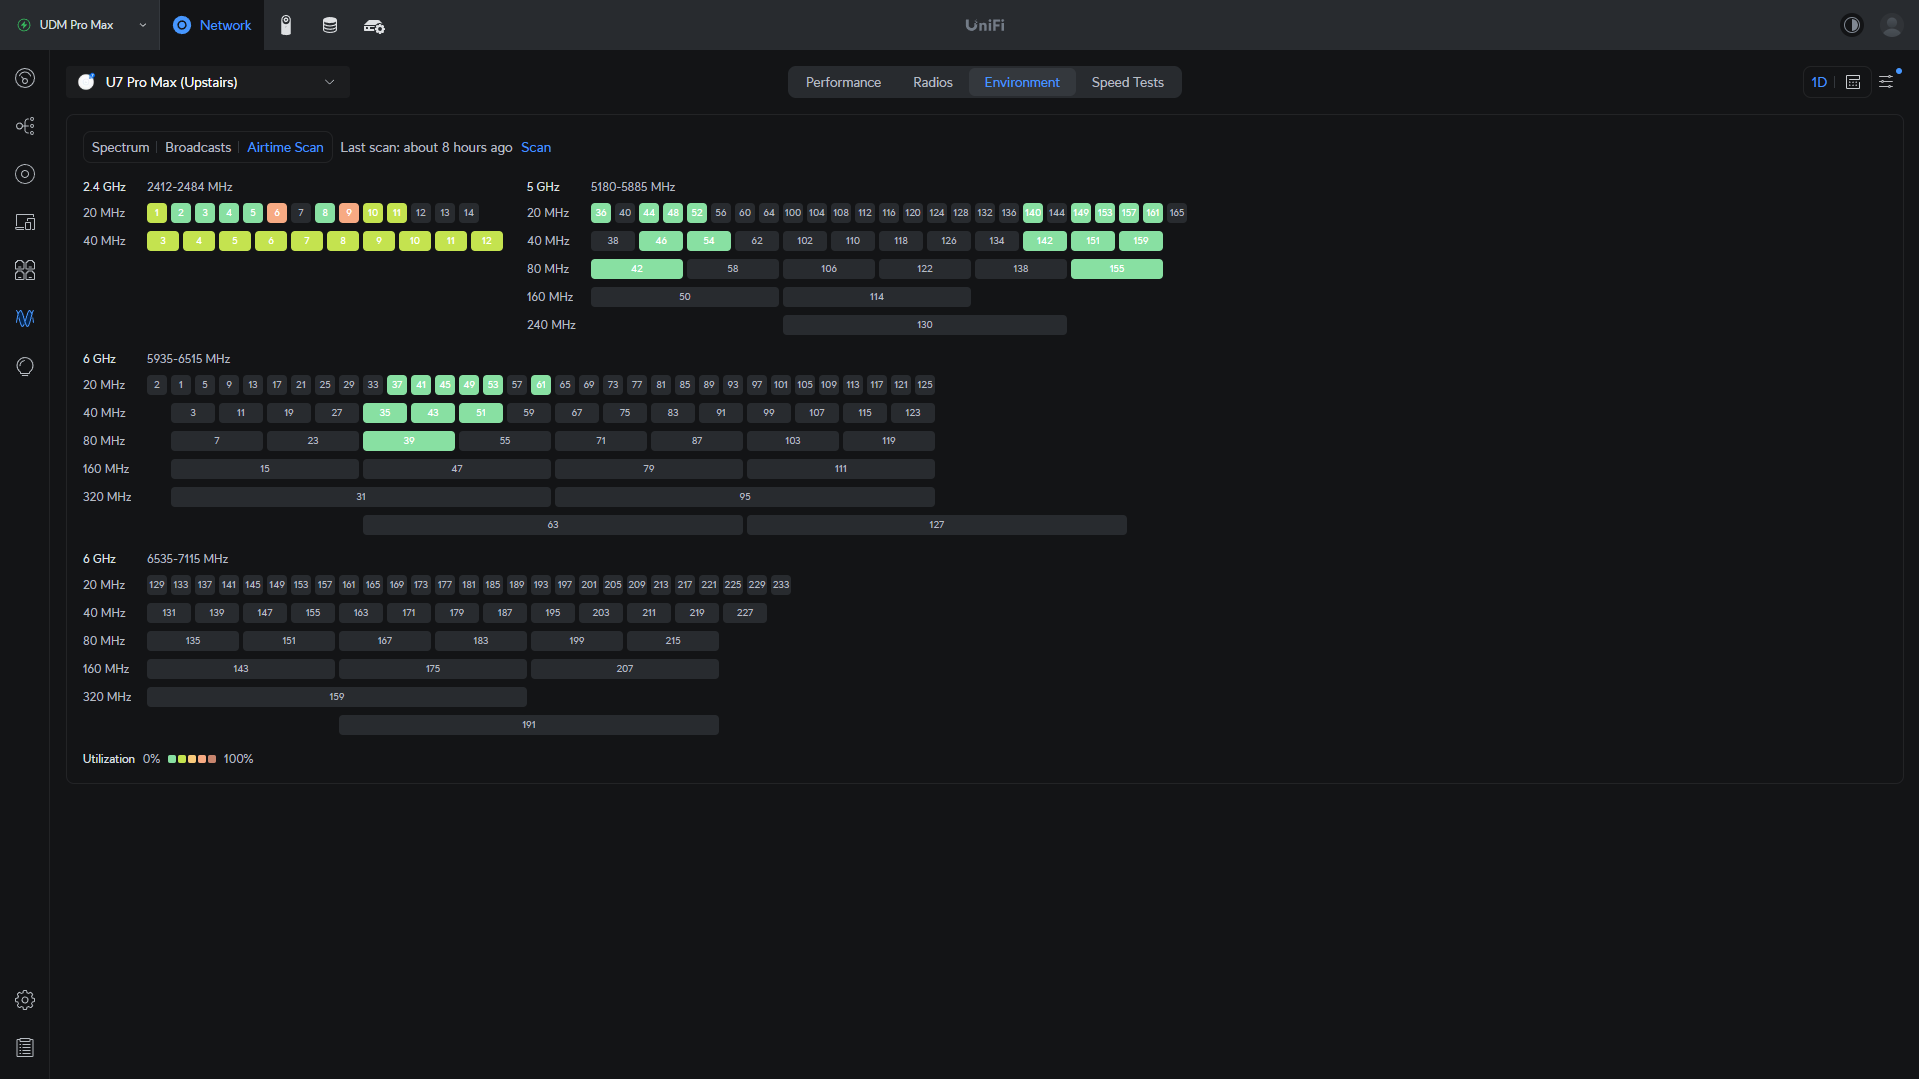
Open UniFi Devices, select an access point, then AirView > Environment. If your access point supports real-time spectral analysis, it shows the band live:
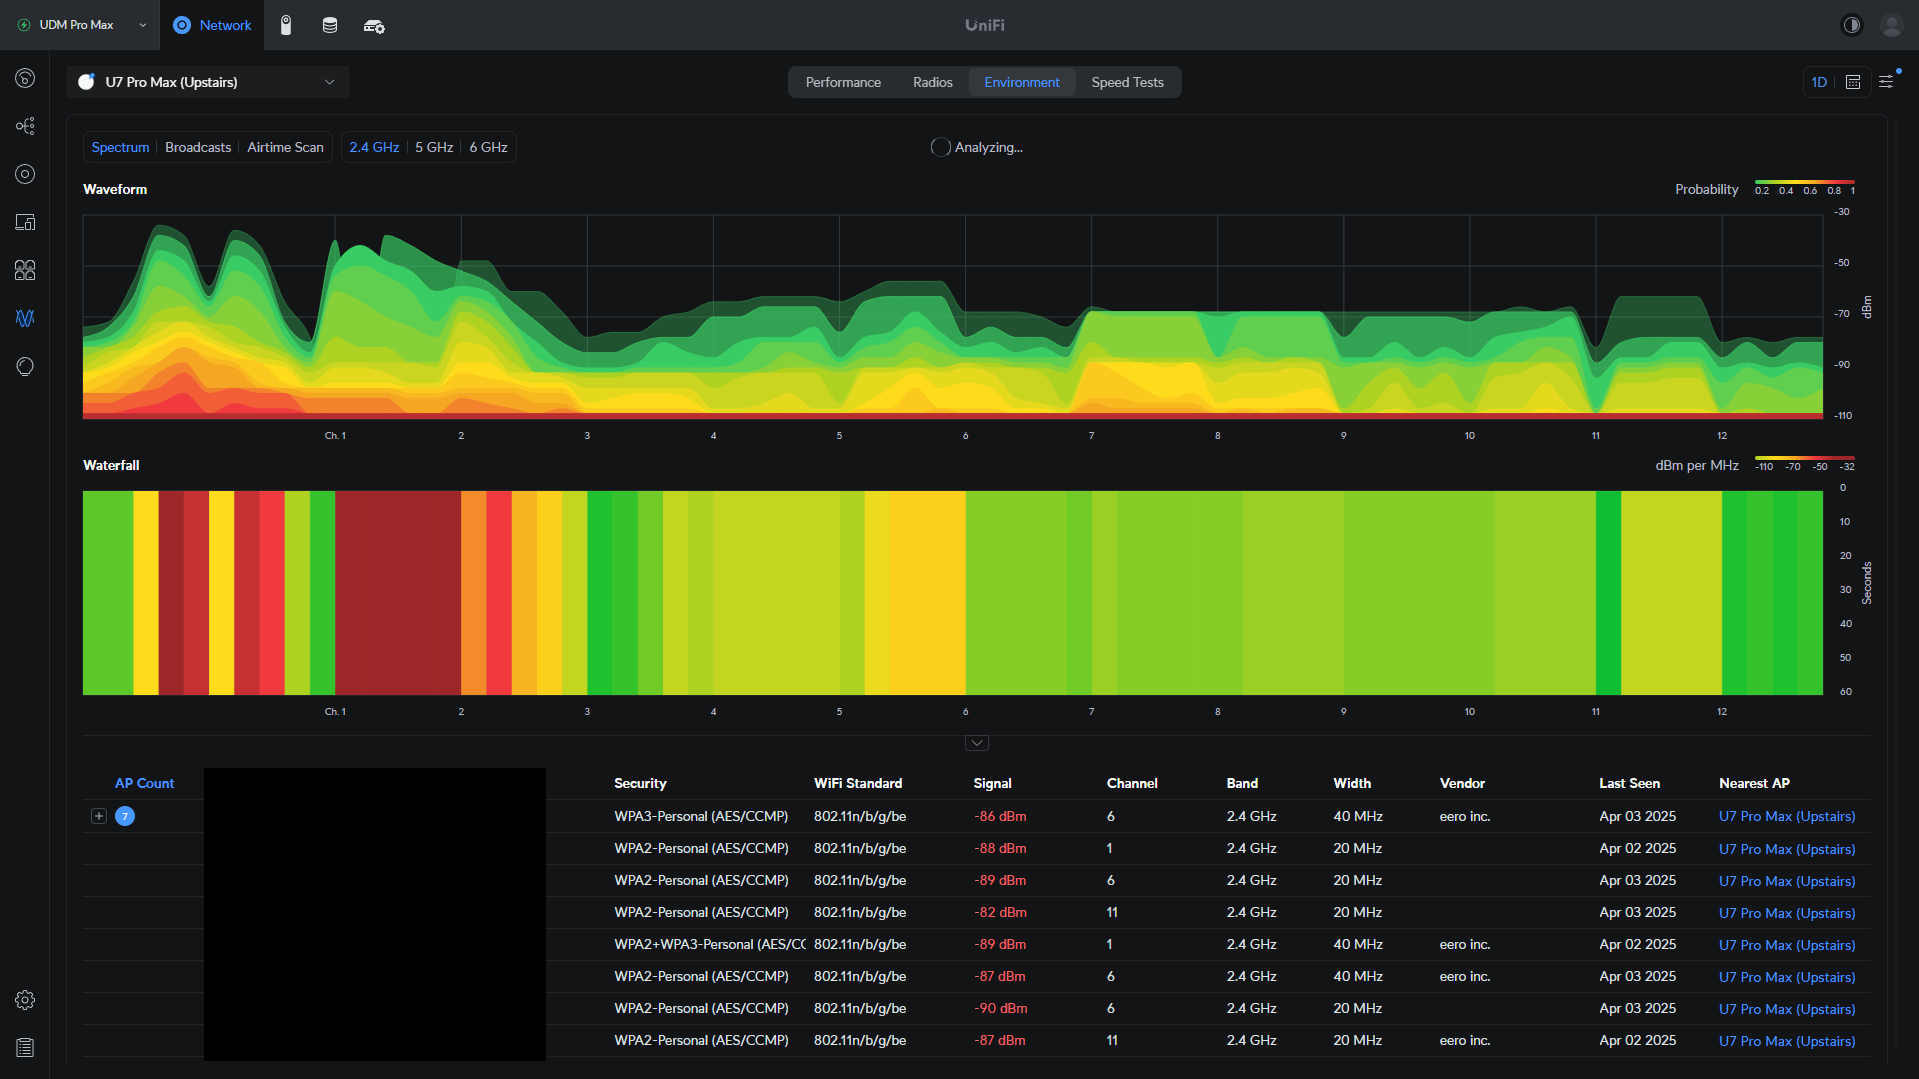
Or run an Airtime Scan. Quick scans channels of the same width, while Full covers every channel but kicks all active clients off that radio, so save it for a quiet time.
Manual or Auto Channels
Then pick one in each access point’s settings (UniFi Devices > select the AP > Settings):
- Set each access point to a specific channel, so neighboring APs sit on different channels.
- Leave the channel on Auto, which picks one when the access point starts up and, since Network 9.1, takes UniFi’s channel plans too.
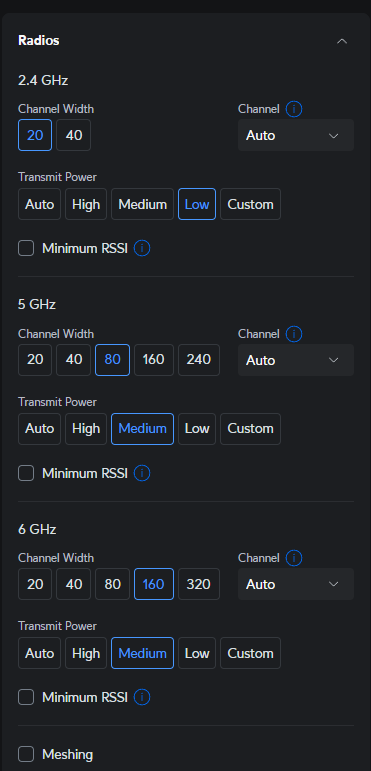
NOTE: On 2.4 GHz, only use channel 1, 6 or 11 if you set one by hand. Those are the non-overlapping channels.
I used to set every channel manually, and the problem was that those channels never changed, so they weren’t necessarily the best choice over time. That’s the case for letting UniFi optimize channels for you. If you’re looking for the Auto-Optimize Network switch from older versions, Ubiquiti’s current documentation doesn’t describe one.
What Happened to the Daily Spectrum Optimizer
The UniFi Spectrum Optimizer is gone. Channel AI now handles nightly channel optimization. Here’s how it changed:
- Network 9.0: Settings > WiFi had a Channelization row with Optimize Now and a Channel Optimization checkbox that ran daily at a set time.
- Network 9.1: renamed Daily Spectrum Optimizer.
- Network 9.5 (October 2025): Channel AI arrived as an on-demand tool.
- By Network 10.0.161: the row was gone, with Channel AI: Click Here to Configure in its place.
- Network 10.6.97 (August 2026): Nightly Channel AI Optimization added, with configurable radio selection.
In the video, I had channel optimization set to run at 4:00 AM, because that’s a time when it won’t impact my Wi-Fi usage. The catch is that with nobody using Wi-Fi then, the results may not be the best. The bigger limitation was that it ran on every band at once, and I couldn’t turn it on for 2.4 GHz only.
The 10.6.97 version may fix that with its radio selection, but Ubiquiti’s Channel AI documentation doesn’t cover the nightly schedule yet, so start at the Channel AI tab in AirView.
Should You Use the Nightly Run or Channel AI on Demand?
If you set your channels manually, keep the nightly run off, because its whole job is changing channels. If your access points are on Auto and you have at least two, run Channel AI on each band after setting up or changing your network. On 10.6.97 or later, turn on the nightly run for the radios you’d like it to manage. According to Ubiquiti, Channel AI only changes channels and applies them without impacting active clients, so for most people it’s low-risk.
How to Use UniFi Channel AI
Channel AI is UniFi’s Radio Resource Management (RRM) tool. It uses neighbor reports and automated scans to recommend a channel for every AP on a band, then applies the plan when you approve it. It needs at least two active access points. Set your channel widths first.
1. Open UniFi Network, select AirView, and then the Channel AI tab beside Radios (unselected tabs show only an icon).
2. Select a band (2.4 GHz, 5 GHz or 6 GHz) above the Optimize button, then select Optimize.
3. Review the optimization summary and select Apply Changes.
4. Repeat for the other bands.
In my December 2025 configuration video, I recommended optimizing with it if you have multiple access points.
DFS Channels and Excluding a Channel
Channel AI only uses the channels you allow. For DFS channels, open Settings > WiFi > Default WiFi Speeds, select Custom, check Extended 5 GHz Spectrum (DFS) and select Apply Changes. To exclude a channel, pick its band above Optimize, select Expand on the Channel Plan, pick the channel(s) and select Apply Changes.
Checking the Result
Network 10.6.97 also added Time Machine to AirView > Radios, which keeps radio usage, configuration changes and radio events for 24 hours. Check it the same day you apply a new channel plan to see whether interference and airtime actually improved.
Channel Width, Meshing and Transmit Power
Channel AI leaves these alone, so set them before running it.
Channel Width
Set it for every access point in Settings > WiFi > Default WiFi Speeds (select Custom to set each band’s width, then Apply to All APs and Apply Changes), or per AP in its Settings. Wider is faster but picks up more interference:
- 2.4 GHz: 20 MHz. Anything wider will most likely add interference.
- 5 GHz: Ubiquiti recommends 80 MHz for most homes and keeps 40 MHz for high-density networks like offices. When I recorded the video, I’d had mine at 80 for a few years without any interference issues.
- 6 GHz: 160 MHz, which is where I had mine in the video. Ubiquiti suggests 160 to 320 MHz, and clients that can’t do 320 connect at 160.
Meshing Configuration
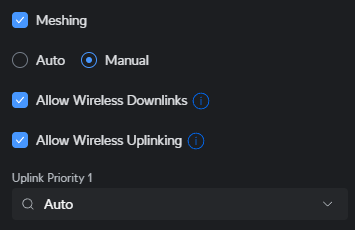
If an access point connects to another one over Wi-Fi, leave meshing on for it and its parent AP. If all of yours are hardwired, turn it off in each AP’s Settings (Network 10.1.83 suggests disabling Mesh Connect on wired APs).
Transmit Power Settings
Leaving transmit power on High or Auto isn’t always ideal with more than one access point. When two APs are close together, a device can hold onto the farther one because its signal is still strong.

Lowering transmit power fixes that, because as you move toward another access point, the far one gets weak while the close one stays strong.

With multiple APs, this is what I’d recommend as of May 2026:
- 2.4 GHz: low, pretty much always.
- 5 GHz: somewhere between low and medium.
- 6 GHz: high, which I’ve had good experiences with.
Ubiquiti’s residential guide says High unless your APs are very close together, so treat these as a starting point and adjust each AP for where it sits. The exception is a single access point, where you want it high so the connection holds as long as possible.

Set it per AP in UniFi Devices > select the AP > Settings, or for several at once in AirView > Radios.
Troubleshooting Common Issues
Poor Roaming Performance
If devices aren’t moving between access points properly:
- Lower the transmit power on your access points.
- Check that Fast Roaming is enabled on the SSID (if your devices support it).
- Check Avg. Signal in AirView > Radios. Ubiquiti treats -70 dBm as the minimum and recommends -65 dBm or better.
Interference Problems
If one or more access points suddenly slow down:
- Run a new Airtime Scan or check spectral analysis, and check Time Machine for what changed on that radio.
- Drop the channel width if you need to (80 MHz to 40 MHz, for example).
- If you set the channel manually, move it to a cleaner one. If you’re on Auto, run Channel AI for that band (with one AP, restart it instead).
Connectivity Issues After Configuration Changes
If devices struggle to connect after a change, look at the last thing you changed. A few of these settings (Fast Roaming, MLO’s switch to WPA3 and Minimum RSSI especially) can hurt older devices, so make one change, test it, and then move on to the next. UniFi’s Wi-Fi and security options change with nearly every release, too, so nothing here is guaranteed to look the same after the next update.