
To install Portainer, Debian and Ubuntu both need Docker Engine from Docker’s own apt repository first, and then Portainer itself is one docker run command and a login on port 9443. The steps below cover Ubuntu 24.04 and 26.04 (22.04 still works) and Debian 13 and 12 (on Debian, use the Debian section for Docker). The Docker commands match Docker’s documentation as of September 2026, when Portainer CE 2.45.1 LTS was the current release. Portainer’s own command sits beside mine.
I use Ubuntu Server because I find it the easiest for beginners, but Debian is a great option as well, and only Docker’s repository lines differ. Early in 2026, after a Docker 29 update broke Dockge, I decided to move my containers back to Portainer. It’s managed by a team, and it’s a reliable way to manage all of your Docker containers.
On other hardware, see my guides for installing Portainer on a Synology NAS and to install Portainer on a Raspberry Pi, or start with running Docker in Proxmox if you’d like this in a VM.
Install Portainer on Ubuntu 24.04 or 26.04
To install Portainer, Ubuntu needs Docker first, and Docker supports the three current LTS releases: 26.04, 24.04 and 22.04. Portainer advises against Docker’s snap package, so use the official Docker instructions below.
1. Remove any conflicting packages (on a fresh server, apt will likely report that none are installed). If you ticked docker on the installer’s Featured server snaps screen, remove it first with sudo snap remove docker.
sudo apt remove $(dpkg --get-selections docker.io docker-compose docker-compose-v2 docker-doc docker-buildx podman-docker containerd runc | cut -f1)2. Add Docker’s GPG key and apt repository. Copy the whole block and run it as one paste.
# Add Docker's official GPG key:
sudo apt update
sudo apt install ca-certificates curl
sudo install -m 0755 -d /etc/apt/keyrings
sudo curl -fsSL https://download.docker.com/linux/ubuntu/gpg -o /etc/apt/keyrings/docker.asc
sudo chmod a+r /etc/apt/keyrings/docker.asc

# Add the repository to Apt sources:
sudo tee /etc/apt/sources.list.d/docker.sources <<EOF
Types: deb
URIs: https://download.docker.com/linux/ubuntu
Suites: $(. /etc/os-release && echo "${UBUNTU_CODENAME:-$VERSION_CODENAME}")
Components: stable
Architectures: $(dpkg --print-architecture)
Signed-By: /etc/apt/keyrings/docker.asc
EOF

sudo apt update
3. Install Docker Engine and its plugins (Compose included).
sudo apt install docker-ce docker-ce-cli containerd.io docker-buildx-plugin docker-compose-plugin4. Check that Docker is running (it starts on its own, so it should show as active).
sudo systemctl status docker --no-pagerIf the status shows that Docker isn’t running, start it:
sudo systemctl start docker5. Run Docker’s test container, which prints a hello message and exits if everything installed correctly.
sudo docker run hello-worldEvery command here uses sudo. Docker’s post-install steps can add your user to the docker group instead, but that group grants root-level privileges. Next, skip the Debian section and continue with the Portainer container below.
Install Portainer on Debian 13 or 12
On Debian, install Portainer the same way as on Ubuntu once Docker is in place, but Docker has to come from its Debian repository. The Ubuntu repository at /linux/ubuntu has no Debian releases, so apt update fails here. As of September 2026, Docker supports Debian 13 (Trixie, the current stable) and Debian 12 (Bookworm, oldstable), and the commands below come from Docker’s Debian page.
If you set a root password when you installed Debian, sudo isn’t installed yet, so run su -, then apt install sudo and usermod -aG sudo your-username, and log out and back in.
1. Remove any conflicting packages.
sudo apt remove $(dpkg --get-selections docker.io docker-compose docker-doc docker-buildx podman-docker containerd runc | cut -f1)2. Add Docker’s Debian GPG key and repository.
# Add Docker's official GPG key:
sudo apt update
sudo apt install ca-certificates curl
sudo install -m 0755 -d /etc/apt/keyrings
sudo curl -fsSL https://download.docker.com/linux/debian/gpg -o /etc/apt/keyrings/docker.asc
sudo chmod a+r /etc/apt/keyrings/docker.asc

# Add the repository to Apt sources:
sudo tee /etc/apt/sources.list.d/docker.sources <<EOF
Types: deb
URIs: https://download.docker.com/linux/debian
Suites: $(. /etc/os-release && echo "$VERSION_CODENAME")
Components: stable
Architectures: $(dpkg --print-architecture)
Signed-By: /etc/apt/keyrings/docker.asc
EOF

sudo apt update
3. Install Docker Engine.
sudo apt install docker-ce docker-ce-cli containerd.io docker-buildx-plugin docker-compose-plugin4. Check the service and run the test container.
sudo systemctl status docker --no-pager
sudo docker run hello-world
If you’re on Debian testing or a derivative like Kali, replace the codename part of the Suites: line with the codename of the Debian release it’s built on, such as trixie. Once Docker is installed, the Portainer install, Ubuntu or Debian, is identical, so continue with the Portainer container below.
Run the Portainer Container (Ubuntu or Debian)
Portainer’s documentation stores its data in a named Docker volume, but I do it a little differently. I like to create a directory for all of my Docker containers and keep their configuration files there, so they stay portable and I can move them to a different device if I ever have to.
To use Portainer’s own command instead, which keeps the data in a named volume called portainer_data, run these two lines in place of steps 1 and 2 (Docker creates a missing volume itself, so the first line is optional).
sudo docker volume create portainer_data
sudo docker run -d -p 8000:8000 -p 9443:9443 --name portainer --restart=always -v /var/run/docker.sock:/var/run/docker.sock -v portainer_data:/data portainer/portainer-ce:lts
The ports differ too. Portainer’s UI is on 9443 over HTTPS, and the docs also publish 8000, a tunnel only Edge agents on remote environments need. When I installed it in January 2026, I published 9443 and 9000 (plain HTTP) and skipped 8000. That still works, but the docs now call 9000 legacy, so if you only use HTTPS, drop -p 9000:9000 from step 2.
1. From your home directory (cd ~), create a folder for Portainer (these are the exact commands I ran).
mkdir docker
cd docker/
mkdir portainer
cd portainer/
pwd
2. Run Portainer. This mounts the folder to the /data directory inside Portainer.
sudo docker run -d -p 9443:9443 -p 9000:9000 --name portainer --restart=always -v /var/run/docker.sock:/var/run/docker.sock -v ~/docker/portainer:/data portainer/portainer-ce:lts3. Confirm the container is up. You should see portainer with a status of Up. Portainer’s 5-minute setup window starts now, so go straight to the login steps below.
sudo docker psThe other flags match in both versions: --restart=always brings Portainer back up after a reboot, and the docker.sock mount lets it manage this host’s containers. My Docker on Proxmox video used the latest tag. As of September 2026 that points to the same image as lts, Portainer’s stable release, but the docs use lts, so I’d use it now.
Where Portainer Keeps Its Data
Everything Portainer knows lives in whatever you mount to /data. Portainer’s docs say that if the data isn’t mounted correctly, it assumes you’re doing a fresh install. So whenever you update Portainer, recreate the container with the exact same /data mapping and your configuration comes straight back.
With the folder method, the data sits in ~/docker/portainer, where you can see it, back it up with sudo and copy it to a new server. Docker will create a missing bind-mount folder for you, but it creates it as root, so making it first (step 1) keeps it owned by your user.
With the named volume, the data lives in Docker’s own directory instead. Run the command below, and the Mountpoint line shows where it is (/var/lib/docker/volumes/portainer_data/_data for a default install).
sudo docker volume inspect portainer_data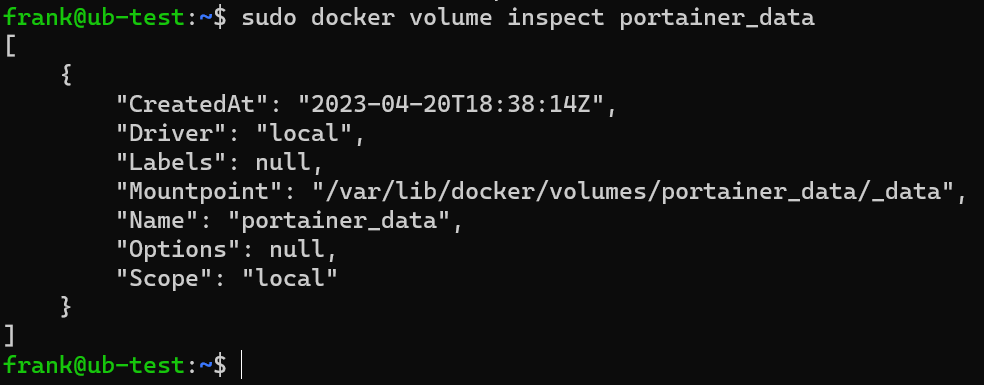
That folder holds the Portainer database (portainer.db), its certificates and compose files.

Log In to Portainer on Port 9443
Portainer gives you 5 minutes after the container starts to finish the first-time setup, and if you miss that window, the service inside the container stops (the fix is after the steps).
1. Open https://<server-ip>:9443 in a browser on another computer (or https://localhost:9443 on the server itself). Portainer uses a self-signed certificate, so accept the browser’s warning and continue.
2. Run the command below and copy the token after setup_token=.
sudo docker logs portainer3. On the New Portainer installation form, keep or change the username (admin by default), set a password of at least 12 characters, paste the token into Setup token, and select Create user. The token only works once, and the Setup token field is new in Portainer 2.43 and 2.39.4 (June 2026). My video used 2.33.6 LTS, so its form has no token field.
4. On the Set up Edge Compute screen, select Skip. Edge Compute is only for Edge agents on remote devices, and you can turn it on later under Settings > Edge Compute.
5. When the Environment Wizard opens, select Get Started to use the local environment Portainer is running in.
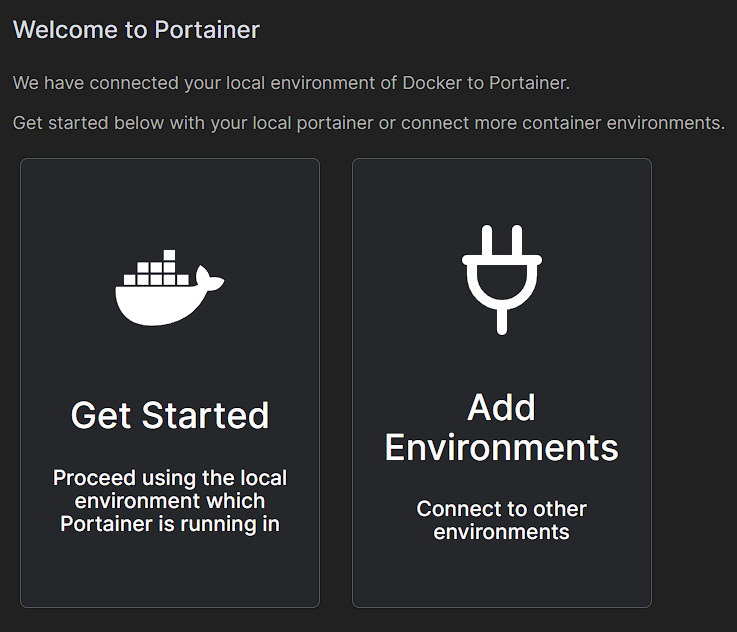
6. Portainer connects to the local Docker environment and opens its dashboard.
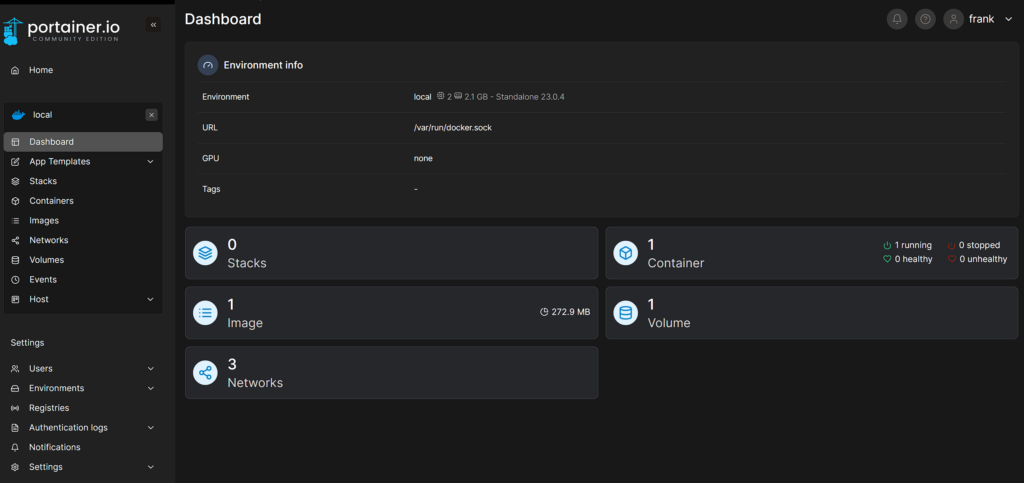
If the page times out, or sudo docker logs portainer says the instance timed out for security purposes, restart the container with the two commands below. That gives you another 5 minutes. The restart prints a new setup token, so run sudo docker logs portainer again and copy the last setup_token= line.
sudo docker stop portainer
sudo docker start portainer
Portainer can skip the token with the --no-setup-token flag, but its docs only recommend that on a network you fully control and trust, so I’d leave it on. Security defaults like this change between releases, and nothing here is guaranteed.
Once you’re in, the Containers page is where you’ll spend most of your time, and my guide to update a Docker container using Portainer covers what you’ll do there most.