In this tutorial, we’ll look at how to install Rancher on Docker.
Rancher simplifies the management of Kubernetes clusters across various types of infrastructure. It provides centralized authentication, strong security policies, multi-cluster deployment, integrated DevOps tools, and a unified multi-cloud support system. We’ll look at how to install Rancher on Docker below, but before we do, we’ll look at exactly what Rancher is and why you might want to use it.
What is Rancher?
Rancher is an open-source platform for managing Kubernetes clusters across diverse infrastructures. It supports containerized applications, streamlines deployments, and addresses operational and security challenges.
Some key features of Rancher include unified multi-cluster management, integration with DevOps tools, and hybrid & multi-cloud support. Rancher ensures consistent security and compliance, offering direct encryption and audit logging.
Rancher does technically allow you to run Docker containers, though there are other tools (like Portainer) that will be easier to use for local container management.
What is Kubernetes?
Kubernetes on Rancher is a powerful option that enables DevOps teams or even home lab enthusiasts to effectively manage and orchestrate containers. Rancher simplifies the deployment, scaling, and handling of containerized apps on any infrastructure.
Rancher enhances Kubernetes by allowing it to run everywhere, from bare metal and private clouds to public cloud services. Rancher also supports self-managed deployments, making it easier to run Kubernetes distributions on diverse environments.
How to Install Docker
In order to install Rancher, you must first install Docker. Docker can run on various operating systems, but I’ll be looking at Ubuntu below (this process will work on any Debian-based Linux distribution). Rancher has specific requirements of 4GB of memory or more!
The instructions are pasted below but are pulled directly from the official Docker instructions.
1. Start by updating the Ubuntu operating system.
sudo apt update && sudo apt upgrade -y2. To Install Docker, run the commands below, one by one, and in order.
sudo apt-get install ca-certificates curl gnupgsudo install -m 0755 -d /etc/apt/keyrings
curl -fsSL https://download.docker.com/linux/ubuntu/gpg | sudo gpg --dearmor -o /etc/apt/keyrings/docker.gpg
sudo chmod a+r /etc/apt/keyrings/docker.gpgecho "deb [arch="$(dpkg --print-architecture)" signed-by=/etc/apt/keyrings/docker.gpg] https://download.docker.com/linux/ubuntu "$(. /etc/os-release && echo "$VERSION_CODENAME")" stable" | sudo tee /etc/apt/sources.list.d/docker.list > /dev/null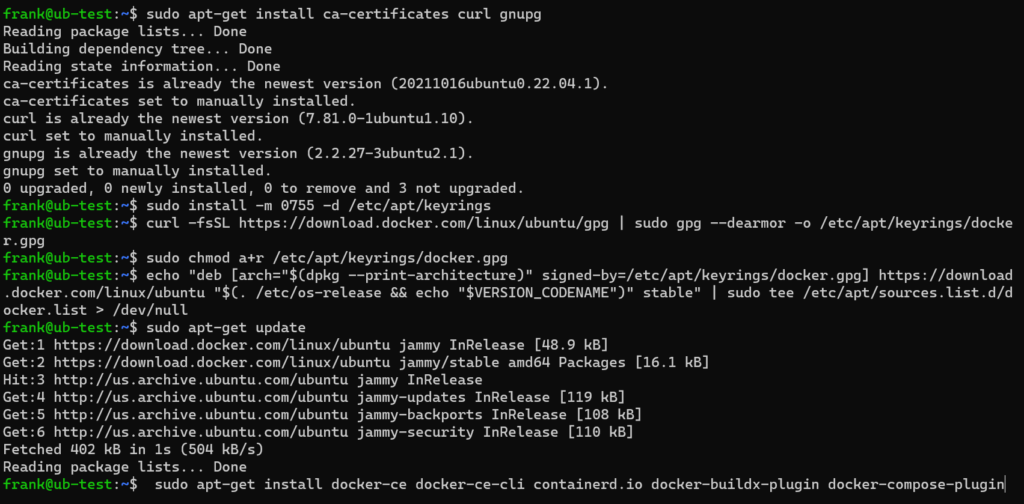
3. Install Docker, then enable the Docker service by running the commands below.
sudo apt-get update

sudo apt-get install docker-ce docker-ce-cli containerd.io docker-buildx-plugin docker-compose-plugin
sudo service docker start4. Docker is now installed and can be accessed through the command-line interface.
Installing Rancher on Docker
Now that Docker is installed, we can create a Rancher container.
1. Run the command below to configure the rancher container. Docker will pull the necessary image and configure the container.
sudo docker run --name rancher --privileged -d --restart=unless-stopped -p 80:80 -p 443:443 rancher/rancher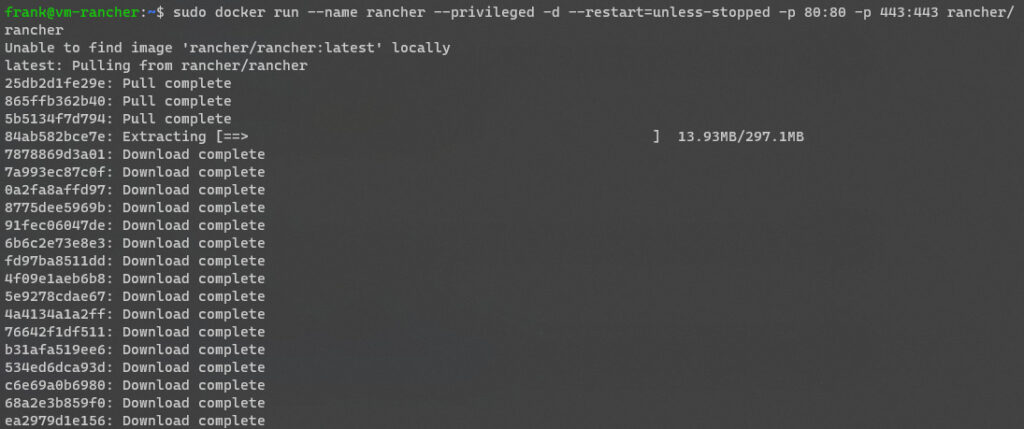
2. The container is now set up, but in order to access it, we need to get the password that was automatically assigned.
Getting the Bootstrap Password of Rancher
Now that Rancher is installed, we must pull the bootstrap password assigned. This is done through the same terminal window by running a few commands.
1. Run the command below to get the Container ID as we’ll need it for the next step.
sudo docker container ls
2. Copy the Container ID and paste it into the command below. When you get the Bootstrap Password, copy it.
sudo docker logs container-id 2>&1 | grep "Bootstrap Password:"
Using the container ID above, this is the exact command I ran:
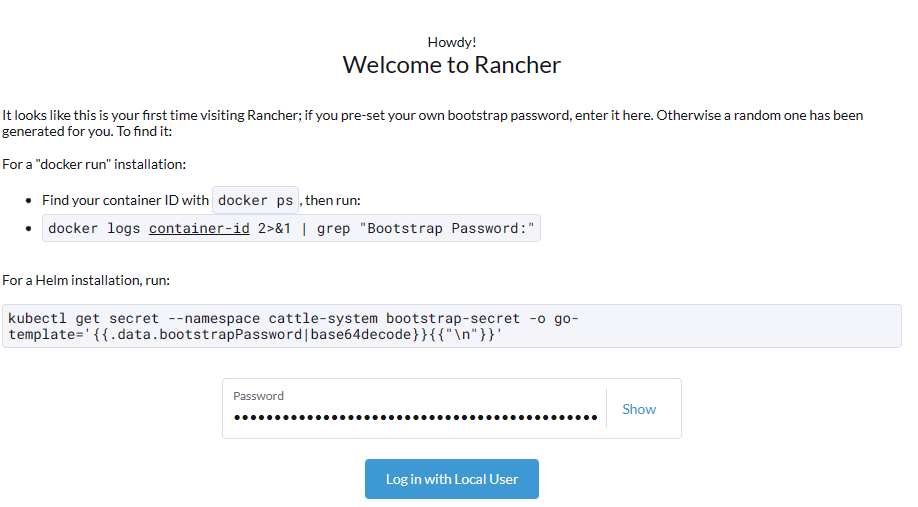
sudo docker logs 3f92e36bb410 2>&1 | grep "Bootstrap Password:"3. Access Rancher by using the IP address of your Docker server. You’ll automatically be forwarded to the secure (HTTPS) page.
https://[DOCKER_IP]
4. Enter the Bootstrap Password in the login screen, then select Log in with Local User.
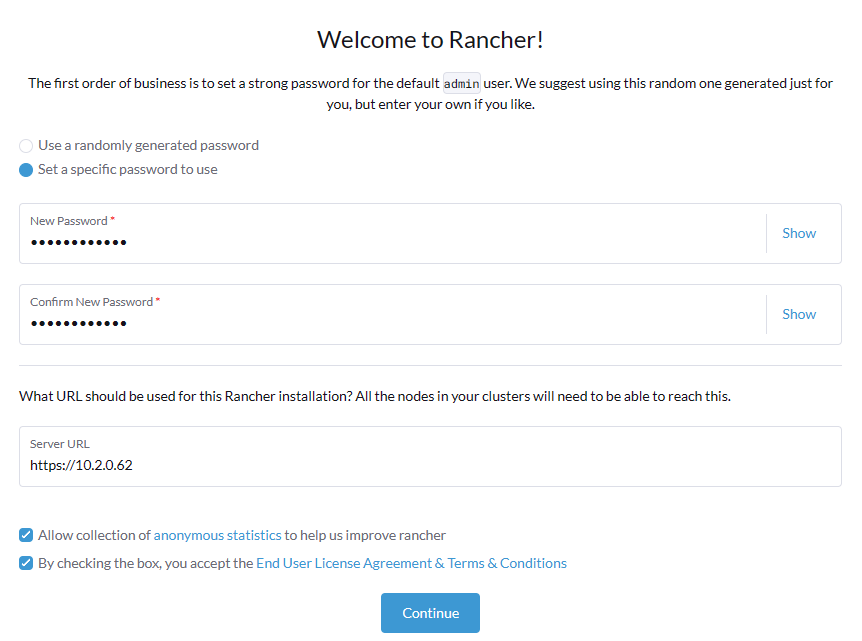
5. Configure the password and server URL, then if you agree to the End User License Agreement, select the checkbox and then Continue.
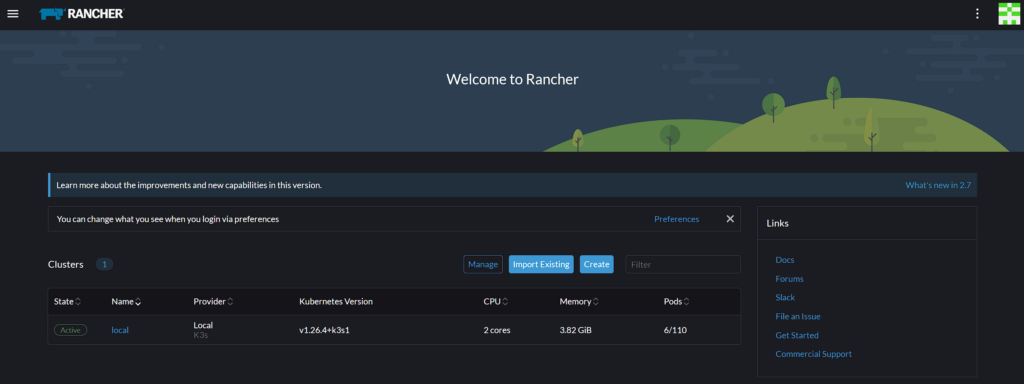
6. Rancher is officially installed and accessible!
Setting Up a Kubernetes Cluster with Rancher
At this point, Rancher is configured, but the power of Rancher is unleashed when it’s used for Kubernetes clusters. The steps below will show how to create a Kubernetes cluster.
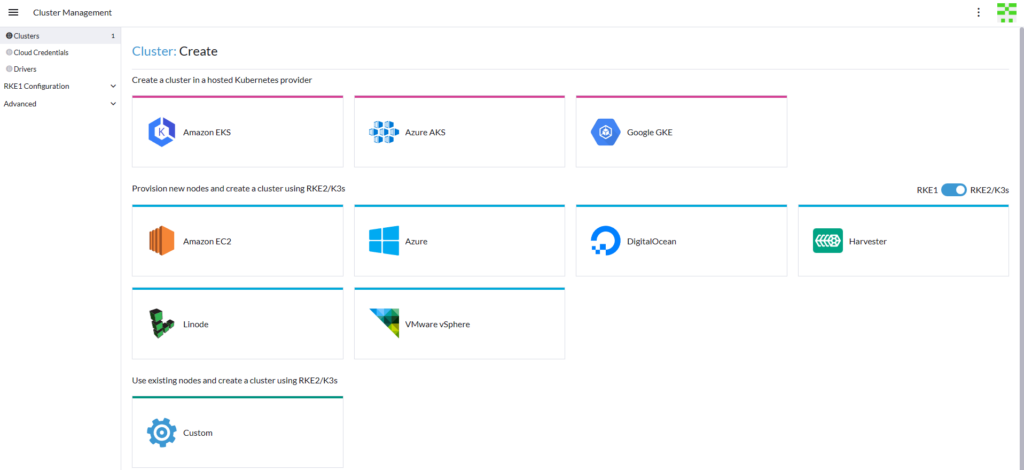
1. From the homepage of Rancher, select Create.

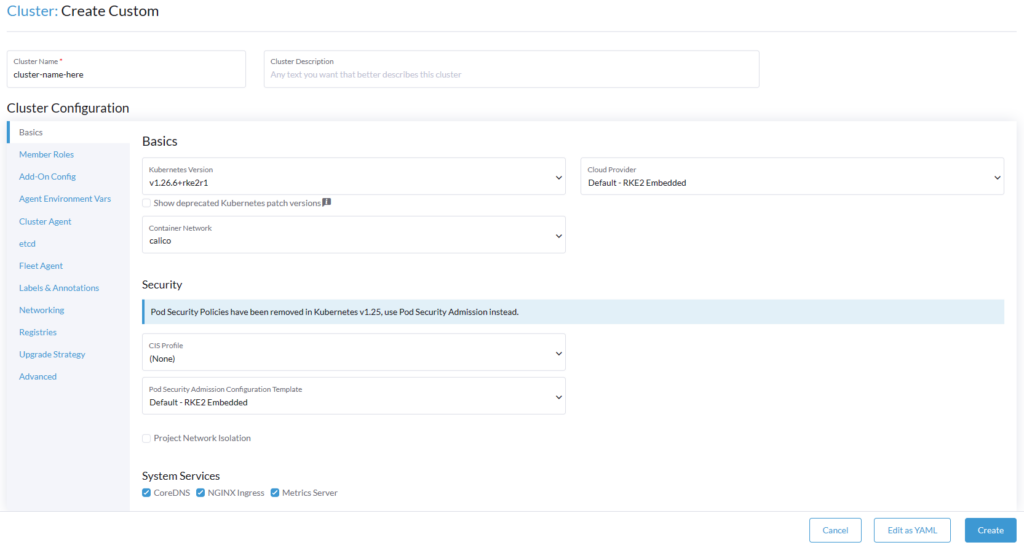
2. Select Custom to create a cluster using RKE2/K3s. This step will differ if you want to create the cluster on a different platform.
3. Enter a Cluster Name, then modify any of the Cluster Configuration settings you’d like. Overall, the settings will differ based on your requirements and if you’re not sure which settings should be changed, read and understand the Cluster Architecture document which should help determine which options you’d like to use.
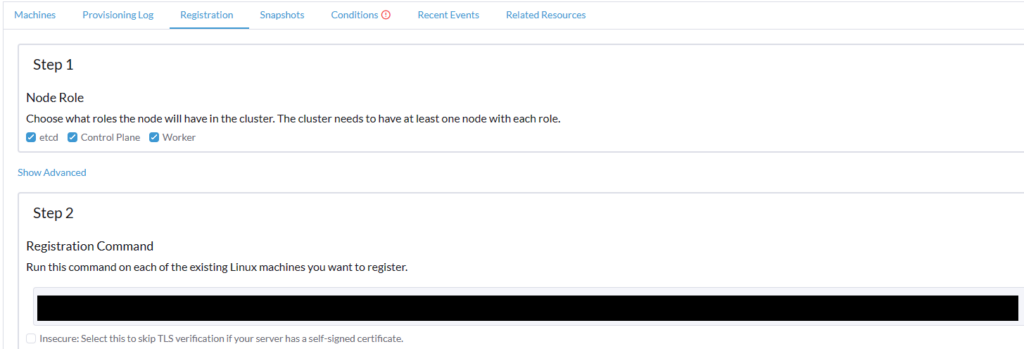
4. After the cluster is created, you’ll be able to access the registration info to allow devices to register with this cluster!
Conclusion: How to Install Rancher on Docker
This tutorial looked at how to install Rancher on Docker. Technically, this also shows the process of how to install Rancher on Ubuntu (as Docker can be installed on various systems). However, Rancher is extremely powerful and we’ll look at how to utilize it in future tutorials.
Keep in mind that Rancher is a great way of managing Docker containers, but you can use other options like Portainer or Yacht as well, which might be easier and overall simpler options if your only goal is Docker container management. Where Rancher shines is with Kubernetes, and that’s the main reason I’d recommend using Rancher.