In this article, we’re going to look at how to set up Docker in Proxmox.
OCI Registry in Proxmox v9.1+
Technically, Proxmox VE 9.1 lets you create LXC containers from OCI images, but it’s not “Docker in Proxmox” the way most people mean it. You’re basically pulling an OCI image and applying it as an LXC filesystem, not getting the normal Docker workflow (compose, upgrades, rollbacks, etc).
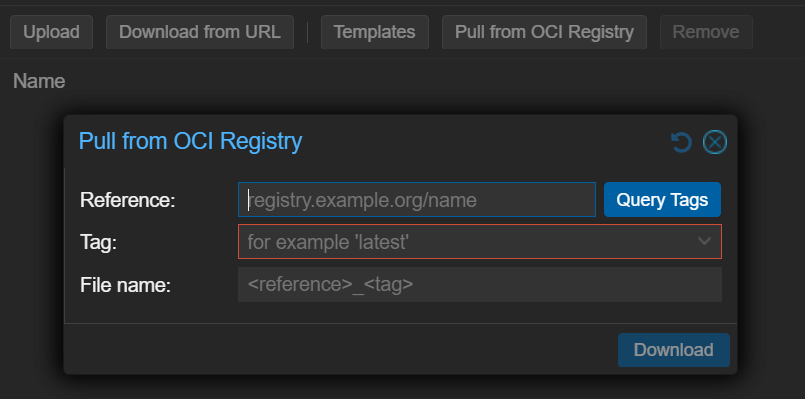
For the average user, it’s easy to expect Docker and end up with something that behaves more like an LXC that you now have to manage. I think this will be great in the future when it’s more fleshed out, but for today, you’re really comparing a VM vs LXC for managing Docker Containers.
VM vs LXC for Running Docker Containers
Running Docker on a Linux Container saves resources on the host, is faster, but is not the recommended option. The Proxmox team recommends that you use a VM rather than LXC for application containerization. This provides better isolation from the host, increasing the overall hypervisor’s security. The downside is that a VM uses a fixed set of resources, but it’s still best to use a VM.
How to Set Up Docker in Proxmox
We will be utilizing Ubuntu Server as the OS, but you can use any Debian-based Linux distro that you’d like.
Installing the OS on a Virtual Machine (VM)
1. Download the ISO image of the operating system you’d like to install, select Create VM, then give the VM a name.
2. Select the Storage location, then the ISO Image, and select Next.
3. Change the System, Disks, CPU, Memory, and Network. After all of the settings have been configured, confirm the settings and create the VM!
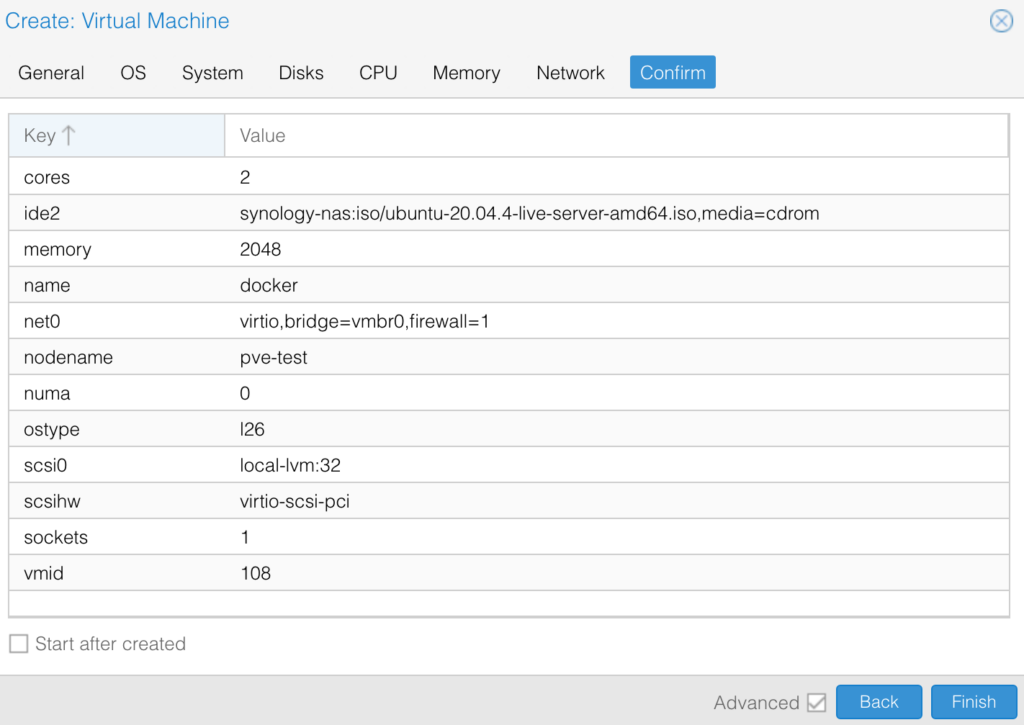
4. The operating system will start up, and you can begin to install the OS. This will be dependent on the settings you’d like to use (user account name, server name, etc), but after the OS is installed, you can configure Docker.
Installing and Configuring Docker and Portainer
1. Start the VM and log in with the username and password configured. Run the command below to update the system.
sudo apt update && apt upgrade -y2. After the system is updated, run each of the commands below one by one. These are taken directly from the official Docker documentation and are the prerequisites for installing the latest version.
sudo apt-get updatesudo apt-get install ca-certificates curlsudo install -m 0755 -d /etc/apt/keyringssudo curl -fsSL https://download.docker.com/linux/ubuntu/gpg -o /etc/apt/keyrings/docker.ascsudo chmod a+r /etc/apt/keyrings/docker.ascAfter the commands above are run, copy and run the entire command below.
echo \
  "deb [arch=$(dpkg --print-architecture) signed-by=/etc/apt/keyrings/docker.asc] https://download.docker.com/linux/ubuntu \
  $(. /etc/os-release && echo "$VERSION_CODENAME") stable" | \
  sudo tee /etc/apt/sources.list.d/docker.list > /dev/null
Finally, update the system.
sudo apt-get update3. After running all commands above, this command will install Docker!
sudo apt-get install docker-ce docker-ce-cli containerd.io docker-buildx-plugin docker-compose-plugin4. Docker is fully configured, and you can now create Containers. However, if you’d like a GUI, you can install Portainer.
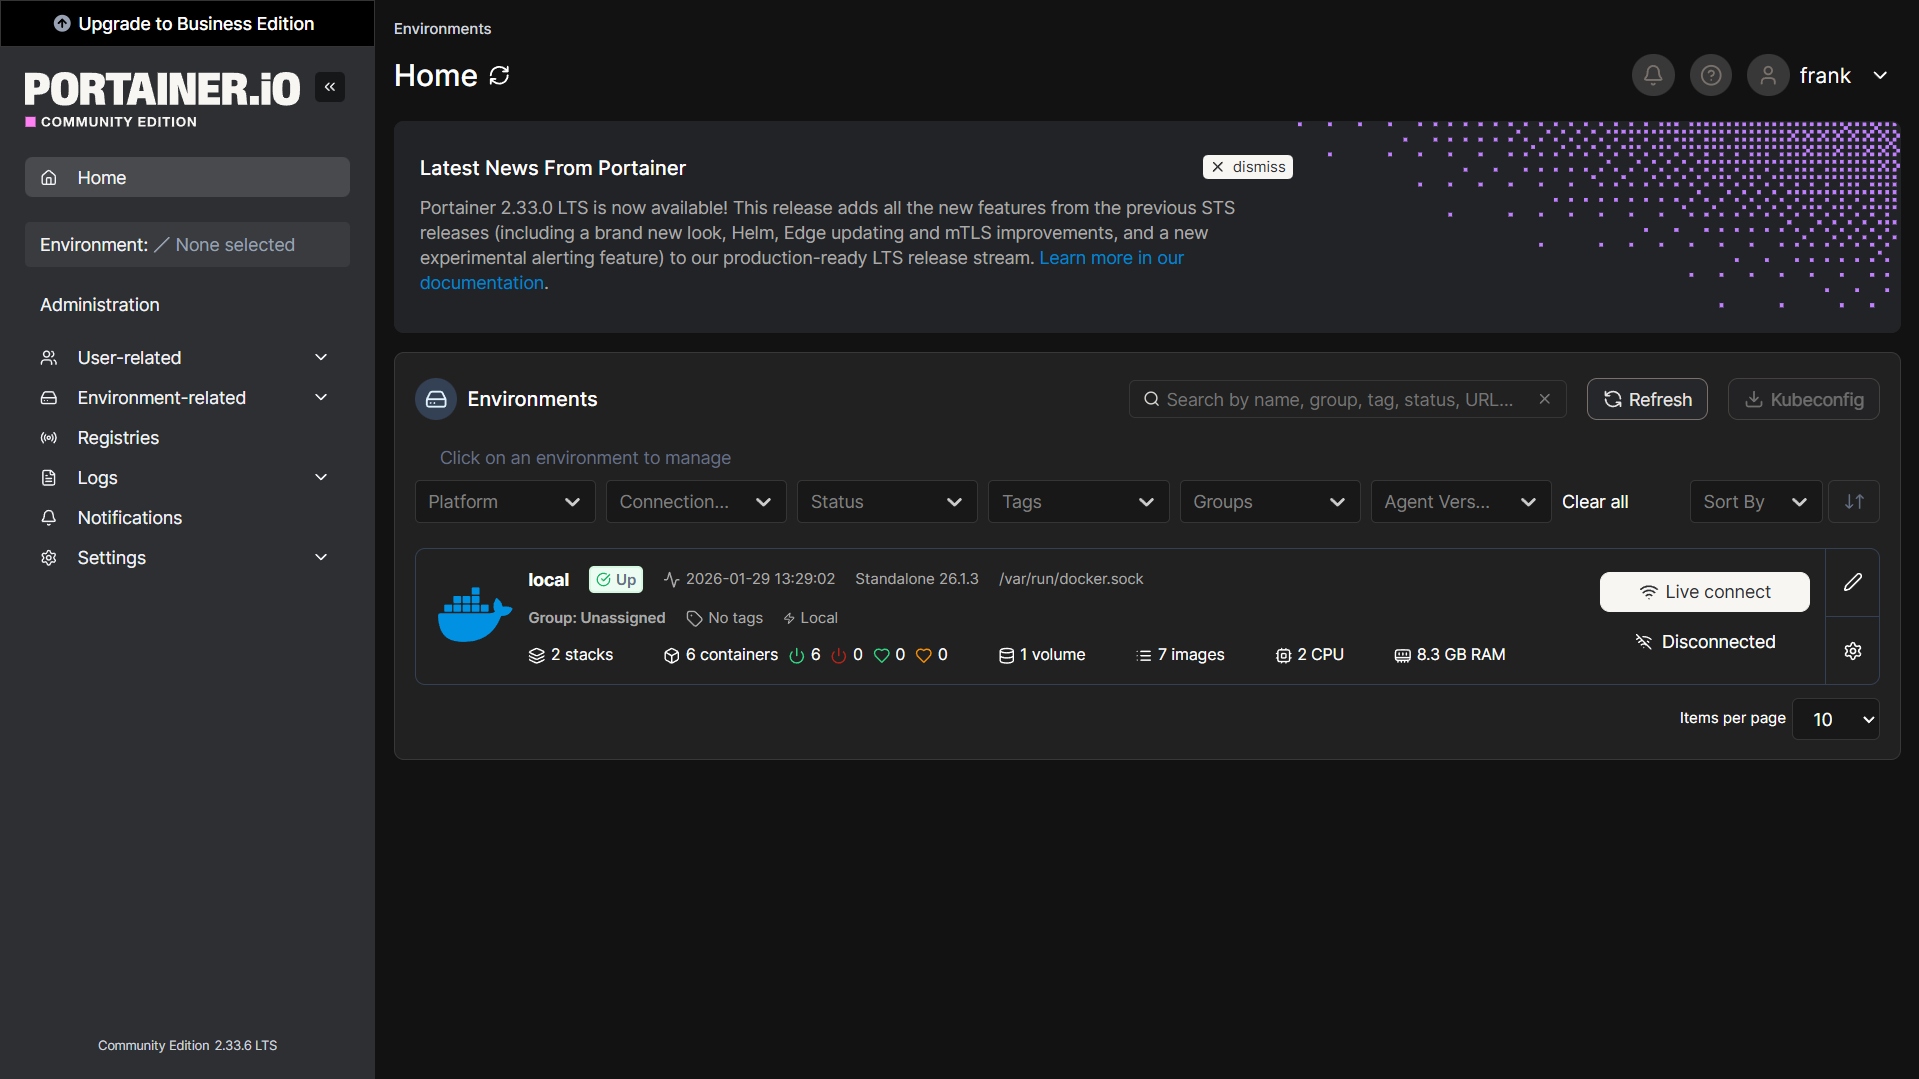
sudo docker run -d -p 9000:9000 -p 9443:9443 --name portainer --restart=always -v /var/run/docker.sock:/var/run/docker.sock -v portainer_data:/data portainer/portainer-ce:latest5. If you installed Portainer, you can access Portainer using the IP address of the VM and port 9000 (HTTP) or 9443 (HTTPS).
http://[VM_IP]:9000
https://[VM_IP]:9443
6. Run through the setup process for your user account, and then you can start configuring Docker Containers in Portainer!