In this tutorial, we will look at how to integrate Blue Iris into Home Assistant.
After setting up and configuring Blue Iris, it’s extremely helpful to connect it directly to Home Assistant for camera viewing (assuming you’re using Home Assistant). The integration is extremely easy to use and it’ll allow you to display all of your cameras from Blue Iris directly in your Home Assistant dashboard. The process below utilizes HACS, so ensure that you have HACS installed before setting up Home Assistant.
How to Integrate Blue Iris into Home Assistant
We will look at how to integrate Blue Iris into Home Assistant.
1. If you don’t have HACS installed, install HACS in Home Assistant before proceeding.
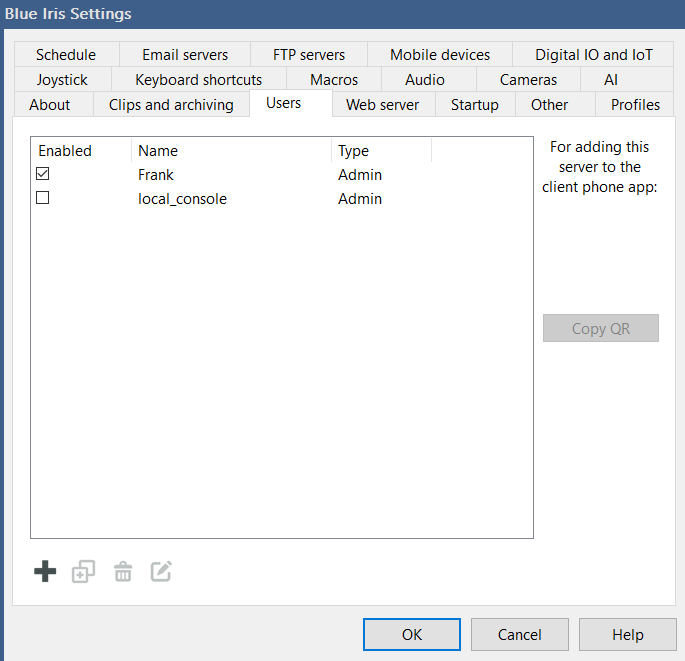
2. In Blue Iris, navigate to the Settings, then select Users. Select the + symbol at the bottom to create a new user.
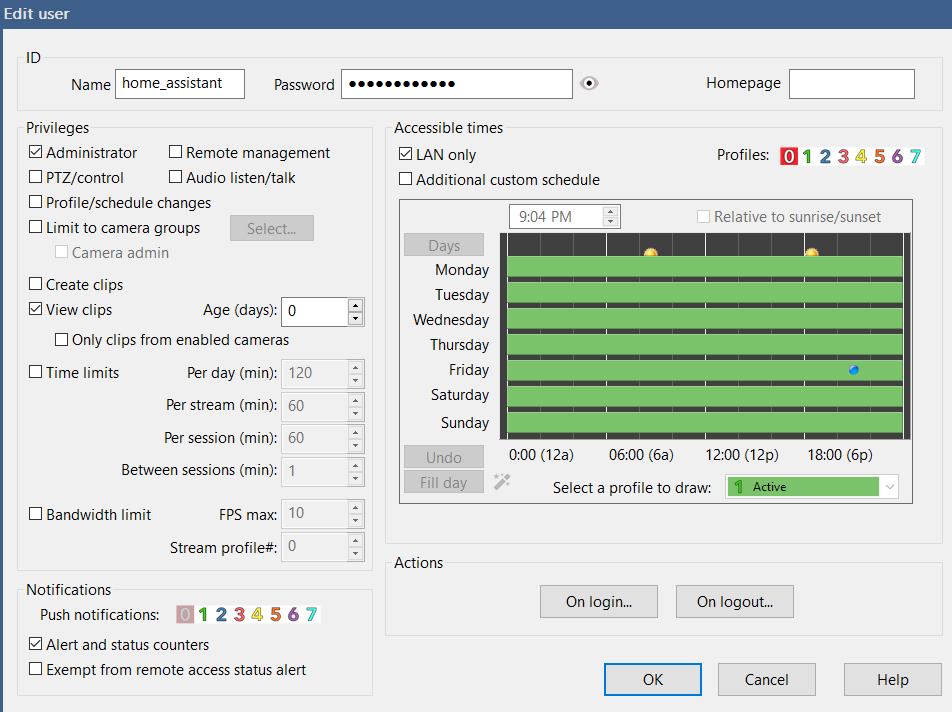
3. We will create a user that we can access Blue Iris through Home Assistant below. You can set the username to whatever you’d like and you must select the Administrator privilege as it’s a requirement for this integration. Set this account to be LAN only as both devices will be local.
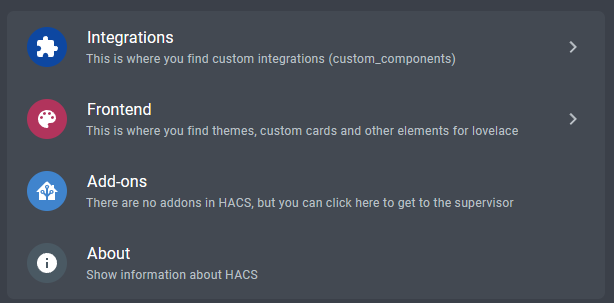
4. Open Home Assistant, select HACS, then select Integrations. As mentioned above, if you don’t have HACS installed, you must install it before proceeding.
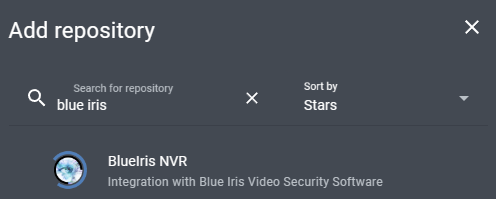
5. In the bottom right, select Explore & Download Repositories.

6. Search for Blue Iris, then select BlueIris NVR.
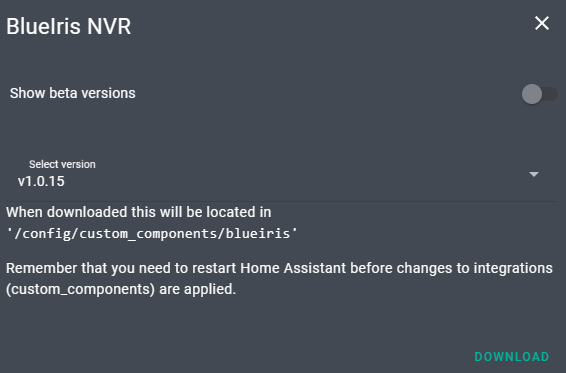
7. Read the documentation if you’d like, then select Download in the bottom right. At the next screen, select the latest version, then select Download. After it’s finished downloading, restart Home Assistant.
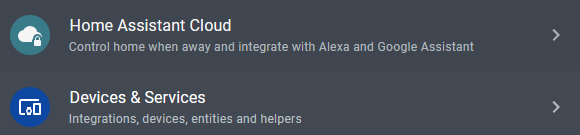
8. After Home Assistant finishes rebooting, select Settings, then Devices & Services.
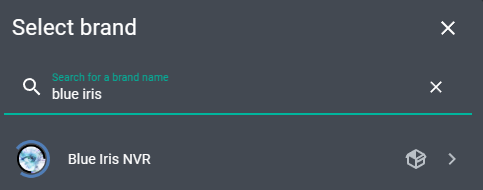
9. In the bottom right, select Add Integration, then search for Blue Iris and select Blue Iris NVR.
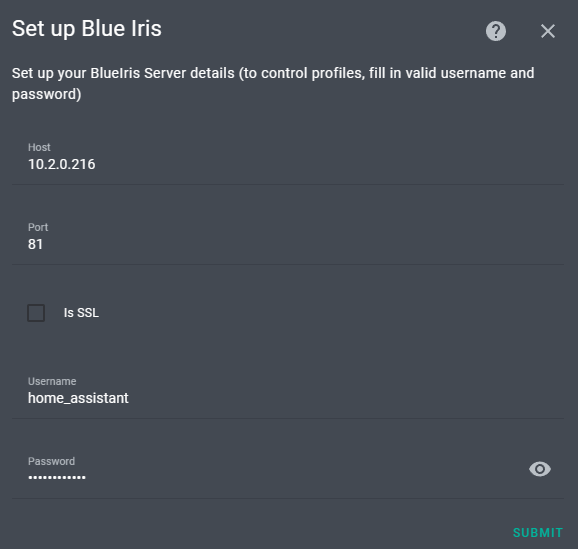
10. In the Blue Iris setup section, enter the IP address or hostname of your Blue Iris server. The port will be the port of the web server (Settings > Web Server in Blue Iris). If you are not using HTTPS to access the Blue Iris web server, then leave SSL disabled. If you are using SSL, enable it at the bottom and log in with the Home Assistant user created above.
After the setup is complete, a bunch of your cameras will be displayed. You can add them to an area in Home Assistant if you’d like, but must add them to your dashboard to view them.
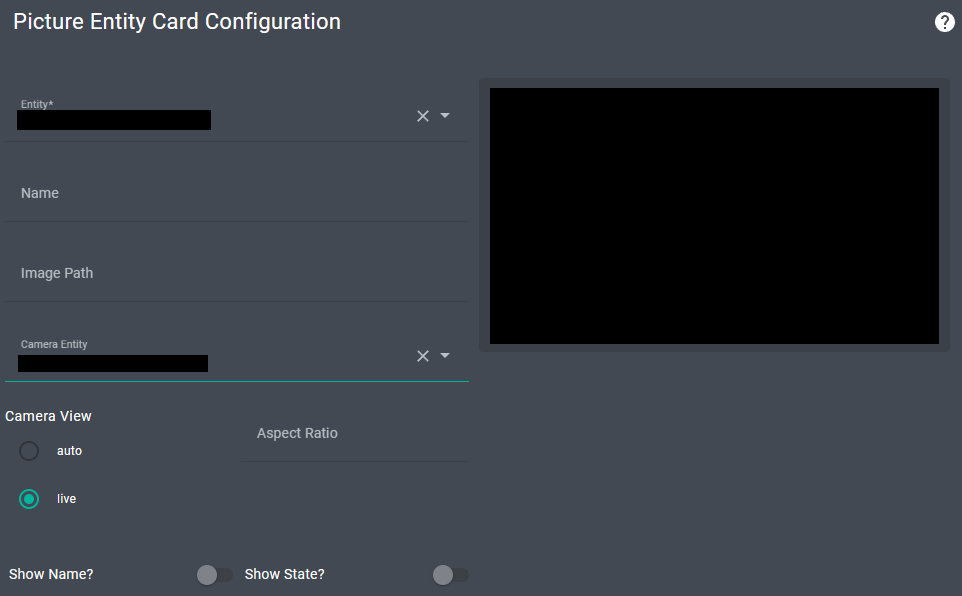
11. On your Home Assistant dashboard, add a new card named Picture Entity. Select the correct Entity at the top, then select the camera entity. Change the Camera View to Live, and disable the name and state (unless you’d like it enabled). The name and image path are not required.
12. After adding the card to your dashboard, it should be displayed and streaming video properly!
Notes – How to Integrate Blue Iris into Home Assistant
Here are a few helpful notes from issues that I ran into when I first configured this integration:
- If you’d like to modify the display name, you can complete it by editing the entity settings. Select the camera, then select Settings and change the Name. When you select the camera now, it will display the name entered.
- The Default Action will maximize the camera, however, you can modify this action if you’d like.
- If you don’t select the correct Entity but select the correct Camera Entity, the camera will not work properly, but it will display properly for a second (it just won’t be live). Make sure that you select the correct Entity and Camera Entity.
Conclusion: How to Integrate Blue Iris into Home Assistant
This tutorial looked at how to integrate Blue Iris into Home Assistant. Overall, if you’re running Blue Iris and Home Assistant, there’s very little reason not to connect the two. Adding your cameras to Home Assistant will make it even more powerful and having the information in one global location is extremely helpful. There are various things you can do to customize the look of the dashboard, but the information above will help you get the cameras connected.