After configuring a Home Lab, a boring, but important step is to ensure that you have a complete way of monitoring it. This involves servers, uptime, logging, and more. The video below highlights the entire process on how you can monitor your home lab, but the information below can be utilized to create containers
Configuring Notifications with Ntfy
Ntfy is the platform that I like to use for notifications. I have the device on my mobile phone and receive all notifications locally.

services:
  ntfy:
    container_name: ntfy
    image: binwiederhier/ntfy
    restart: unless-stopped
    environment:
      NTFY_BASE_URL: http://[NTFY_URL]
      NTFY_CACHE_FILE: /var/lib/ntfy/cache.db
      NTFY_AUTH_FILE: /var/lib/ntfy/auth.db
      NTFY_BEHIND_PROXY: true
      NTFY_ATTACHMENT_CACHE_DIR: /var/lib/ntfy/attachments
      NTFY_ENABLE_LOGIN: true
      NTFY_UPSTREAM_BASE_URL: https://ntfy.sh
      NTFY_WEB_PUSH_FILE: /var/lib/ntfy/webpush.db
    volumes:
      - /home/frank/docker/ntfy:/var/lib/ntfy
    ports:
      - 8088:80
    command: serve
networks: {}
Beszel Setup for Monitoring
The video above goes over how to configure Beszel and set up a client, but overall, there are really two main options.
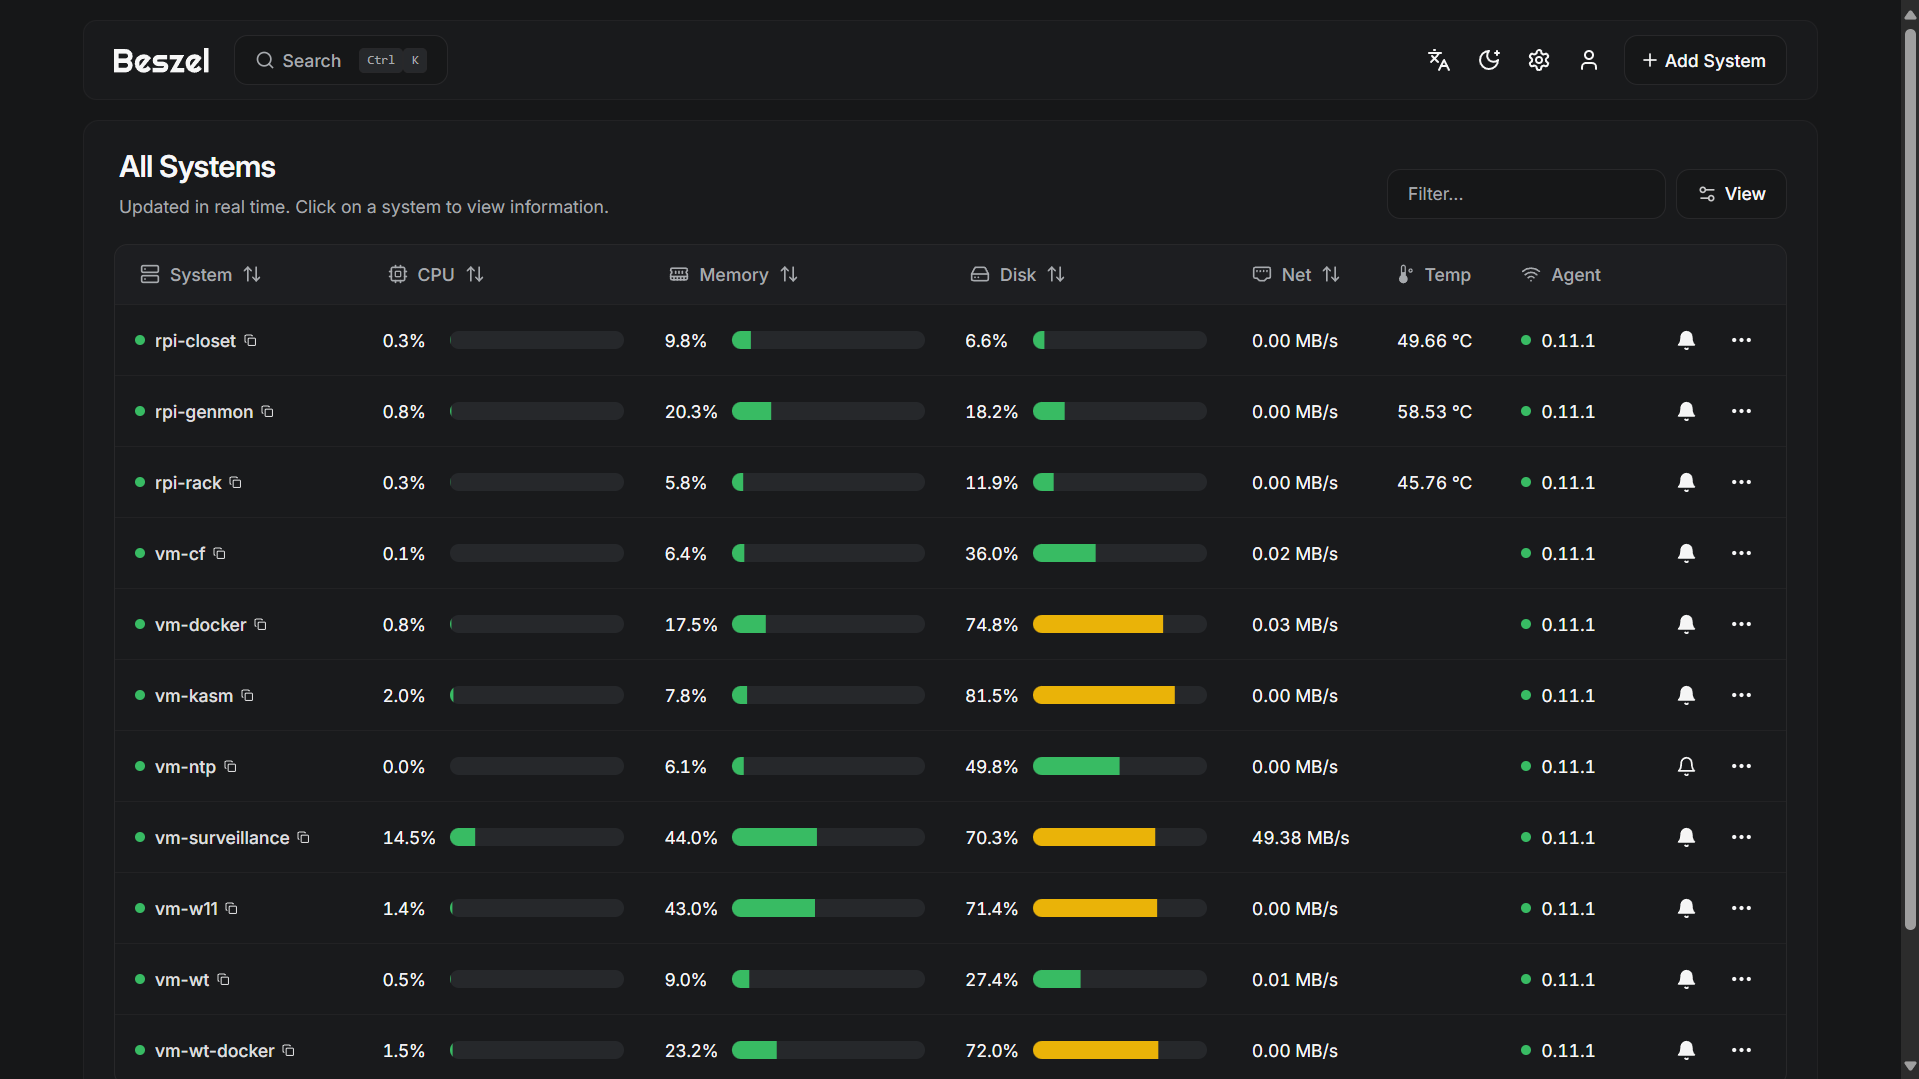
You can install the hub locally or by using Docker, but this is the Docker Compose file I used in the past to get it working.
services:
  beszel:
    image: henrygd/beszel
    container_name: beszel
    restart: unless-stopped
    ports:
      - 8090:8090
    volumes:
      - /home/frank/docker/beszel:/beszel_data
  beszel-agent:
    image: henrygd/beszel-agent:latest
    container_name: beszel-agent
    restart: unless-stopped
    network_mode: host
    volumes:
      - /var/run/docker.sock:/var/run/docker.sock:ro
    environment:
      PORT: 45876
      # Do not remove quotes around the key
      KEY: "ssh-ed25519 [KEY COPIED FROM "ADD SYSTEM" SECTION IN HUB]"
networks: {}
Uptime Kuma Setup
Uptime Kuma allows you to monitor your servers, services, and more for uptime. As soon as a service goes down, you can be notified. For the Uptime Kuma setup portion, please follow these instructions.
Docker Monitoring
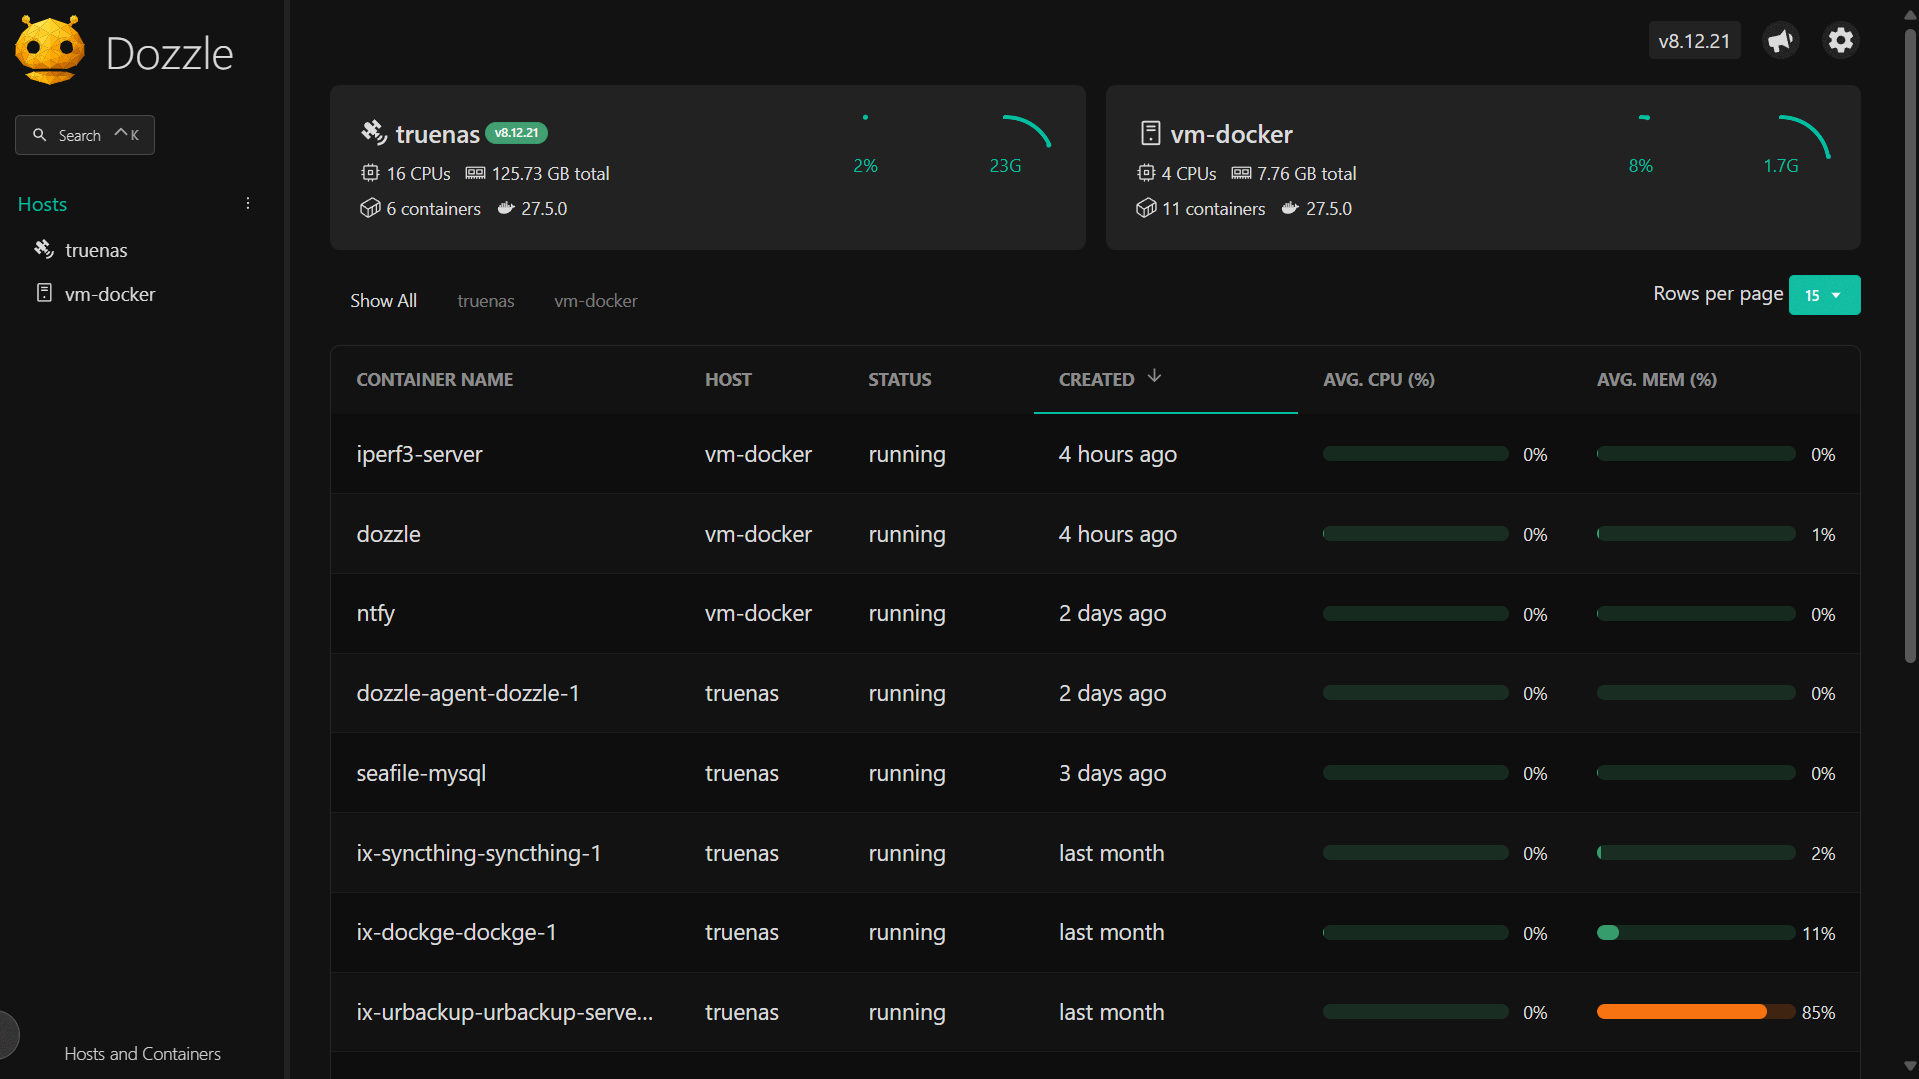
Docker can be monitored using a Container named Dozzle. Dozzle allows you to monitor your Docker containers locally and install an agent on other Docker instances that can communicate with Dozzle. This allows you to monitor your entire Docker environment from one location.
services:
  dozzle:
    container_name: dozzle
    restart: unless-stopped
    image: amir20/dozzle:latest
    volumes:
      - /var/run/docker.sock:/var/run/docker.sock
    environment:
      - DOZZLE_REMOTE_AGENT=10.2.1.15:7007 # (optional, but enter the IP of remote docker instances and add the agent listed below to those instances)
    ports:
      - 8080:8080
networks: {}
This is the Dozzle agent that can be configured on each instance which allows for communication back to the “master” agent.
services:
  dozzle:
    volumes:
      - /var/run/docker.sock:/var/run/docker.sock
    ports:
      - 7007:7007
    image: amir20/dozzle:latest
    command: agent
networks: {}
Central Logging Server
A logging server will ensure that you have a central location where logs can be sent. This allows you to monitor just about everything you’d like (assuming it supports it), with one of the most popular options being for networks.
I monitor my TrueNAS server and UniFi Network and send all logs to Graylog, but there are other options available as well. Graylog is a fairly involved setup, but there’s a great video that Tom from Lawrence Systems created on the setup that you can follow below.
Final Thoughts & Conclusion on Home Lab Monitoring
Monitoring isn’t the most interesting topic, but it’s also necessary, and following this approach and using these tools ensures that when and if a service, server, device, etc, runs into problems, you’ll be aware of it and can proactively help resolve it. Thanks for checking out the video and article!