In this tutorial, we are going to look at how to use Veeam to back up Linux PCs to a Synology NAS. The SMB share will be hosted on a Synology NAS and after the backup is successful, we will look at restoring individual files/doing a bare-metal restore.
Before we get started, if your destination is a Synology NAS (like mine is), you need to ensure that SMB3 is enabled.
The tutorial below is for the Debian/Ubuntu operating system. Though the process is the same, the commands you will need to run are different. You can find those commands here.
Use Veeam to Back up Linux PCs to a Synology NAS
1. Open File Services and access the Advanced Settings of the SMB share.
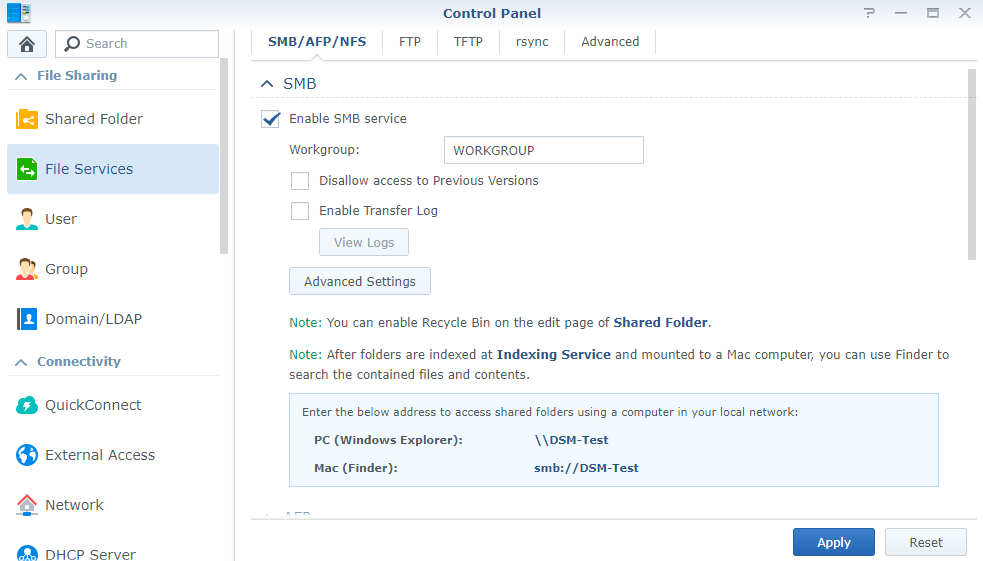
2. Ensure that the Maximum SMB Protocol is set as SMB3.

3. You will also need to ensure that the cifs-utils package is installed on your Linux PC.
sudo apt-get install cifs-utils

Installation Instructions – Veeam Backup for Linux
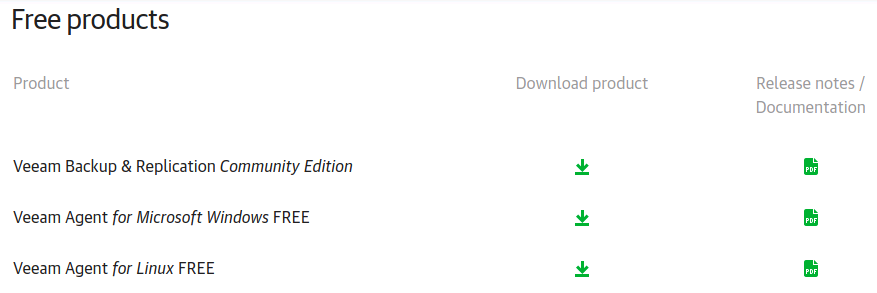
1. Navigate to the Veeam website download page and download the Veeam Agent for Linux FREE.
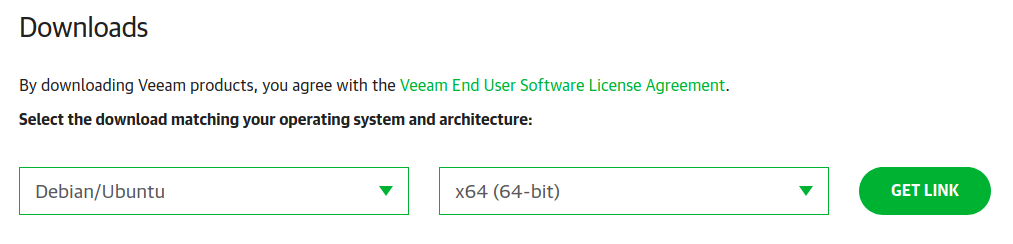
2. You will need to create a free account. When you are logged in, select the operating system you will be using (in my case, Ubuntu) and an architecture. Select Get Link and then Download, and download the file to your ~/Downloads folder.
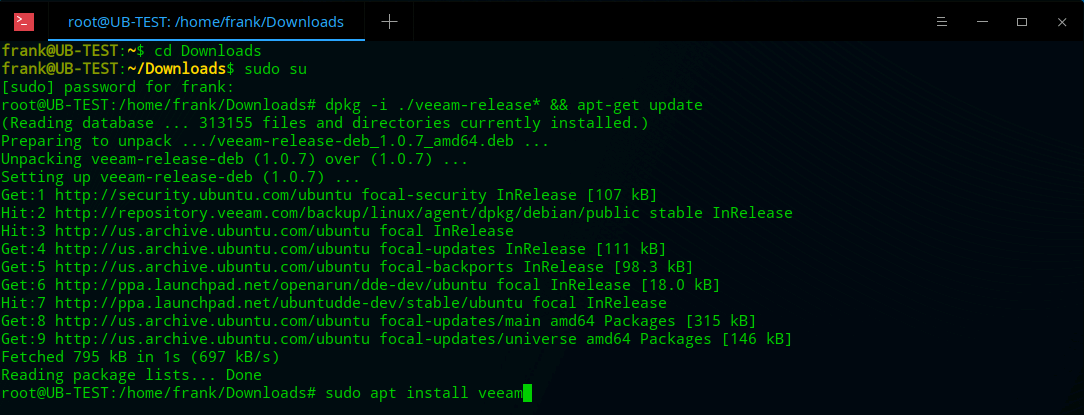
3. After the package is downloaded, navigate to the Downloads folder, set yourself as the root user, and then extract the package.
cd Downloads
sudo su
dpkg -i ./veeam-release* && apt-get update

4. Install Veeam.
sudo apt install veeam
Veeam Configuration Instructions
1. Now that Veeam is installed, we can configure it. Enter the command below to access the configurator.
veeam

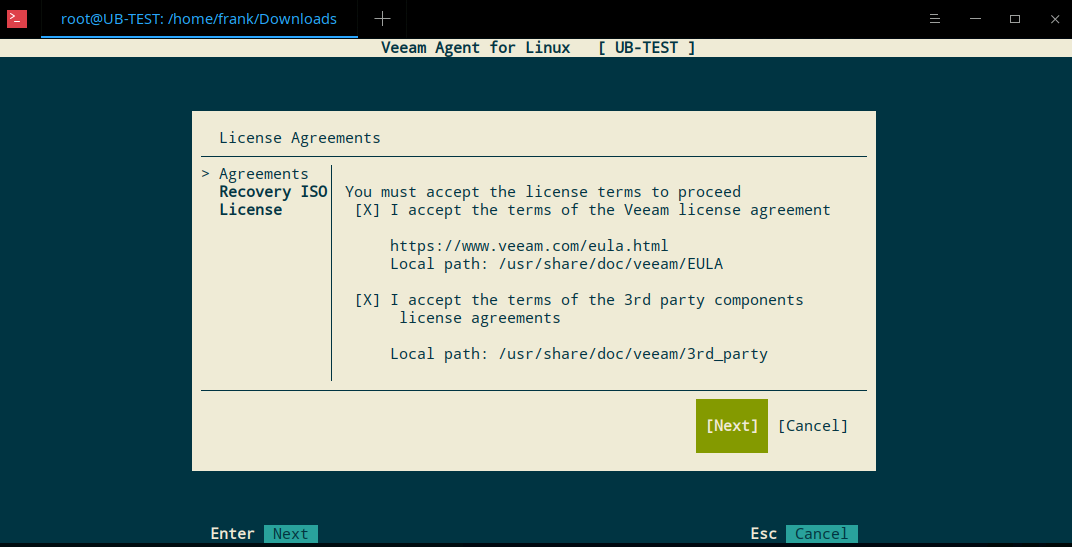
2. You must accept the terms and press enter.
3. You will be asked to patch the drivers into the recovery ISO. I have tested this, and it has never worked for me, but your mileage may vary. In a later step, I will go over how to use the default Veeam recovery ISO. Press enter to skip this step.
4. The next step will ask you to install a license. If you have a license, you can browse to the location and install it. If you don’t have a license, you can press enter to skip this step.
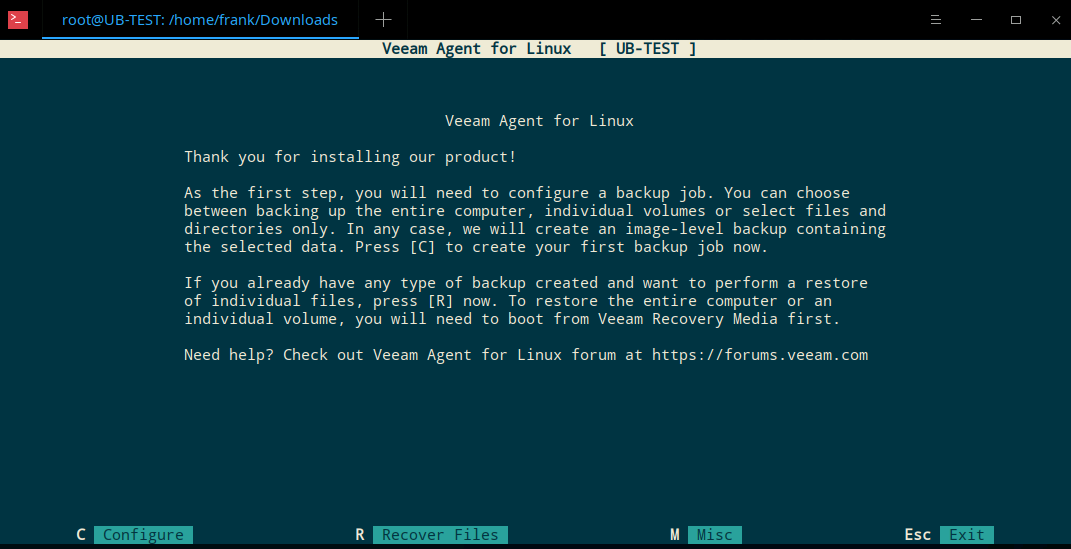
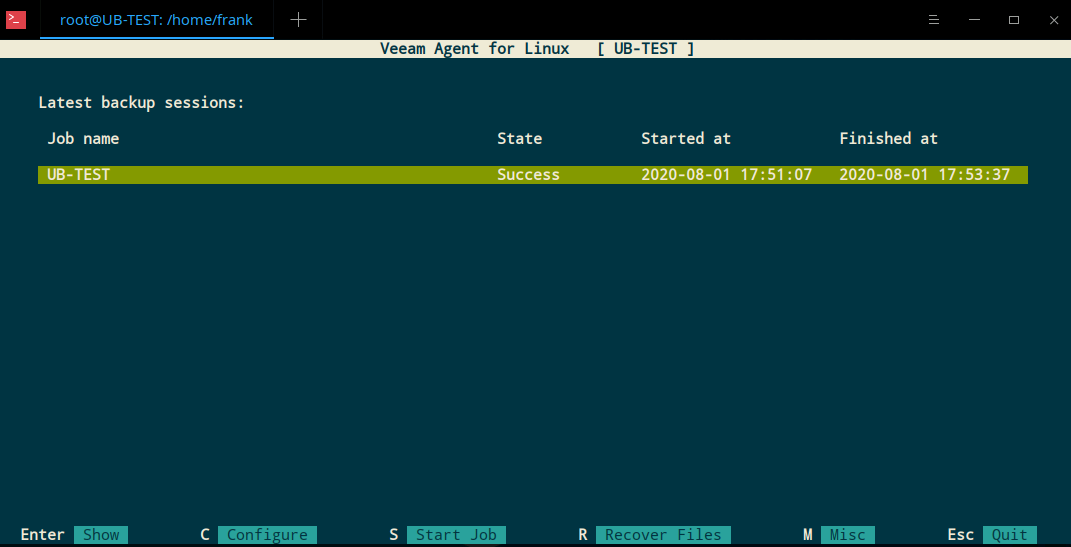
5. You will now be brought to the main screen to access/configure your Veeam installation. Press C to create your backup job.
6. You will now need to configure a few settings:
- Name: give your backup job a name and press enter.
- Backup Mode: select the backup mode you’d like to use. I will be backing up my entire machine.
- Destination: At this step, I will be backing up my system to a Synology NAS’s SMB share. If you’re backing up your system locally, select Local. Press Enter.
- Network: Select SMB (if you’re using SMB), and enter the information requested. If you don’t have a domain, leave it blank.
- Advanced: If you’d like to enable any advanced options (like backup encryption), you can do it here.
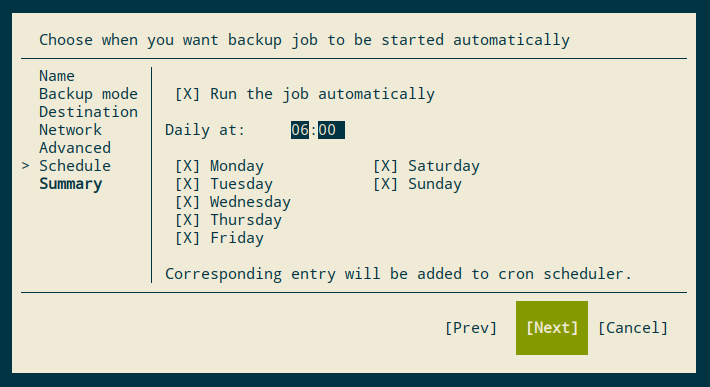
- Schedule: Specify when the backup job should run. I will be running this backup job daily at 6:00 AM.
7. You will then receive a confirmation page. Select Finish.
8. Your backup job will now run.

Recover Backup Files – Use Veeam to Back up Linux PCs to a Synology NAS
Veeam gives you the option of mounting your backup to a local folder and navigating/restoring the files.
1. At the Veeam backup page, press R to recover files.
2. You will then need to select your backup and the restore point.
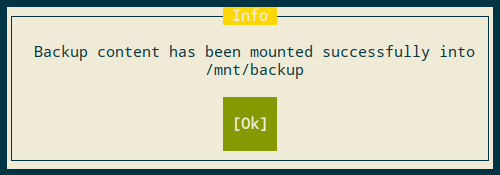
3. You will receive a message stating that your backup has been mounted to a local folder.
4. You can now navigate and restore files from that mounted folder!

Bare-Metal Restore – Use Veeam to Back up Linux PCs to a Synology NAS
Veeam gives you the option of completing a bare-metal restore using recovery media.
1. Navigate to the Veeam download page, log in, and select your operating system.
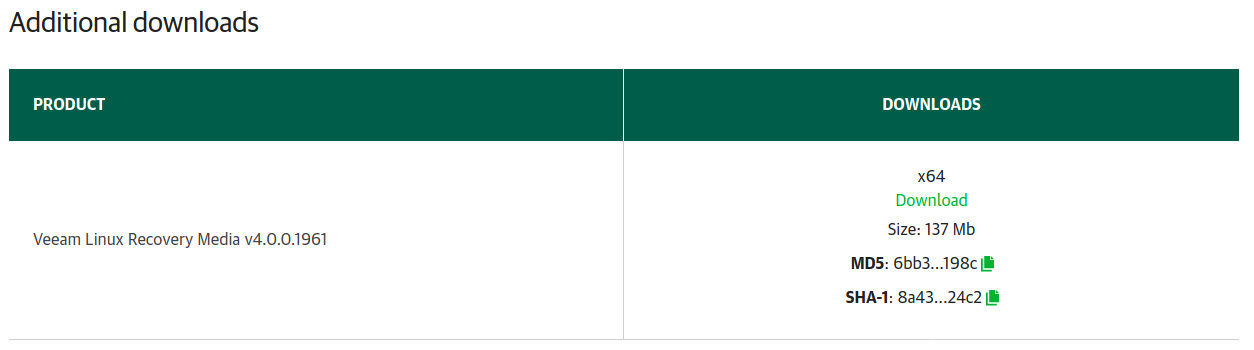
2. At the bottom of the page, you will see an Additional Downloads section that has the Veeam recovery media. Download the ISO image.
3. After the ISO image is downloaded, you will need to create a bootable USB drive and boot your PC from the USB drive. I will be using a virtual machine to demo this functionality.
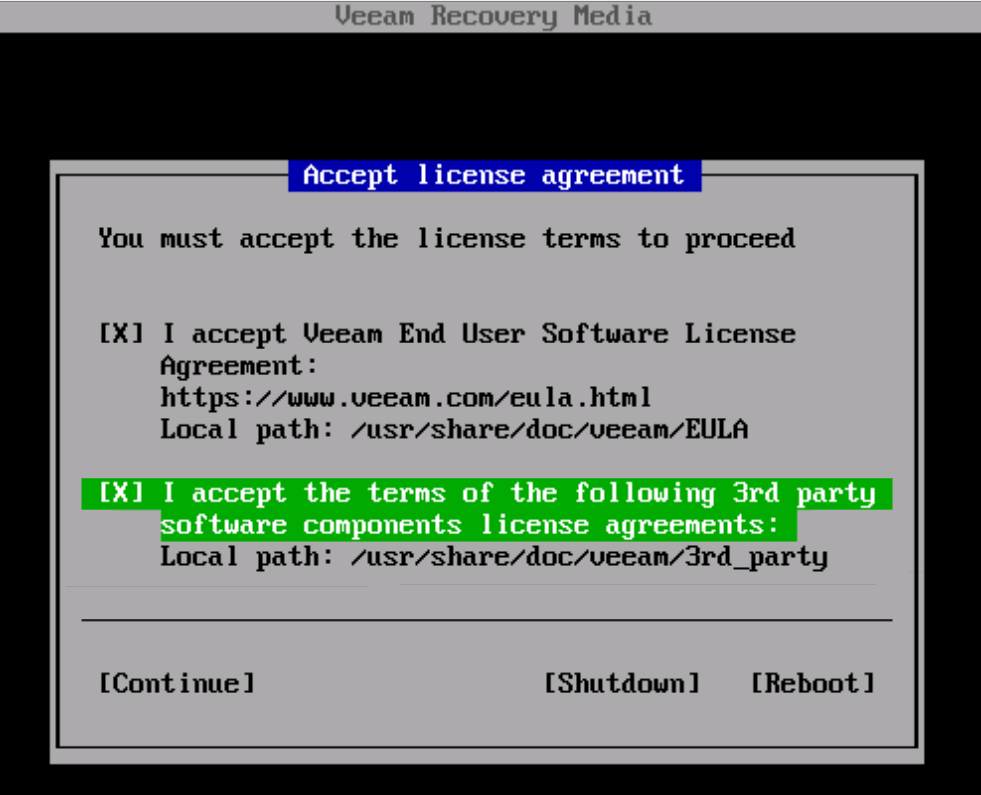
4. Accept the license and continue.
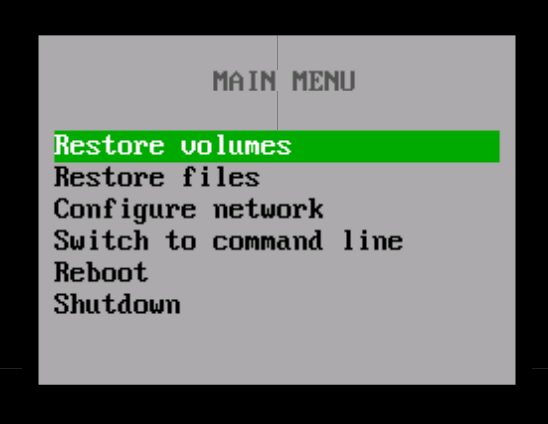
5. At this point, since we are doing a bare-metal restore, select restore volumes.
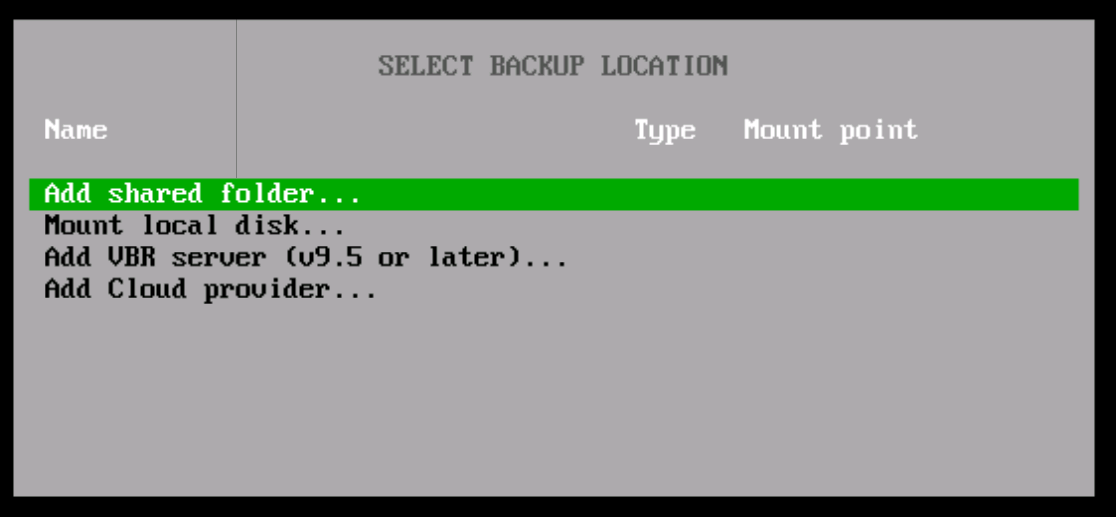
6. Since we backed up our system using SMB, we will restore using a shared folder. Select Add Shared Folder.
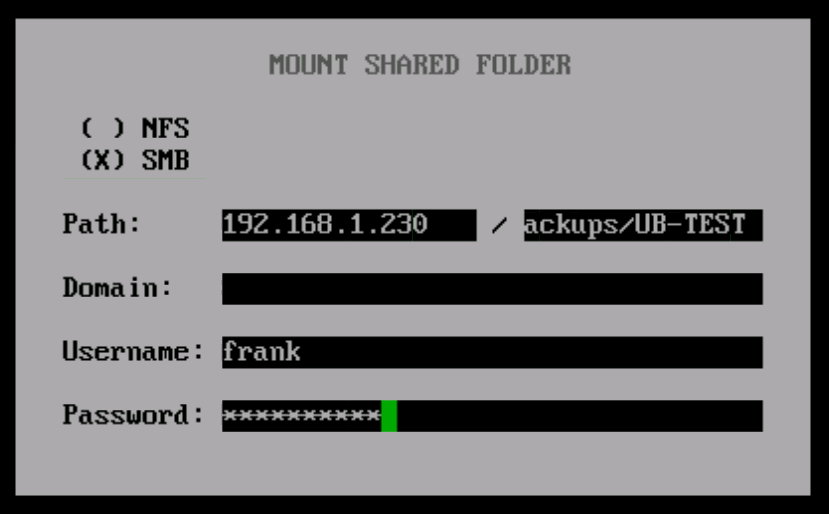
7. Enter the SMB information that we used for our backup earlier.
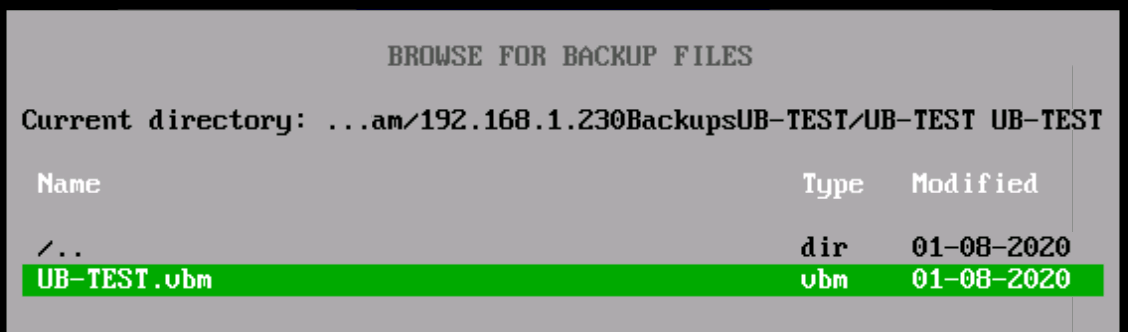
8. Select the directory and backup file.
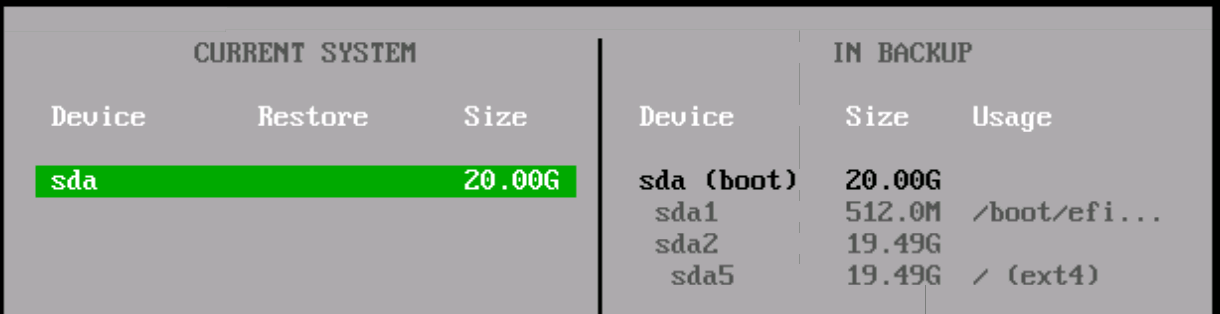
9. Select the restore point you’d like to restore from and select enter.
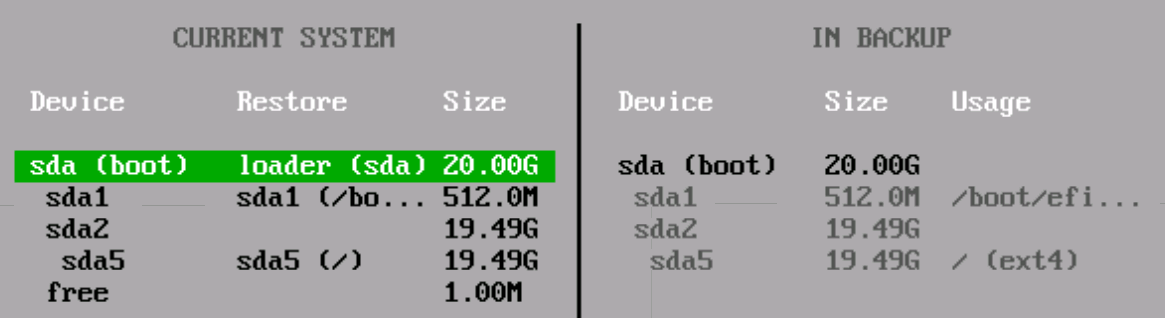
10. Select the drive you’d like to restore the volumes to.
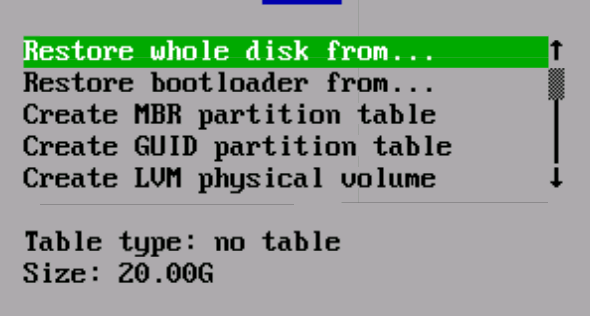
11. Select Restore whole disk from…
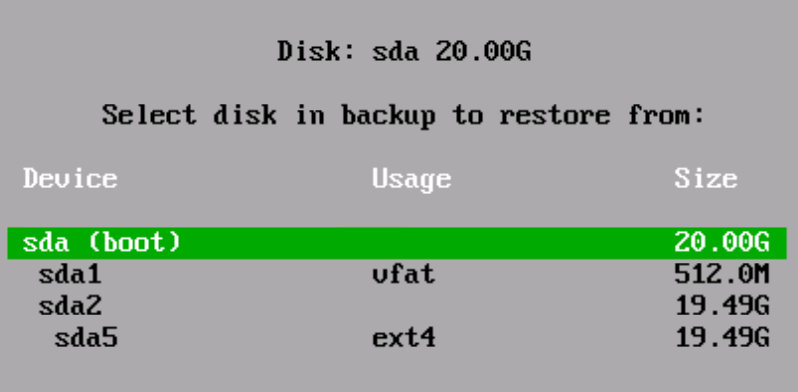
12. Select the boot partition.
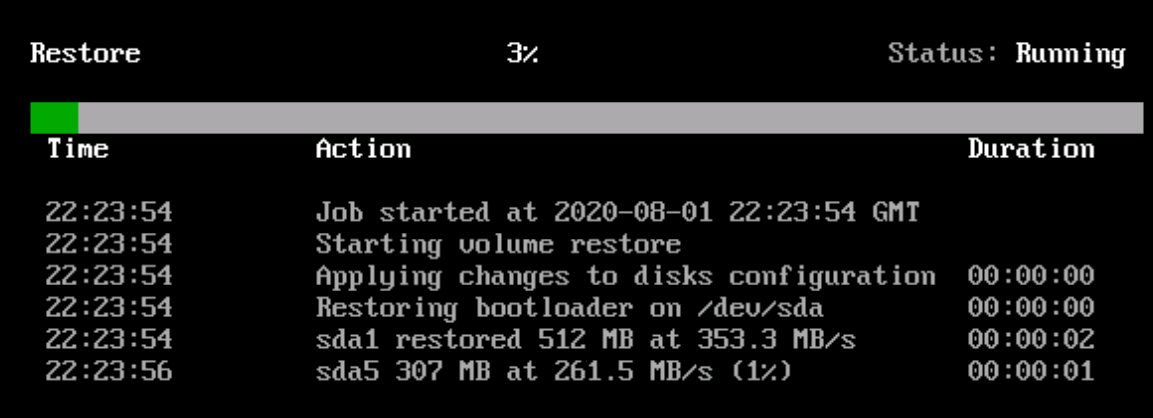
13. Press S to start the restore and enter to start recovery.
14. Your system will now restore. When it’s done, reboot. Your system should now be accessible!
Conclusion – Use Veeam to Back up Linux PCs to a Synology NAS
This tutorial looked at how to use Veeam to back up Linux PCs to a Synology NAS. The Veeam Agent for Linux is the perfect backup tool. If you’re looking to simply back up files, our Rsync tutorials will show you how you can easily do that. However, if you’re looking for a backup tool that can do bare-metal restores, Veeam is it!