Today we are going to look at how to update a Docker container using Portainer.
There are many different ways to update Docker containers, but Portainer makes the process somewhat straightforward.
To demo how to update a Docker container using Portainer, I will be updating an Nginx Proxy Manager container. Currently, I’m running an old version (2.3.1), and we will be updating that to the latest version.
Before starting this process, ensure that your container is created properly and that volumes are included with your important data. If the data is not mapped to a local folder, it will be overwritten with the latest image data.
Video Tutorial on Updating Docker Containers using Portainer
Watch our step-by-step video tutorial on how to update Docker Containers using Portainer. We’ve embedded our full YouTube walkthrough below.
How to Update a Docker Container using Portainer
Before you can update Docker Containers with Portainer, you must install Portainer.
Installing Portainer
1. Download and run the Portainer Container by running the commands below.
sudo docker run -d -p 8000:8000 -p 9000:9000 -p 9443:9443 --name=portainer --restart=always -v /var/run/docker.sock:/var/run/docker.sock -v portainer_data:/data portainer/portainer-ce:latest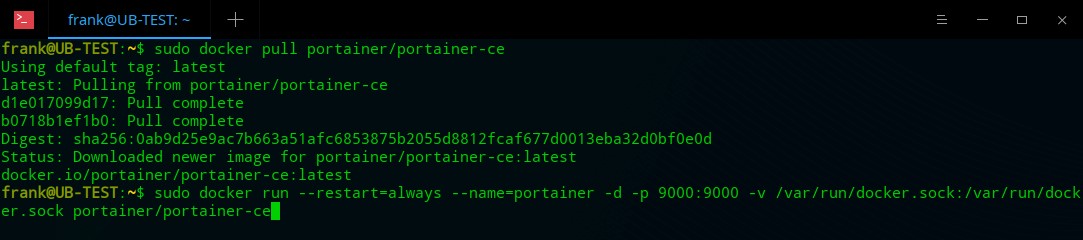
2. This will install Portainer and it will be accessible by the workstation’s IP address and port 9000. When you get there, create a username and password.
http://[WORKSTATION_IP_ADDRESS]:9000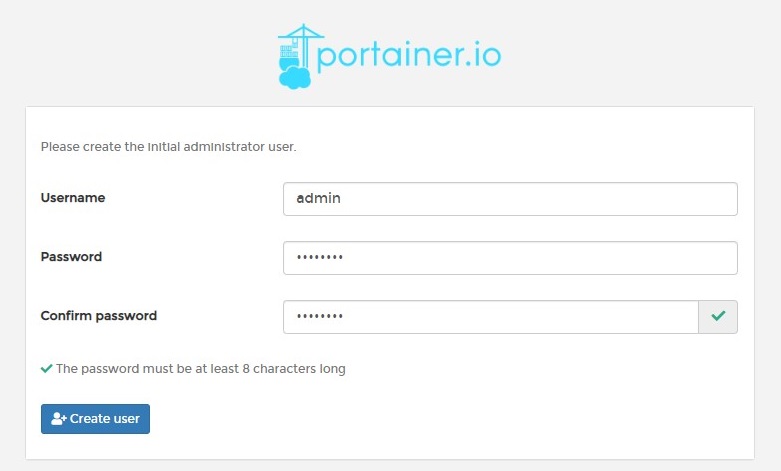
3. Select Docker and Connect.
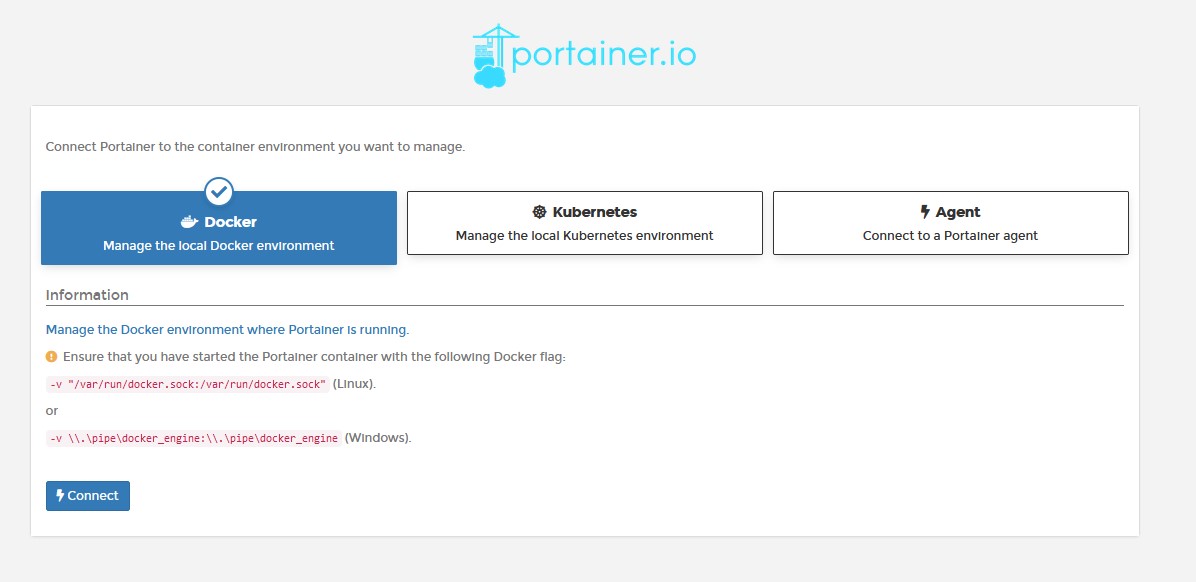
4. Select Local.

Updating Docker Containers Using Portainer
Now that Portainer is installed, you can run the steps below to update Docker Containers.
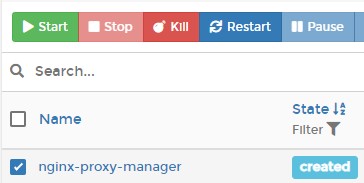
1. Select Containers, then stop the container that you’d like to update.

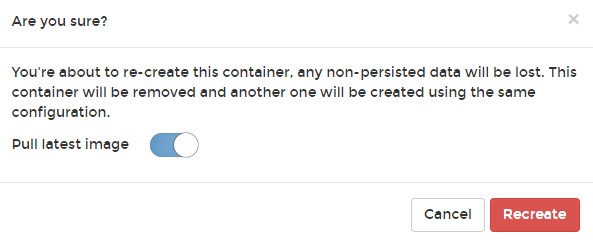
2. Select the container, and you’ll see a button named Recreate. By selecting this button, the container will take the persistent data and recreate the container. Keep in mind that the only data that will stay on the container is data that was mapped to a volume. This is explained in greater detail in the video above.

3. Select Pull latest image, then Recreate.
4. When this process is finished, the container will be recreated with the latest image. Select the container and Start it. The status will change to running.
5. The container will now exist with the newest released version!
Final Thoughts on Updating Docker Containers with Portainer
This tutorial looked at how to update a Docker Container using Portainer. As I stated above, this is not the only way of doing this. There are various ways, but this is what I consider to be the easiest. It’s good to periodically check and ensure that your containers are running the latest version.
Keep in mind that you can always recreate an existing container using an older version if you run into any unexpected problems. This is what makes Docker containers so easy to work with!