Home labs are easy to accidentally expose. Most people focus on getting services running and only think about security after something breaks — or worse, gets accessed by someone who shouldn’t have it. These five changes will make your home lab harder to compromise, easier to recover, and safer to run day-to-day.
Quick disclaimer: security is never guaranteed and it’s always changing. What’s covered here is general best-practice guidance for home labs — use your own judgment and test changes in your environment before rolling them out broadly.
1. Stop Exposing Services to the Internet
This is the most obvious one, and also the most commonly ignored. Exposed admin panels are the number one avoidable mistake in home labs. If a service doesn’t need to be accessible from outside your local network, it shouldn’t be.
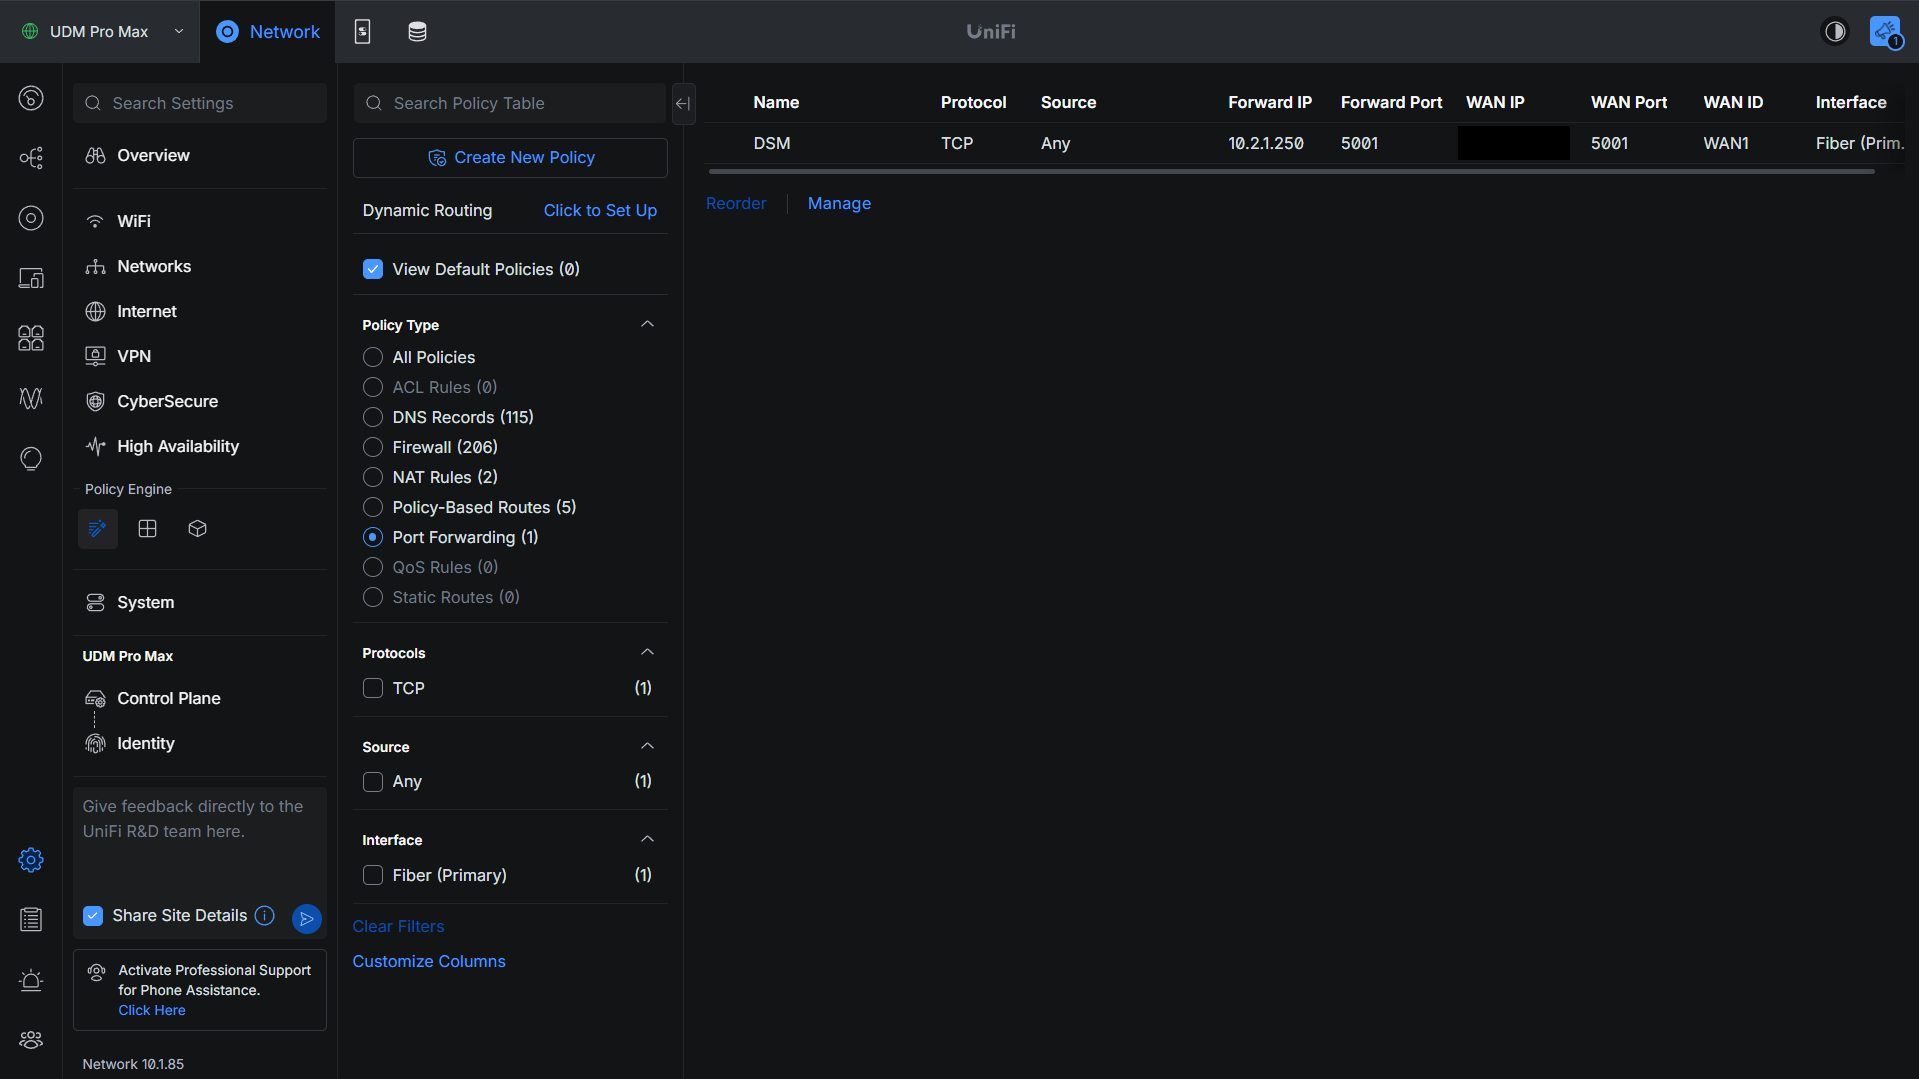
Start by auditing your port forwards. Check your router and delete anything you don’t actually need. While you’re at it, disable UPnP. UPnP allows devices to automatically open port forwards on your behalf — which means there may be ports forwarded right now that you didn’t intentionally configure and may not even be aware of.
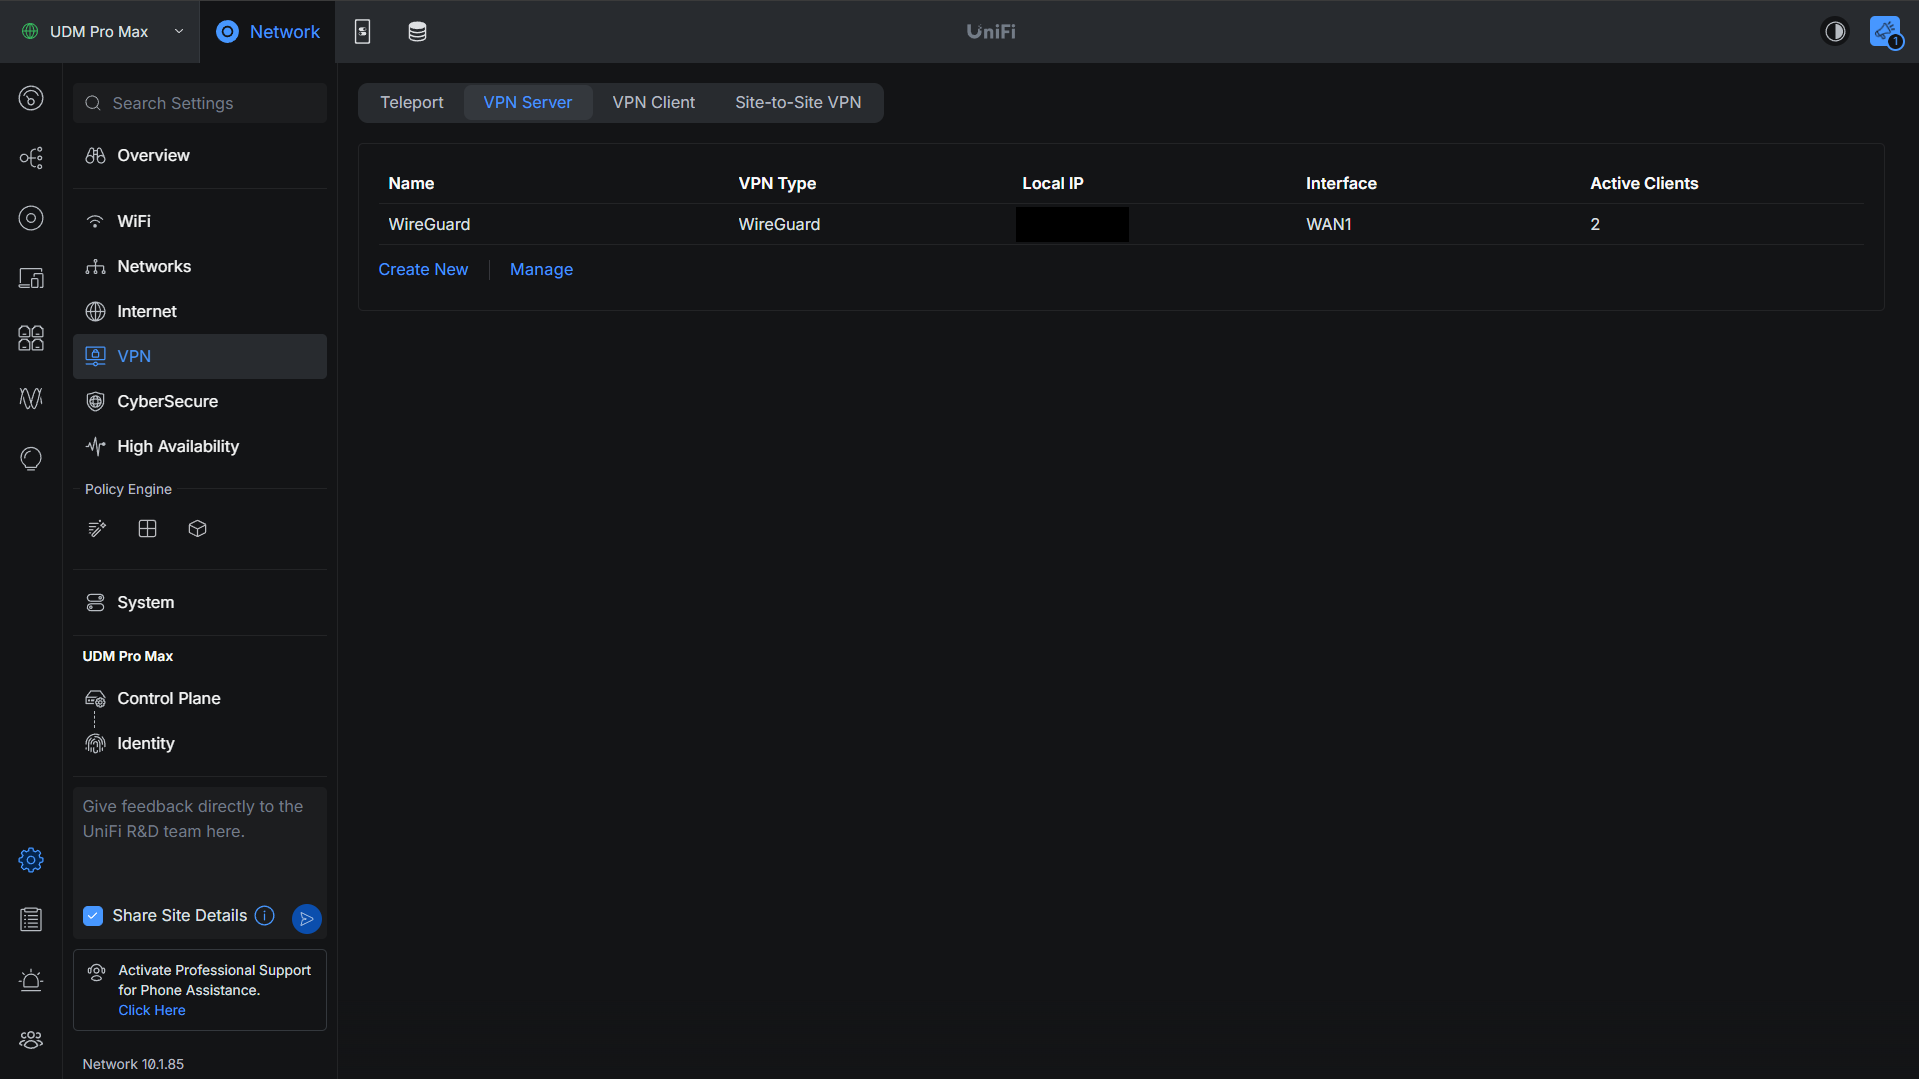
Once you’ve cleaned up port forwards, the next question is how to handle legitimate remote access. A VPN is the safest default. It keeps your services off the public internet entirely and requires authentication just to reach them.
If a traditional VPN doesn’t fit your workflow, a zero-trust network (like Cloudflare Tunnel or Twingate) is a reasonable alternative. Zero-trust solutions give you more granular access control, but they do involve routing traffic through a third party — that’s a trade-off worth understanding before you commit.
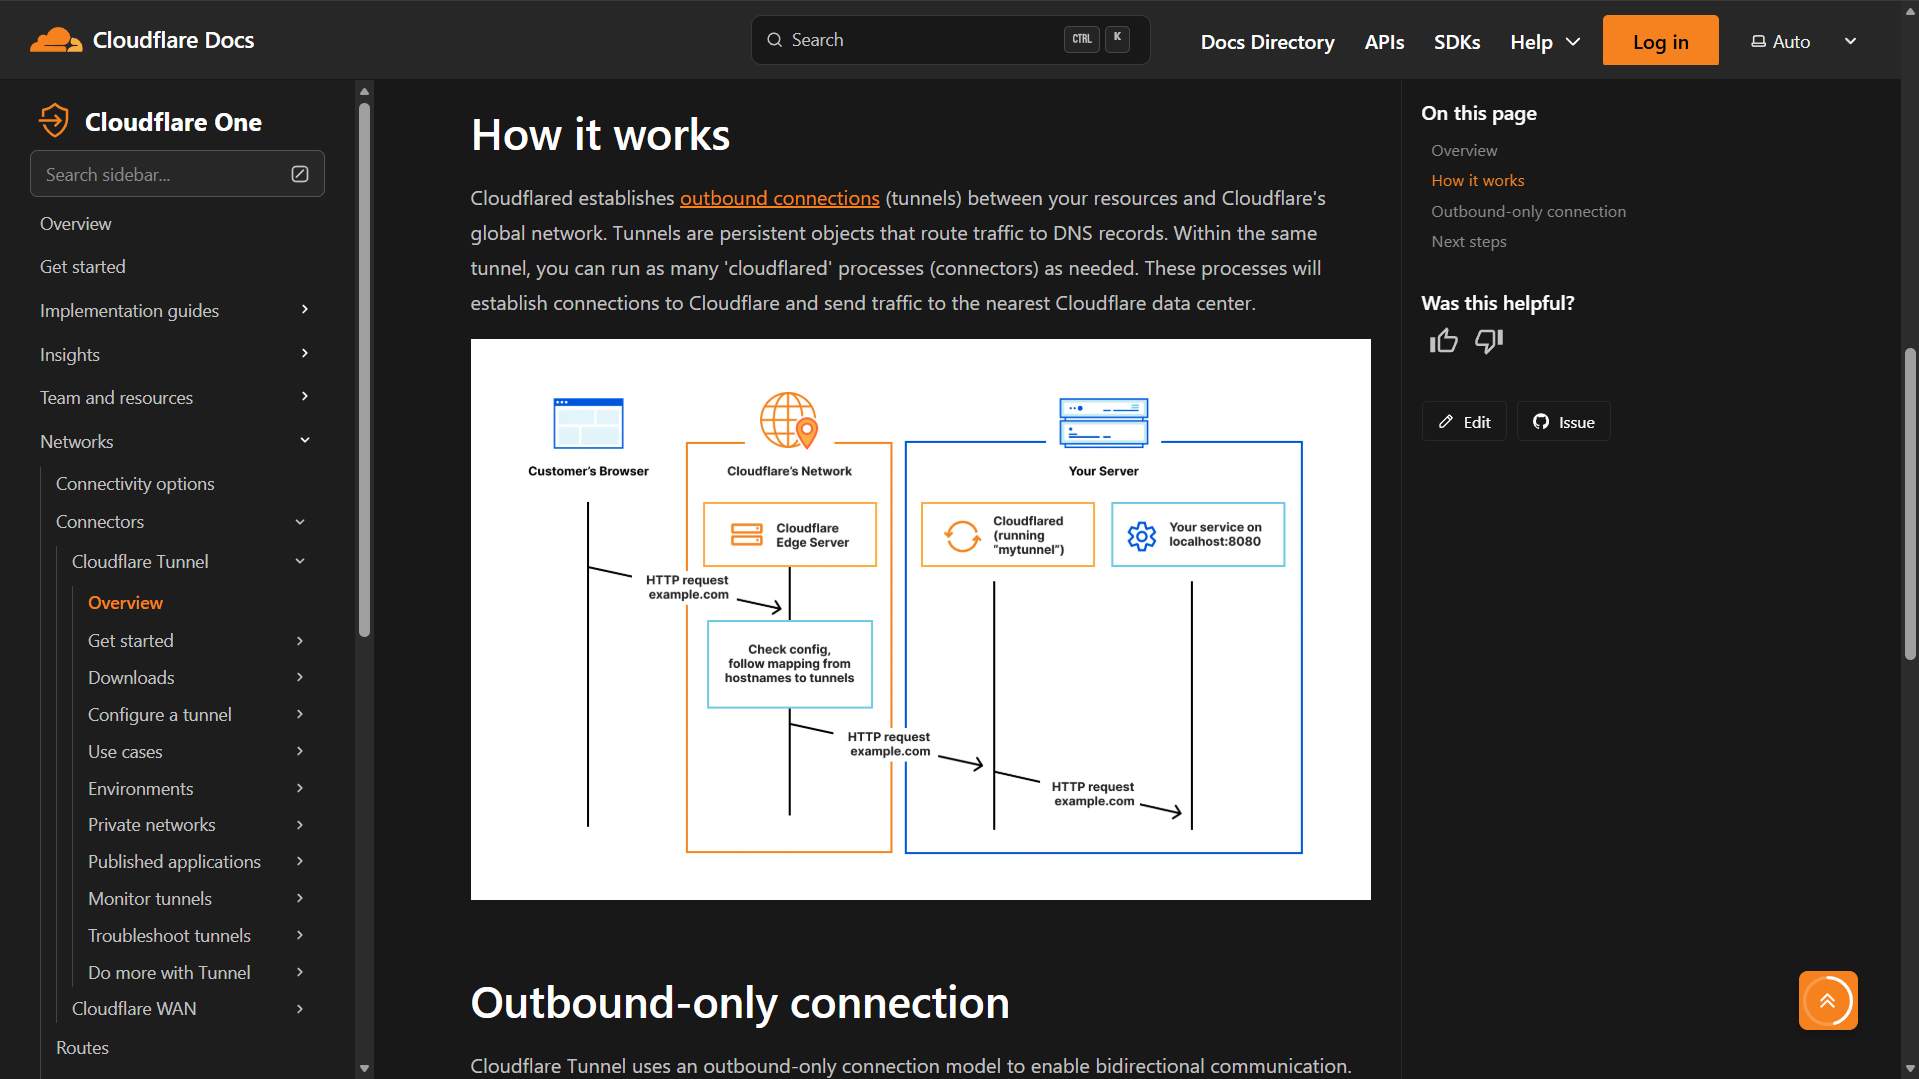
If you absolutely must expose something directly to the internet, at a minimum, it should have strong authentication enabled, a properly configured firewall limiting access as much as possible, and patches applied as soon as they’re available.
2. Properly Segment Your Network with VLANs
The reason network segmentation matters is simple: assume something gets compromised. If all your devices are on the same flat network, a compromised IoT device or camera can reach everything — your NAS, your hypervisor, your management interfaces. VLANs limit the blast radius.
A reasonable baseline for most home labs:
- Trusted — your primary devices, VMs, and servers
- IoT — smart home devices, sensors, anything you don’t fully trust
- Guest — internet access only, isolated from everything else
- Surveillance/Cameras — completely isolated, no access to sensitive data
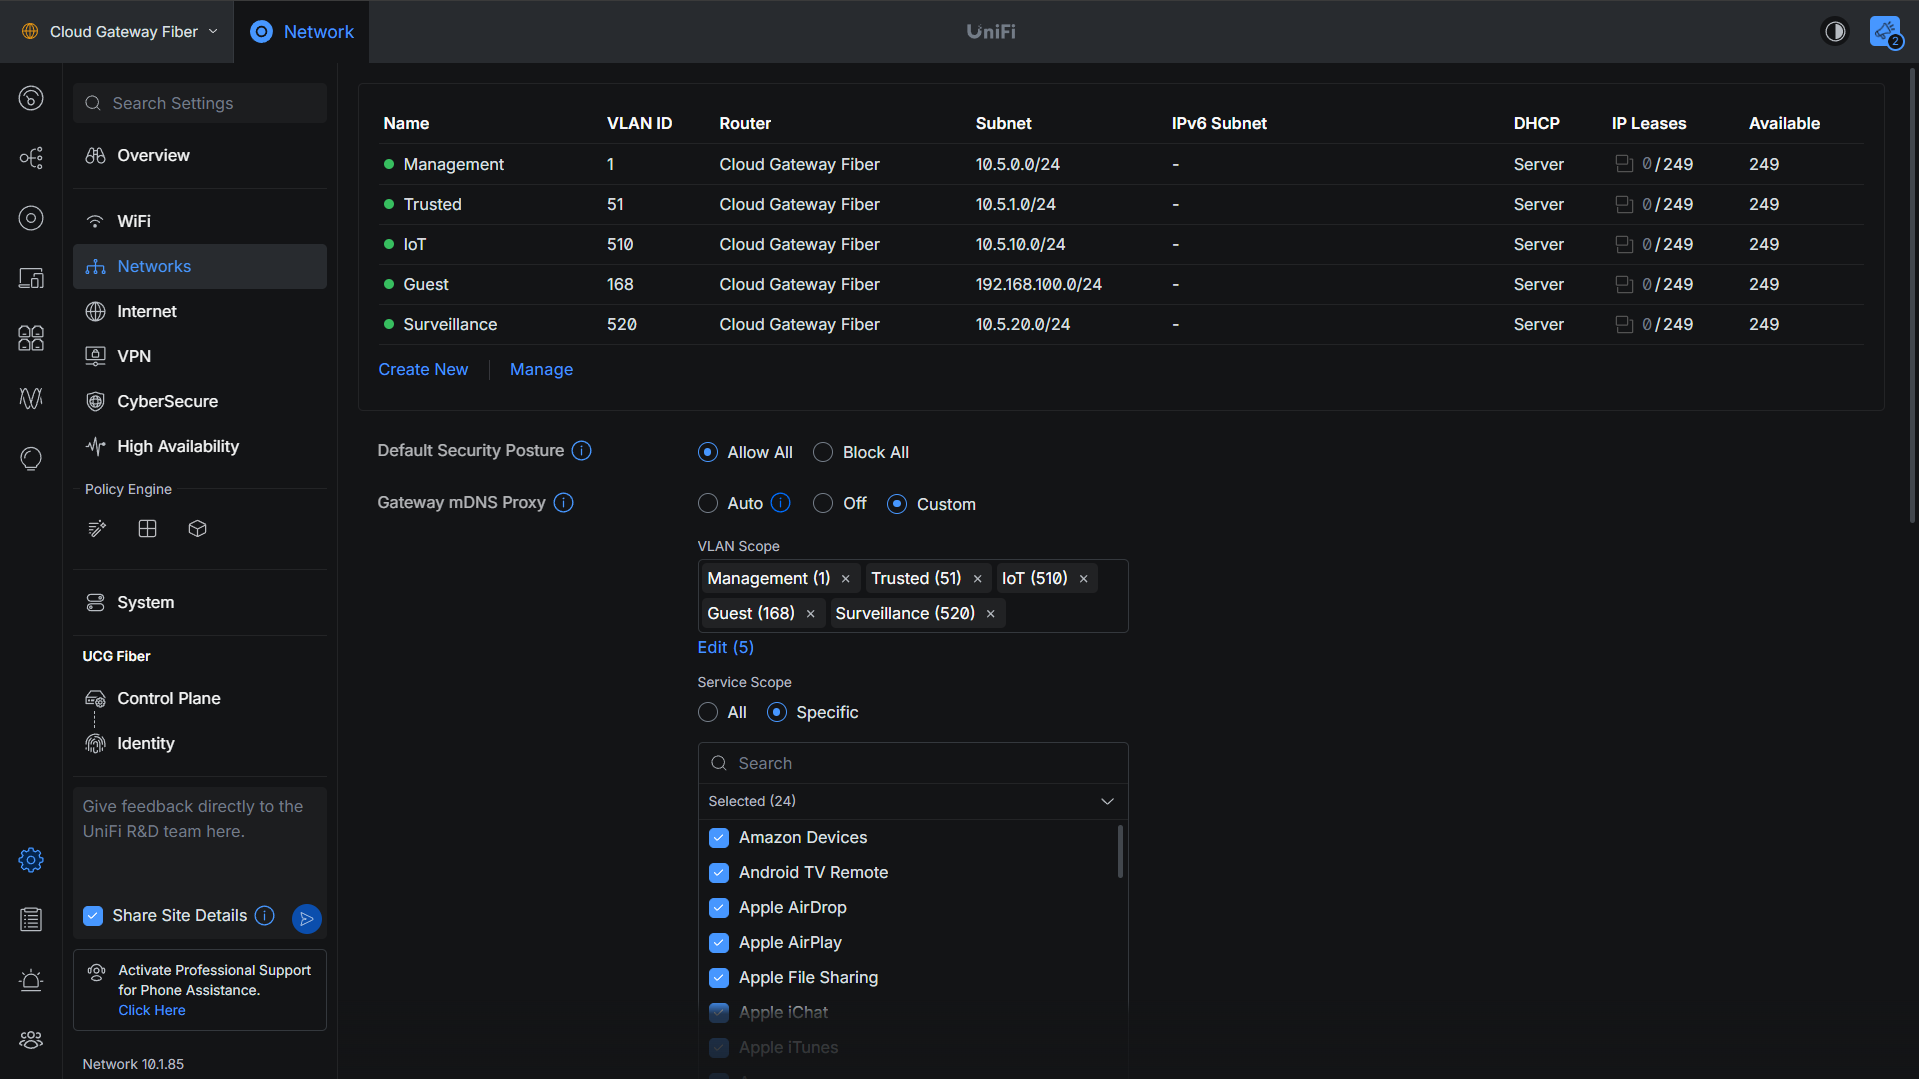
VLANs alone don’t tell the whole story, though. The real security comes from the firewall rules between them. The goal is to default deny between VLANs, with specific rules allowing only the traffic flows you actually need.
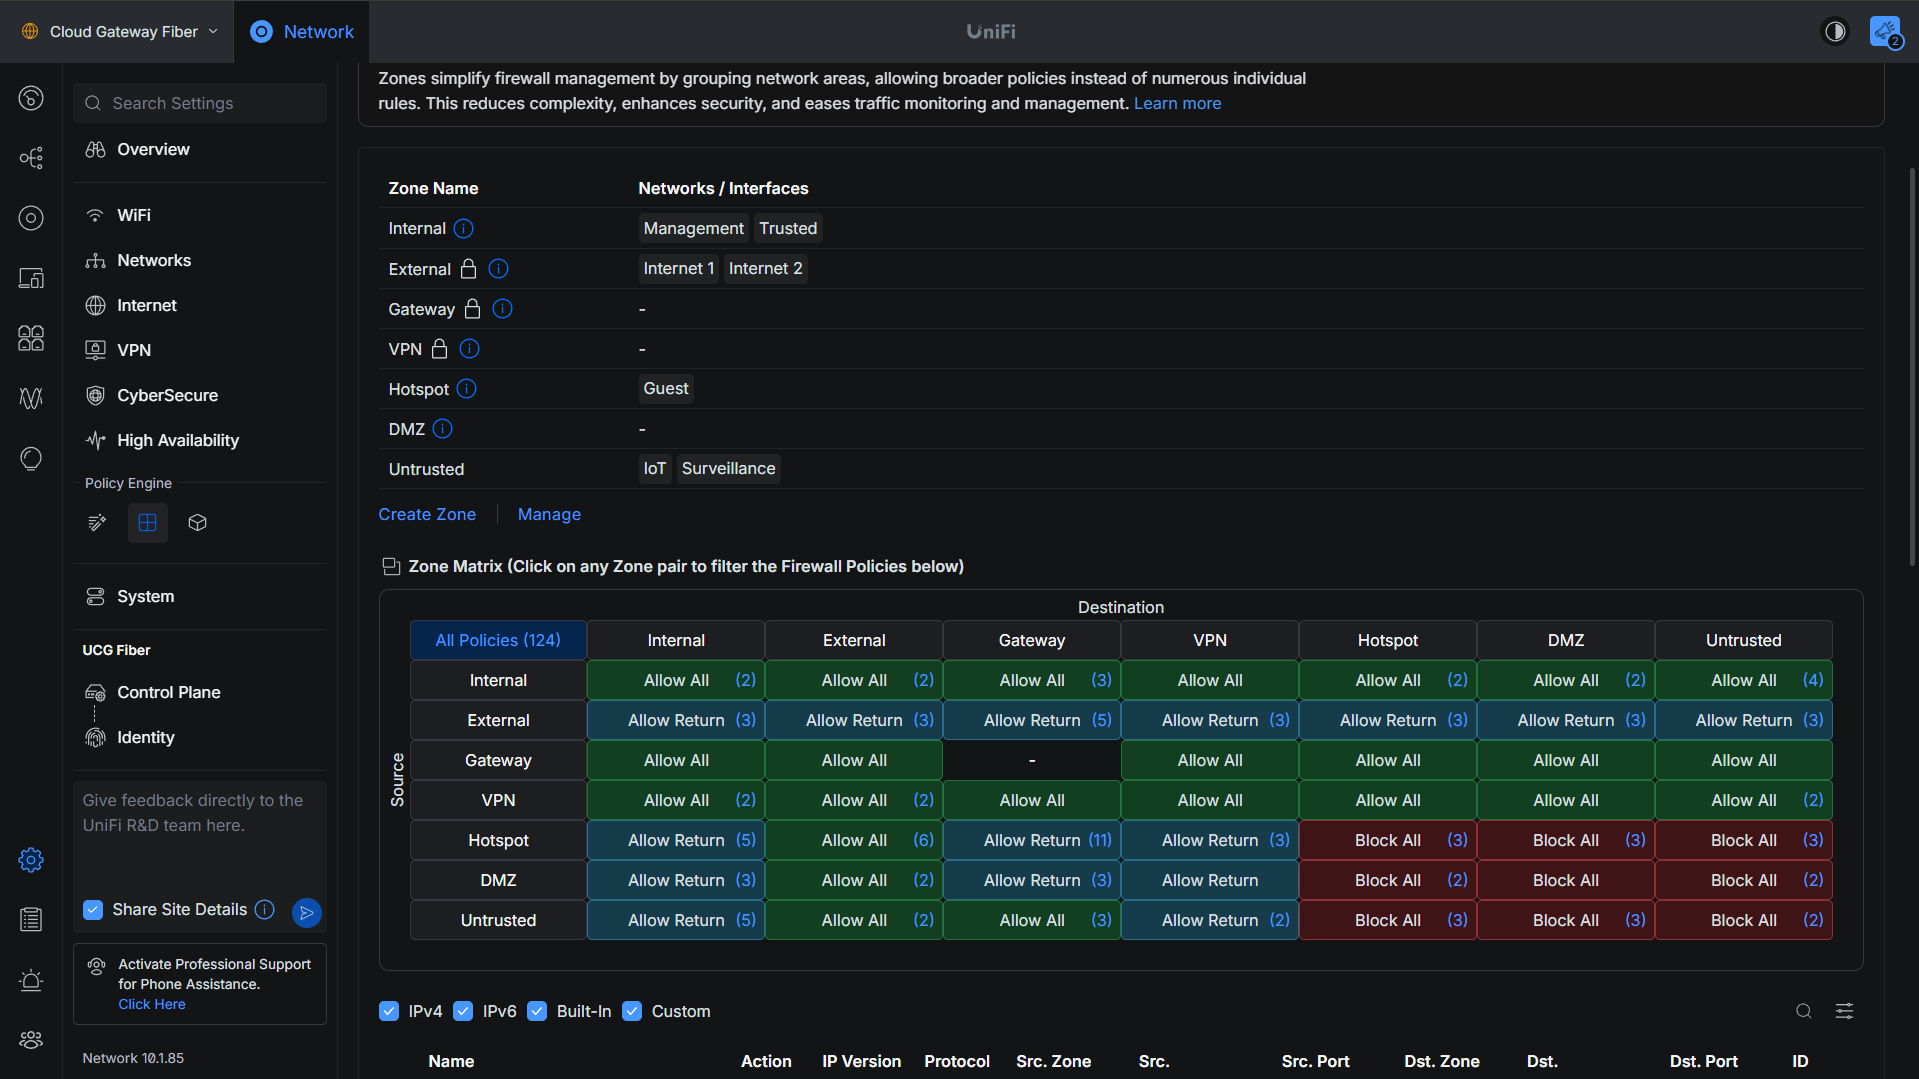
For example, your surveillance VLAN shouldn’t be able to reach your NAS by default. But if you need your NVR to write recordings to a NAS share, you create a specific rule allowing that one device to reach that one destination on that one port — nothing more.
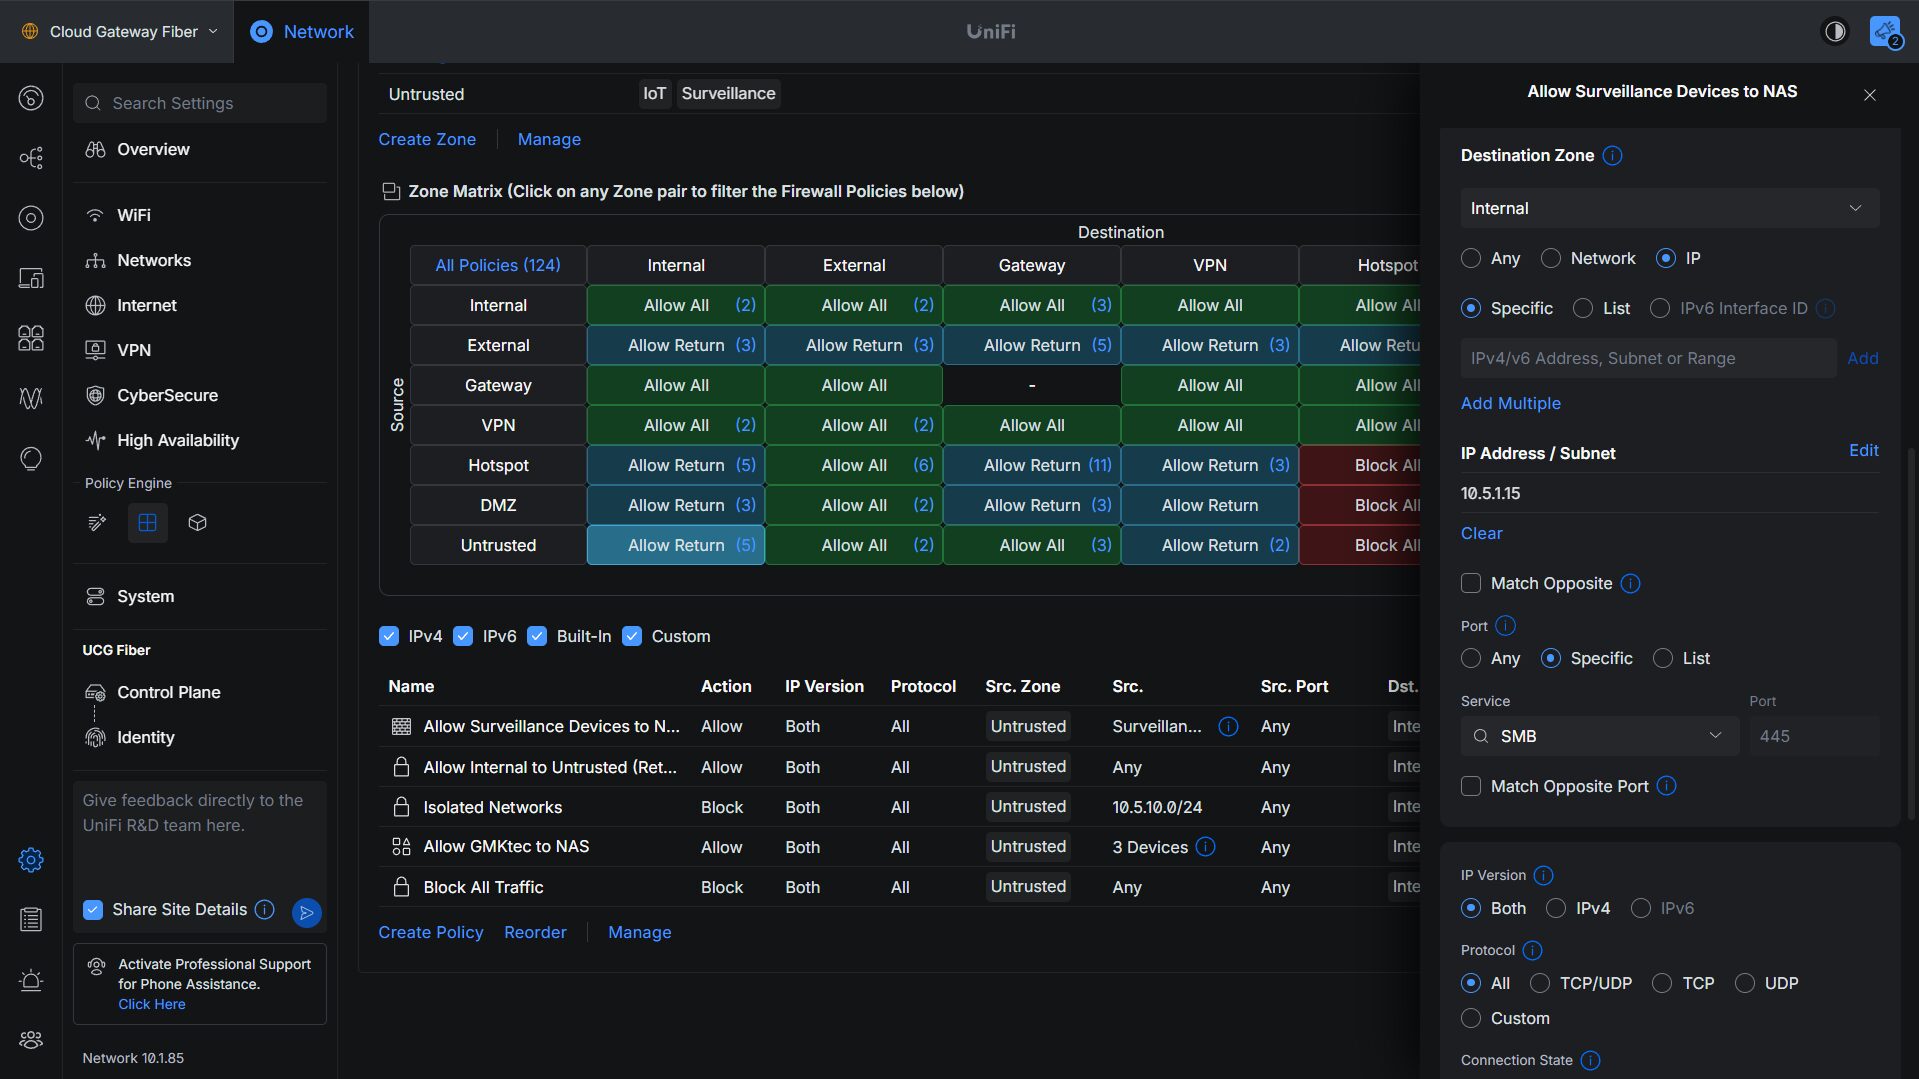
This approach of “punching holes” for specific required flows is far more secure than allowing full VLAN-to-VLAN communication just because it’s convenient.
3. Practice Least Privilege
Breaches get significantly worse when every account and service has admin-level access. The goal here is to limit what any single compromised account can actually do.
In practice, this means:
- Separate admin and daily-use accounts. Use a dedicated admin account for managing your NAS, hypervisor, or other systems — and a regular account for day-to-day tasks like accessing SMB shares. If your regular account is compromised, an attacker still can’t make admin-level changes.
- Don’t grant broad permissions out of convenience. If a user only needs access to one shared folder, give them access to that folder. Everything else should be denied by default.
- Use service accounts with minimum permissions. Applications and containers shouldn’t run as root or with full admin rights unless there’s a specific reason. Configure each container or service to access only the resources it actually needs.
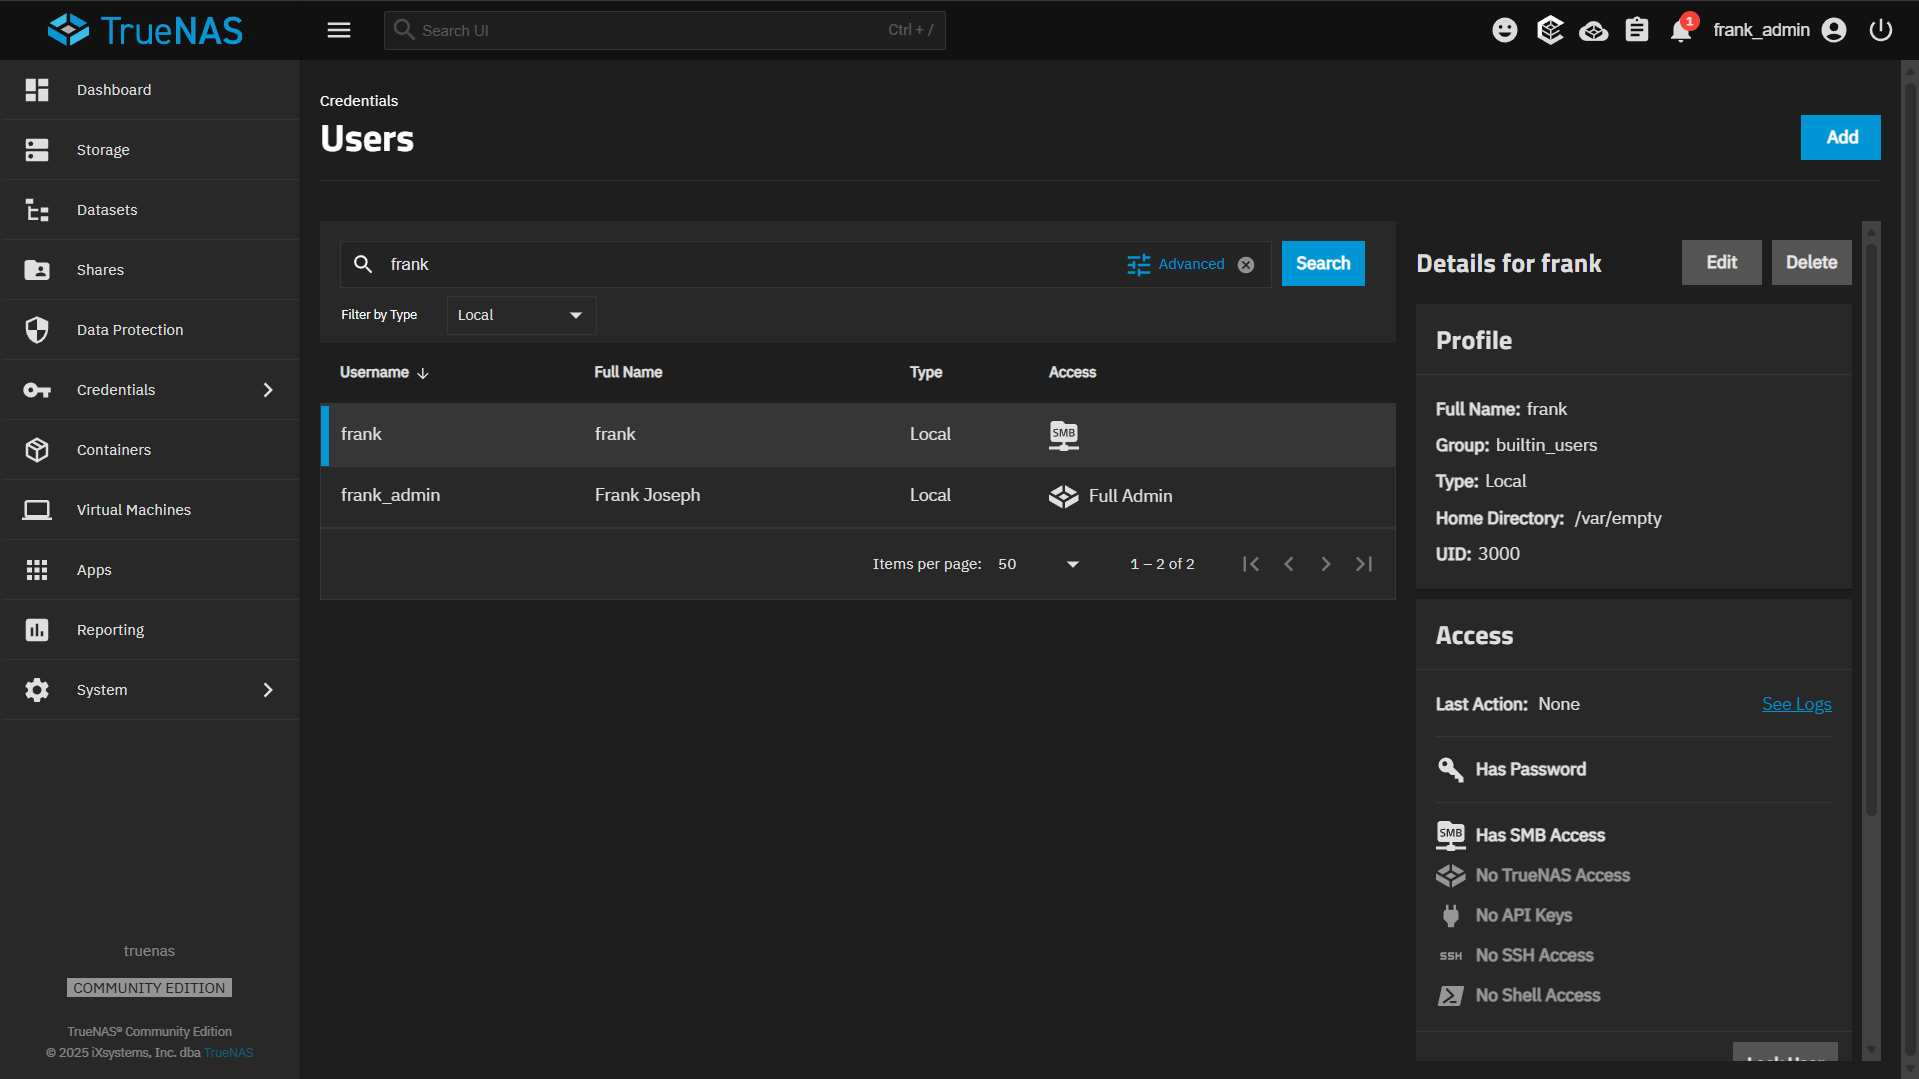
The underlying philosophy is: if something goes wrong, how much can an attacker actually do? Limiting permissions at every level keeps that answer as small as possible.
4. Build a Recovery Strategy That Can Survive an Attack
Ransomware’s primary goal isn’t just encrypting your data — it’s destroying your ability to recover. If your only backups are on the same system that gets compromised, you don’t have a real recovery strategy.
Here’s what actually matters:
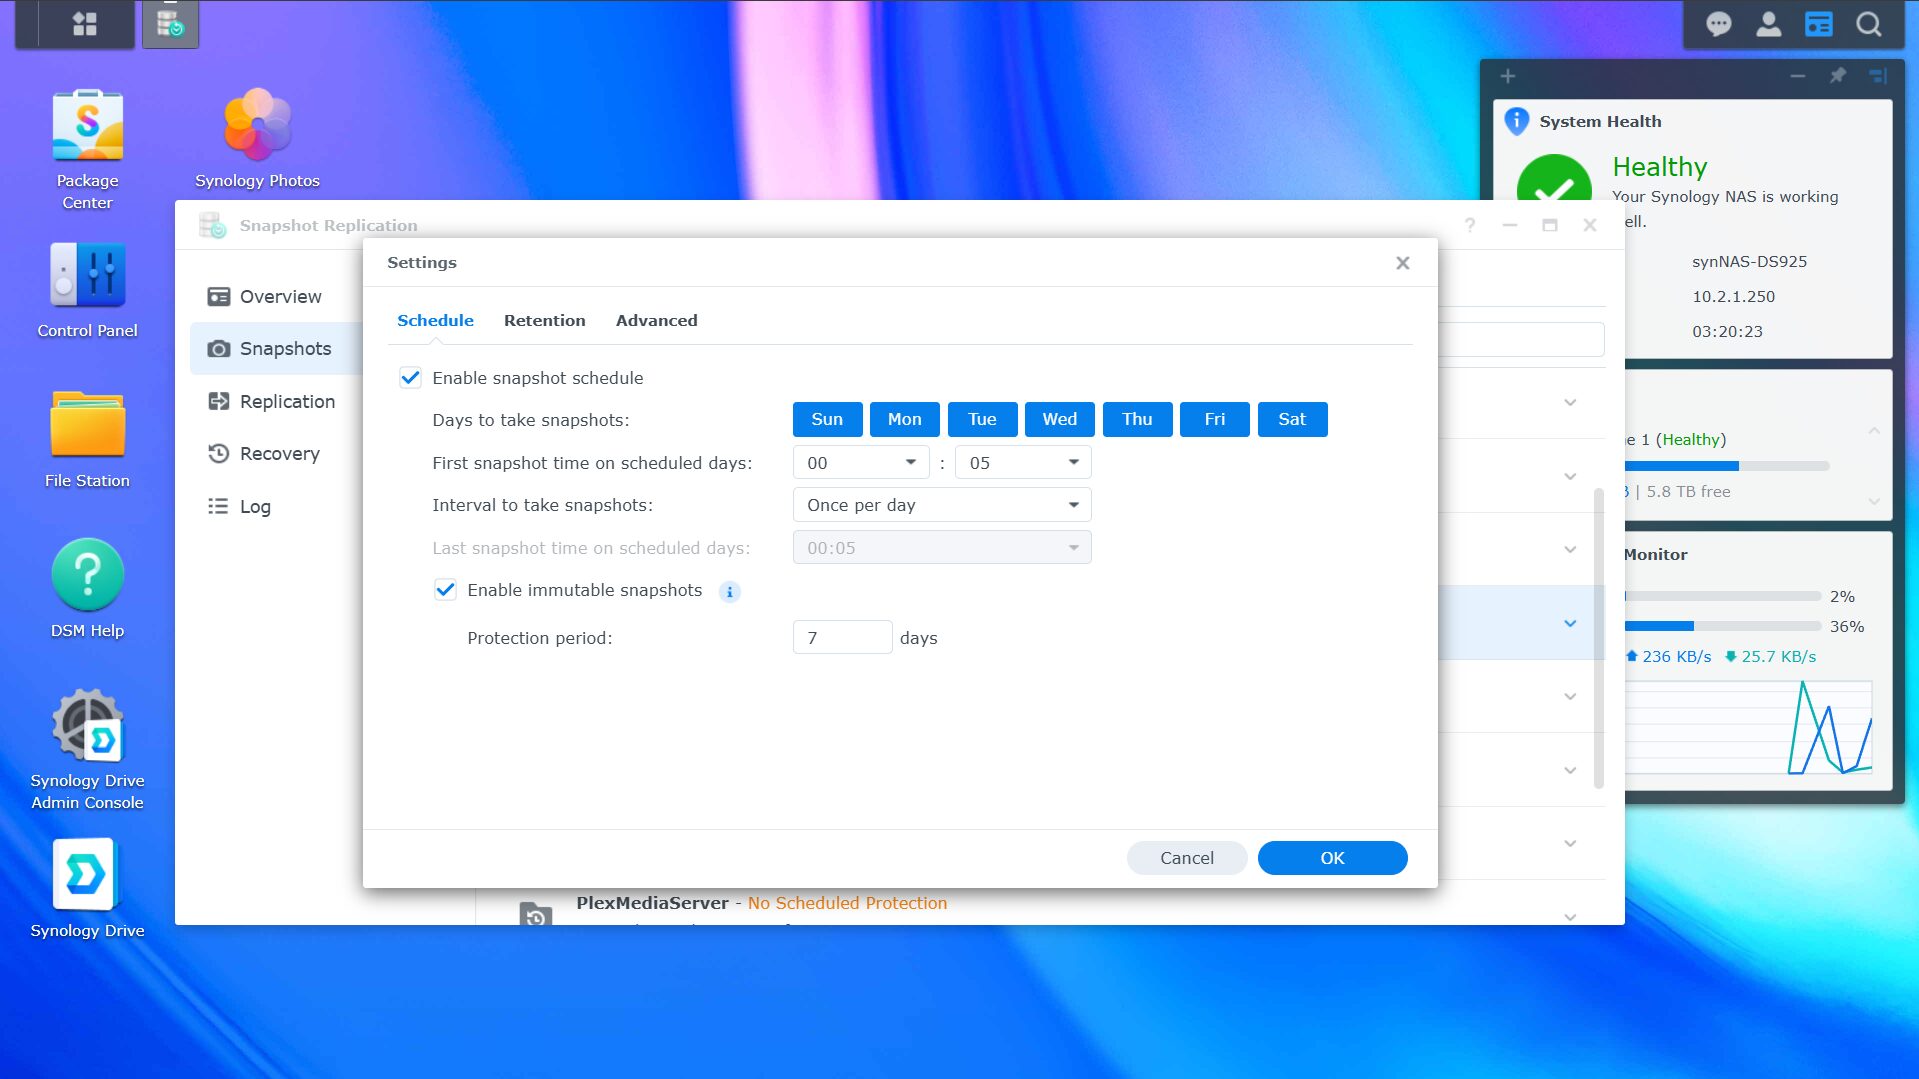
Snapshots with immutability. If your NAS or storage system supports it, enable immutable snapshots with a retention lock. Immutable snapshots can’t be deleted or modified, even by an attacker who gains access to the system. A 7-day protection period is a reasonable starting point.
Separate credentials for your backup system. Your backup destination should have its own credentials, separate from everything else. A pull-based backup (where the backup destination pulls data from the source) is generally safer than push-based, because the source system doesn’t need credentials to the backup destination. If the source is compromised, the attacker can’t reach the backup.
Offsite or cloud copy. An on-site backup protects against drive failure. It doesn’t protect against a fire, flood, or an attacker who has access to your entire network. Backing up to a separate physical location or a cloud destination gives you a recovery point that’s genuinely isolated.
Test your restores. This one gets skipped constantly. If you’ve never successfully restored from a backup, you don’t actually know your backups work. Test at least one restore — a file, a dataset, a VM snapshot — to confirm the process works before you need it.
5. Use Strong Authentication Everywhere
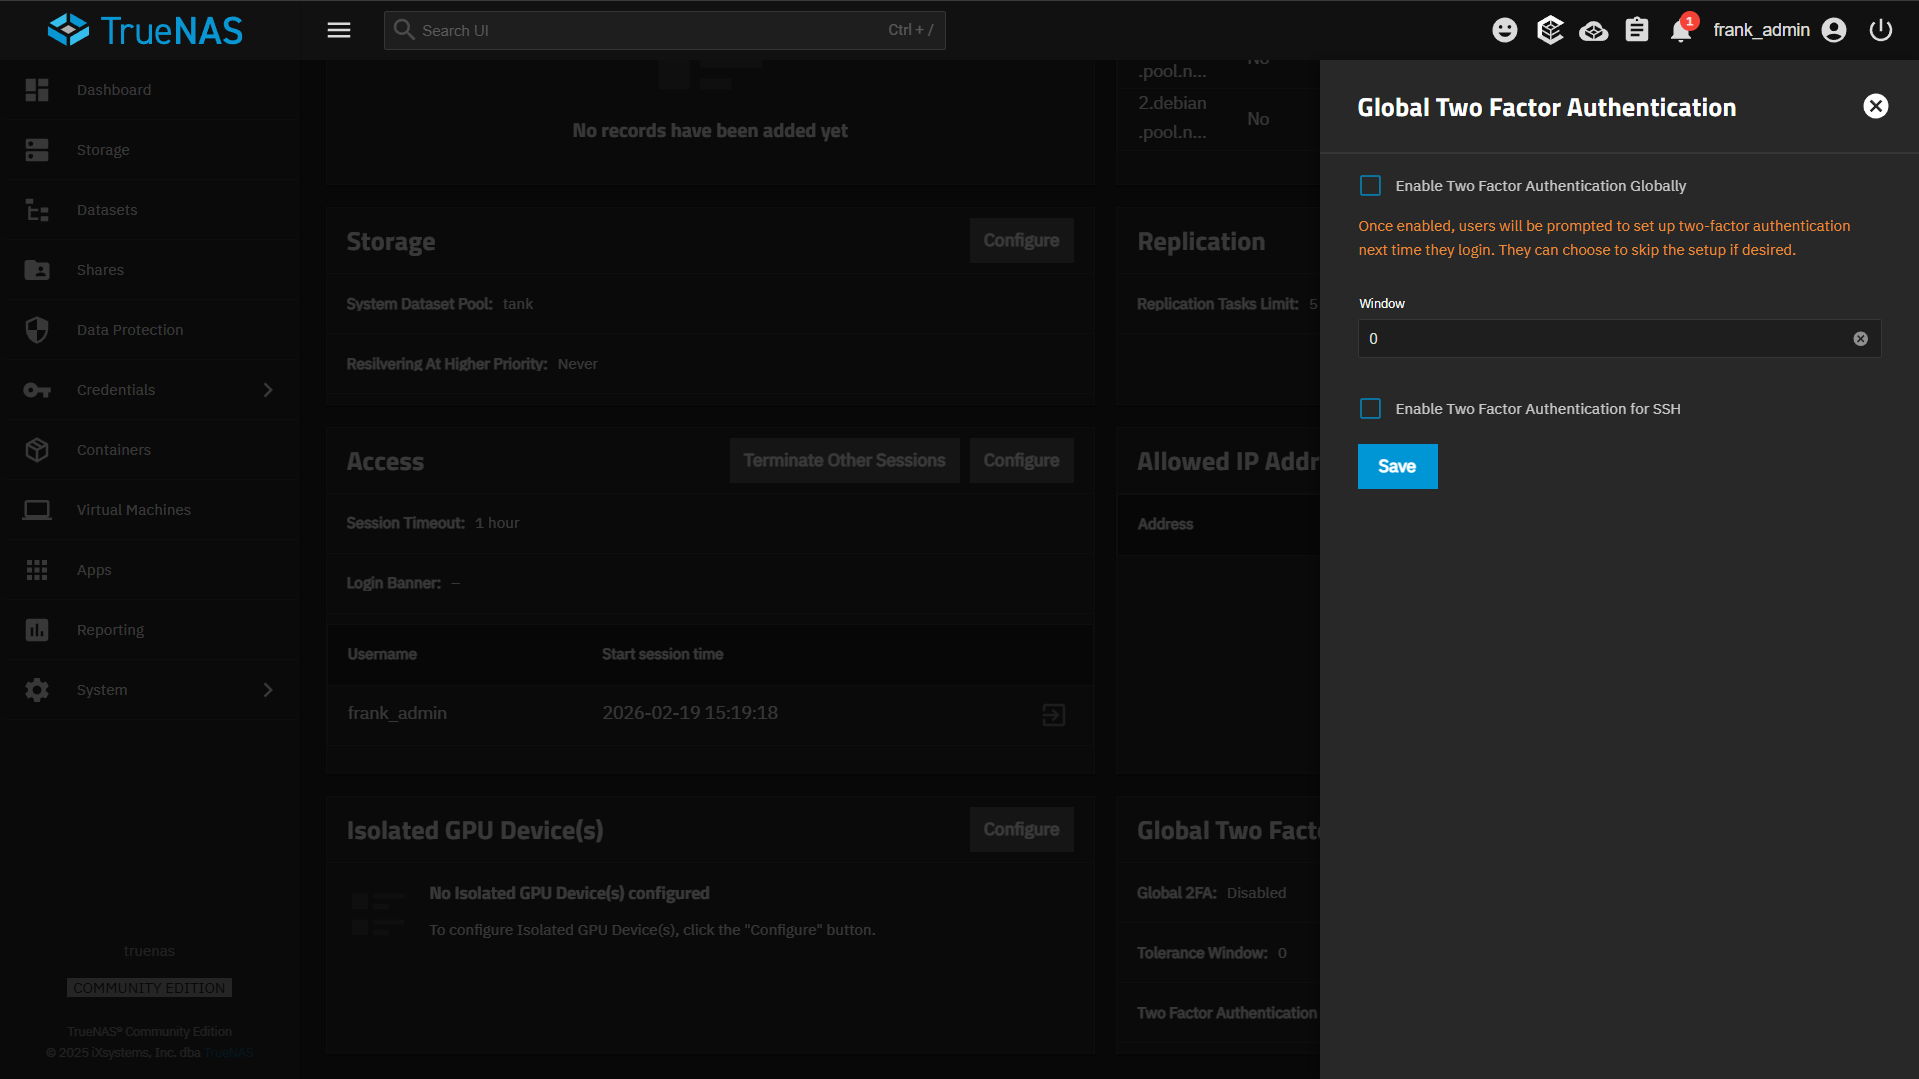
This comes down to two things: a password manager and multi-factor authentication.
Password manager. Every service should have a unique, randomly generated password (check out our Vaultwarden vs Bitwarden article to learn more). Reusing passwords across services is one of the most common ways a breach on one platform turns into a breach everywhere. A password manager solves this without requiring you to memorize anything.
MFA. For anything admin-facing, require a second factor. An authenticator app is the minimum. If the service supports passkeys, use them instead — passkeys are tied to a device and a biometric or PIN, can’t be phished, and are resistant to credential stuffing attacks. They’re also faster to use than a one-time code.
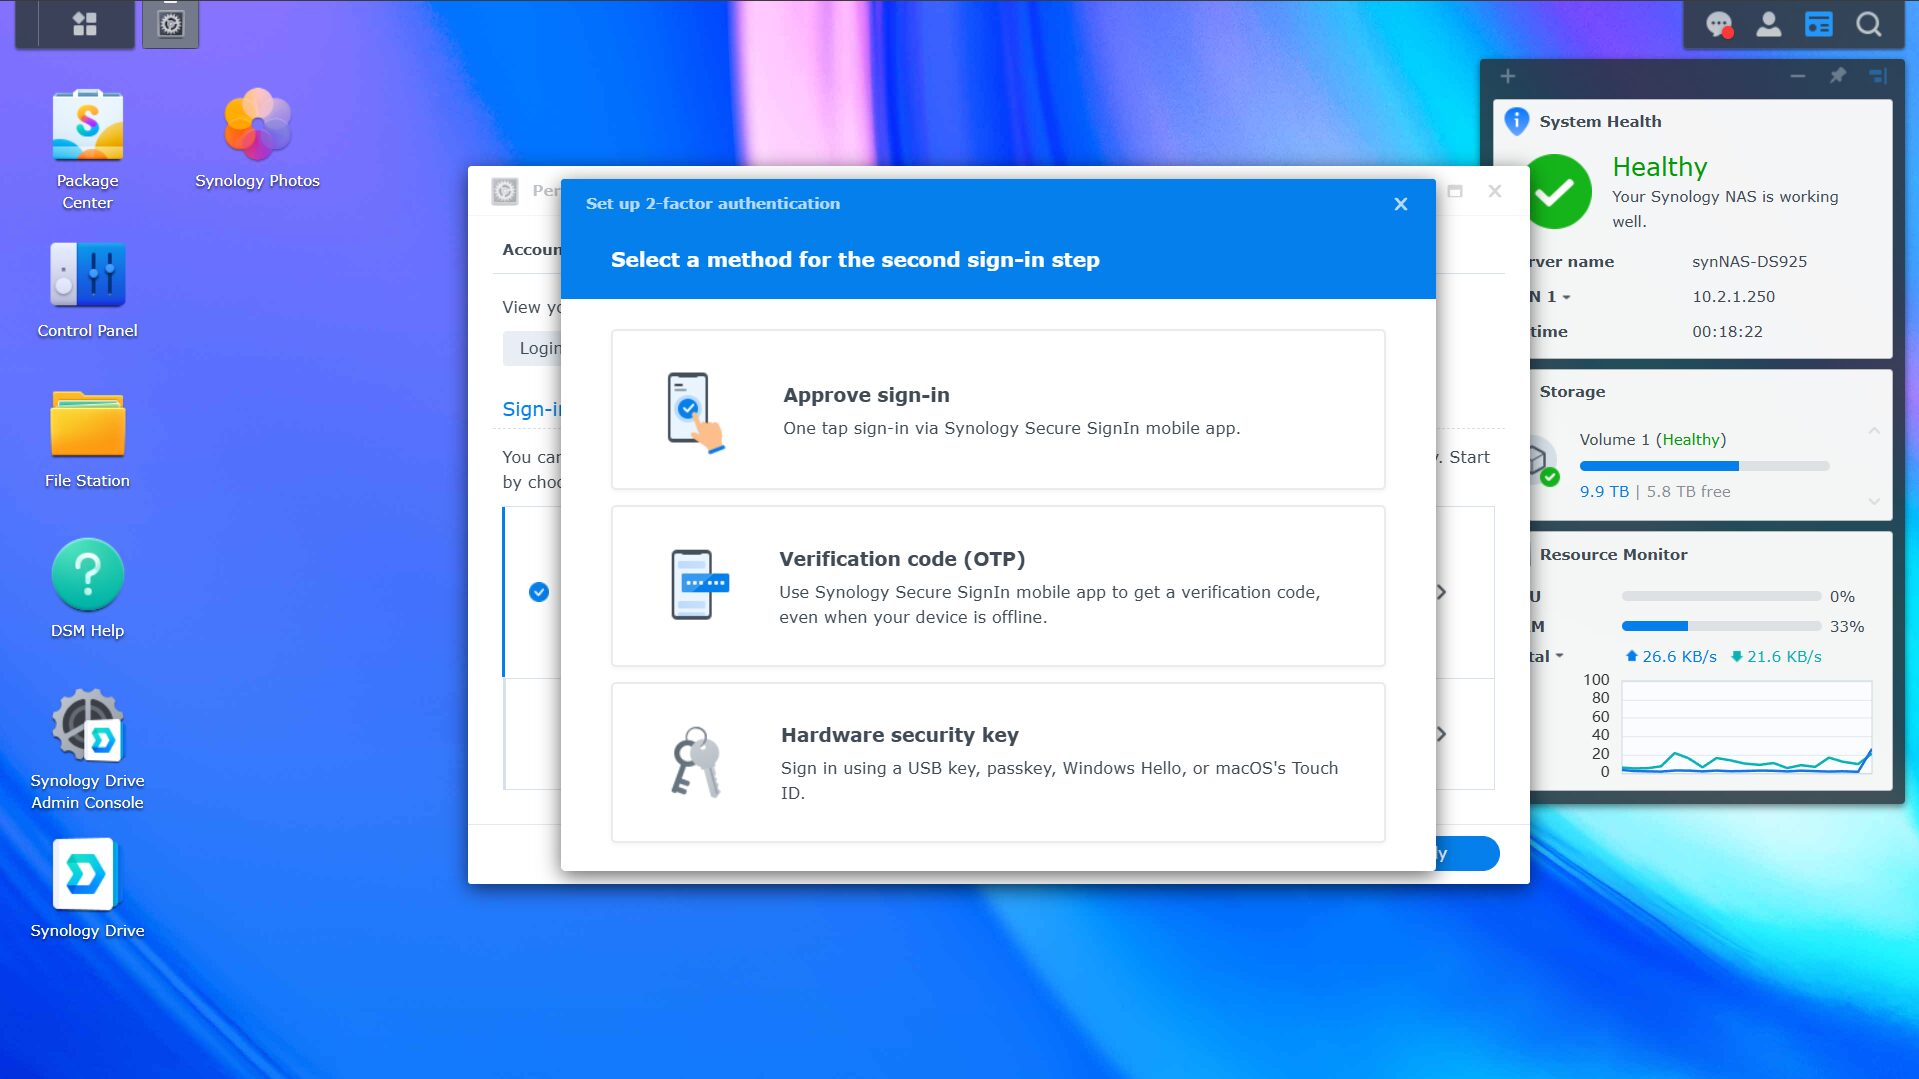
Passkeys are increasingly supported across NAS systems, hypervisors, and other home lab tools. If your service supports them, enable them now. If not, any MFA is better than none.
Quick Recap
None of these are difficult to implement, and none require you to rebuild your entire setup. Here’s the short version:
- Remove unnecessary port forwards, disable UPnP, use a VPN for remote access
- Create VLANs for trusted, IoT, guest, and surveillance — with default deny between them
- Use separate admin and daily accounts, apply minimum permissions everywhere
- Enable immutable snapshots, use separate backup credentials, keep an offsite copy, test restores
- Use a password manager with unique passwords, enable MFA, use passkeys where supported
None of this makes a breach impossible. But it does mean that if something goes wrong, the damage is contained, you know about it sooner, and you can recover.
Frequently Asked Questions
Do I need VLANs if I only have a few devices?
VLANs are more about what those devices are than how many you have. If you have IoT devices or cameras on the same network as your NAS or hypervisor, segmentation is worth doing regardless of device count. The setup overhead is low once your hardware supports it.
Is a zero-trust network better than a VPN for remote access?
It depends on what you need. A VPN gives you access to your whole local network once connected. Zero-trust solutions give you per-application access control and don’t require you to open any inbound ports, but they route traffic through a third party. Neither is universally better; it depends on your threat model and workflow.
What’s the easiest way to start with least privilege if I haven’t done it before?
Pick one system (your NAS is a good starting point) and create a second account with limited access. Use that account for normal day-to-day tasks (file access, media, etc.) and reserve the admin account for configuration changes only. From there, review folder-level permissions and remove anything that’s broader than it needs to be.
What makes immutable snapshots different from regular snapshots?
Regular snapshots can be deleted. Immutable snapshots have a retention lock, so they can’t be modified or removed for the duration of the protection period, even by an admin account. That’s what makes them useful against ransomware specifically.
Are passkeys actually more secure than authenticator apps?
Yes, in most cases. Passkeys are phishing-resistant because they’re bound to a specific site and device. A fake login page can’t capture and replay them the way it can with a one-time code. They’re also more convenient once set up, which means you’re more likely to actually use them.