In this tutorial, we’re going to look at how to set up Synology Cloud Sync.
Synology Cloud Sync is an awesome tool that allows you to sync data from your Synology NAS to a cloud storage location bidirectionally, or by uploading or downloading changes only. This gives you three different options on how you can utilize the service.
I want to be clear that Synology Cloud Sync is a sync tool, and is not a great backup tool. To summarize this as easily as I can, if you open a file that’s synced with Synology Cloud Sync, delete the entire contents of that file and save it, the file will sync to the other location. In this example, you just synced a blank file from the source to the destination and now have two blank files. This is explained in greater detail in the video above.
I recommend you check out our tutorial on Synology Hyper Backup if you’re interested in implementing a backup solution.
How to Set Up Synology Cloud Sync
1. Ensure that Synology Cloud Sync is installed by opening the Package Center, then searching for Cloud Sync. Install it if it’s not already installed, then Open it.

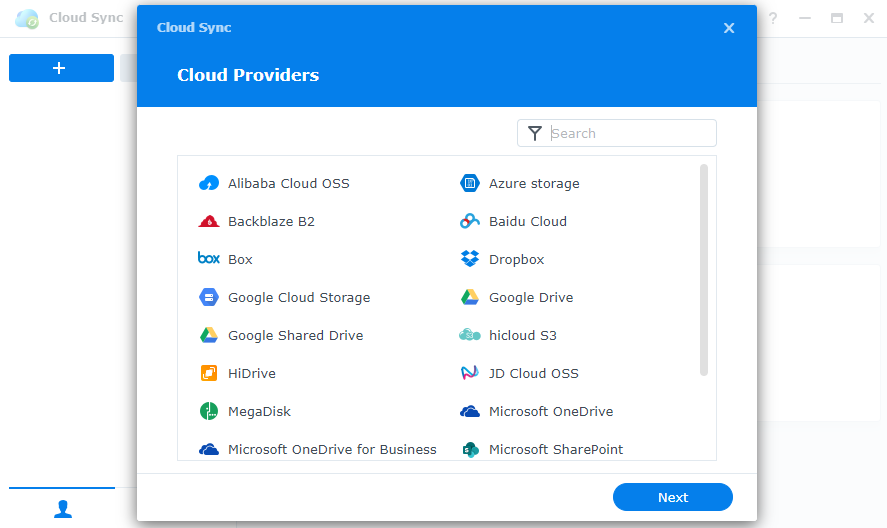
2. When you launch Cloud Sync, a list of cloud providers will appear. There are tons of different providers that you can use and the initial setup will be different for each of them. However, they’ll all function the exact same once they’re configured. In this example, I’ll be using Google Drive, but select the provider you’d like to use and then select Next.
3. At this point, you’ll have to authenticate with the cloud provider. I can’t show this option as it will be different based on the provider that you select, but the steps after this will be the same.
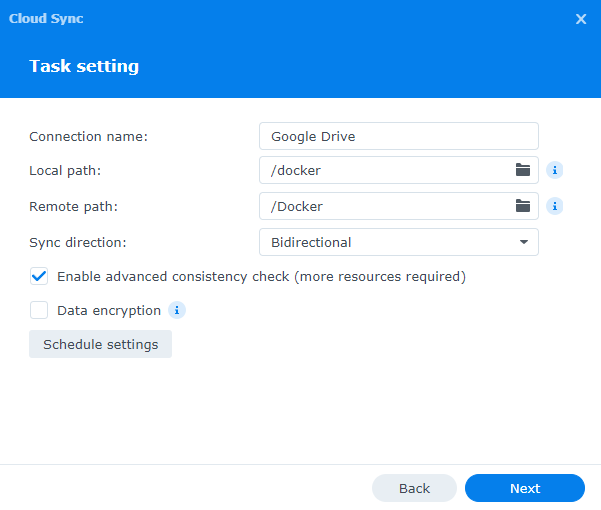
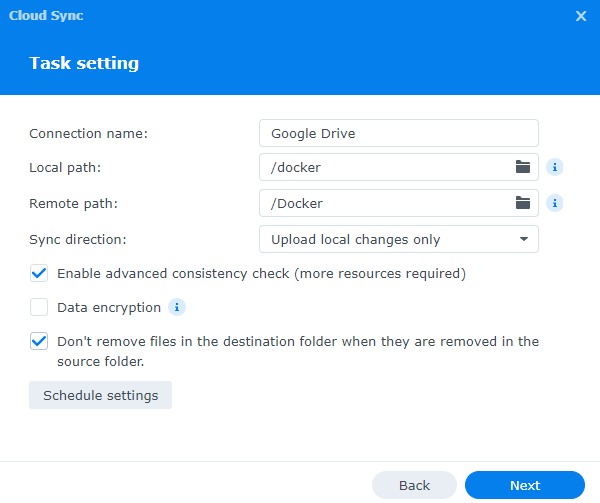
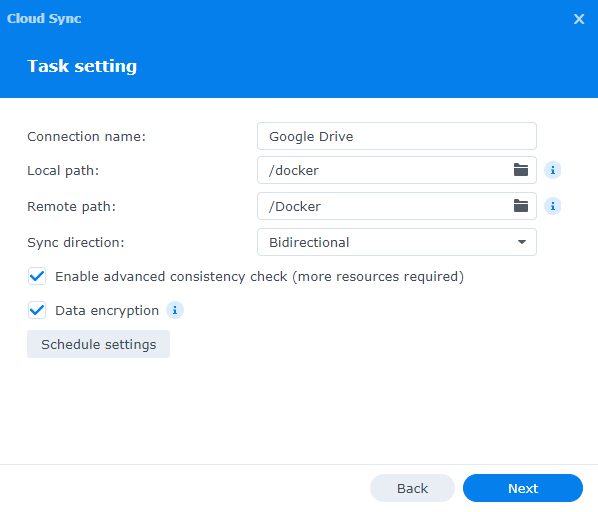
4. Select a Local Path, then a Remote Path. The local path will be the location on your NAS and the remote path will be the location on the cloud server.
NOTE: When data is synced in a bidirectional format, changes to the Synology or the cloud location are automatically synced to the other location. If you download local changes only, the data will sync from the cloud server to the NAS only. Uploading remote changes only will be the opposite (only uploading changes from the NAS to the cloud server).
5. Both download/upload remote changes only have an option to keep files in the destination folder if they’re removed in the source (doesn’t remove files in the destination folder when they are removed in the source folder).
Please keep in mind that this is still not a backup, though a beneficial feature if you’re worried about file removals. The reason is highlighted above, as unintended changes can automatically sync from the source to the cloud server or vice versa. This only protects against file deletion.
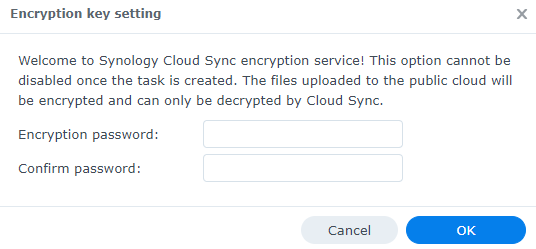
6. Finally, you can enable data encryption if you’d like. Data encryption will ensure that the file syncs from the source to the destination with file encryption.
To be clear, without the encryption password or encryption key (exported after creation), the file cannot be opened from the destination location. This is a great option if you’d like to keep files encrypted in the cloud and unencrypted on the source NAS.
If you ever need to unencrypt files, you can use the Synology Cloud Sync Decryption tool located here.
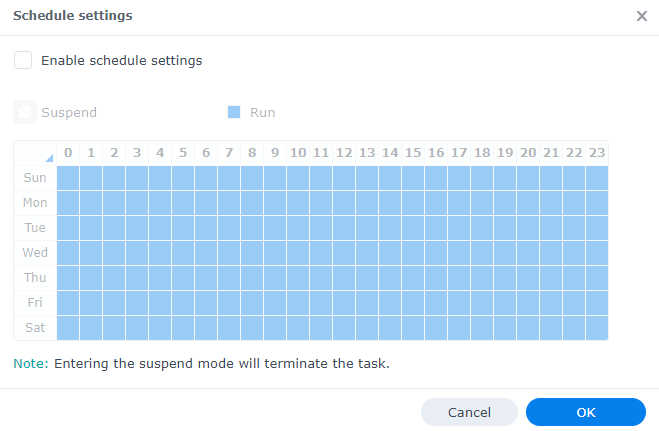
7. If you select Schedule Settings, you can specify the schedule in which this task should run. By default, files will sync immediately, but you can change this to any schedule that you’d like.
8. After all settings have been configured, select Next to create the task. If you enabled Data Encryption, you’ll have to enter an encryption password. The encryption key will be exported after the task has been created, so keep it in a safe location as you might need it one day.
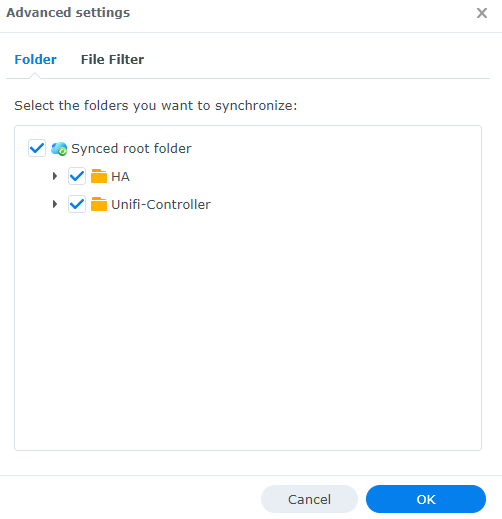
9. At the final summary, you can select Done if you’re complete, or Advanced Settings.

10. The Advanced Settings will allow you to modify the folders that will sync or use the file filter.
11. The task will now create! If you used encryption, the encryption key will automatically download to your PC and the files will start to sync from your NAS to the cloud server.

Automatic 3-2-1 Sync
If you use Synology Cloud Sync with Synology Drive, there’s a pretty easy way to automatically get files from your PC to your NAS, then to the cloud. I’ve used this process for a few years and I absolutely love it. Check out the video below to learn how it works!
Is Cloud Sync a Backup Tool?
As mentioned above, Synology Cloud Sync is a sync tool and not a true backup. This video explains why in detail.
Conclusion & Final Thoughts on Synology Cloud Sync
This tutorial looked at how to set up Synology Cloud Sync. Synology Cloud Sync is an awesome syncing tool, but you need to be aware that it should be used in combination with a backup tool as well like Hyper Backup. Depending on the settings, you can get Synology Cloud Sync to immediately sync your files the second they’re added, updated, or deleted.