GPU passthrough on Proxmox allows you to map a physical PCIe GPU to a virtual machine and use it inside of the VM with near-native performance. In this tutorial, we will look at a beginner’s guide on how to set up GPU Passthrough on Proxmox so that you can pass a GPU to a virtual machine.
Prerequisites for PCIe Passthrough on Proxmox
GPU Passthrough on Proxmox is highly specific to your hardware. In my experience, it’s easiest to get this working with a processor that has integrated graphics. This allows you to pass the GPU through to a VM while maintaining a GPU for the host machine. Without this setup, you can get it working, but it’s going to be harder than with integrated graphics.
Here are a few additional notes I’ve experienced:
- The newer versions of Proxmox seem to work better with PCIe passthrough than the older ones, so I’d consider upgrading if you run into issues and you’re on an older version.
- You must ensure that the Proxmox host does not attempt to use the GPU. This can be as simple as making a BIOS change (and setting the default GPU) or something more challenging like setting up a script in Proxmox to disable the GPU at boot.
- Passing the GPU to the VM and seeing the GPU in the VM does not mean that the process has worked. Until the drivers for the GPU are successfully installed and you see GPU activity, you may run into issues.
- In extreme cases, you may have to add a ROM file for your GPU. In more extreme cases, you may have to patch the ROM file further before adding it.
- If you run into issues, troubleshoot each step one by one because it’s very easy to start randomly changing things, hoping they will work, which can have a severe impact on your ability to actually solve the problem.
Setting Up GPU Passthrough on Proxmox
Follow the steps below, in order, to configure GPU passthrough on Proxmox. This includes turning on IOMMU, so make sure that you have IOMMU enabled in your BIOS before proceeding.
Enabling IOMMU for PCIe Passthrough
1. Ensure that IOMMU is enabled in the BIOS, and then we will enable IOMMU in Proxmox. Run the command below to modify the GRUB bootloader.
nano /etc/default/grub2. Comment out the line below by adding a # in front of it.
#GRUB_CMDLINE_LINUX_DEFAULT="quiet"3. Add a new line and add one of the two lines below, depending on whether you’re using an AMD processor or an Intel Processor.
AMD:
GRUB_CMDLINE_LINUX_DEFAULT="quiet amd_iommu=on"Intel:
GRUB_CMDLINE_LINUX_DEFAULT="quiet intel_iommu=on"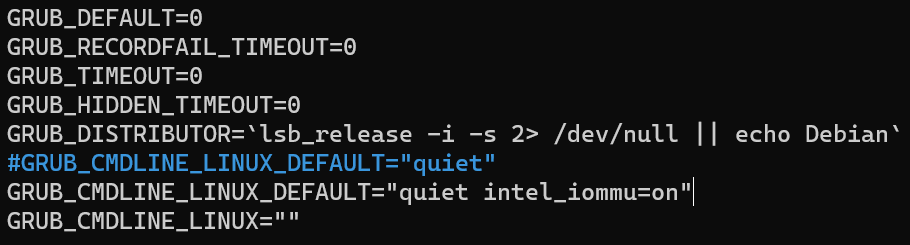
4. Save the file, then run the command below to update GRUB. It will take a few seconds to complete.
update-grub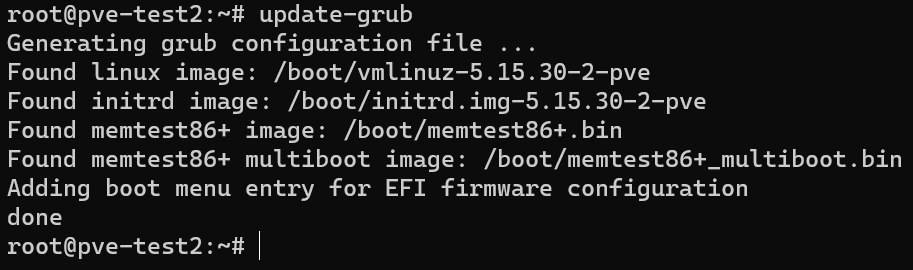
5. Run the command below to edit the modules file and add the required modules.
nano /etc/modulesThis file will be blank, so add the information below, then save the file. VFIO stands for Virtual Function I/O, and they’re kernel modules that we’ll use for the GPU passthrough.
vfio
vfio_iommu_type1
vfio_pci
vfio_virqfd
Configuring IOMMU Isolation if Required (Optional)
Every motherboard will have different IOMMU groups. You might get lucky and have very isolated groups (meaning that each device has its own IOMMU Group), or you might get unlucky and have to try and force it. Before you attempt this, check to see if the GPU has its own IOMMU group.
1. Run the command below to find the GPU, then check the group number for the GPU. In my case, it’s group 16. Please note that there may be two – one for the GPU and one for the audio device for the GPU.
lspci -v
2. Once you have the group number, run the command below to find all of the IOMMU groups. Please note that the group number above was group 16, and in the screenshot below, group 16 only has two total lines – one for the GPU and one for the audio device on the GPU.
find /sys/kernel/iommu_groups/ -type l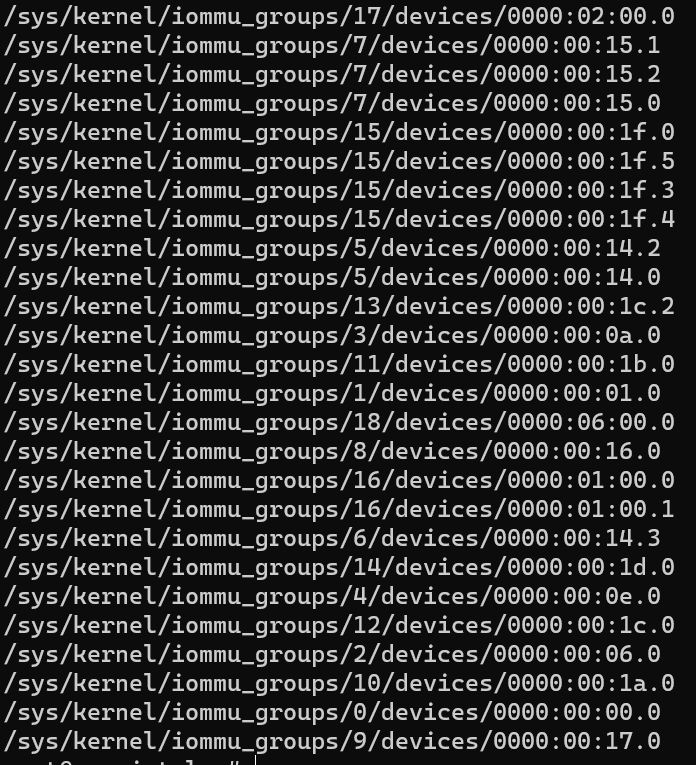
3. Since my GPU doesn’t have any additional devices in the same group, I can proceed. However, if you do notice that the GPU you’re using is in the same group as another device, run the command below to attempt to isolate the device, reboot Proxmox, then run steps one and two above again.
You can also read about IOMMU Interrupt Remapping here.
echo "options vfio_iommu_type1 allow_unsafe_interrupts=1" > /etc/modprobe.d/iommu_unsafe_interrupts.confPassing the GPU Through to the Virtual Machine
After all of the steps above are completed, the actual process for configuring GPU passthrough is complete. However, you must set up a virtual machine to confirm that GPU passthrough is working. In the example below, I am using a Windows VM, but the process should work for any OS (but the driver installation will be different).
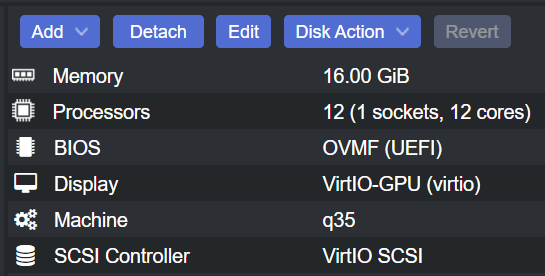
1. Ensure that you’re using q35 as the Machine type and OVMF (UEFI) as the BIOS. Also, make sure that the Memory does not have Ballooning Device enabled.
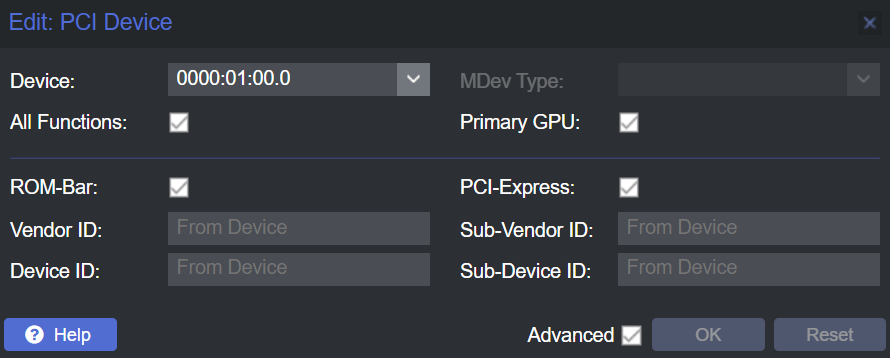
2. After the VM has been set up, add the GPU to the VM by selecting Add, then PCI Device. Ensure that All Functions, ROM-bar, Primary GPU, and PCI-Express are all enabled.
All VMs are different, so you may have to do certain things to access the VM (like enable RDP in Windows) before you can pass through the GPU.
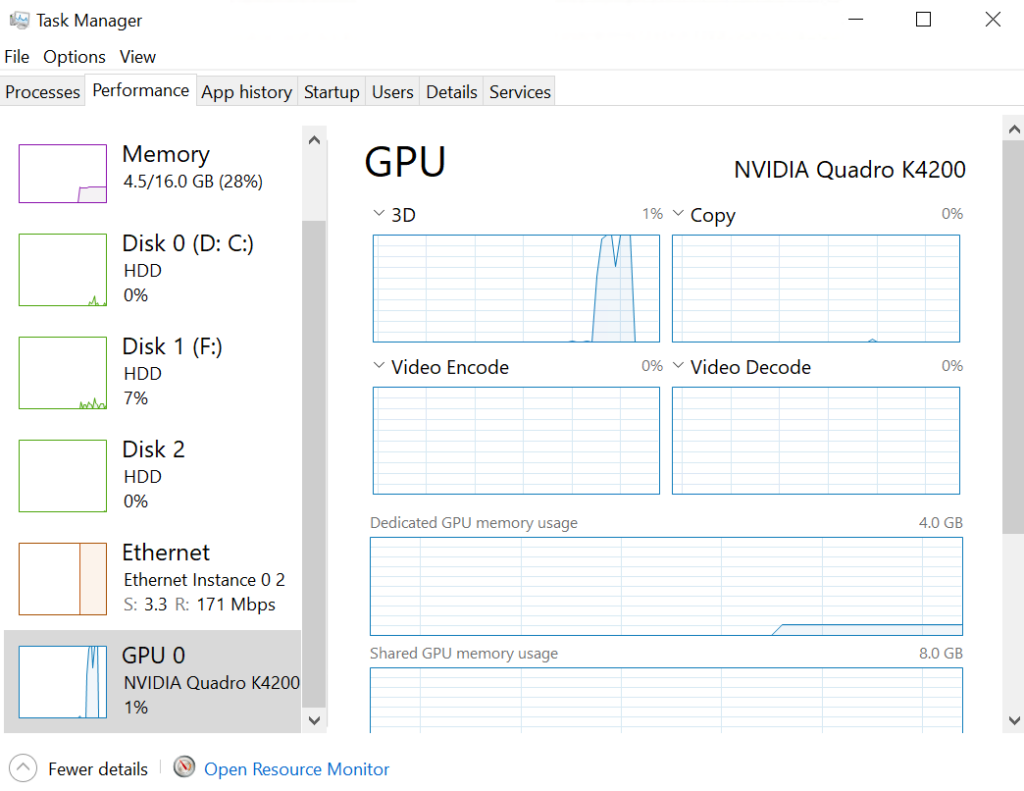
3. Start the VM, then install the GPU drivers! If the drivers install properly, you should be able to see the GPU inside the VM, with activity showing it’s working.
Troubleshooting GPU Passthrough Issues
If the process above didn’t work, you are in the unlucky group that has to make additional changes and/or configurations.
The first thing I would try is to blacklist the GPU drivers so that Proxmox doesn’t attempt to use the GPU. Run the command below, then add the three lines below to the file and save. After making the changes, reboot Proxmox and try again.
nano /etc/modprobe.d/blacklist.confblacklist radeon
blacklist nouveau
blacklist nvidia
If blacklisting the GPU drivers does not work, there are various things that can be causing issues. Start with the troubleshooting steps in the Proxmox documentation, then head over to the Proxmox forums and try and find similar hardware configurations.
Conclusion & Final Thoughts on PCIe Passthrough for GPUs
GPU passthrough is highly specific based on your hardware. Since newer Processors generally have integrated graphics, GPU Passthrough has been fairly straightforward for me recently. However, if you are using a device that does not have integrated graphics, follow the troubleshooting steps above to isolate what can be causing issues.