In this article, we’re going to look at a complete beginner’s guide on how to use Dataview for Obsidian.
By default, Obsidian is a way that you can take notes and tag or link them together. Over time, you’ll gather tons of different types of notes, and using plugins to extract the data can be very helpful. That’s where Dataview will transform your entire Obsidian vault and make retrieving and displaying data significantly easier.
Dataview (along with a few other plugins) really makes Obsidian a serious competitor for tools like Notion which focus on database-like functionality. Without plugins, Obsidian is very note-oriented, but not nearly as powerful.
What is Dataview for Obsidian?
Dataview is a plugin that you can use to turn your vault from a note-only repository to a fully functional database by reading the content and markdown that exists. By installing the plugin and writing different types of queries (directly in an Obsidian note), you can display data dynamically, create lists, and generally structure your notes in any way that you’d like.
The queries can be as simple or complex as you’d like, and the data that’s added in the future will automatically reflect anywhere that a query is written. While it may seem like a small addition, Dataview truly does allow you to structure your notes in a database-like way.
How to Install Dataview for Obsidian
Follow the instructions below to install Dataview for Obsidian.
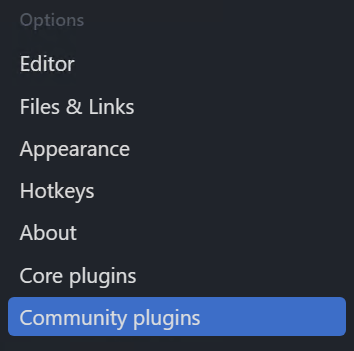
1. Select the Settings icon (gear in the bottom left), then Community Plugins.
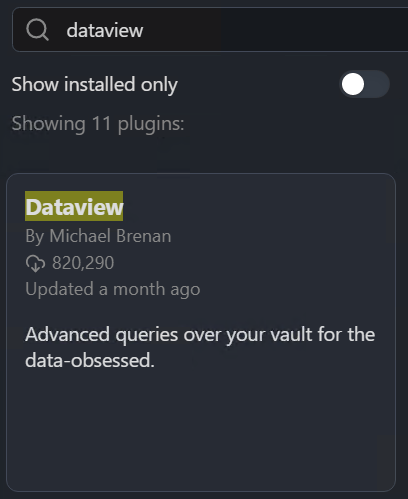
2. Ensure that Restricted Mode is turned off, then select Browse under Community Plugins.

3. Search for and select Dataview.
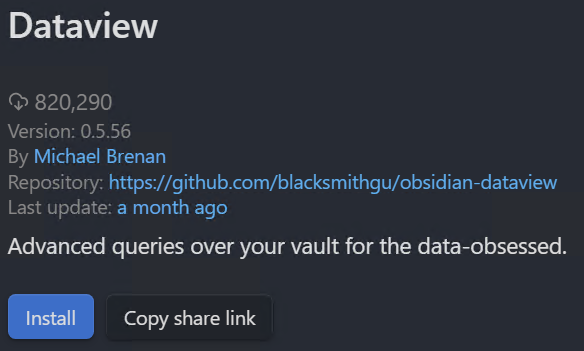
4. Select Install, then Enable to install the Dataview plugin.
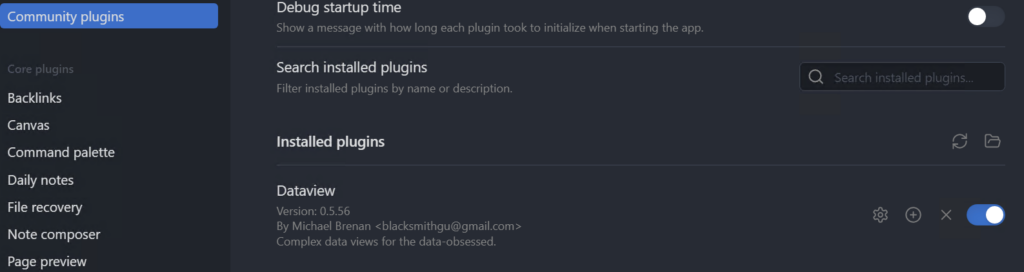
5. In the Community Plugins section, ensure that Dataview is Enabled, and it will be functional! You can now start creating queries!
Display Formats in Dataview
The data that you extract from Obsidian can be a table, list, task, or calendar. This is important to remember because the format you use will determine how the data is displayed.
I will use four different examples below to show how the data is displayed with notes in Dataview.
Table Format
```dataviewtable
```
List Format
```dataviewlist
```
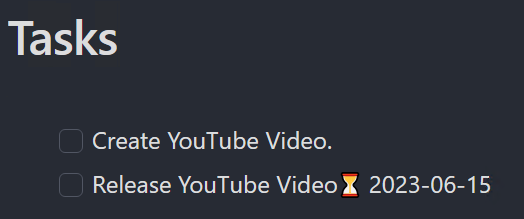
Task View
NOTE: Please keep in mind that active tasks must be created in Obsidian first, but if they are, you’ll have full task management features!
```dataview

task

```
Calendar
It is possible to create calendar queries as well by following the format below.
```dataview
calendar
 ```
Creating Queries with Dataview in Obsidian
Now that Dataview is installed, enabled, and the display formats are clear, you can create queries to pull data from your other notes. Queries are created using the Dataview Query Language (DQL), which has similar, but different syntax from SQL queries (which many people are familiar with).
To be entirely clear, you can create very powerful queries, but the information below can really only be used for reference purposes as you’ll have to modify the query based on the data you’re trying to retrieve.
I highly suggest that you view the Dataview documentation to learn about all of the different types of queries that can be created.
Please remember that a good query can use everything below in one way or another. As mentioned above, I cannot create specific queries as everyone has different notes, but the general information below should help construct your own query.
Frontmatter: Dataview Obsidian
Using metadata is an extremely powerful way of limiting notes and is very easy to implement. In summary, Frontmatter allows you to create YAML metadata at the top of any note that can be used in queries to limit results.
The format is below, but in summary, you’ll add three “-” symbols, then the metadata values you’d like to use (formatted with the metadata name and then metadata value), then three more “-” symbols.
---
MetadataName: MetadataValue
---
Pulling Data From a Specific Location: Obsidian Dataview
As shown above, the standard queries will pull everything, but you generally want to limit data. In order to do that, you can use a FROM statement which will narrow down the query to a specific note or tag.
Using the example below, the data will display everything in our Plex tag.
```dataviewlist from #Plex ```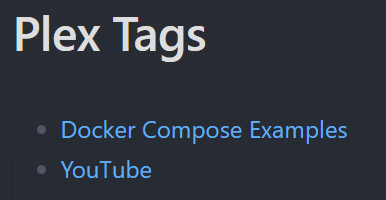
Next, you can limit it down to an individual note if desired (add the note name in between double quotes).
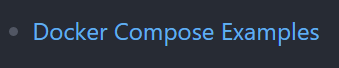
```dataviewlist from "Docker Compose Examples"```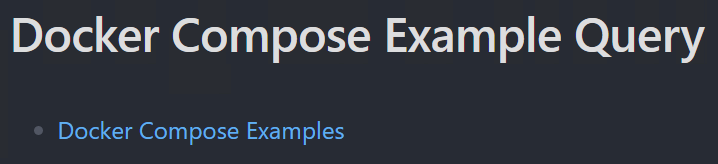
Using AND/OR Commands
The data that’s retrieved from a specific location can be altered by using AND/OR. This means that you can pull data from multiple notes by concatenating them together with AND/OR.
```dataviewlist from "YouTube" and "Website"``````dataviewlist from "YouTube" or "Website"```Depending on the query, AND/OR (or potentially both, with parentheses) can be used.
Using Filter Commands
Now that the data is retrieved, you can limit it by using WHERE statements. You can also SORT or GROUP BY on data to display it in more helpful ways.
A WHERE statement will allow you to use metadata values to limit results (file.name is used to retrieve a note).
```dataviewlist
where file.name = "Docker Compose Example Query"```
If you’re using Frontmatter, you can utilize metadata values to limit results:
```dataviewlist
where MetadataName = "MetadataValue"```
You can also SORT (ascending or descending), or GROUP BY the values as well.
```dataviewlist
sort MetadataName asc``````dataviewlist
group by MetadataName```There are a ton of different things you can do with filtering data, and I’d really recommend looking at the documentation because there are various examples that can be used to create your own individual queries.
JavaScript Queries
If the default Dataview queries above don’t provide the information that you’re looking for, you can create JavaScript queries as well. JavScript queries will execute code using the Dataview JavaScript API. This allows you to write DataviewJS code directly in the inline editor.
```dataviewjs```The Codeblock Reference will provide all of the information you’re looking for to write these queries. There are a few important notes that must be mentioned when discussing JavaScript queries in Dataview:
- JavaScript queries are more powerful than regular Dataview queries (using DQL) as you’ll have full access to the JavaScript API that Dataview uses.
- JavaScript queries will execute at the same level of permission as other Obsidian plugins. This is a good and bad thing, because it makes these queries very powerful, but also means they have more permission than usual.
- The Dataview documentation goes further into this, but always make sure you trust the script you’re running (if you found it online) and if possible, write your own.
Conclusion: Dataview for Obsidian
Obsidian is powerful in its own right, but when you add Dataview for Obsidian, you’re really opening yourself up to creating various types of dynamic lists, tasks, tables, or calendars. With that added functionality, Obsidian turns into a legitimate Notion competitor because you’re able to display various types of data dynamically without having to continuously filter/edit lists.
I’d highly suggest looking at the Dataview for Obsidian documentation because there is a ton of information there with various examples, but I’m hoping that this overview helped explain some of the functionality.
Thanks for checking out the tutorial on Dataview for Obsidian. If you have any questions on Dataview for Obsidian, please leave them in the comments!