Most people build a home lab to learn, host services, or just have something to tinker with. Security usually comes last, if at all. The problem I always see is that the longer you run a lab without thinking about it, the more quietly exposed it becomes — open ports you forgot about, accounts with broad permissions, no recovery plan if something goes wrong. These five changes aren’t theoretical. They’re practical, and they’re implementable without turning security into a full-time job, and they make a real difference.
A quick note before getting into it: security is never a finished state. What’s here is solid general guidance for home labs, but you should always test in your own environment and use your own judgment.
Stop Exposing Services to the Internet
This is the most obvious one, and also the one most people get wrong. Exposed admin portals are the number one avoidable mistake in home lab setups. Nothing that doesn’t need to be accessible outside your local network should be. That means auditing your port forwards and deleting or disabling anything you don’t actively need.
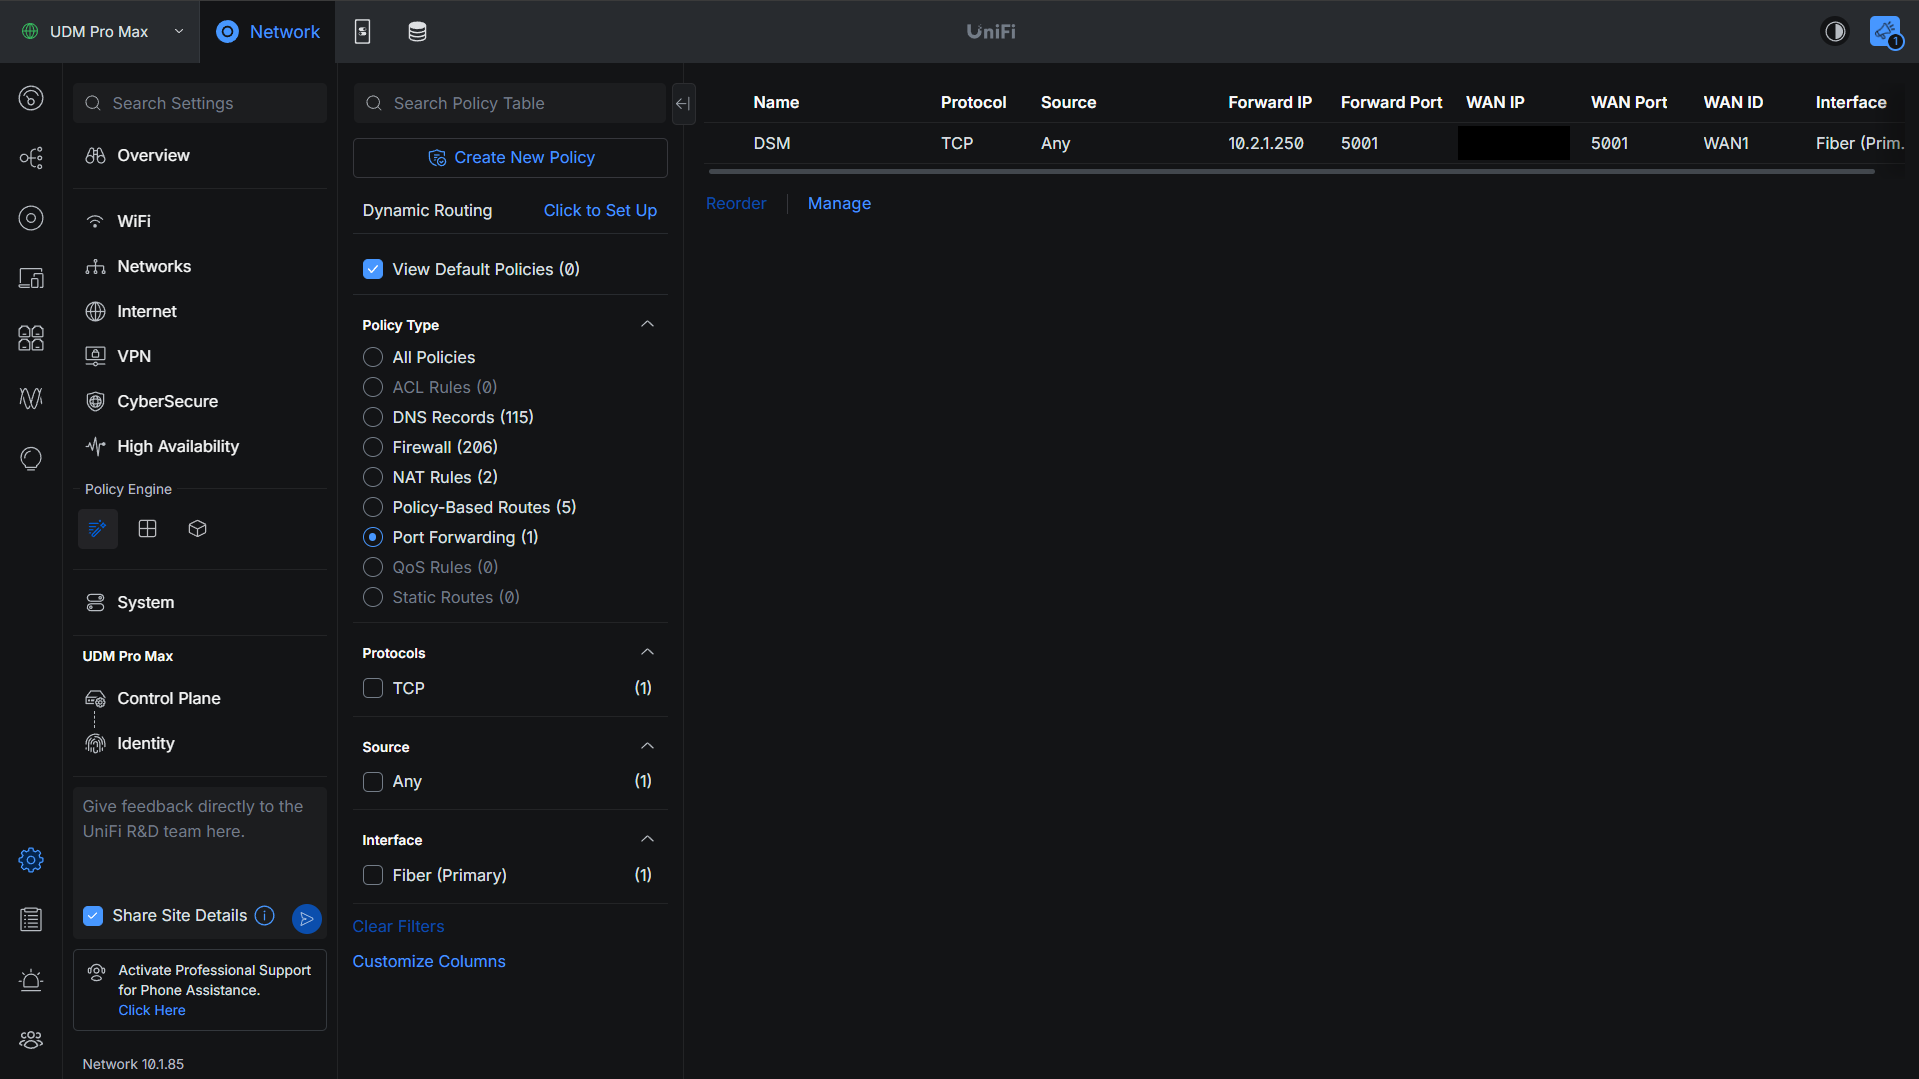
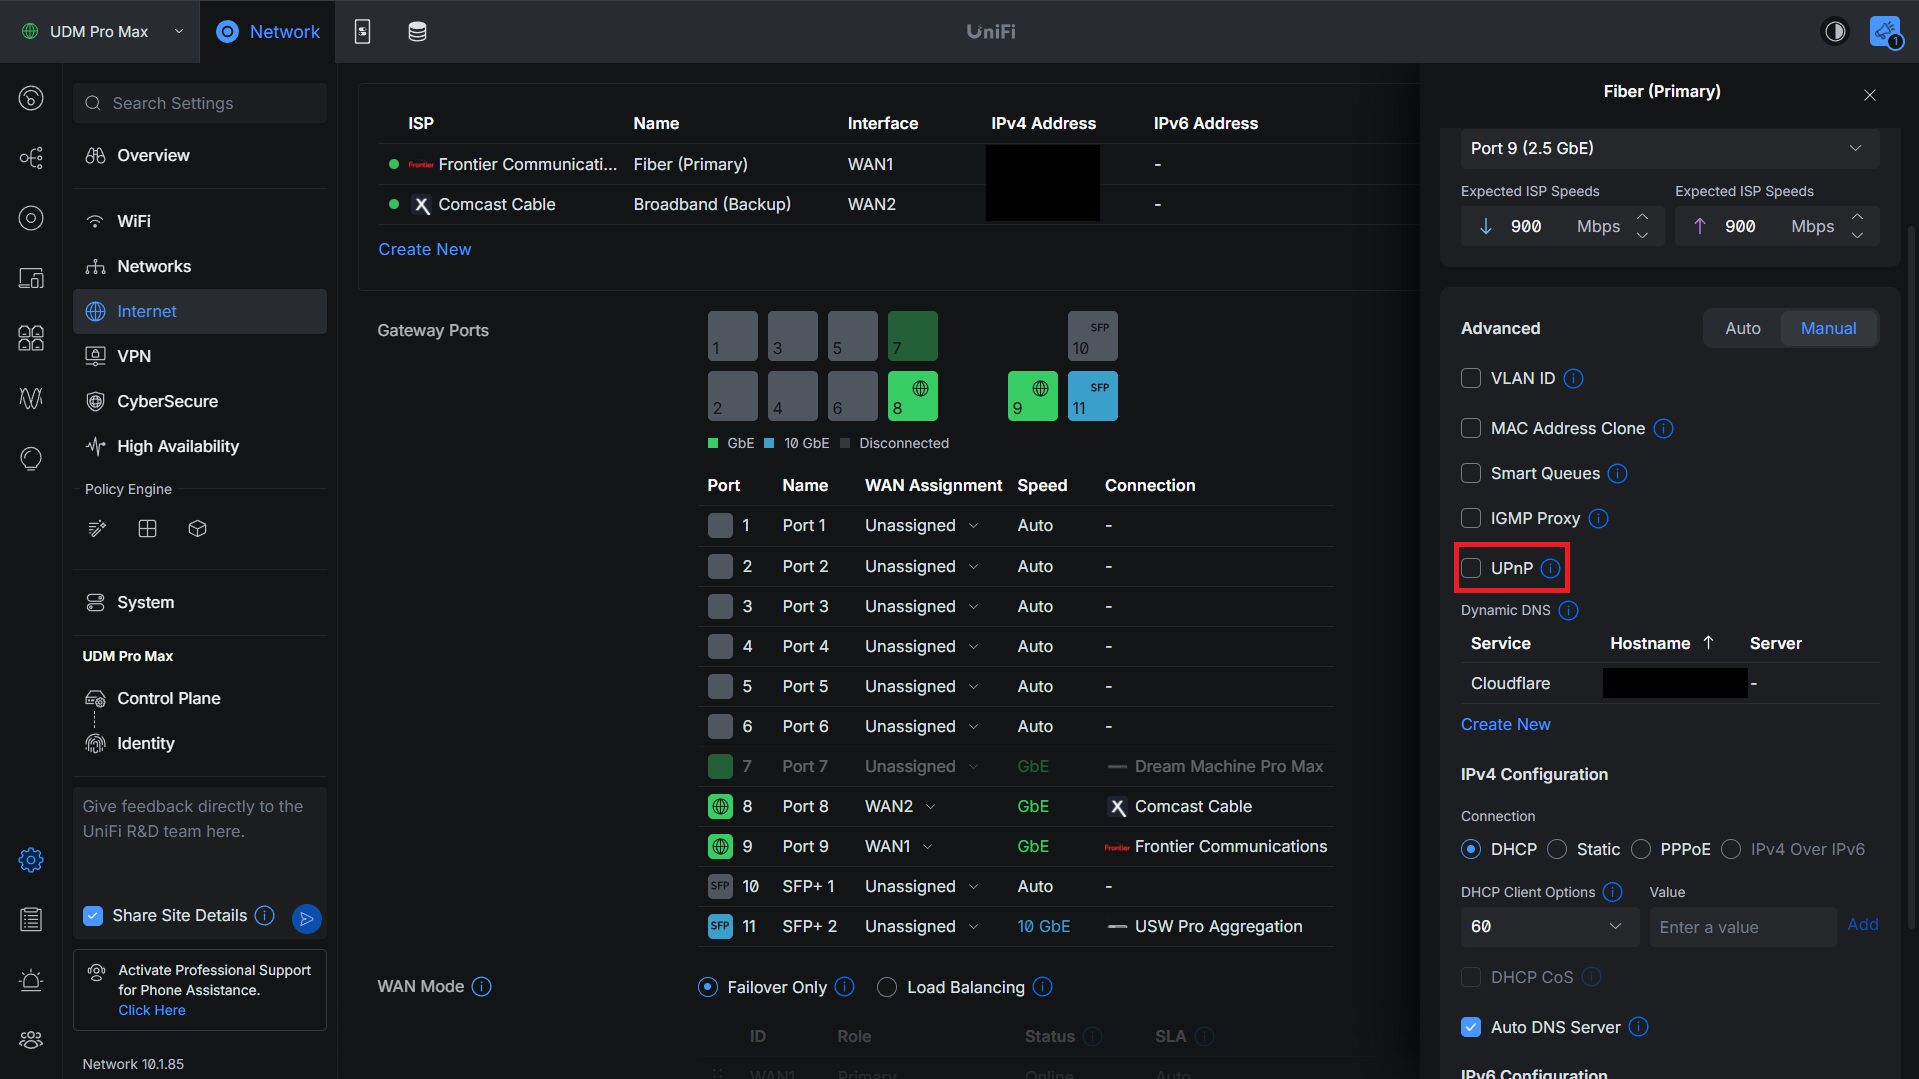
One thing worth checking: devices like a NAS can sometimes set up port forwards on your behalf using UPnP without you ever explicitly configuring them. You might have open ports you’re not even aware of. Go through your router, disable UPnP where you can, and verify what’s actually exposed.
The safest way to access internal services remotely is through a VPN. If you want something with lower friction, a zero-trust network is worth looking at — tools like Twingate put you in a position where you’re granting exactly the access needed, nothing more.
A traditional VPN adds an extra layer on top of whatever you’re accessing, and if you do have to forward something, make sure you’re following solid practices: two-factor authentication, firewall rules limiting exposure as much as possible, and patches applied quickly. Check out WG-Easy for a straightforward WireGuard setup if you want a VPN that’s not complicated to run.
Segment Your Network with VLANs
VLANs exist for exactly this scenario: assume something gets compromised, and make sure it can’t reach everything else. If a camera or IoT device gets popped and it’s sitting on the same flat network as your NAS with all your data on it, that’s a bad day. If it’s on its own VLAN with firewall rules blocking it from talking to anything sensitive, the blast radius is contained.
The baseline I’d recommend for most home labs is four VLANs: trusted devices, guest devices, cameras, and IoT/surveillance. Those four categories cover the things you want completely isolated from each other.
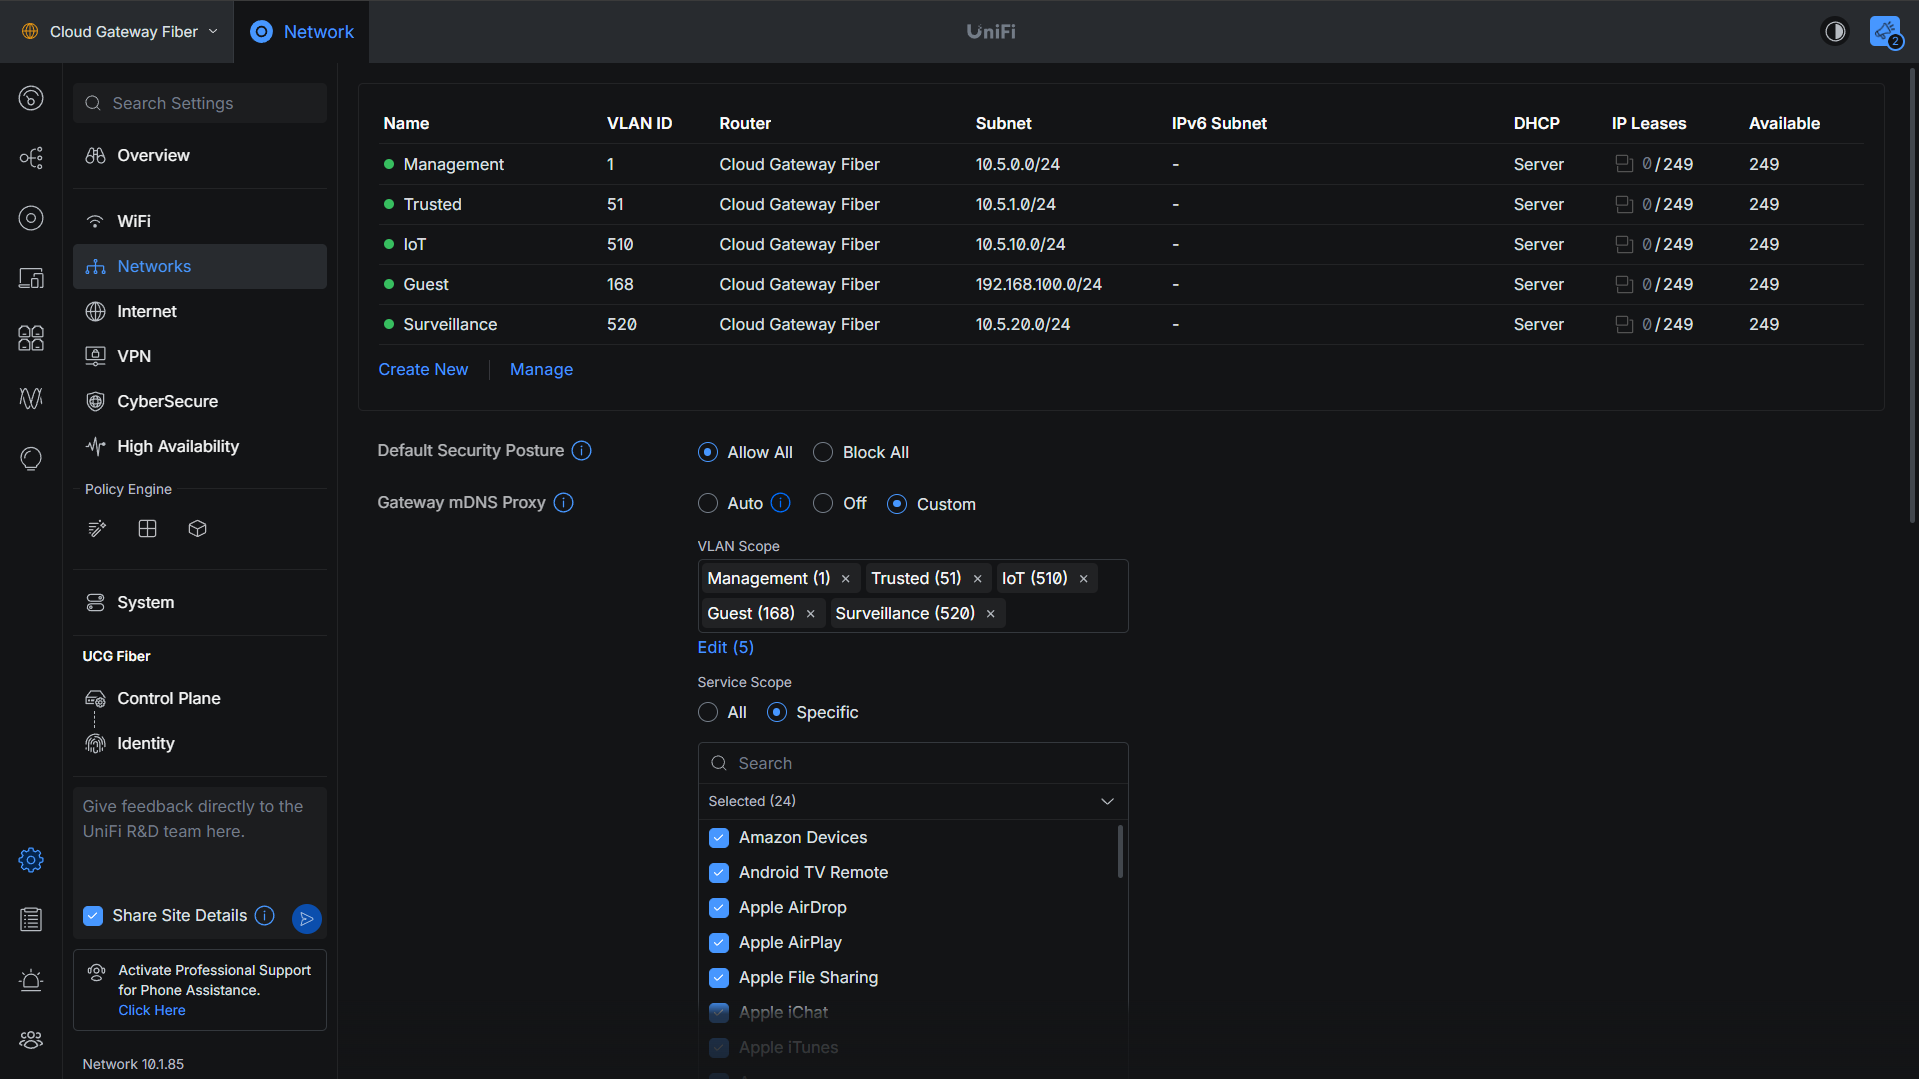
The key part people skip is the firewall rules — VLANs without inter-VLAN deny rules don’t actually do anything. Your router or firewall needs rules in place that deny traffic between those VLANs by default. The exception is when you deliberately need to punch a hole — allowing a specific device to talk to a specific service — rather than opening up full VLAN-to-VLAN communication.

Apply Least Privilege Everywhere
Breaches are bad. Breaches where a compromised account can reach everything are catastrophic. The principle here is simple: accounts should only have access to exactly what they need, nothing more. In practice, that means having a dedicated admin account for managing your NAS or console, and a separate regular account for day-to-day use like SMB shares. If the regular account gets compromised, it can’t touch anything it doesn’t have permission to.
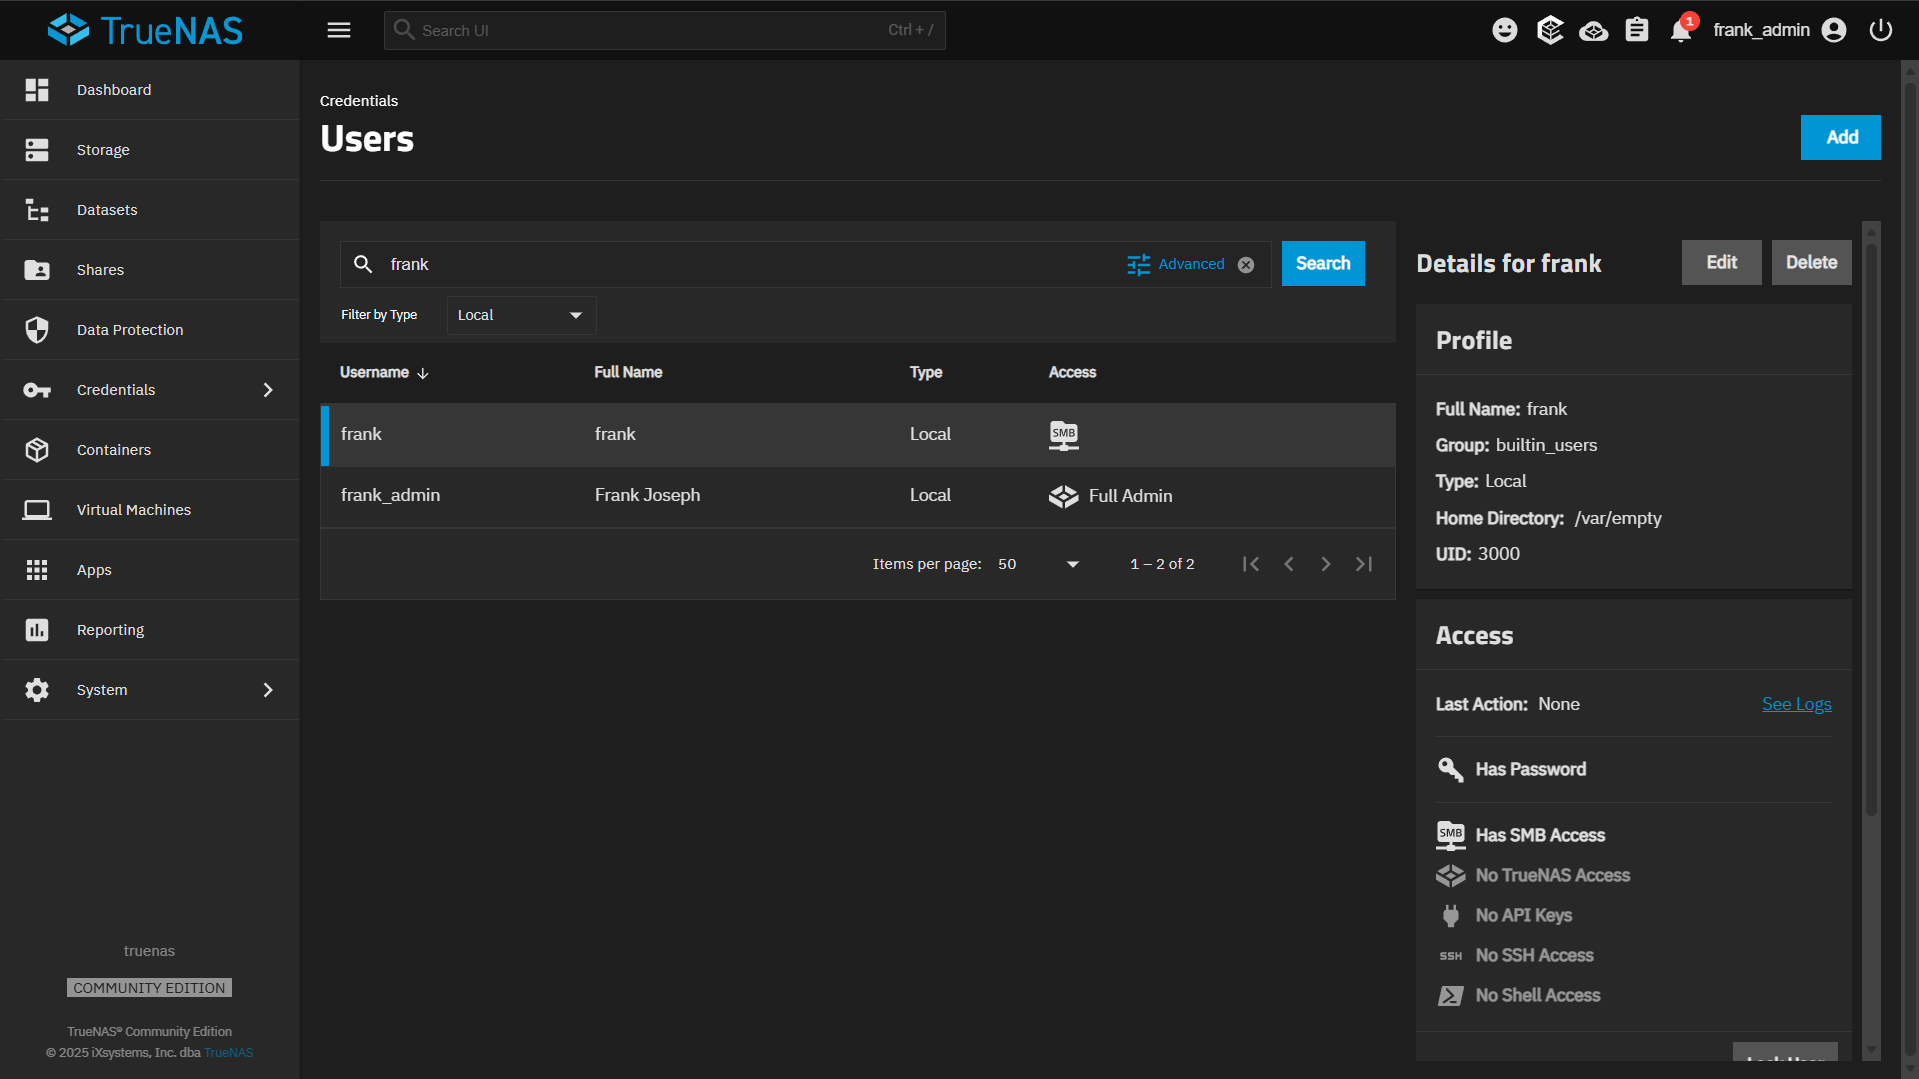
The same logic applies to folder permissions — if a specific person needs access to one folder, give them that folder. Don’t give them broad read access across the whole share just because it’s easier to set up. Go through and verify that permissions reflect what users actually need, and deny everything else by default.
This extends to Docker containers too. Don’t run containers as root. Configure each container to only access the resources and paths it actually needs. The goal is simple: if an account or container gets compromised, the blast radius should be as small as possible. Limiting permissions is how you make that happen.
Build a Recovery Plan That Survives Ransomware
Ransomware attacks are rampant, and the whole point of ransomware is to destroy your recovery points before you notice. If your backups are reachable from the same credentials as your primary data, they’re not safe. A few things make a real difference here.
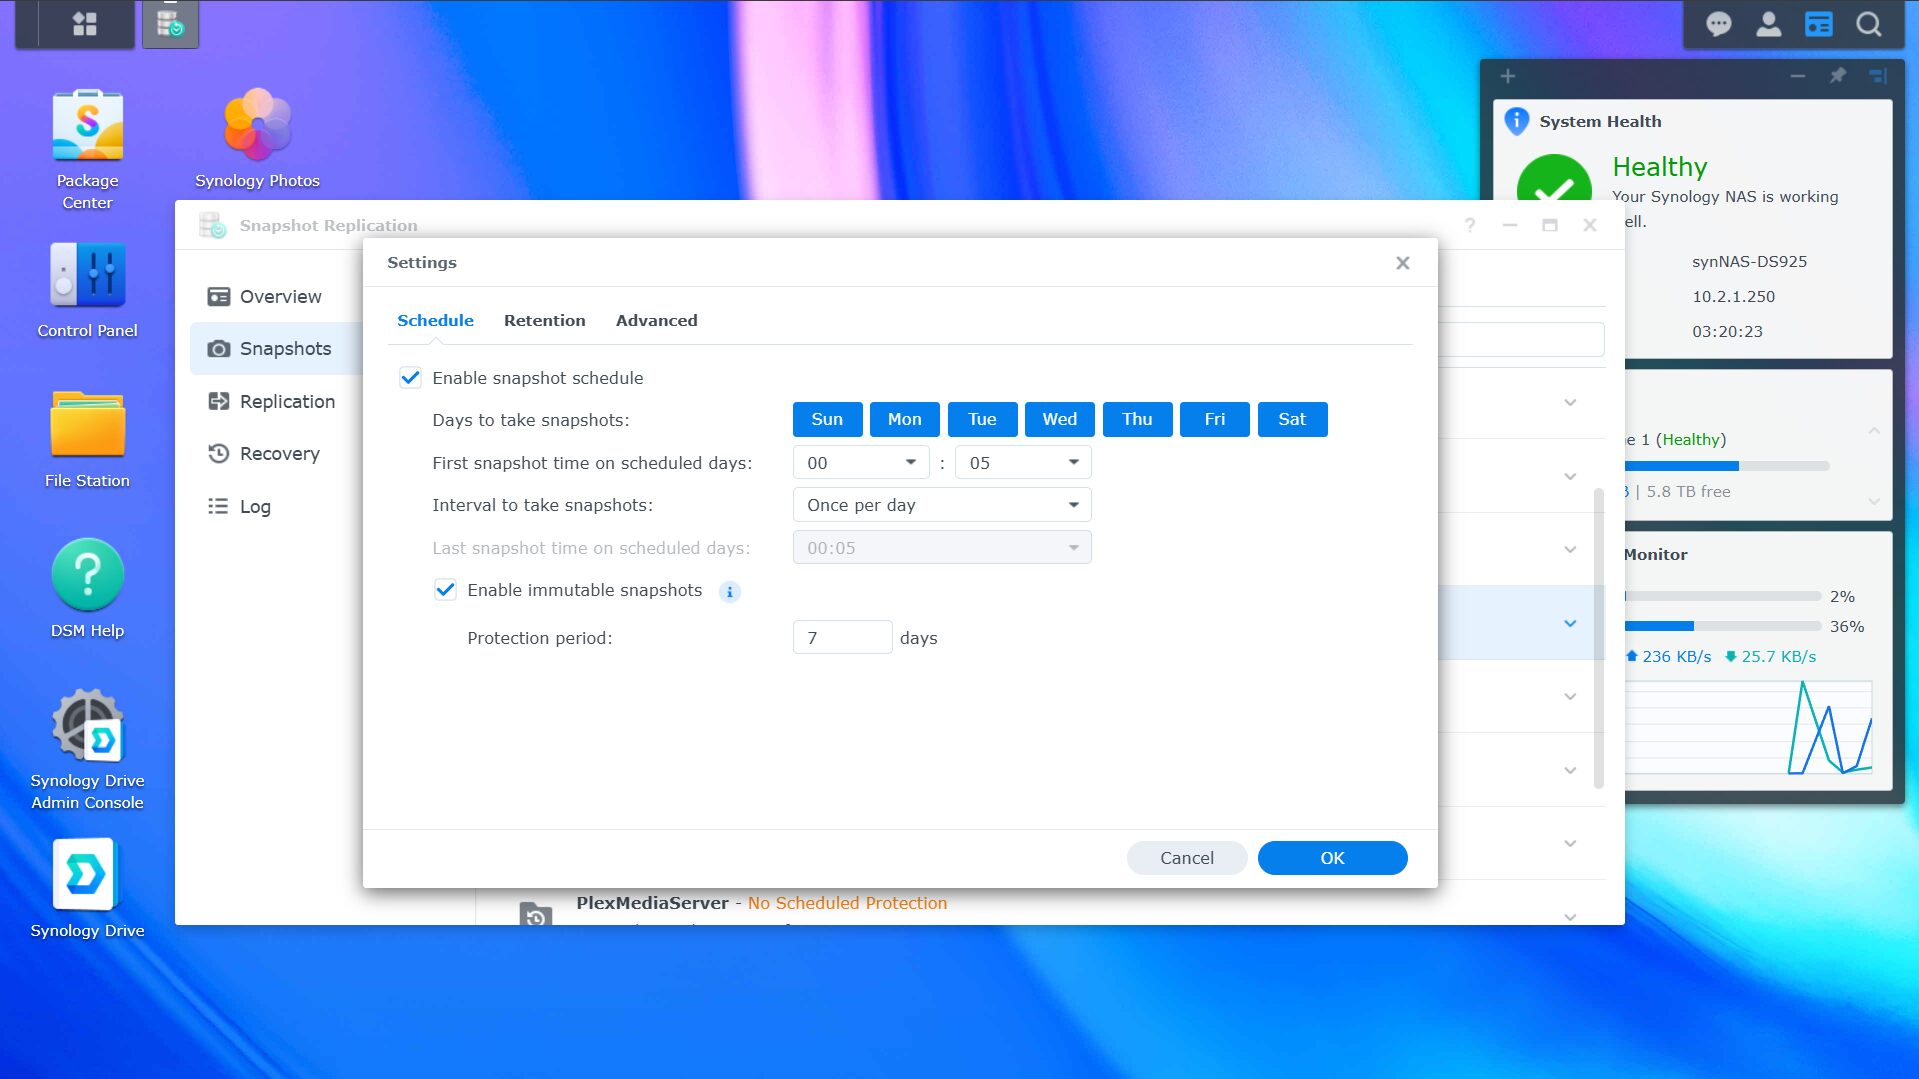
First, use snapshots where your system supports them, and enable immutability or retention locks so snapshots can’t be deleted.
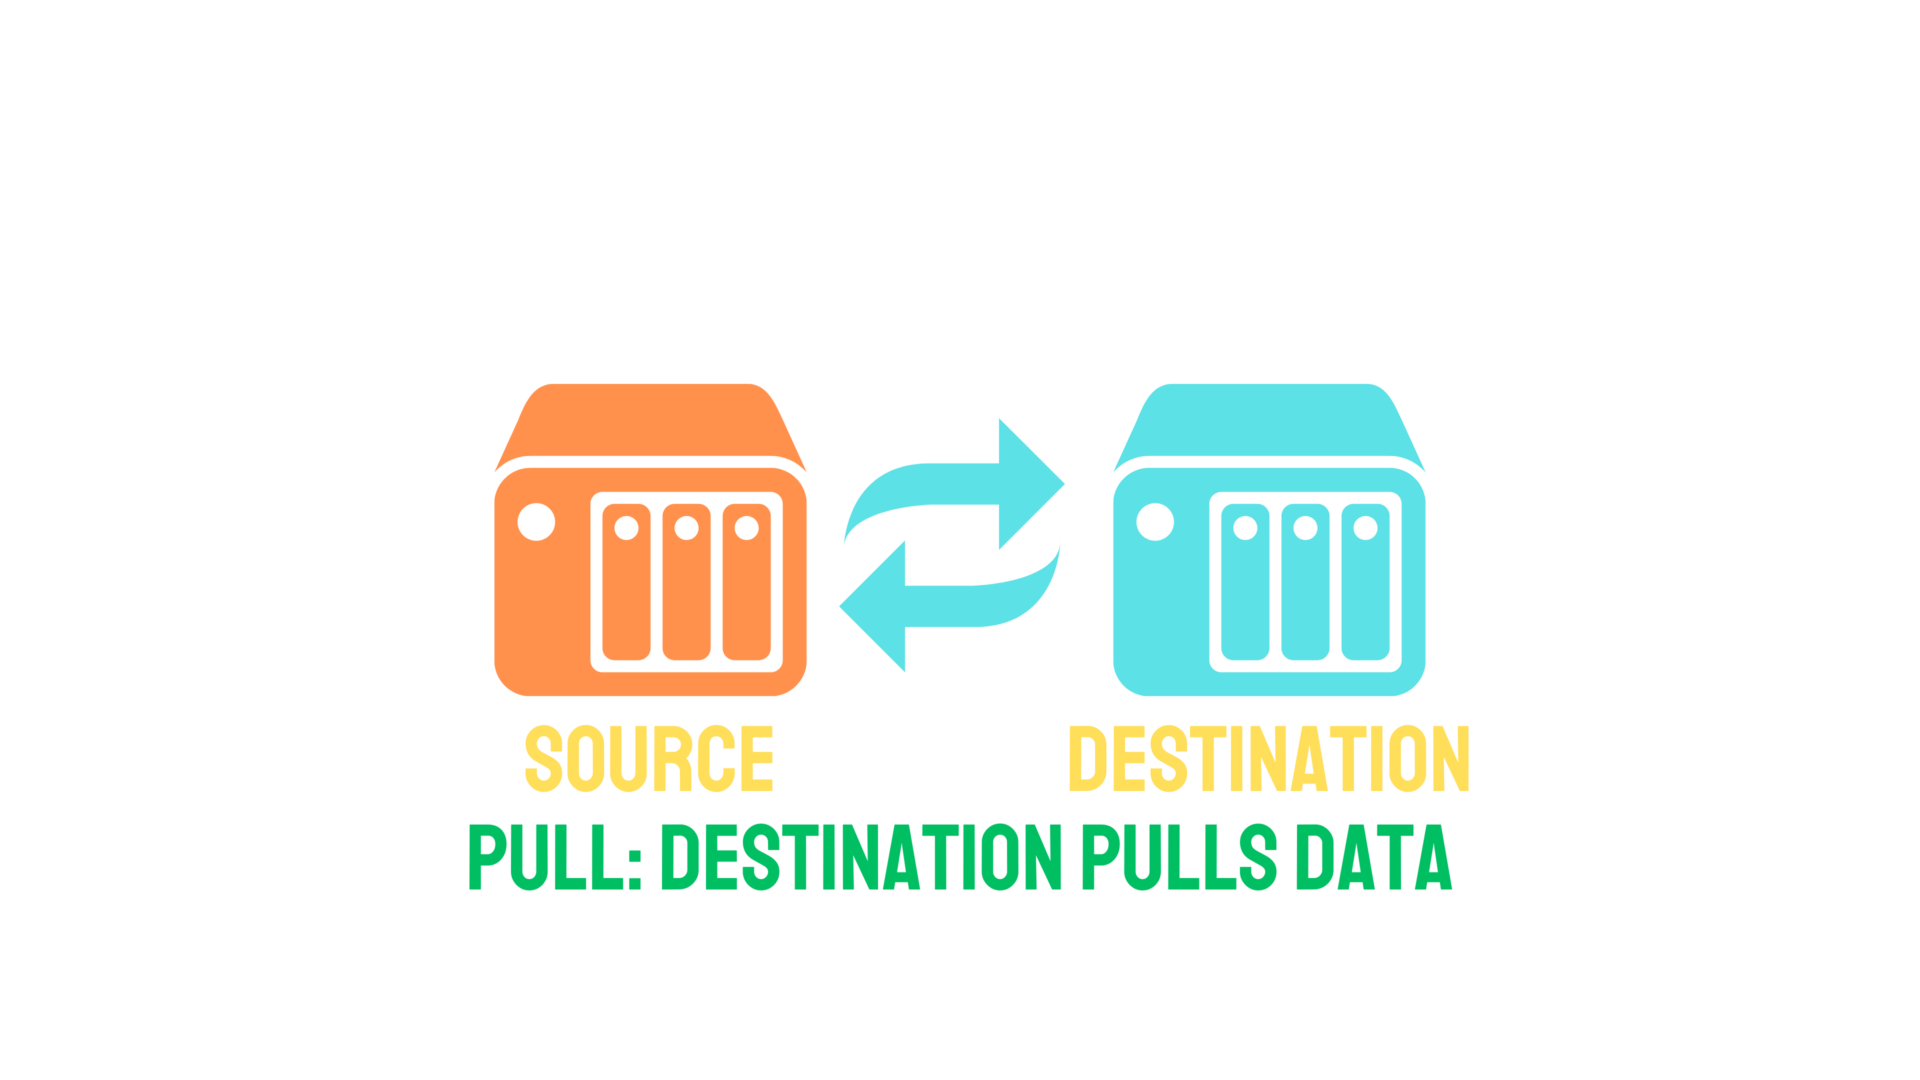
Second, set up your backup replication to pull rather than push where possible. If your secondary NAS is pulling data from the primary, the primary doesn’t have credentials to the secondary — so if the primary is compromised, the attacker can’t reach the backup destination.
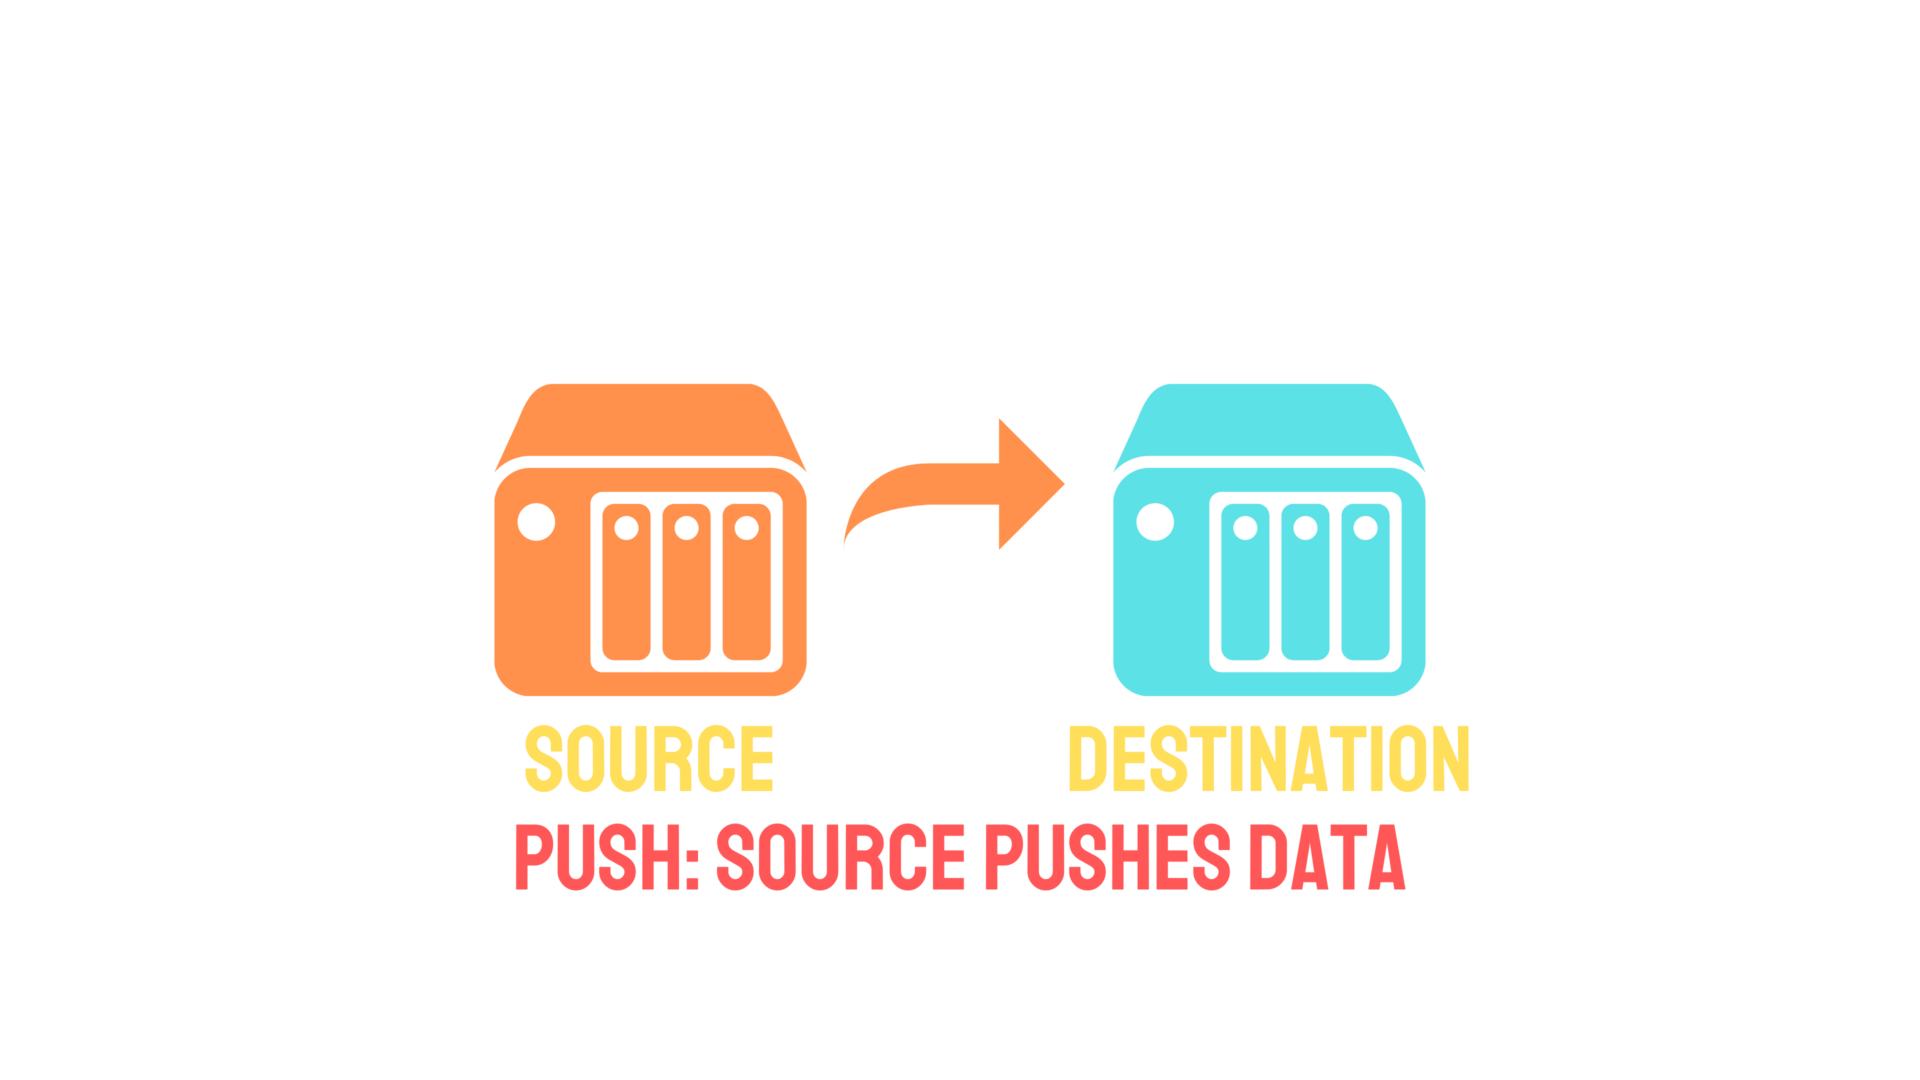
If you’re pushing backups, the credentials to the destination exist on the source, which means a compromised source can potentially wipe the backup too.
An off-site copy matters as well. Backing up to a cloud location or a physically separate site means that even if your entire local setup is hit, you have a clean restore point somewhere else. If you’re running a Synology NAS, the Synology security best practices guide covers a lot of the NAS-specific backup and hardening steps worth implementing.
Use a Password Manager and Replace Passwords with Passkeys
Every service should have a unique password and, ideally, a unique username. If you’re reusing credentials across services and one of those services gets breached, every other service using those same credentials is now exposed. A password manager solves this — you get one place to manage everything, and generating unique credentials for each service becomes the default.
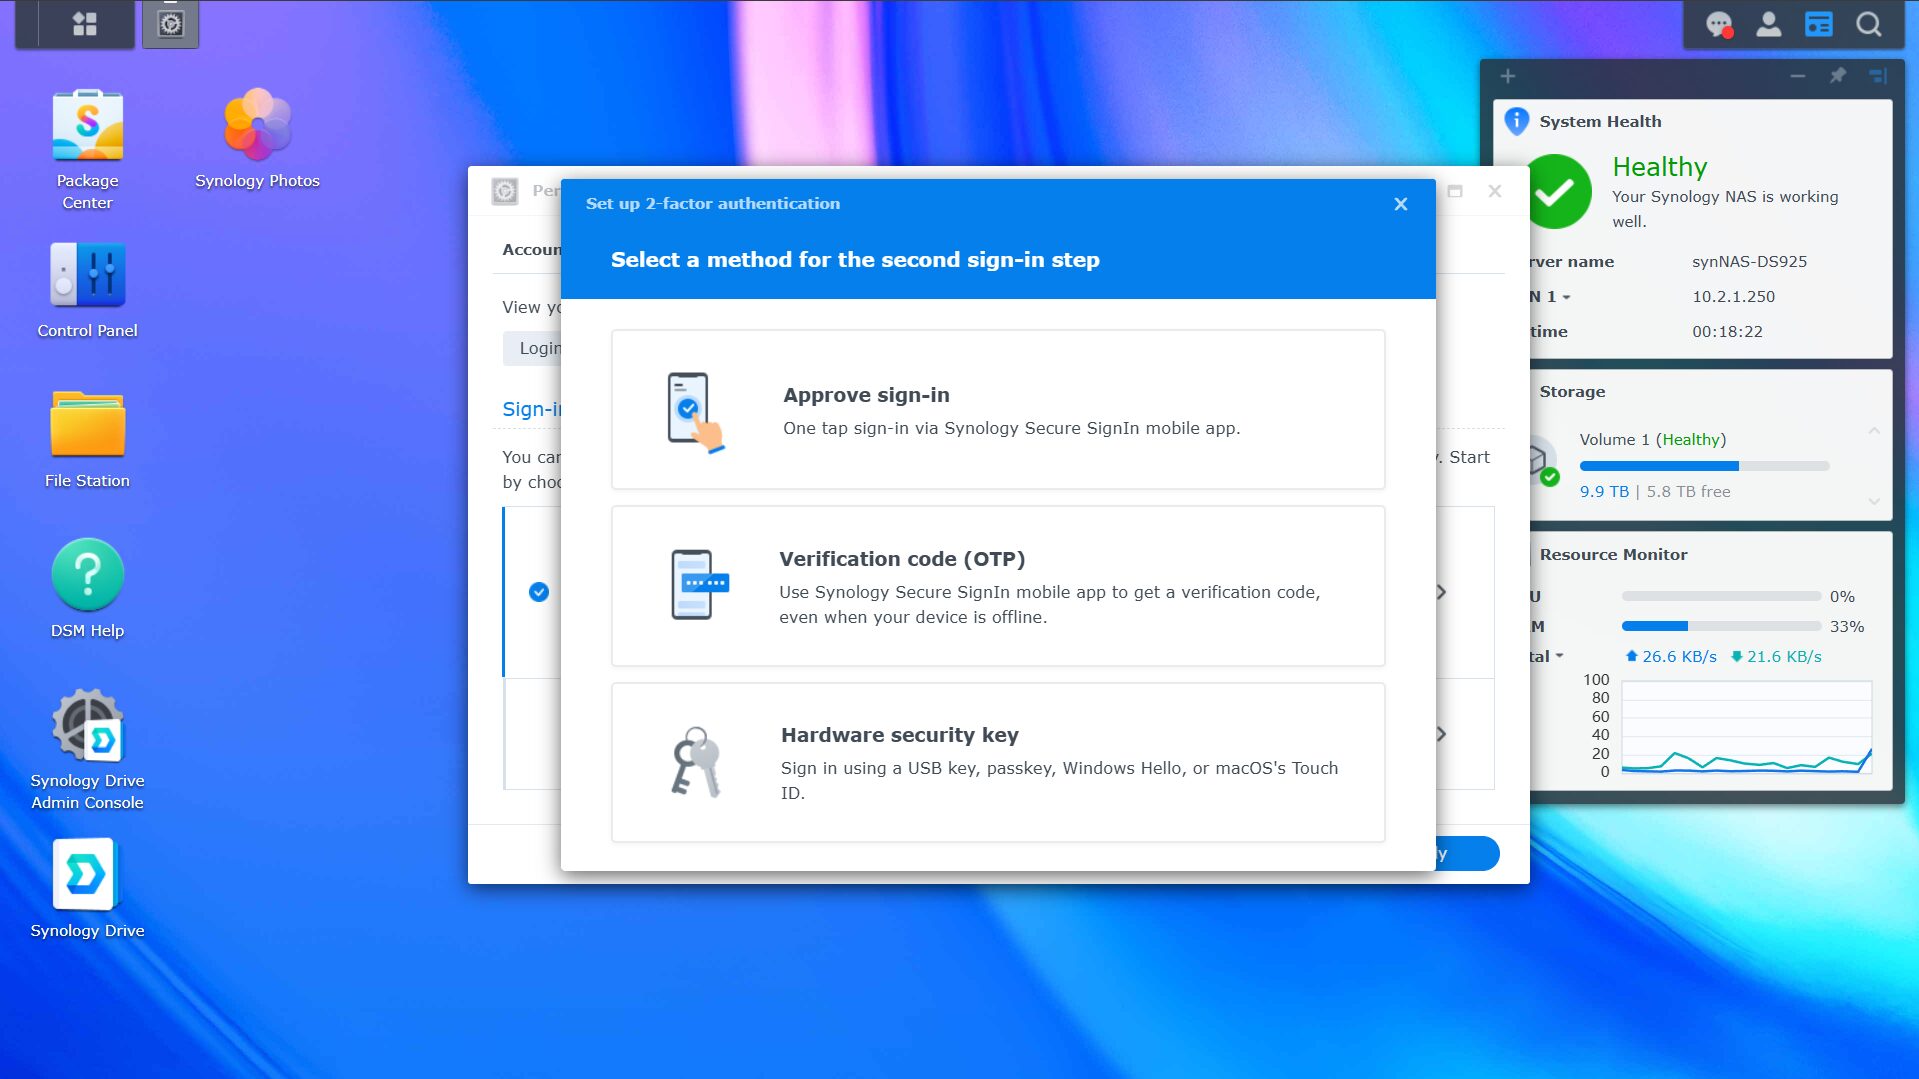
Beyond passwords, multi-factor authentication should be enabled on everything that supports it. And where passkeys are available, use them instead. Passkeys are based on what you have (your device) and what you are (biometrics like face or fingerprint) rather than something you know. They can’t be phished, they’re resistant to credential breaches, and in practice, they’re more convenient than typing a password and waiting for a TOTP code. If a service you use supports passkeys, switch to them now. It’s one of the highest-value security improvements you can make with the least friction.
For home lab monitoring that ties into keeping an eye on your services after locking them down, Uptime Kuma is a good addition, and my full home lab monitoring guide covers a broader approach to staying on top of what’s running.
None of these five things guarantees you’ll never have a problem — security doesn’t work that way. What they do is make your lab significantly harder to compromise, and if something does get in, they limit how far it can go and make sure you can recover. That’s the realistic goal that everyone can follow.