Running a private cloud is something that the majority of home lab users are or will be interested in, but there are so many ways to do it. I have run Synology Drive for many years, and it’s worked great, but I have always wanted to switch to an open source solution, and finally selected Nextcloud AIO. This gives me options in the future from a hardware perspective and doesn’t lock me into a specific vendor, while maintaining flexibility.
This article is meant to supplement the video below, which highlights the complete installation process for Nextcloud AIO.
Why Use Nextcloud AIO?
The biggest issue I have always had with Nextcloud is the number of dependencies it has. Rather than creating one container, you’re generally creating multiple containers that work together. There are certain Docker images out there that avoid the additional containers, but the performance has always been poor in my testing.
Nextcloud AIO fixes all of these problems. It’s an all-in-one (AIO) installer that basically sets up and configures everything for you, so why didn’t I switch to this years ago? Simply put, I never liked the fact that it automatically creates Docker volumes (that store critical system data). I could have always remapped these volumes, but I finally realized that I have simply been approaching this wrong.
Nextcloud AIO is designed to run by itself, and as soon as I embraced that, I was able to get the full value out of Nextcloud that I always wanted. The biggest lesson that I learned? If I want to move Nextcloud, I shouldn’t migrate the containers the way I do with other Docker containers. Instead, I should take a backup and then restore it on the new system. As soon as I embraced this, I was able to get the full value out of Nextcloud.
How to Set Up Nextcloud AIO
As mentioned above, the Nextcloud AIO installer will handle just about everything. All we are going to do is configure Nextcloud using a Docker Compose file, but there are a few important steps that need to be taken first.
Reverse Proxy Server for Nextcloud
By default, Nextcloud AIO will either use a reverse proxy server (my recommended approach) or will configure a web server. I recommend a reverse proxy server because you’ll be able to handle the certificates through that, which is overall easier in my opinion.
For this, I’d recommend using Nginx Proxy Manager with either proper port forwarding (for remote access) or with a wildcard certificate as an internal reverse proxy server.
This is the Docker Compose file that I use for Nginx Proxy Manager.
version: '3.8'
services:
  app:
    image: 'jc21/nginx-proxy-manager:latest'
    restart: unless-stopped
    ports:
      - '80:80' # Public HTTP Port
      - '443:443' # Public HTTPS Port
      - '81:81' # Admin Web Port
    volumes:
      - ./npm/data:/data
      - ./npm/letsencrypt:/etc/letsencrypt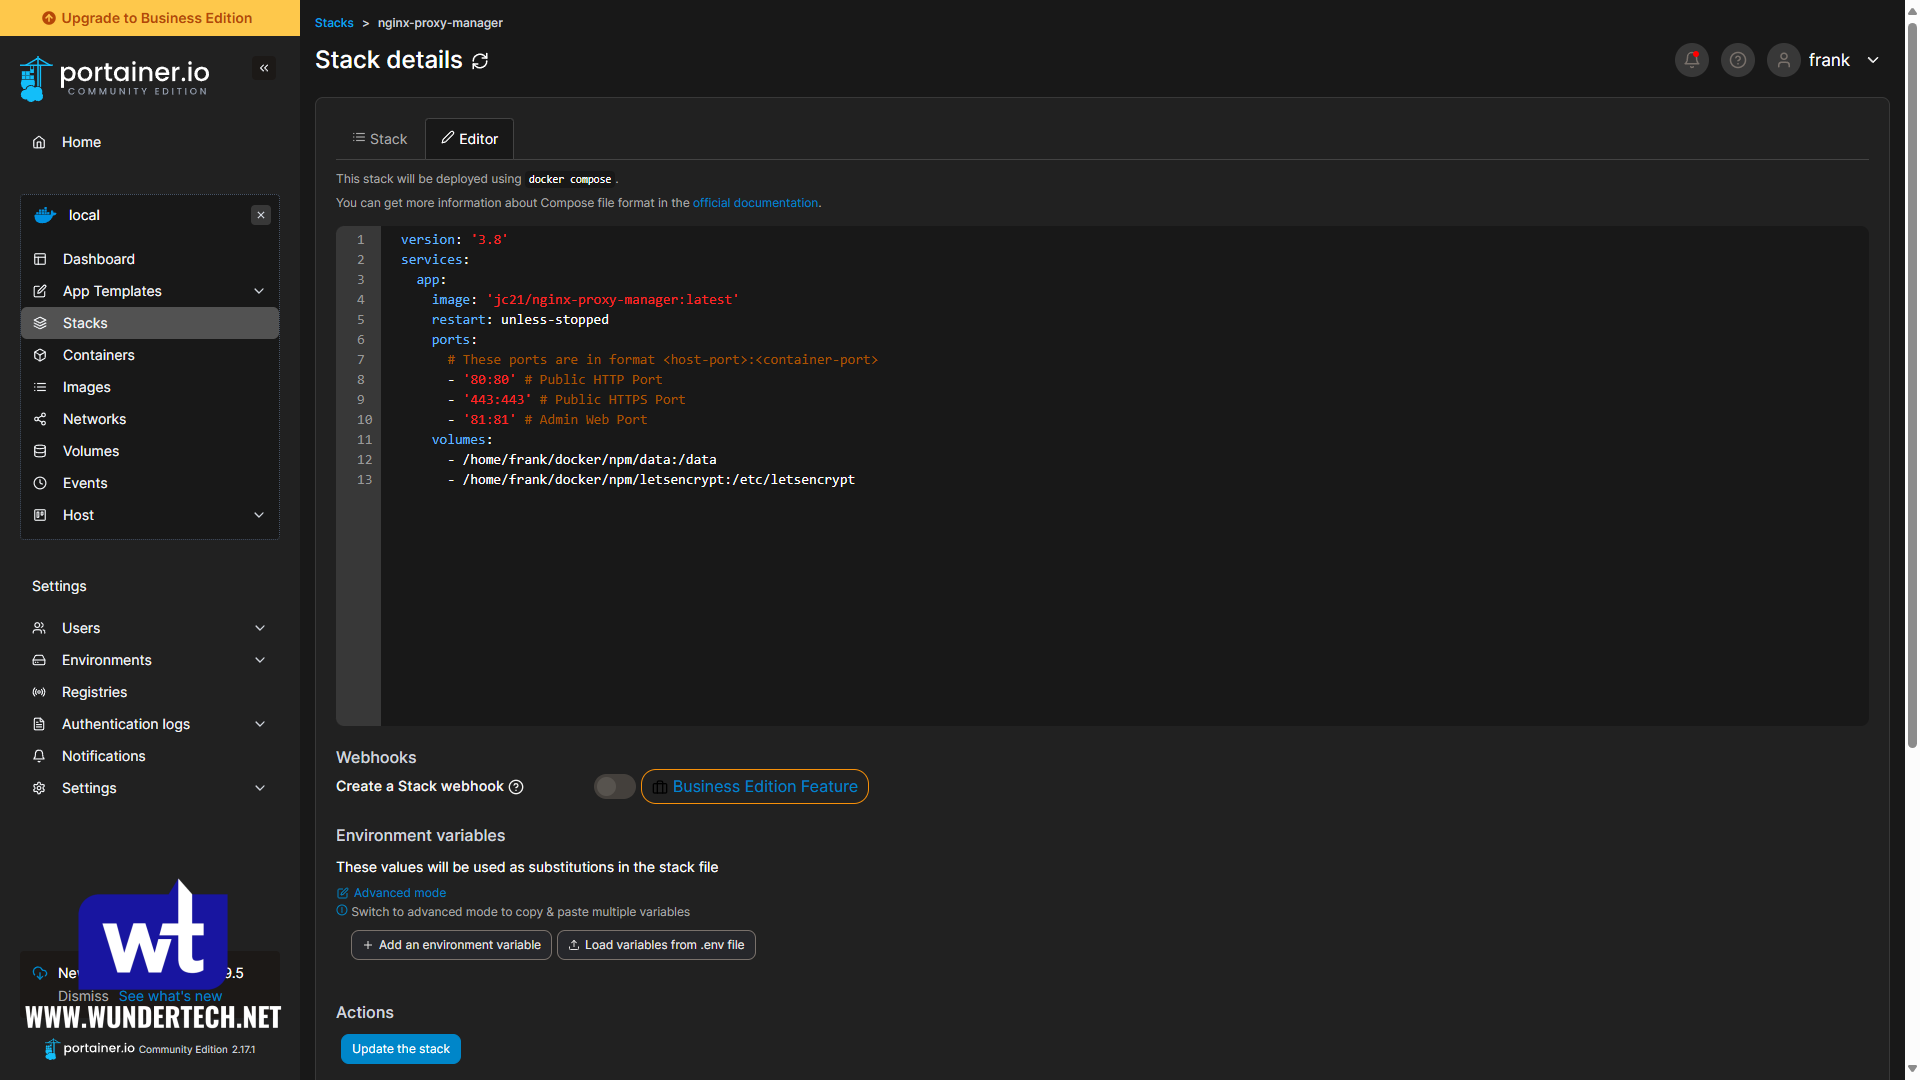
Nextcloud AIO Docker Compose
This is the Nextcloud AIO Docker Compose file that I used to set everything up. Overall, you do not need to bind-mount any volumes, but I configured it to bind-mount the master containers’ volume.
You will have to update the data directory (NEXTCLOUD_DATADIR) and the bind path (device:) to locations on your Docker host.
version: "3.3"
services:
  nextcloud-aio-mastercontainer:
    container_name: nextcloud-aio-mastercontainer
    restart: always
    ports:
      - 80:80 # AIO UI over HTTP
      - 8080:8080 # AIO UI alt port
      - 8443:8443 # AIO UI HTTPS (domain setup)
    volumes:
      - nextcloud_aio_mastercontainer:/mnt/docker-aio-config
      - /var/run/docker.sock:/var/run/docker.sock:ro
    image: ghcr.io/nextcloud-releases/all-in-one:latest
    environment:
      - NEXTCLOUD_DATADIR=/home/frank/docker/nextcloud-data
      - APACHE_PORT=11000
      - APACHE_IP_BINDING=0.0.0.0
volumes:
  nextcloud_aio_mastercontainer:
    name: nextcloud_aio_mastercontainer
    driver: local
    driver_opts:
      type: none
      o: bind
      device: /home/frank/docker/nextcloud-aio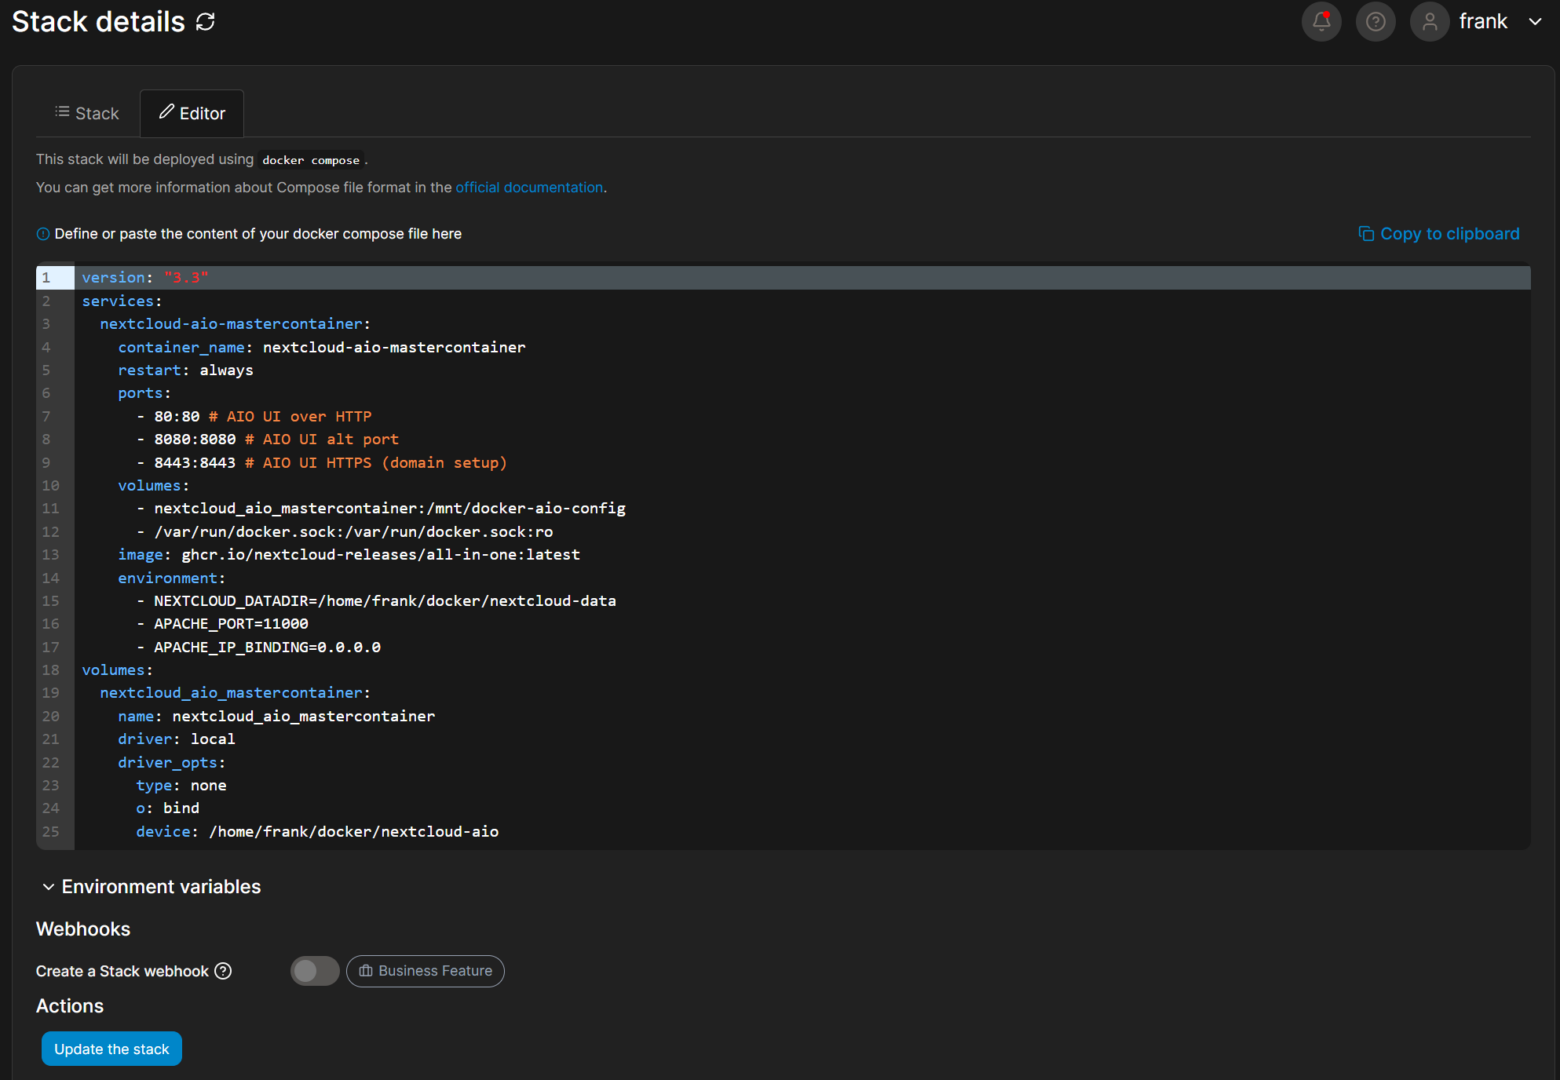
Once the container is running, access the IP address of Docker and port 8080 to run through the setup process as outlined in the video above.
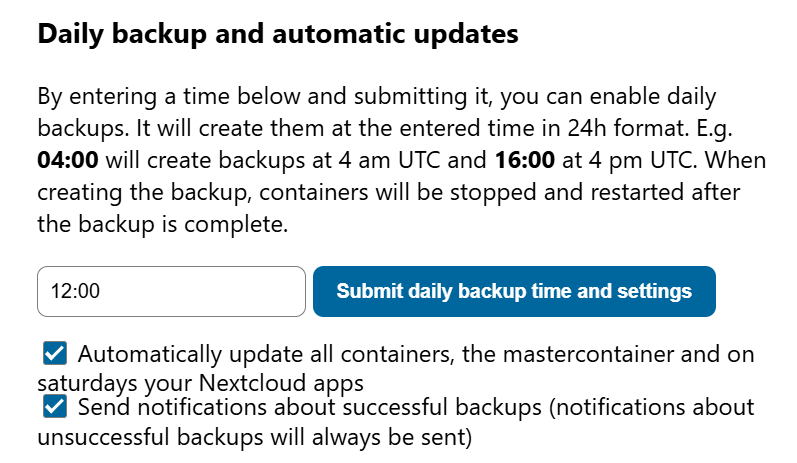
Nextcloud Backups
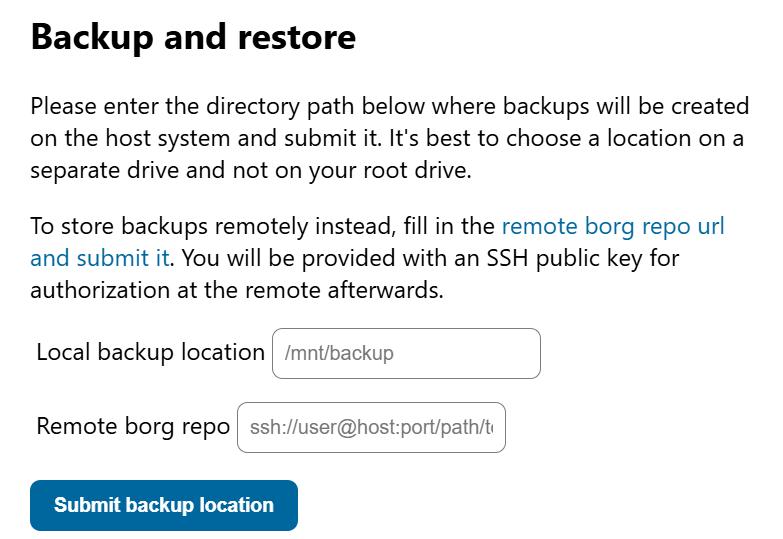
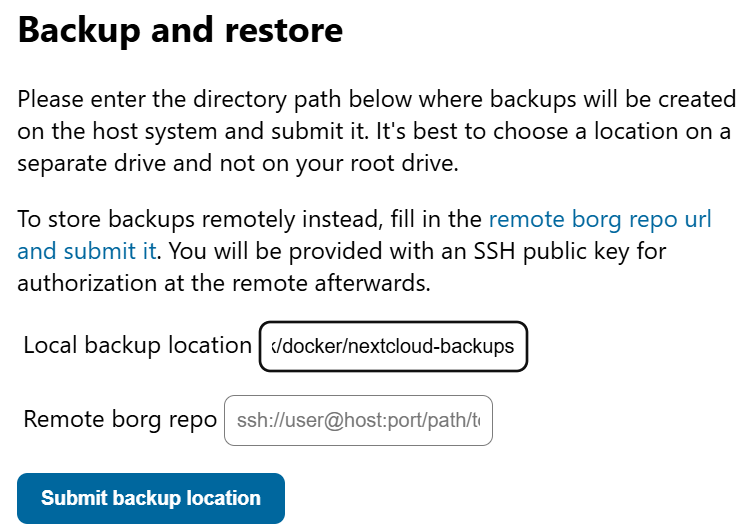
One of the benefits of Nextcloud AIO is that it can take automatic backups. To do this, access the AIO setup page and enter a local path (preferably, linked to a NAS through an NFS share) where backups will be stored. Please note, this cannot be the data directory we used to set up Nextcloud.
After setting up backups, an encryption key will be generated. Do not lose this encryption key, or you will not be able to restore the backup! You can now manually create backups.
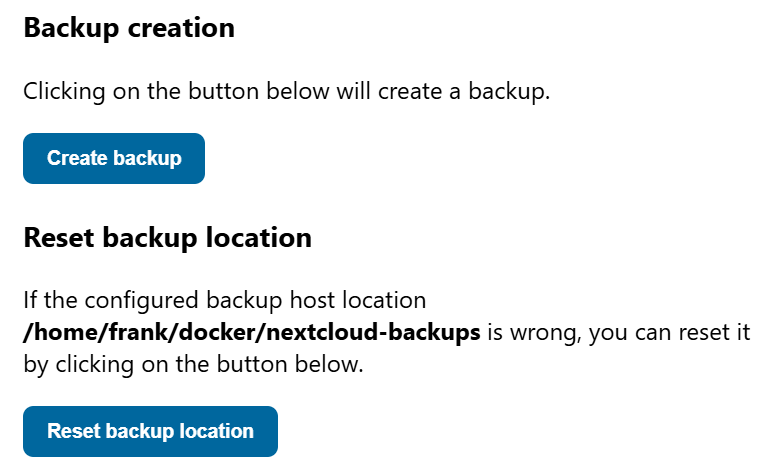
Once a manual backup is completed, you can automate this as well, which will also automate the update process for Nextcloud AIO.
Remote Access with Twingate
In the video, I show how you can use Twingate to configure remote access. I prefer this approach because you’re able to ensure that external users that need to access Nextcloud can only access Nextcloud, and I feel that this is the best way of limiting access to Nextcloud exclusively.
One area where you can make things a little smoother is by using the Proxmox Helper Script for Twingate to automate the LXC creation that the video highlights.
Rather than creating a full LXC manually, this helper script will atuomate the entire process for you!
Final Thoughts on Nextcloud AIO
I’ve only used Nextcloud for a few weeks at this point, but it’s done everything that I’ve needed. There were some initial hiccups with learning how everything worked, but I set it up exactly as I needed and it’s been running great!