In this tutorial, we’ll look at how to enable SSH on pfSense. SSH (or Secure Shell), provides a secure, encrypted method to remotely access your pfSense firewall. In general, most things can be done through the pfSense GUI, but there are times when you might want to SSH into pfSense and the steps below will explain how to do it.
Before proceeding, make sure you understand the best practices that you should be following.
Why Use SSH with pfSense?
There are a few benefits that SSH can provide with pfSense:
- Remote Management: SSH enables administrators to securely access and manage the pfSense system using any client.
- Troubleshooting and Diagnostics: Sometimes, using the web interface may not be enough for troubleshooting specific issues. SSH gives you access to the command line, where you can execute commands to test network connectivity, review logs, monitor system processes, and much more.
- Advanced Configuration and Customization: While pfSense’s graphical user interface provides a wide array of configuration options, certain tasks and configurations might require direct access to the underlying FreeBSD system. SSH allows you to directly edit system files and utilize FreeBSD’s features to their full extent (though using this can be dangerous so do this at your own risk).
- Disaster Recovery: If you’re unable to access the pfSense system through the web interface due to a configuration error or another issue, SSH can often provide a backdoor for troubleshooting and recovery.
- Secure File Transfer: SSH also provides secure file transfer capabilities, which can be useful for backing up configuration files or transferring data to/from the pfSense system.
How to Enable SSH on pfSense
By default, SSH is disabled on pfSense, however, you can easily enable it by following the steps below.
1. Select System, then Advanced. Scroll down to the Secure Shell section and Enable Secure Shell.
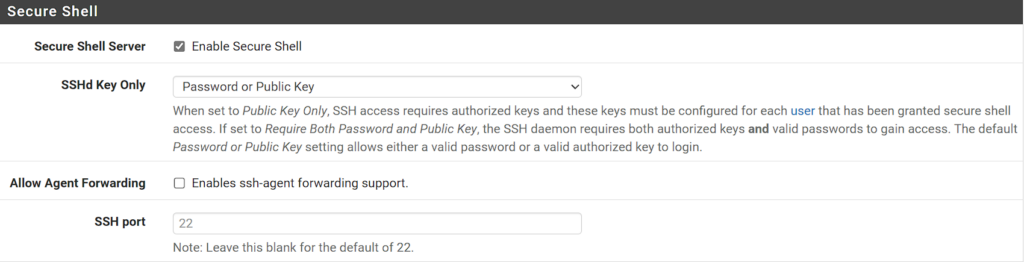
2. There are three different ways that you can authenticate with pfSense:
- Password or Public Key
- Public Key Only
- Require Both Password and Public Key
If you’re using this on your LAN only, any of the options above will be fine, though you might want to consider disabling SSH when you’re done. If you’re using a Public Key, you must configure it through the pfSense GUI which we’ll look at below, but Save your settings (using whatever option you’d like above) before proceeding.
Configuring the Public Key for a User
In order to use SSH and a Public Key, it must be generated from a client you’ll be connecting with and then the public key must be added to a user account. You can use a tool like PuTTY to generate the SSH key, or you can generate one manually if you’d like. The key is that the public key must be accessed and added to pfSense.
NOTE: If you don’t want to use SSH keys, you’ll simply connect using the Password or Public Key option above and use the admin password (if you’re connecting to the root user).
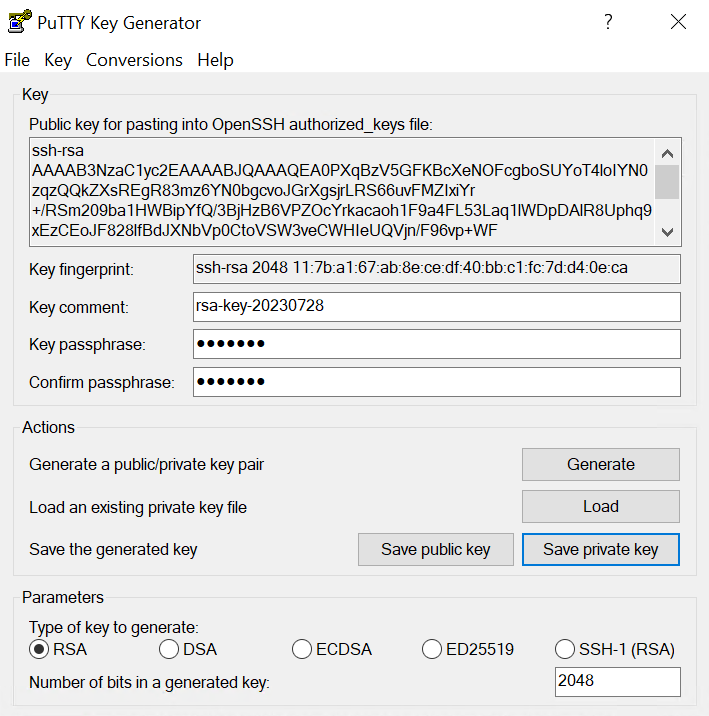
1. Generate an SSH key using one of the options below:
Sample PuTTY Key Generation
Sample Command to Generate an RSA Key
ssh-keygen -t rsa
If you use this option, you must get the Public Key of the SSH key, but the path you use (in red below) might be different.
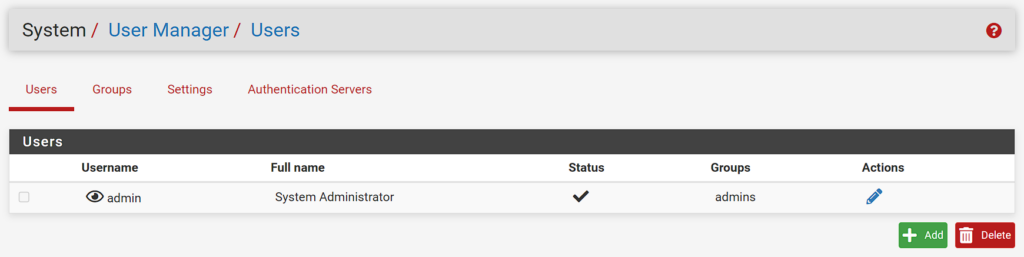
cat .ssh/id_rsa.pub2. As soon as you have your Public Key, select System, then User Manager, and edit the user that you’d like to connect as (I will be using Admin).
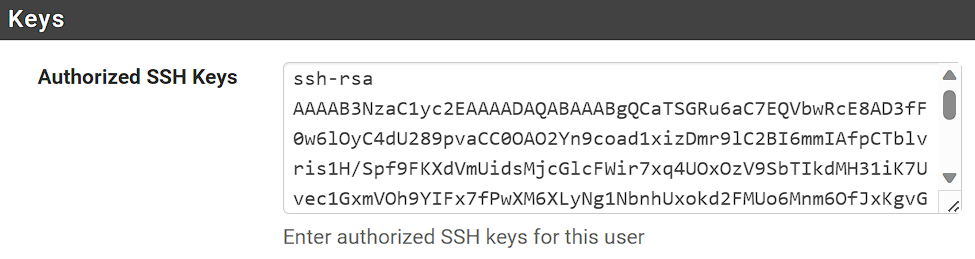
3. In the Authorized SSH Keys section, you’ll want to paste in the Public Key generated, then Save
Using SSH to Access pfSense
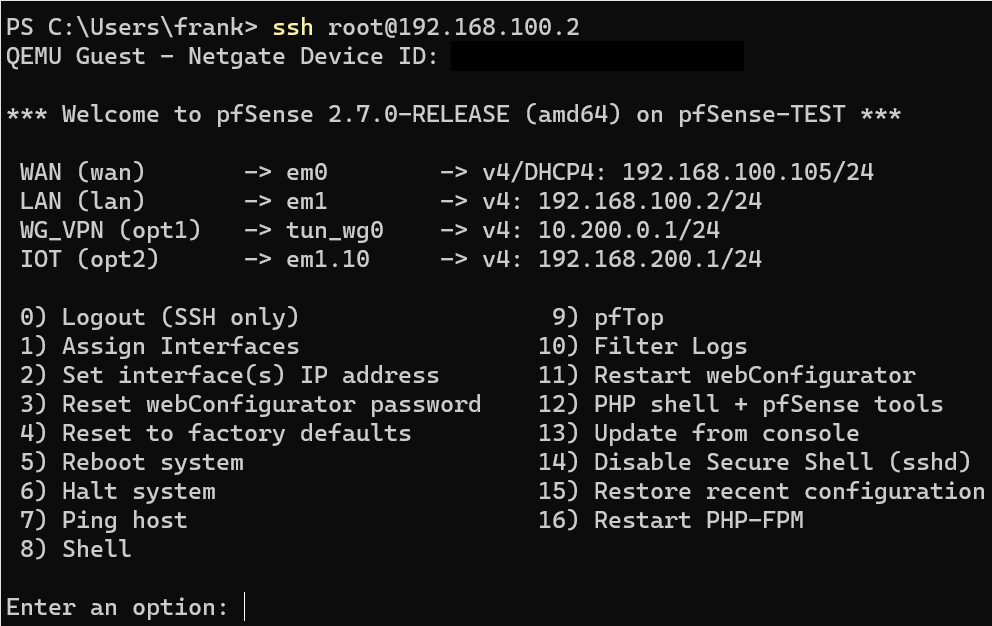
Now that SSH has been configured and the key has been added, you can connect to pfSense using PuTTY or a terminal window. If you’re using the admin account, you’ll connect in using the root user.
ssh root@[pfSense_IP]If you’re using the Public Key Only or Password or Public Key option, you won’t have to enter your pfSense password if you’re using the device with the same Public Key (generated above).
However, if you’re not using the same device (and using the Password or Public Key option) or you’re using the Require Both Password and Public Key option, you’ll have to enter the password to the pfSense account you’re trying to connect to.
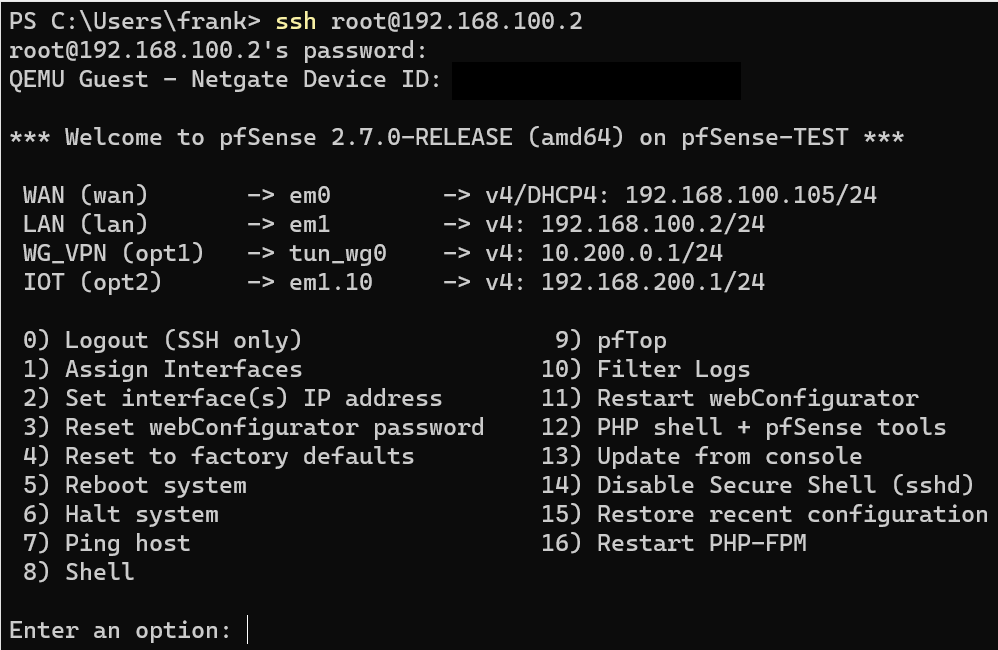
At this point, you’ll be connected to the pfSense console! If you’re having trouble connecting, make sure that you aren’t blocking it with the pfSense firewall.
Conclusion & Final Thoughts on SSH + pfSense
There are many reasons why you might want to access the terminal in pfSense, but ultimately, that reason will differ based on the user and what you’re looking to do. The difficult part (if there is one) is generating the RSA key. However, that process is not necessary if you’re willing to use the account’s password.
As mentioned above, make sure you understand the best practices that you should be following.