Today we are going to look at how to install AdGuard Home on a Synology NAS.
AdGuard Home is a network-wide ad-blocker and a competitor to Pi-hole. I have a few tutorials on how you can setup Pi-hole on a Raspberry Pi and Synology NAS, but this tutorial will focus on installing AdGuard Home on a Synology NAS.
How to Install AdGuard Home on a Synology NAS
We will look at how to install AdGuard Home on a Synology NAS below.
Should you use AdGuard Home or Pi-hole?
The first and logical question will be “which is better?”, as both AdGuard Home and Pi-hole are network-wide ad blockers. This is a completely subjective question and I’d be wary of anyone who tells you one is better than the other.
If you look at the AdGuard Home website, you’d believe that AdGuard Home is the clear winner, but after further inspection, Pi-Hole is a lot closer than it might first appear.
So here’s my completely subjective answer as someone who has used Pi-hole for a long time: I like Pi-hole and will continue to use it, but if I was interested in setting up encrypted DNS (DNS-over-HTTPS), I’d probably spring for AdGuard Home.
You can set up DNS-over-HTTPS on Pi-hole as well, but it isn’t nearly as simple. Whether this is necessary can be debated, but in my opinion, it’s a lot easier to set up on AdGuard Home.
Docker Folder Settings
1. Install Docker from Synology’s Package Center.
2. We need to create two folders that we will map our Docker image to. By default, Docker will create a folder named docker after it’s finished installing. Inside of this folder, we are going to create a folder named adguard. Inside of that folder, we are going to create two subfolders. Create one folder named conf and another folder named data.

Before we proceed, there are two different ways to set this up. The first is using your host network device, which means that all traffic will be sent to the IP address of your NAS. The second is by creating a macvlan network interface in Docker.
I prefer creating a macvlan network interface because it sets a separate IP address for the DNS server and avoids port conflicts. If you use the host network interface, you will need to use your NAS’s IP address as your DNS server.
You also might run into conflicts with existing services using this method, so I will not be going over it in this tutorial. However, you’d pretty much skip all of the networking steps and check the “use the same network as Docker Host” checkbox when configuring the network interface.
Installing AdGuard Home on a Synology NAS
1. Ensure you can SSH into your Synology NAS.
Open Control Panel, select Terminal & SNMP, and Enable SSH service. If you are using Synology’s Firewall, ensure that you allow port 22 traffic. I created a video on how to SSH into your Synology NAS if you have any problems.
2. SSH into your Synology NAS using your favorite SSH tool.
3. We need to create a Docker macvlan network interface. First, we need to determine what network interfaces currently exist (on your Synology NAS) and note down the adapter name.
To do this, run the command below and note down the network interface name that has your Synology NAS’s IP address (in this example, mine is eth0).
ifconfig

4. Next, you need to run the command below while substituting the correct subnet (most are 192.168.1.0/24 or 192.168.0.0/24 by default).
You also need to pick an IP address that you’d like to use that’s not currently in use. I will be using 192.168.1.198. NOTE: ag_network will be the name of the network (you can substitute this as you’d like).
sudo docker network create -d macvlan -o parent=eth0 --subnet=192.168.1.0/24 --gateway=192.168.1.1 --ip-range=192.168.1.198/32 ag_network

Our network is now created. We can then exit our SSH session and disable it in DSM (if you won’t be using it). If you are disabling it and created a firewall rule for it, you should inactivate the firewall rule as well.
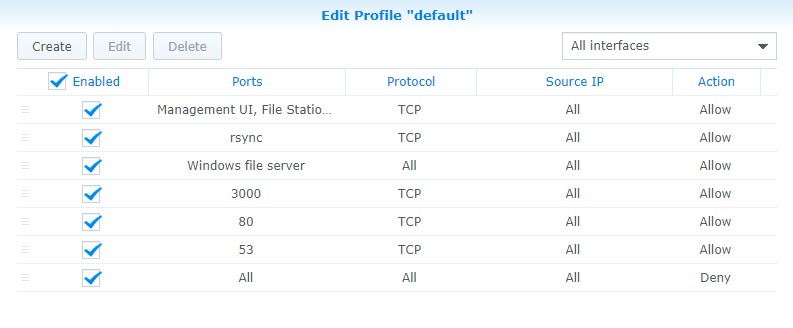
Firewall Setup
Not everyone will be using Synology’s Firewall, but if you are, you need to open port 3000, 80, and 53. 3000 is used for the initial setup process, 80 is used after the setup process is complete, and 53 is used for DNS querying. NOTE: after the setup process is complete, you can close port 3000 if you’d like.
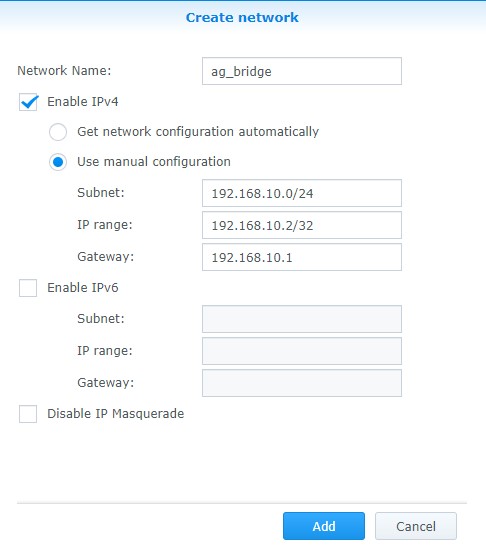
5. Next, we need to create a bridge network. This is what will allow our host (NAS) to communicate with our Pi-hole container. Open Docker and navigate to the Network section. Select Add and enter a subnet that’s not currently in use. The IP address of the bridge I am creating will be 192.168.10.2.
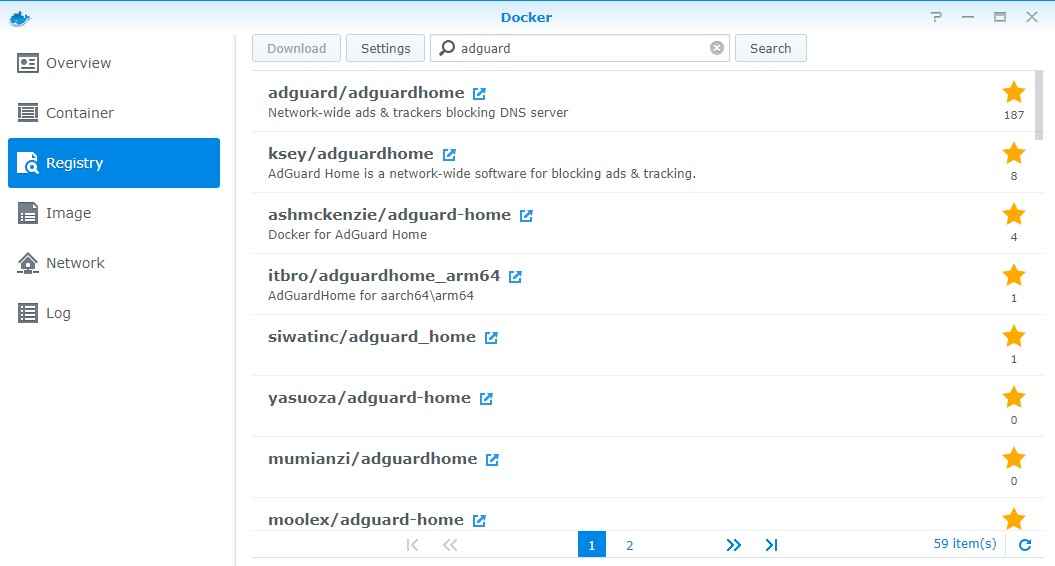
6. Open Docker, navigate to the Registry and search for AdGuard. Double click adguard/adguardhome image to download it. Select latest when the popup appears.
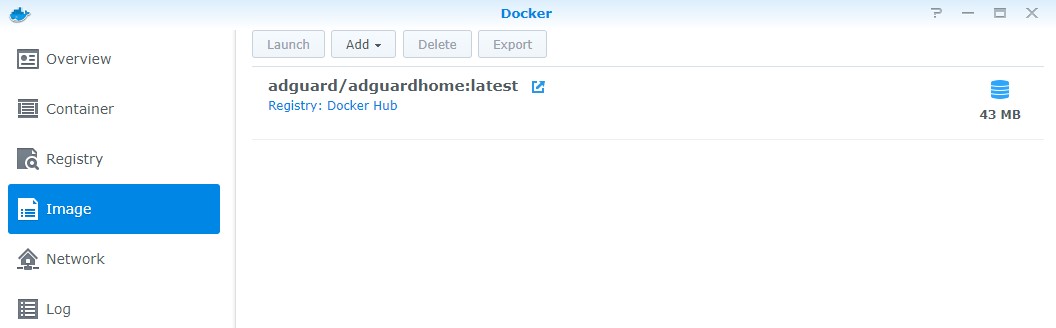
7. Double-click the AdGuard image to create a new instance.
8. Give the container a name and select Advanced Settings.
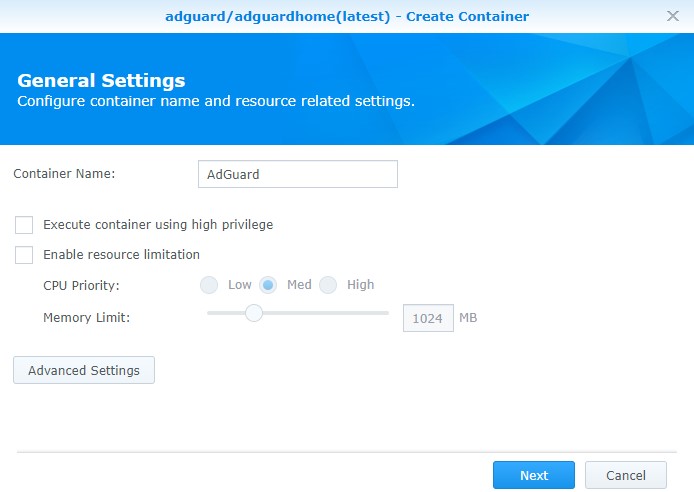
9. We now need to configure the Advanced Settings.
- Check off Enable auto-restart.
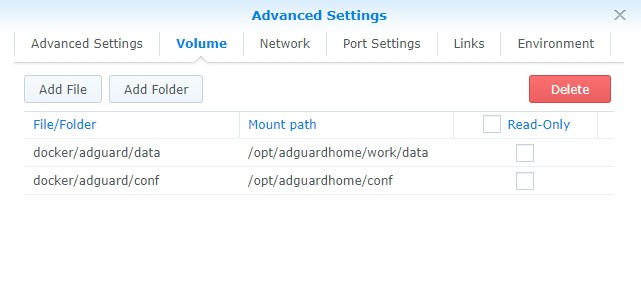
- In the Volume section, we need to map the folders we created to the internal Docker Pi-hole locations. Select Add Folder and add the conf folder and type the mount path as /opt/adguardhome/conf. Do the same for the data folder with the mount path as opt/adguardhome/work/data.
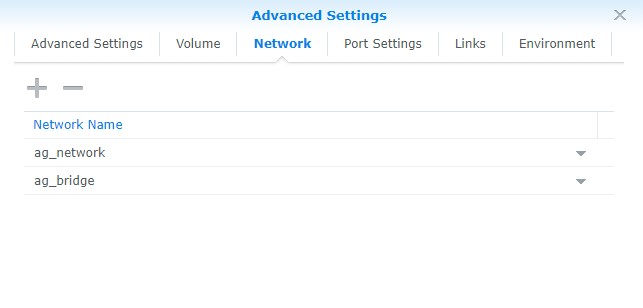
- In the network section, add the ag_network and ag_bridge networks that we created earlier. Remove the default bridge network.
The rest of the settings can stay as default. Select Next and then Apply to create the container.
10. You should now be able to access AdGuard Home using this web address:
http://[IP_ADDRESS]:3000
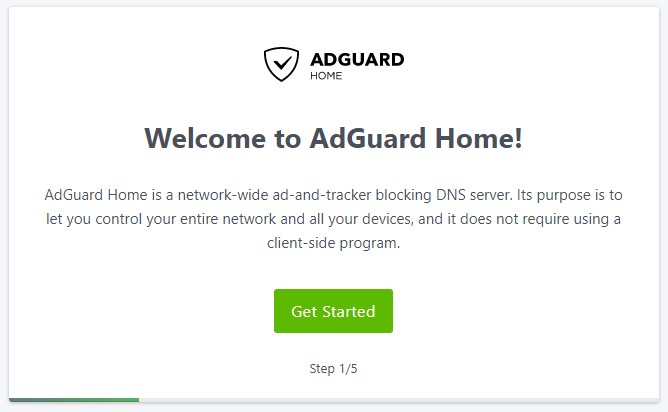
11. Select Get Started to start the configuration process.
12. Specify the macvlan connection to be default for the admin interface and DNS server.

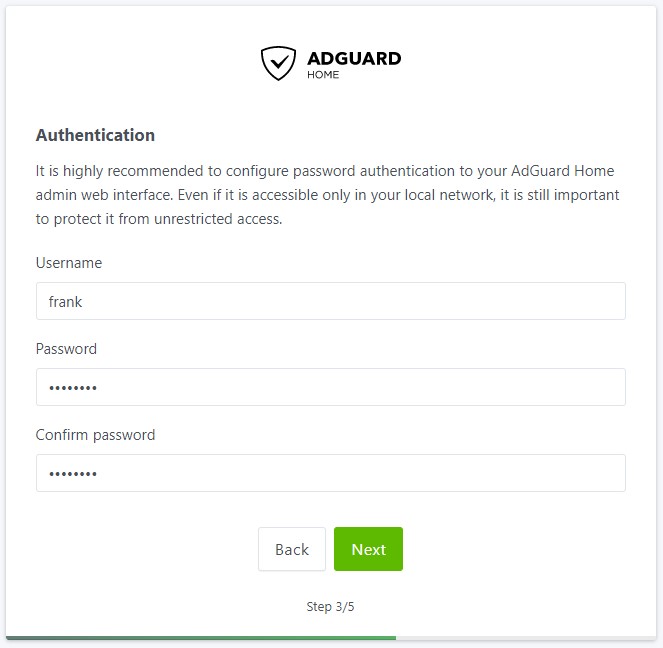
13. Specify a username and password.
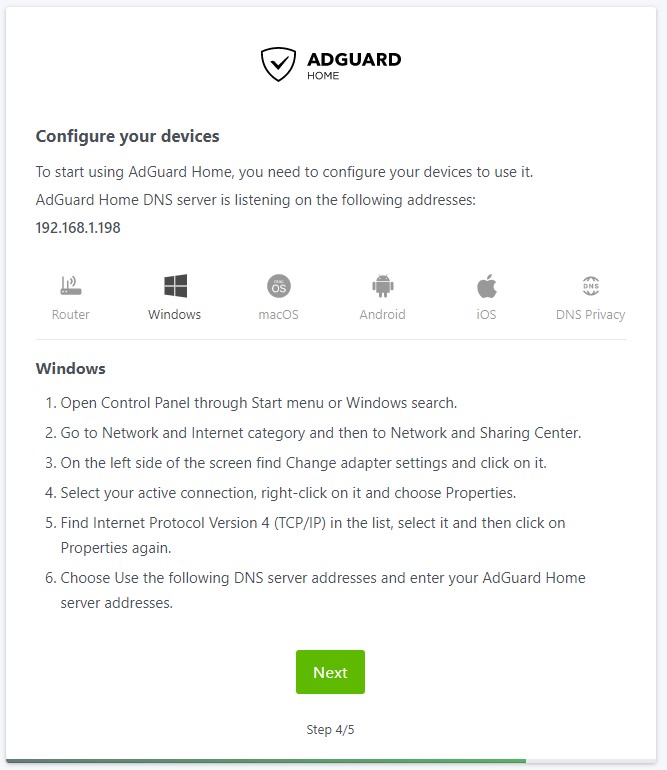
14. The next screen will show you how to configure different devices. In the next section, I will go over my preferred approach which is setting AdGuard Home to be my router’s DNS server. If you aren’t interested in doing that, this is a great section to learn how to set up the DNS server on your local device.
15. Select Next and then Open Dashboard. Sign in when prompted.
16. AdGuard Home is now set up and installed. Please note that you will no longer use port 3000 when navigating to the web portal. After the setup process is complete, you will be able to access to management portal using the macvlan IP address only (as it uses port 80).
https://[IP_ADDRESS]
Synology NAS AdGuard Home Settings
I’m not going to go into specifics as far as settings go because they’re mostly personal preference, but here are a few things you might want to check right after installation:
- Settings – DNS Settings: These are your upstream DNS servers. By default, the upstream DNS server will be listed as quad9 which is encrypted DNS-over-HTTPS. If you don’t configure a certificate, you will not get the benefits of DNS-over-HTTPS.
- Settings – Encryption Settings: This is where you will configure your certificate if you’d like to enable DNS-over-HTTPS. The AdGuard team has a pretty good tutorial here that will show you how to configure it if you’re interested.
- Settings – General Settings: The majority of settings are somewhat self-explanatory on this page but this is where you can configure logging and query retention.
- Filters – DNS Blocklists: This is where you can add new blocklists (if you’d like to add any).
- Filters – Blocked Service: Quickly block an entire service.
- Filters – DNS Allowlists: Define domains that should not be blocked.
There are plenty of options that you can play around with but these are some of the most important ones right after installation.
DNS Configuration
Now that the setup of AdGuard Home is complete, we need to determine a way to point our clients to our DNS server. There are two main ways to do this:
- Point your router’s DNS server to your AdGuard Home server IP address. This will ensure that any device connected will use AdGuard Home as its DNS server.
- Point each client to your DNS server. This is beneficial if you only want certain clients to use AdGuard Home as a DNS server.
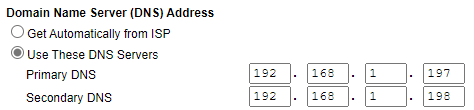
I point my routers DNS servers to my AdGuard Home server as I want to ensure every device connects to it.
NOTE: The 192.168.1.197 IP address below is the IP address of my Raspberry Pi, as I am using two DNS servers for redundancy. If you are only using your Synology NAS, you will only add 192.168.1.198 here.
Conclusion: How to Install AdGuard Home on a Synology NAS
This tutorial looked at how to install AdGuard Home on a Synology NAS. I’ve been using AdGuard home for a few weeks and I’m pretty impressed with it.
It’s impossible to not talk about Pi-hole when discussing AdGuard Home, so it’s important to do some research and pick the best option for you. I think that ultimately, you can’t go wrong with either and you’ll be happy one way or the other!
Thanks for checking out the tutorial on how to install AdGuard Home on a Synology NAS. If you have any questions on how to install AdGuard Home on a Synology NAS, please leave them in the comments!