Today we are going to look at the Synology NAS setup process on DSM 7!
This will be a long tutorial that will have many different components in it, but I’ll do my best to break it down by section. I want to highlight that everything in this tutorial isn’t mandatory, but it’s a good starting point where you can pick and choose what you’d like to implement. The goal of this tutorial is to give you all the necessary steps (and a few suggestions) on setting up your new NAS.
This tutorial is for Synology DSM 7.0 or greater. If you are looking for how the initial Synology NAS setup process on DSM 6, please watch this video.
There are a lot of tutorials linked in this post that were created in DSM 6. The settings are generally the same, though the UI will be different and there might be a few settings in different locations. If you have any specific questions about where something might be in DSM 7, please leave a comment.
Some links below are Amazon affiliate links which means that I earn a percentage of each sale at no cost to you. Thank you for your support.
1. Synology NAS Setup & Configuration: Initial Steps
We will quickly discuss how to setup a Synology NAS whether you purchased it new or factory reset it. Ensure that your NAS is plugged in and has internet access before proceeding.
For the initial Synology NAS setup steps below (1.1 & 1.2 – how to find a Synology NAS, install DSM 7, and set up a storage pool/volume), please watch this video that walks through the entire process (as well as many other things on the WunderTech YouTube page)!
1.1 How to Find a Synology NAS & Install DSM
1. Navigate to the website http://find.synology.com and wait for your device to be found. DHCP will automatically give your DiskStation an IP address. Select Connect.
2. Accept the End User License Agreement and proceed.
3. Select Install.
4. DSM 7 is different than DSM 6 in the sense that it requests that you download the latest version of DSM using Synology’s Download Center. Select the model NAS that you have, then in the OS Version section, select 7.0 Series. You can then Download the current DSM 7 Operating System.

5. You will be informed that all data on your drives will be deleted. If you agree, select the checkbox next to I understand that all data on these drives will be deleted, then Continue.
5. DSM will install and reboot when finished. After a few minutes have passed, open a new tab and navigate to http://find.synology.com. Your DiskStation should show up and you will be able to connect.
6. Give your DiskStation a Server Name, Username and Password.

7. The next step will ask you to create a Synology account. You can do this at a later time if you’d prefer.
8. The next step will ask you to enable Synology Active Insight and configuration backups. Select whichever you’d prefer, then proceed.
1.2 How to Set up a Synology NAS Storage Pool/Volume
DSM 7 has made storage pool creation incredibly easy and straightforward. You will be prompted immediately to set up a Storage Pool and Volume, but if you’re not, open the Storage Manager and select Storage, then Create a Storage Pool.
1. You will be brought to a wizard that will guide you through the setup process. Select Start.
2. Give your storage pool a description if you’d like, select the RAID type you will be using and select Next to proceed.
4. Select the Hard Drives (generally all of them) that you’d like in this Storage Pool and select Next.
NOTE: You can always add drives later and expand your storage pool/volume.
5. You will be prompted that all data on the drives will be erased. Select Continue.
6. The next option will ask if you’d like to perform drive checks. If you’d like to test the drives, you can select Perform drive check. If you’d like to skip it, select Skip drive check.
7. This next section will determine how much of the volume you’d like to allocate. Generally, most people will use all of it, so you can select Max. If you’d like to use something smaller, you can enter the value.
8. Click Apply and your storage pool will be created!
1.3 How to Set a Static IP Address for a Synology NAS
The first thing that I always do when I set up my Synology NAS is set a static IP address so that it’s always the same. It’s best to make a DHCP reservation in your router’s configuration, but a lot of ISP-provided routers don’t allow you to do that.
If you can’t reserve a DHCP address, check to see if you can limit the IP addresses your DHCP server can give clients (<150, for example) so that you have a range to work with (and DHCP will not try and hand out that IP address).
Follow these instructions if you’d like to set a static IP address from DSM.
1. Go to the Control Panel and select Network Interface. Select Edit on the LAN device.

2. Select Use manual configuration and enter the IP Address you’d like to use. The subnet mask, gateway, and DNS server can all stay as default (since they were pulled from DHCP). Select OK. Your network settings will apply and your DSM session will refresh with your new IP address.
NOTE: A lot of NAS’s have multiple ethernet ports. If you’ve plugged in more than one ethernet cable, you’ll need to set distinct static IP address for each LAN interface.
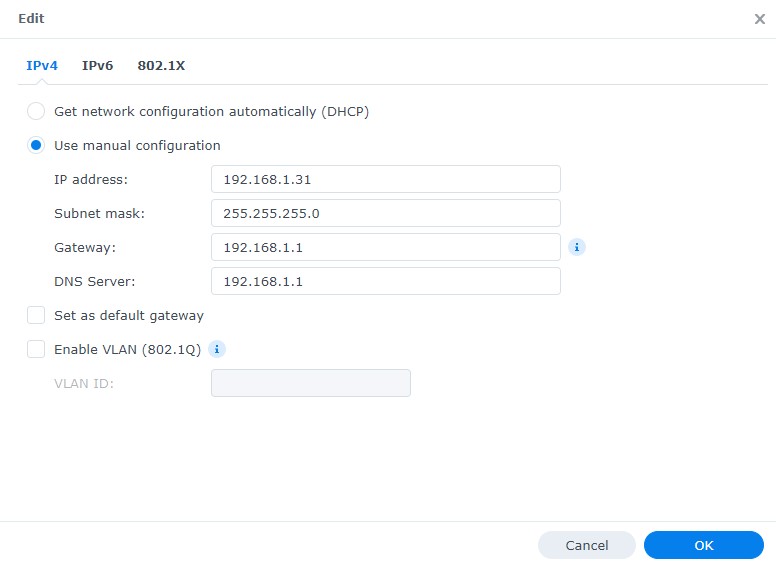
3. The IP address that you set (in the example above, 192.168.1.31) will now be the static IP address of your Synology NAS!
Any time you need to access your NAS, you’ll be able to use this static IP address and it will not change!
Most people buy and setup a Synology NAS intending to create network folders for various reasons. To create a shared folder in DSM, you need to first create a storage pool and volume. After that’s done, you can create as many shared folders as you’d like!
After the storage pool and volume is created, we can now create a shared folder. Shared folders are the backbone of NAS units and are what you’ll store all your files on!
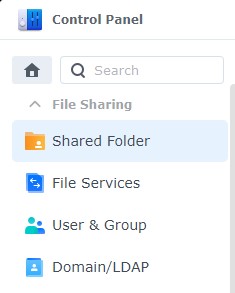
1. Open Control Panel and select Shared Folder.
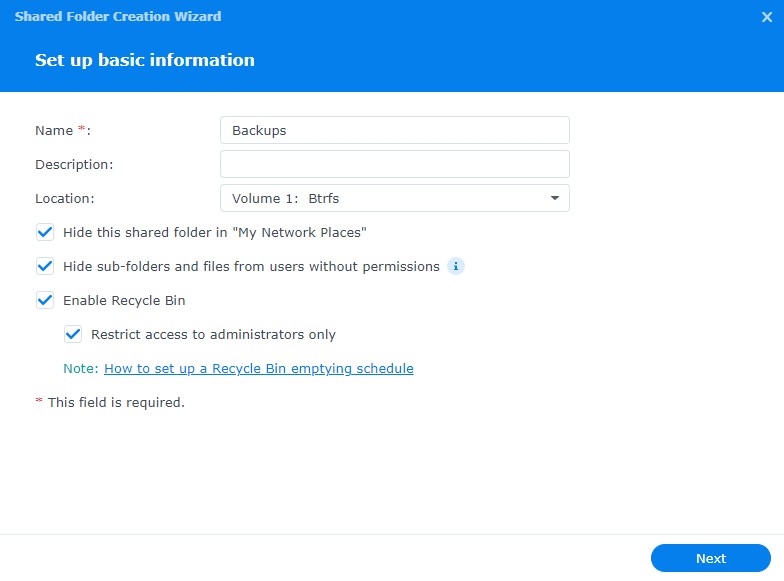
2. Select Create. A new dialogue box will appear where you’ll need to change a few settings:
- Name: Name of the Shared Folder.
- Description: Description you’d like to use.
- Location: Volume you’d like to use.
- The next three options are personal preference based on if you’d like the folders visible to others and if you’d like a recycle bin enabled (so files aren’t deleted permanently).
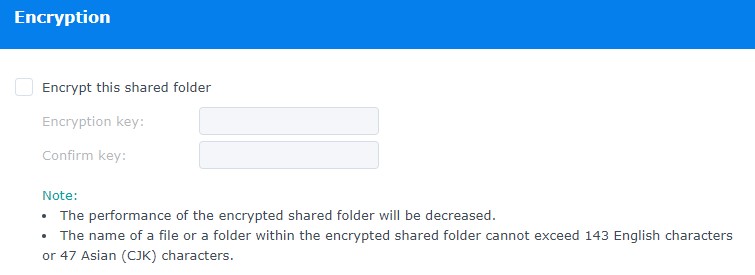
3. The next screen will ask if you’d like to encrypt the shared folder. If you would, select the checkbox and enter an encryption key.
A few things to note with encrypted files: Encrypted files work by mounting/unmounting them with the encryption key (password) in DSM. When you mount the folder, it functions the same way as other shared folders do. It simply gives you the option to unmount the shared folder when you’re done adding files.
When the drive is unmounted, no one can access the files until you mount the folder again. If you lose the encryption key, your files will be lost forever. Keep it somewhere safe!
4. Enable data checksum (if applicable) and file compression/folder quota if you’d like. Select Next.
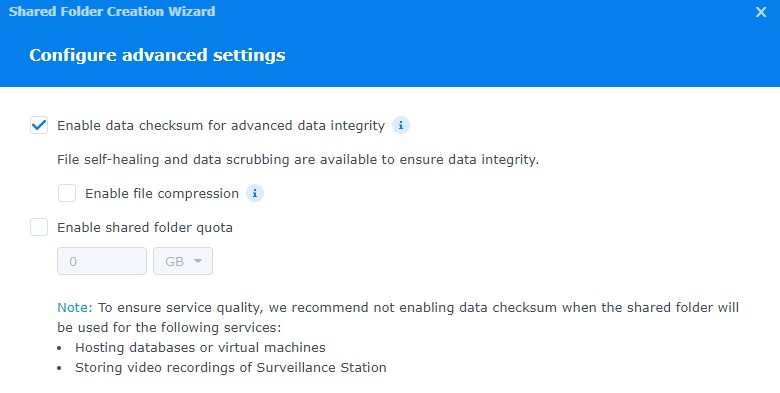
5. Select Next.

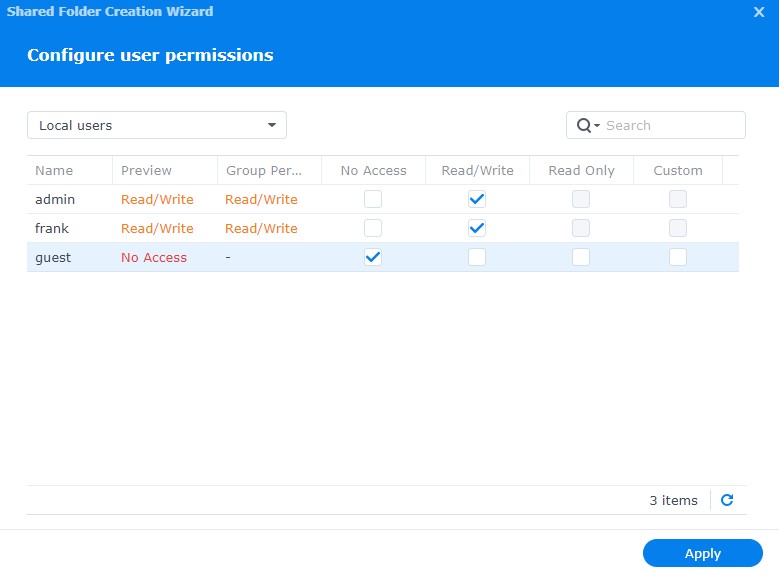
6. After the folder is created, you will be brought to the folder’s permissions. Change the permissions to match what you’d like. Your folder is now created!
2. Data Protection & Monitoring
Now that a storage pool, volume, and shared folder are created, we need to change a few settings to protect and monitor our data.
2.1 How to Set up a Data Scrubbing Schedule on a Synology NAS
Data scrubbing inspects your volumes and modifies detected inconsistencies. In simple terms, this protects your NAS against bit-rot. There isn’t a specific schedule that’s mandatory, but it’s a good idea to run it at a minimum, bi-annually.
1. Open Storage Manager, select Storage Pool, then Schedule Data Scrubbing. Then select Set Schedule.

2. Select Enable Data Scrubbing schedule, then select the Storage Pool, select a Frequency and Save.
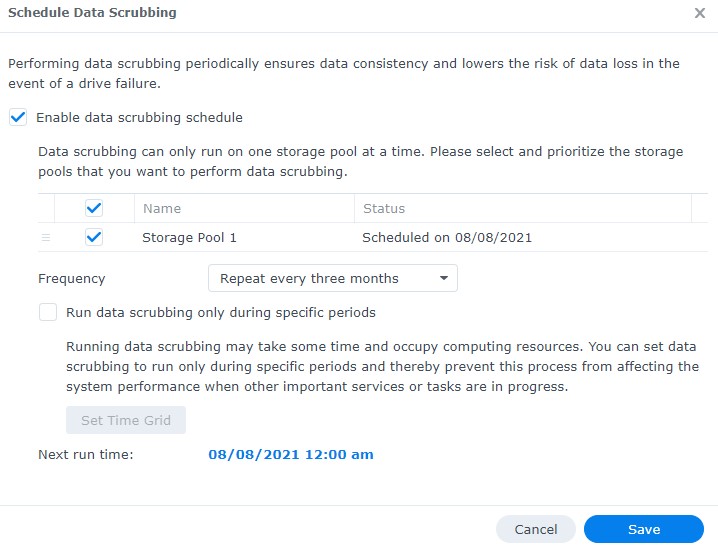
3. Data scrubbing will now be scheduled!
2.2 How to Set up Snapshots on a Synology NAS
The easiest way to think of snapshots is that they “freeze” your files in time and allow you to recover those files later if necessary.
Every time a snapshot is created, a “restore” point is created, which allows you to recover files/folders from a point in time. The best part about this is that the snapshots themselves take up very little space and give you tons of flexibility!
1. Open the Package Center, search for Snapshot and install the Snapshot Replication package.
2. When the install finishes, launch the Snapshot Replication application. Select Snapshots and select settings on the folder you’d like to schedule protection for.
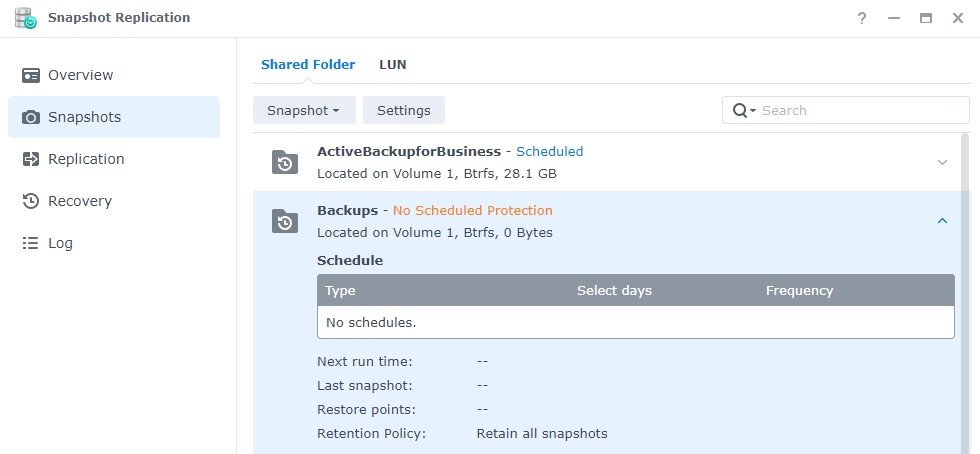
3. Enable the snapshot schedule. At this point, there are two final settings you’ll need to check:
- Retention: Select how many snapshots you’d like to retain. Depending on the file type (and size), you’ll most likely have different retention policies for different folders.
- Snapshot Visibility: If you would like snapshots to be visible, select the checkbox under the Advanced section.

After the snapshots have been configured, your system will start to create snapshots regularly. When the retention policy hits its maximum, old snapshots will be deleted. Your files are now protected! Keep in mind – this is not a backup.
If you’d like to learn more about snapshots, please check out the video below!
2.3 How to Set up a Recycle Bin Task on a Synology NAS
By default, the recycle bin will retain files until you empty it. However, there’s an easy way to set up a schedule so that your NAS automatically deletes these old files after a certain period of time.
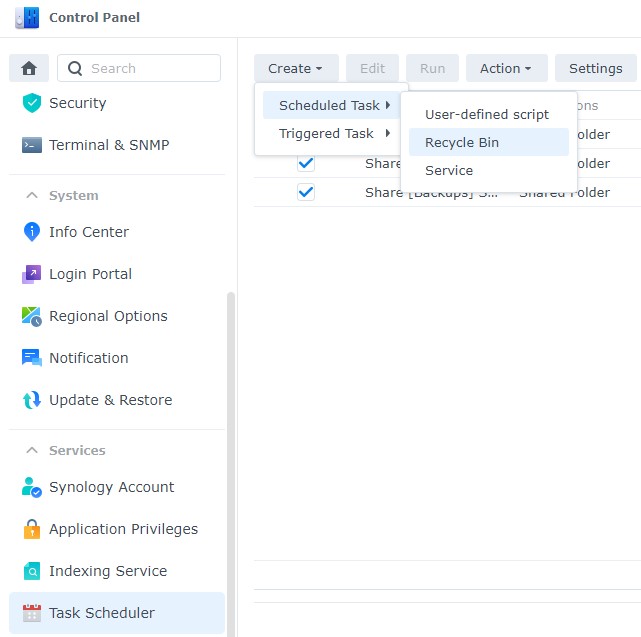
1. Open the Control Panel and select Task Scheduler.
2. Select Create, then Scheduled Task, then Recycle Bin.
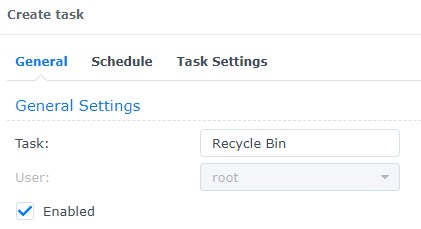
- General: Enter a Task Name.
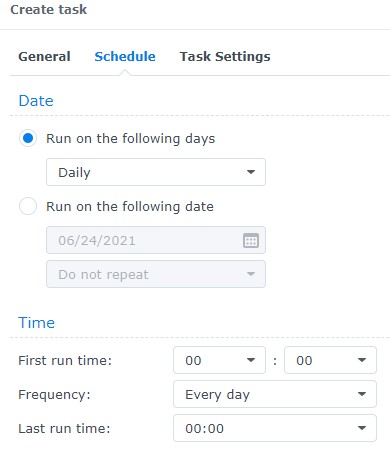
- Schedule: Specify when you’d like the task to run.
- TaskSettings: Specify if you’d like all recycle bins to empty or only specific ones.
- Retention Policy: This is an important step! I retain all deleted files for 14 days, but this is completely personal preference. This setting specifies when files are deleted. There are also advanced settings you can check.
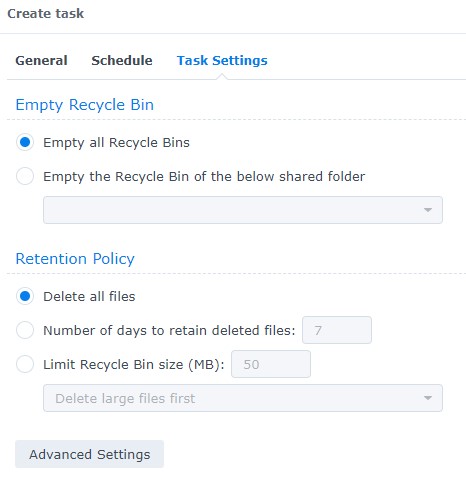
This is very important because when you’re using a NAS, you generally have data rotating like snapshots and backup files. This means that if you don’t set up a recycle bin emptying schedule, your old files will pile up and take up unnecessary space. A small step that really helps!
2.4 How to Set up the Storage Analyzer on a Synology NAS
The storage analyzer allows you to see what files/folders are taking up space on your NAS and if any duplicates exist. It’s a powerful tool that periodically comes in handy.
1. Open the Package Center, search for Analyzer, and install the Storage Analyzer package.

2. When it’s done installing, open the package. You will be asked to specify a location to save your reports. Select Yes. Specify a location to save your reports and the frequency you’d like reports generated.
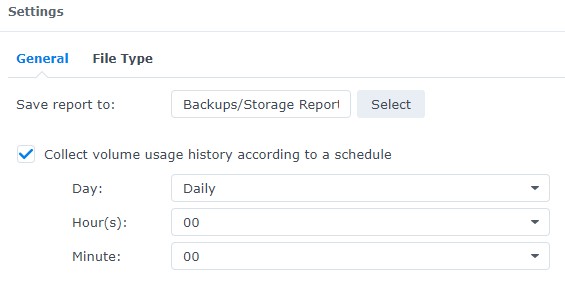
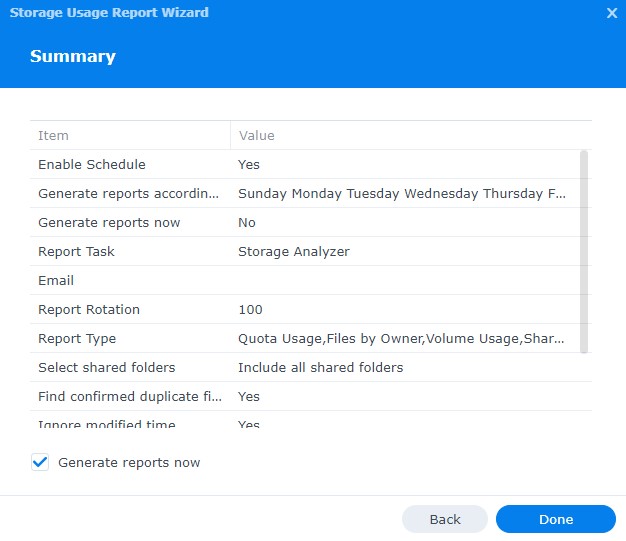
3. A wizard will then start to assist you in the creation of the scheduled task. Give your report a name, set a schedule, and then specify the total number of reports you’d like to keep.
4. Keep all Report Types selected (unless you don’t want specific ones generated) and click Next.
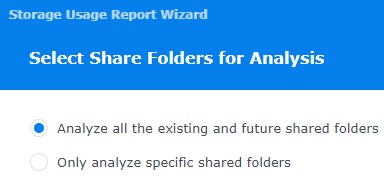
5. Determine if you’d like to analyze all current and future shared folders, then select Next.
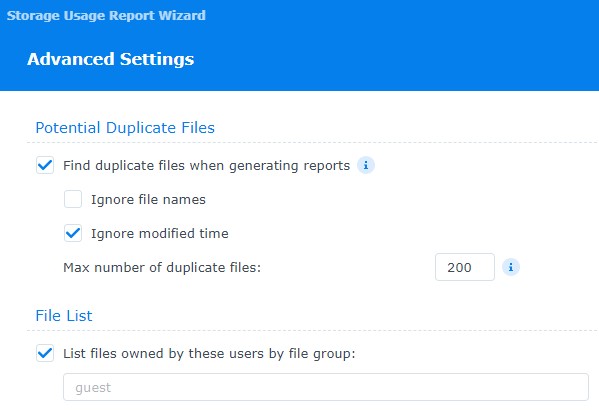
6. Select the settings you’d like to use to find duplicate files.
7. Select Generate reports now, then Done, and the process is officially set up!
This might not seem important on the surface, but understanding how your storage is being used is integral!
2.5 Uninterruptible Power Supply (UPS)
If your data is important to you, a UPS is the cheapest security blanket you can buy. It ensures that consistent power is delivered to your NAS and in the event of a power outage, it can safely power down your NAS. If you don’t have a UPS, it requires an additional purchase, but in my opinion, it’s well worth it.
Here is a link to my favorite UPS (that I own). If you’d like to buy a UPS but spend a little less, here is another great option which has USB data transfer as well so it can automatically turn off your NAS! Here are some other Synology NAS UPS options.
When you get your UPS, follow these instructions to configure it.
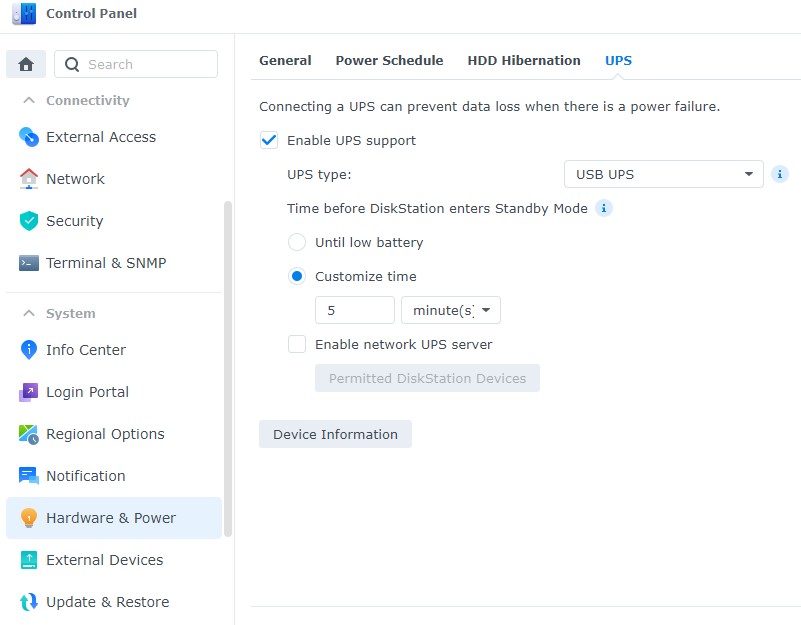
1. Open Control Panel, Hardware & Power, then UPS.
2. Enable UPS support and select the UPS type that you own. You can then configure the time before your NAS enters safe mode.
2.6 How to Set up Notifications on a Synology NAS
By default, Synology NAS devices have a bunch of different ways that they can be monitored. However, monitoring does very little if you aren’t being notified of issues that have occurred on your NAS.
This should be part of the initial Synology NAS setup due to its importance, so if you haven’t set it up, consider following this tutorial and enabling it!
3. Security for Synology Devices
The security of your Synology NAS setup is incredibly important. I am going to go over a few basic settings that can be changed to secure your NAS. It’s important to note that cybersecurity is always evolving and staying up to date with best practices is important. These are things I normally change, but depending on your needs, you can potentially secure your NAS even further.
If you aren’t exposing your NAS to the internet, some of these settings won’t affect you. However, it’s still a good idea to change them. If you are exposing your NAS to the internet, these settings are mandatory!
3.1 How to Set up Synology NAS DSM Update Settings
If you do nothing else, installing Synology’s newest updates should be at the top of your list. Not only do you get new features, but more importantly, you get the newest security enhancements.
There are certainly exceptions to this (like when DSM 7 was first released) where you might not want to be first to update. However, as time goes on, you will notice that you connect to your NAS less frequently than you initially did, and this is where I believe automatic updates add value.
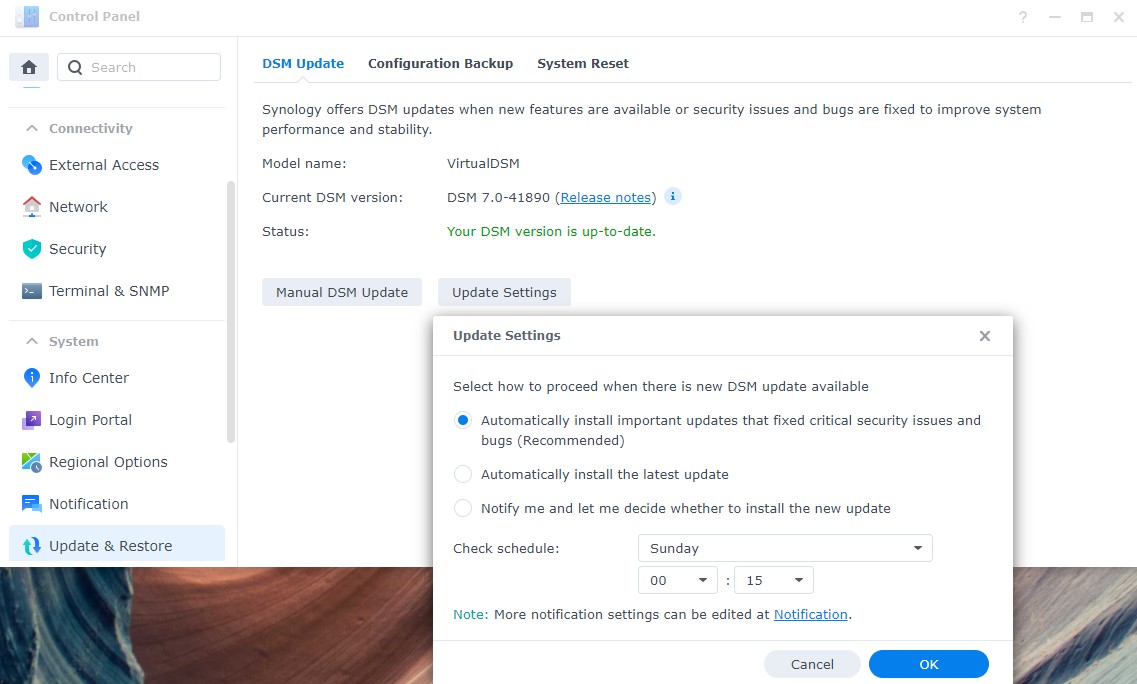
1. Open the Control Panel and select Update & Restore.
2. Select Update Settings and Automatically install important updates that fixed critical security issues and bugs (Recommended). Pick a date and time (preferably during the middle of the night) that updates will be installed. If you won’t be logging into your NAS very frequently, you can consider selecting Automatically install the latest update.
3.2 How to Change Default Ports
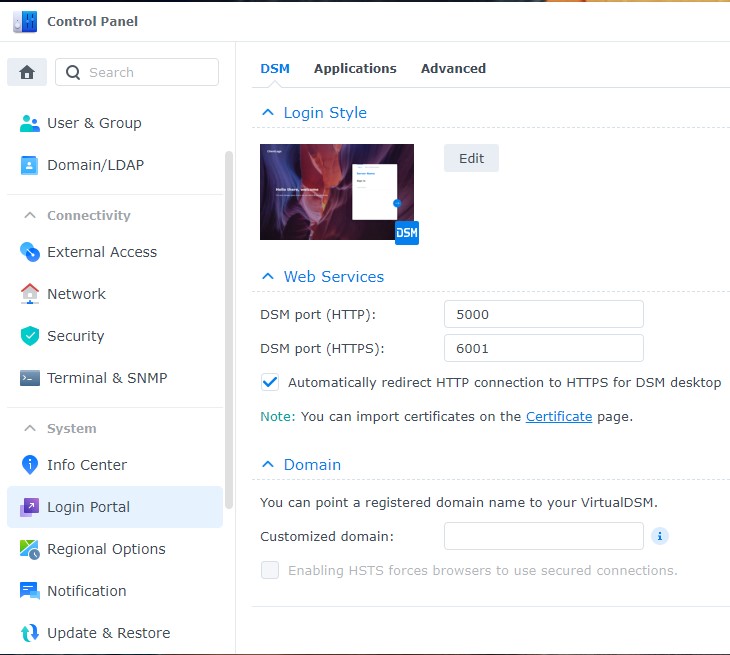
After the initial Synology NAS setup process is completed, the default HTTP port is 5000 and the default HTTPS port is 5001. I always change these ports as it’s a good security practice to do so.
If you don’t intend on exposing your NAS to the internet, I wouldn’t say it’s necessary, but if you do intend on exposing it, I would change these ports.
1. Go to the Control Panel and select Login Portal and change the default ports from 5000/5001 to the ports of your choosing. After making the change, DSM will restart your web server.
You can also consider selecting Automatically redirect HTTP connection to HTTPS for DSM desktop if you want all traffic to go through HTTPS. NOTE: Make sure the ports you picked are not currently being used.
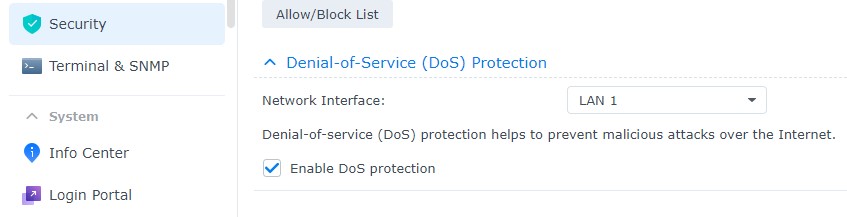
3.3 How to Enable Denial-of-Service (DoS) Protection
A Denial-of-Service (DoS) attack’s purpose is to shut down your machine or network making it inaccessible. Synology has an easy way to protect against this.
1. Open the Control Panel and select Security.
2. Select Protection and Enable DoS protection.
NOTE: You will need to do this for every network interface that you have.
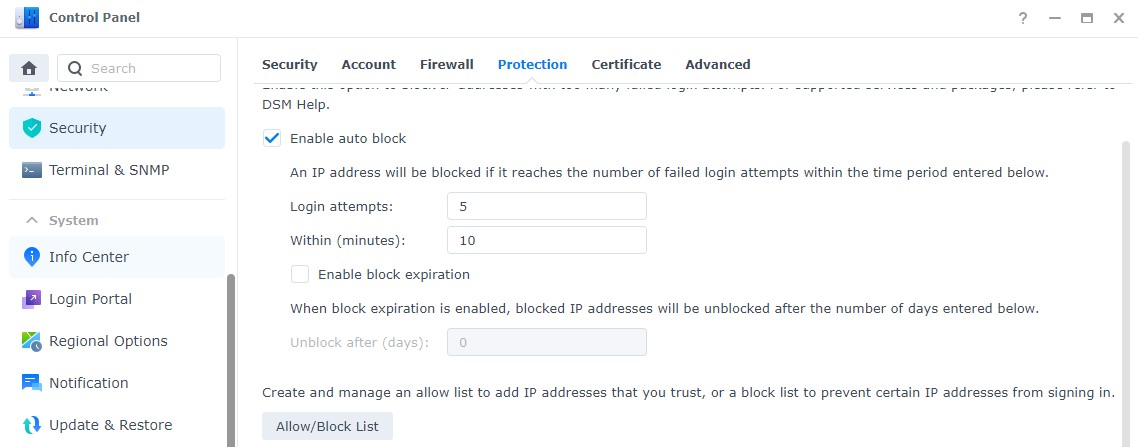
3.4 How to Configure Auto Block
1. Open the Control Panel and select Security.
2. Select Protection. Ensure Enable auto block is selected and modify the Login attempts/Within parameters if you’d like. If you would like to whitelist a specific IP address, select Allow/Block List and add the IP address to the Allowed list.
3.5 How to Set up the Synology NAS Firewall
I did my best in the written instructions below to explain how Synology’s Firewall works, but I highly suggest that you check out the Firewall video as it breaks everything down and is much easier to understand!
Synology’s firewall monitors incoming and outgoing network traffic and permits or blocks data packets based on the security rules defined. This is incredibly important, as this firewall will be what determines which traffic should be permitted to your NAS.
Firewall rules are completely dependent on what you’re using. This means that someone who is using SSH will have an “allow” rule for SSH, while someone who isn’t will block it. For this reason, I can’t go over exactly what you should add, but I will go over a few fundamentals.
For an entire Synology Firewall overview, please review the written instructions.
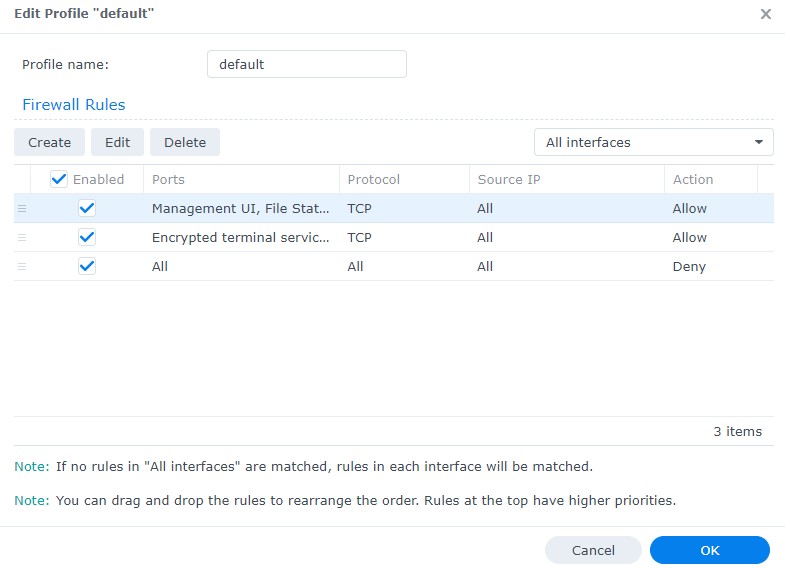
- Firewall rules are executed top to bottom. Meaning that all “allow” rules must be at the top of the list, with a “deny all” rule at the bottom. When traffic enters the NAS, it will go through the list and if it isn’t explicitly permitted, the “deny all” rule will block traffic. TLDR: put your allow rules at the top and the deny all rule at the bottom.
- You shouldn’t open ports to applications you aren’t actively using. For example, you might have SSH enabled, but it’s a good idea to turn off SSH when you’re done and to remove the “allow” firewall rule.
- As you add new packages to your NAS, new “allow” rules will need to be created. Your NAS will generally inform you that you need to create a new rule when you finish installing/configuring a new package.
Firewall Instructions
1. Open Control Panel and select Security. Select Firewall and Enable firewall. When done, select Edit Rules.
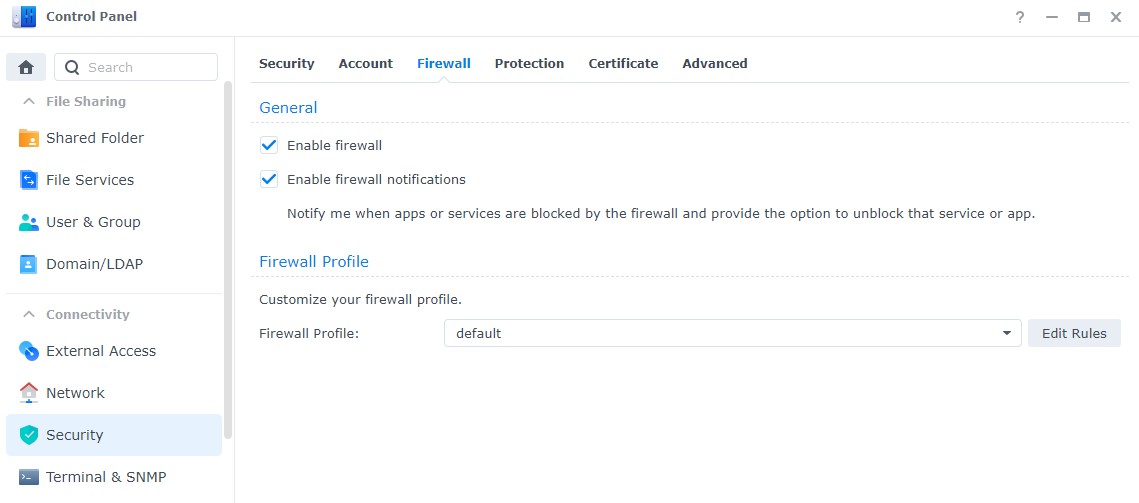
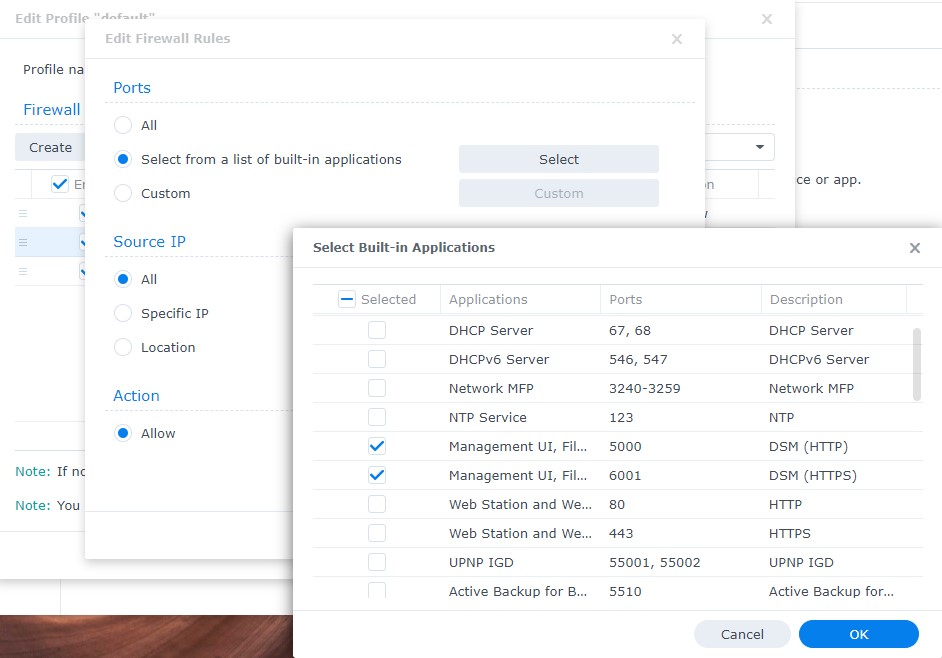
2. At this point, you will need to create rules that allow traffic into your NAS. The first thing you need to ensure is that you allow traffic to DSM.
Select Create and when the firewall rules criteria appears, check off select from a list of built-in applications. Select the Management UI checkboxes, click OK, and then add the rule.
- NOTE: Technically, you only need to create one “allow” rule which is a combination of all of the ports that you’d like permitted. However, if you want to allow traffic to certain ports by IP subnet (for example), you should have one rule per service/application. TLDR: create one rule per application so that you can easily manage them.
3. Go through all of the applications and ensure that you are allowing traffic where necessary.
4. At the bottom (as your last rule), create a “deny all” rule.

5. When you’re done adding all of your rules, Apply your changes.
Your firewall is now activated! This is something that you will constantly have to maintain by adding new rules and removing older ones no longer needed. Remember, cybersecurity must be maintained! Unfortunately, “set it and forget it” won’t work in this case which is why it’s important to focus on this during your Synology NAS setup process.
3.6 How to Enable Two-Factor Authentication
I know…it’s annoying, but it works. Two-factor authentication ensures that if your password is compromised, you have an additional layer of security that ensures your account cannot be accessed.
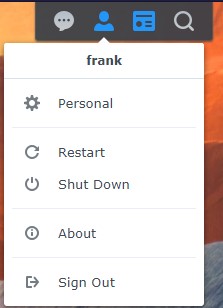
1. Select the Person icon in the top right and select Personal.
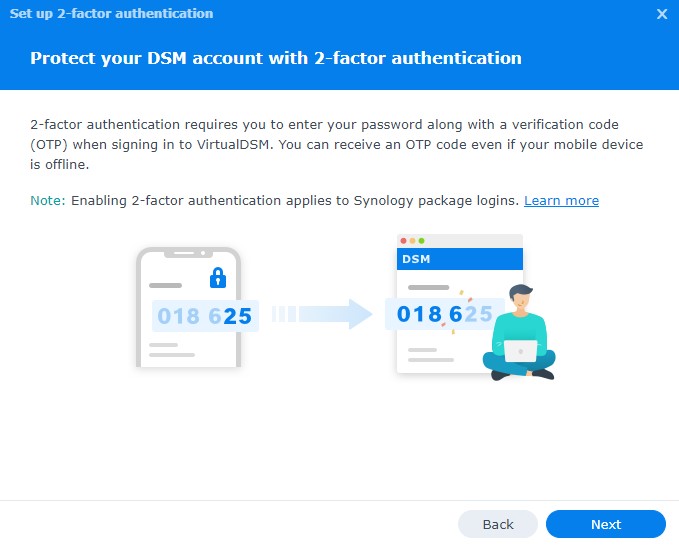
2. Select 2-step Authentication, then Verification code (OTP).
3. Select Next to protect your DSM account with 2-factor Authentication.
4. The next section will suggest that you install Synology’s Secure SignIn. This is not required. This is simply Synology’s TOTP application – you are free to use whatever TOTP application you’d like.
5. Scan the QR code, enter the code, then select Next.
6. Set up the Email service provider, then select Next.
7. 2-factor authentication is now set up!
If you’re interested in learning more about two-factor authentication, I highly suggest you check out this video by Tech Me Out as it’s broken down into much greater detail!
3.7 Additional Security Steps
There are many complex layers to securing a Synology NAS setup. Generally, they are more “best practices”, but there are certain things you can do to enhance the security of your Synology NAS.
If you’re interested in learning more, I have written an article on Synology NAS setup security, or you can check out the video below:
These are simply suggested approaches to securing your NAS. Ultimately, exposing your NAS to the internet is an inherent risk that makes the security practices above (and potentially more) mandatory. If you don’t want to use QuickConnect, consider setting up a VPN so that you can only allow traffic to your NAS from internal IP addresses (both are shown in section 5.1).
4. Additional Recommendations
While we went through the initial Synology NAS setup process, there are many additional items you can use your NAS for. I have a bunch of tutorials that I will link below showing how to complete certain actions. Keep in mind, there are a ton of apps you can install and these are my favorite Synology NAS apps that you can install!
4.1 Accessing your Synology NAS Outside of Your Local Network
After setting up a Synology NAS, most people are interested in accessing their NAS from outside of their local network.
These are a few ways (with a few additional ways in our Synology NAS security tutorial) that you can securely access your NAS which are shown in the video below, but there are written instructions below for each.
4.1.1 How to Setup OpenVPN on a Synology NAS
The best and most secure option to access your NAS from outside of your local network is to use a VPN. If you can’t set up a VPN on your router, it’s very straightforward to set up WireGuard or OpenVPN on a Raspberry Pi, but you can set up OpenVPN on your Synology NAS as well if you’d prefer.
I have written instructions on setting up OpenVPN on your Synology NAS, or you can watch the video below:
4.1.2 Synology’s QuickConnect
Synology QuickConnect allows you to access your NAS from outside of your local network. This is Synology’s way of ensuring you don’t need to open ports to your NAS to access your data externally.
I don’t use this, but there’s nothing wrong with using it. The way that I access my data from outside of my network is through my VPN. Keep in mind that if you do use this, technically, you’re trusting Synology’s ability to secure your data. Look into configuring a VPN Server on your NAS (as shown above) if this bothers you.
If you’re interested in configuring QuickConnect, please follow our Synology QuickConnect article.
4.1.3 How to Setup Dynamic Domain Name Service (DDNS) on a Synology NAS
Having a DDNS hostname ensures that you are always connecting to your external IP address. Most providers assign dynamic external IP addresses to clients which means that your current external IP address might not be the same tomorrow or two weeks from now.
Synology provides a free “synology.me” DDNS hostname and you can learn how to configure it here, or you can watch the video below:
4.2 Best Applications to Install for Synology NAS Devices
There are many different applications that you can setup/install on your Synology NAS and we will go over a few of them in this section.
4.2.1 Synology Drive Client/Server Setup on a Synology NAS
Synology Drive is my FAVORITE Synology application. Synology Drive ensures that my local documents successfully sync to my Synology NAS whenever they are created/modified. This ensures that I have at least two copies of my files at all times, with a third backup to the cloud (shown below) occurring that night.
Synology Drive has a few pieces to it, so I have a full tutorial on how to set up and use Synology Drive here, or you can watch the video below:
4.2.2 How to Set up Docker (Container Manager) on a Synology NAS
There are tons of Docker containers that you can run on your Synology NAS, and I’ve created a bunch of tutorials (one of the most popular being Pi-hole), on how to use some of them.
However, it’s more important to understand how Container Manager works (Container Manager is now used to install Docker containers on Synology NAS devices). Understanding how it works will allow you to implement any container you’d like! I created a tutorial on how to use Docker and you can find the written tutorial here (for versions prior to DSM 7.2).
Here is the video tutorial on Container Manager:
4.2.3 Synology Photos Overview & Review
Synology Photos is a new application that Synology released with DSM 7. It replaces the Synology Photo Station/Moments applications from DSM 6.
Synology Photos allows you to automatically back up photos/videos from your mobile device directly to your NAS. Overall, it works well, and I have instructions on how to use Synology Photos, with a video explaining the entire application below:
4.2.4 Home Assistant Setup Process
If you’re interested in managing a smart home, one of the most popular choices is Home Assistant. Home Assistant can easily be installed on a Synology NAS by utilizing Virtual Machine Manager.
4.2.5 Media Servers (Plex, Emby, Jellyfin)
There are ultimately three different media servers that you can configure on a Synology NAS to use which will stream media from your NAS to a client device (cell phone, smart TV, etc). The most popular option is Plex, with two other great options being Emby and Jellyfin.
4.3 How to Back Up Devices to a Synology NAS
Synology NAS devices generally have tons of storage which makes them perfect destinations for backups. This section will focus on a few ways that you can back up devices to your Synology NAS.
4.3.1 How to Backup a Windows PC to a Synology NAS using Active Backup for Business
Active Backup for Business is a great tool that allows you to easily manage your Windows device backups in a central location. It also offers bare-metal and file-level restores, which make it an awesome backup application.
You can learn how to backup Windows PC’s to your Synology NAS here, or you can watch the video below:
4.3.2 How to Backup a Linux PC to a Synology NAS
In DSM 7, Synology now gives you the option to backup Linux machines to a Synology NAS (tutorial coming soon). However, you can easily back up a Linux PC to a Synology NAS using Veeam (free), or Rsync. I prefer Veeam as I like to have the option of bare-metal restores, but Rsync is a perfectly acceptable option as well! You can learn how to install Veeam here or watch the video below:
4.4 Synology NAS Backups
RAID IS NOT A BACKUP! If the data on your NAS is important to you, you need to back it up. Following the 3-2-1 backup rule, you should have three copies of your data, on two storage mediums, with one off-site.
All options below utilize Hyper Backup to back up important data from a Synology NAS to an external device.
4.4.1 How to Backup a Synology NAS to Backblaze B2
I back up all of my super-important data to Backblaze B2. It’s quick and easy to set up, the prices are reasonable, and I ensure that my important data can be recovered in the event of data loss. I have a tutorial on how to back up a Synology NAS to Backblaze B2 here, or you can watch the video below:
4.4.2 How to Backup a Synology NAS to a Raspberry Pi
While some people prefer backing up their data to cloud storage, it’s perfectly acceptable to back up your Synology NAS to local storage as well, as long as you have a copy off-site.
This tutorial focuses on how you can use a Raspberry Pi as an on-site or off-site backup location. I have a written tutorial here or you can watch the video below:
4.4.3 How to Backup a Synology NAS to a Destination Synology NAS
If you’re fortunate to have two Synology NAS devices to setup (or a friend who will let you back up your data), you can easily configure Hyper Backup and Hyper Backup Vault.
This will allow you to back up your Synology NAS to a remote Synology NAS, with full written instructions here or a video below:
4.4.4 How to Backup a Synology NAS to an External Hard Drive
While it’s important to back up your super important information off-site, there’s nothing wrong with having a local backup. Local backups can be done using an external hard drive and are extremely simple to set up on a Synology NAS with Hyper Backup:
5. Conclusion & Final Thoughts
This Synology NAS setup guide was created to give you a full list of all the things you can implement on your Synology NAS. Not everyone will implement everything, but it’s a good starting point that you can build on! If you’re running into any problems specifically, sometimes checking the system logs will help isolate what the issue is.
We have tons of other tutorials if you’d like to check any of those out and the initial video gives a very deep understanding of the entire DSM operating system.
Thank you for checking out the tutorial. If you have any questions, please leave a comment!

Hello! Great guide! How come we change the DSM ports from their 5000/5001 defaults?
Thank you! There is a lot of debate on if changing the default ports is necessary. In general, the only real reason is so that you’re not using the default ports. The idea is that if there are bots trying to scan ports 5000/5001 in specific, you would bypass them by having something different. In practice, a port sniffing bot will most likely still find your open ports, so there’s a lot of debate on if this is necessary.
My personal belief is that this doesn’t hurt anything, so I do it. This is harder to justify if you’ve setup a bunch of applications that are already using your current DSM port. Hopefully this helps!
I tried setting up notifications by email, but when I try to send a test email, it says that the test mail fails to send. I think I have to do something with the default gateway and the preferred DNS server IP address? No idea how to do this?
Also, how do you remove a drive from the storage pool?
Thanks
Thanks for reading the tutorial! What email provider did you use? You shouldn’t have to change anything with the default gateway or DNS server.
These are the instructions on how to configure Gmail: https://www.synology.com/sv-se/knowledgebase/DSM/tutorial/Management/How_to_use_Gmail_SMTP_server_to_send_emails_for_DSM
You cannot remove a drive from a storage pool after it has already been added. You can, however, change the RAID type (depending on the type of RAID you’re using). This link has more information: https://www.synology.com/en-global/knowledgebase/DSM/tutorial/Storage/Reduce_RAID_drives
Hopefully this helps!
Interesting. So I should be able to change from SHR-1 to SHR-2 and then remove a drive? However, the option to change my storage pool to SHR-2 is greyed out (maybe because I’m currently running an integrity check on my backup?)
If you change from SHR-1 to SHR-2, I believe that you will be locked in at SHR-2 (and unable to change back).
Can you backup your NAS, then recreate the Storage Pool/Volume to be in the configuration that you want? I’m worried that changing RAID types and trying to pull drives out may not do exactly what you want and then you’ll be locked in at SHR-2.
On the firewall settings, I had to allow SMB ports (137~139, 445) in order for Synology Assistant and Windows to access the NAS. Might want to address that in this guide. And thank you very much for all of this info.
Brilliant guide, I receive my DS720+ tomorrow, so this guide will be one of my first port of calls when I set it up initially. Will also be looking at your Bitwarden tutorial as I plan on trying that as I use Bitwarden for my passwords.
Hi,
Do you have a PDF of this tutorial so I can print it? Much easier to learn from paper…
Thank you!
Hello!
I unfortunately don’t, but that’s great feedback that I will try and incorporate in the future. I assumed it was easier to use a webpage for searching, but I can certainly see how some people would prefer it printed.
Thank you for the feedback and I apologize for not being able to offer you anything right now. Hopefully sometime soon!
Hi, Just wanted to say thanks. As a newbie home user it is daunting and a step by step guide like this is incredible.
Thanks so much for the kind words! I’m glad that the information helped!
Like many people I am not a specialist about security and your tutos are more than interresting and give the essential to secure our lovely NAS.
Many thanks for your efforts. I already recommended you to friends who also use Synology NAS.
I profit of this post to wish all people the best for 2021, Stay safe 🙂
I’m glad to hear it helped, thank you so much for the kind words! Happy Holidays/New Year!
Thanks for a great tutorial. I talked with APC about the BX1500M UPS and they said it does not have a USB port to initiate shutdown for the Synology NAS. The back of the UPS says USB/Serial, but it clearly is a serial port. How does your BX1500M shutdown Synology? I personally have the SMC1000, which is overkill on my next project. I need a smaller solution, and the two that you listed would be ideal, but I am not sure how it will communicate with the DS2220+.
Thanks,
Did your UPS come with a data cable? It should be an RJ11 (I believe) cable to a USB cable. From there, you should be able to plug the USB into the Synology NAS, then pull up the control panel and it will find the UPS.
Let me know and we can continue troubleshooting!
Question- I’m setting up a new DS418 and wondering how can I test the new hard drives in the synology and where would I find the test results for surface scan, bad sector counts, reallocated sector counts? Or what your suggestions would be on hard drive testing/monitoring procedure. Thanks for the tutorial, really helpful.
The best thing to do would be to run a SMART test (extended if you want best results) by opening the Storage Manager, selecting HDD/SSD, select the drive, select “Health Info”, “S.M.A.R.T”, then run an extended test. When it’s done, you will see it in the “Overview” section.
Fantastic! Thank you for going through the trouble to create this tutorial. It’s been very helpful.
Bottle of Advil! First thank you for sharing your talent/info. For the most part easy to follow as a NEW beginner. I have followed most everything after watching and reading white paper. Ok so here it is….! Im on a mac, have created shared folders as you show how. The problem is I can’t find them on the Mac. I have external drives I use on my Mac and they show up on the desk top and easy to access. The Synology “shared folders” should show up on the desktop so I can access them. How do I get them to show up? I am confused as I feel this should be an automatic step. This is a very simple question but I can’t find the drives! I appreciate your help very much.
How have you set up the NAS? Do you know if you enabled SMB? SMB is generally how most access the data on their NAS. If you did, this should help in connecting to it: https://ag.montana.edu/it/support/smb-macs.html
Hi WunderTech, this is an amazing guide, thank you! I watched your video as well.
I recently purchased a Synology DS1821+ and I have it up and running, and now I have 2 very silly questions I can’t seem to find answers to (even with the help of your helpful guide):
1. If I wanted to just STORE media files on my Synology NAS to free up space on my other SSDs (video footage and movies), how do I do that? I tried to use Drive Server but two-way sync means those files are on BOTH the Synology NAS and my computer… I just want to be able to access those files “on-demand” (for example on windows you can choose “Cloud only” right, but not on mac…
2. If I wanted to stream movie files straight to my phone or iPad, is there a tutorial you point me to?
Thank you so much!
Glad to hear that they’ve helped!
1. You would most likely connect to the device via SMB. You can enable SMB on the NAS, and then in Windows, select Start –> Run. Then type in the IP address of your NAS in this format: “\\IP_OF_NAS”. When you hit enter, you should be forced to log in and at that point, you should see the shared folders on your NAS. Uploading them there will allow you to store the data on your NAS without having it sync back to your PC.
2. There are tons of different ways to do this, but I’d probably suggest Plex. It’s pretty straight-forward to set up (open Package Center and install Plex. You can then configure it to read the folder that has your media files), but I don’t have a tutorial for it up just yet. I am happy to explain in greater detail if needed.
Hopefully this helps, but let me know if you have any questions!
Hi WunderTech! Is it bad that I half didn’t expect a reply? I’m extremely grateful you did reply! Let me try the SMB and Plex solutions like you mentioned. Thank you!
By the way, do you do paid consultations…?
Haha! I try and answer every message I get, but depending on the volume, I am slower some days than others. Right now I don’t do any consulting, but I am planning on it within the next few months (hopefully)!
Let me know if you have any other questions!
Hi WunderTech!
Firstly, thank you so much for all your your tutorials and guides, they’ve been mega helpful for me in setting up my first NAS. I’m still running DSM 6 and want to manage photos – with photos getting a new app in DSM 7, do you recommend using photo station or moments first in DSM 6? Or upgrading to the open beta?
Thanks so much for the kind words! I wouldn’t personally upgrade to DSM 7 yet, but I would say that Memories is probably the most similar to the new Photos app so that might be best? Ultimately, as long as you have your photos and take proper backups, you’ll be able to implement it however you’d like when DSM 7 is released!
Only issue I have with DSM 7 is that Synology Photos is in no way a replacement for its predecessors in DSM 6.
Specifically what is annoying is that you can no longer cast from your Tablet to your TV whether it be via Chromecast to a TV or to a Sony Android TV (Sony I used to used the onboard DS Photo app).
DS Video still seems to work ok… interestingly…
This coupled with the loss of other features that were in Photo Station etc is very annoying. How they released DSM 7 without completing the photo functionality is beyond me…Wish I’d stayed with DSM 6…
Are there any alternative Photo apps for DSM 7 that will allow me to at least cast my photos in good quality to my large screen TV’s using Chromecast or to an onboard app in Sony TV?
Responses from Synology in other forums are not encouraging to date..:(
Great article though…wish I’d read it before upgrading..
None that I know of, if I’m being honest. I know that there are a few docker solutions that you might want to try, but I haven’t used any of them so I don’t want to recommend them. There are definitely people who were heavy DS Photo/Photo Station users that are disappointed with Photos (understandably so). Let’s hope Synology updates the application in the future!
Thank you for responding. Much appreciated.
Thank you for taking such effort. Great guide!
Thanks a BUNCH for this very thorough post: I truly appreciate it! 🙂
Glad that it helped!