In this tutorial, we will look at how to set up WireGuard VPN server on a Raspberry Pi using PiVPN! The goal is to provide easy instructions that will help you set up the WireGuard Raspberry Pi VPN server.
WireGuard is awesome! Up until WireGuard, the gold standard for VPNs has been OpenVPN, which is still a great VPN option. However, WireGuard is a faster alternative that’s somewhat easier to implement.
It also has the benefit of being a lot simpler than OpenVPN, which doesn’t seem important, but it is. For this reason, we will look at how to set up a WireGuard VPN Server on a Raspberry Pi below. If you’re already using OpenVPN, the overall functionality will be similar.
Ultimately, more complex systems have more attack points, so if you care about security, WireGuard might be your answer. In this tutorial, we will look at how to set up a WireGuard VPN Server on a Raspberry Pi, but it’s important to note that you can install WireGuard on various types of devices.
It’s best to run PiVPN and WireGuard VPN Server on a Raspberry Pi 4 or 5, but if you have at least a Raspberry Pi 3 B+, that should be fine. This is because only the Raspberry Pi 3 B+ and Raspberry Pi 4 have gigabit ethernet, which is preferable for PiVPN and WireGuard.
- What is WireGuard?
-
How to Set Up a WireGuard VPN Server on a Raspberry Pi
- 0. Installing Raspberry Pi OS (Initial Install Steps)
- 1. Using PiVPN to Set Up a WireGuard VPN Server
- 1.2 Configuration File Changes for WireGuard on a Raspberry Pi
- 1.3 VPN Profile Creation for WireGuard
- 1.4 Persistent Keep-Alive
- 1.5 Port Forwarding for WireGuard on a Raspberry Pi
- 1.6 Static Route Configuration
- 1.7 Accessing/Testing WireGuard VPN Config Files
- 1.8 WireGuard Performance
- Conclusion & Final Thoughts: WireGuard on a Raspberry Pi
What is WireGuard?
WireGuard is a modern, high-performance VPN protocol designed to be easy to use and highly secure. It’s an open-source protocol that uses cryptography to provide more secure connections.
Compared to other VPN protocols, WireGuard has a smaller codebase, making it easier to audit for security vulnerabilities. Its efficient design results in lower latency and quicker connection times, improving overall network performance.
How to Set Up a WireGuard VPN Server on a Raspberry Pi
Setting up a WireGuard Raspberry Pi VPN Server is a quick and easy process thanks to PiVPN which we will be utilizing in this tutorial.
0. Installing Raspberry Pi OS (Initial Install Steps)
Before you can install WireGuard on a Raspberry Pi, you must install the Raspberry Pi OS using the steps below.
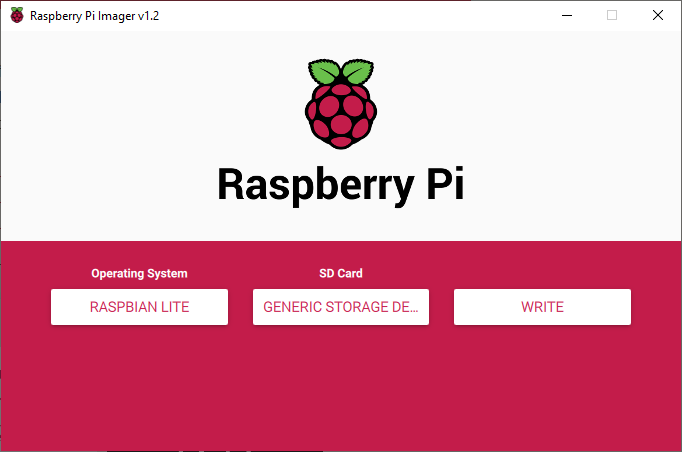
1. Navigate to the Raspberry Pi website and download the Raspberry Pi Imager.
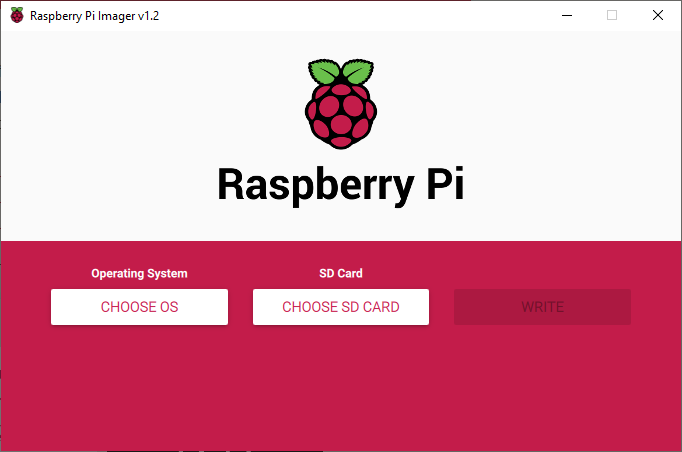
2. After the download finishes, launch the Raspberry Pi Imager application and connect your SD card to your computer.
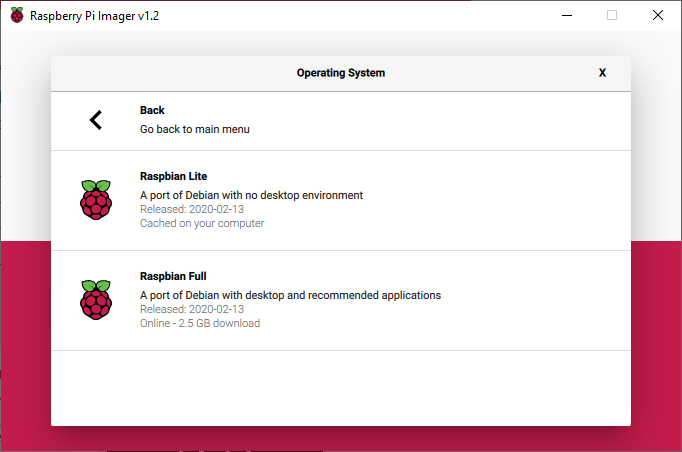
3. Select Choose OS and choose the operating system that you would like to use. In this example, I will be using Raspbian Lite.
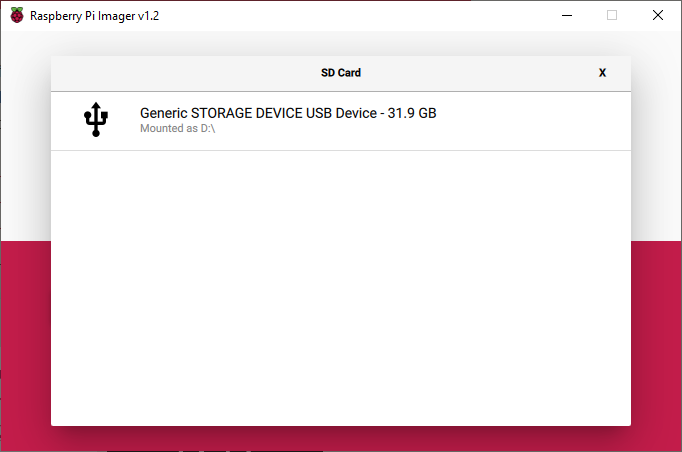
4. After selecting your operating system, select Choose SD Card and select the SD card that you connected to your machine.
NOTE: This will fully format the SD card so remove any important data prior to proceeding.
5. After the operating system and SD card have been selected, select write. This will write the operating system to the SD card.
1. Using PiVPN to Set Up a WireGuard VPN Server
We will look at how to set up WireGuard on a Raspberry Pi below using PiVPN.
Thanks to a handy script (PiVPN), installing WireGuard VPN Server on a Raspberry Pi is very simple. Generally, you want to ensure the script you’re running is trusted. This is a known and trusted script, but I still urge you to review it. We will look at how to set up WireGuard on a Raspberry Pi below.
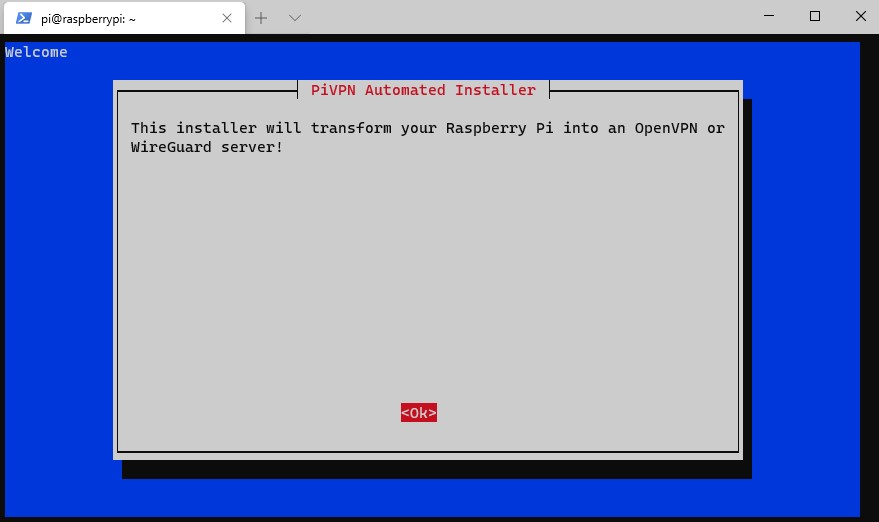
1. Open Terminal on your Raspberry Pi and run the command below, which will execute a script to install PiVPN (which has WireGuard built-in).
curl -L https://install.pivpn.io | bash

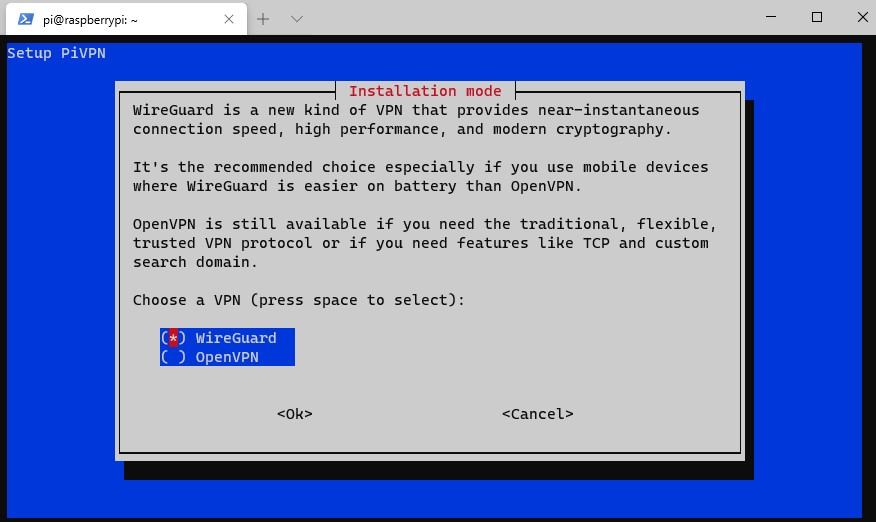
2. Wait for the process to install the necessary packages. When it’s done, you will be brought to a screen that will inform you that PiVPN will allow you to install OpenVPN or WireGuard on a Raspberry Pi. Select OK.
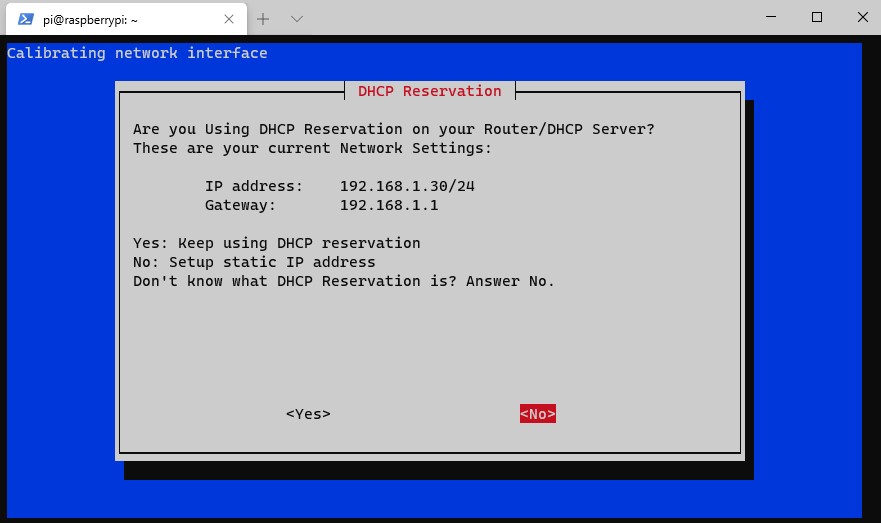
3. The next screen will inform you that you need to set a static IP address. It’s best to set a static IP address in your router’s settings, as you are ensuring that DHCP does not try and give this address to any other devices.
However, certain routers (mostly ISP provided ones) do not allow you to complete DHCP reservations. If you can’t set a static IP address for your Raspberry Pi in your router, set a static IP address on the Raspberry Pi by following the instructions.
I specified a static IP address in my router so I am going to skip this step.
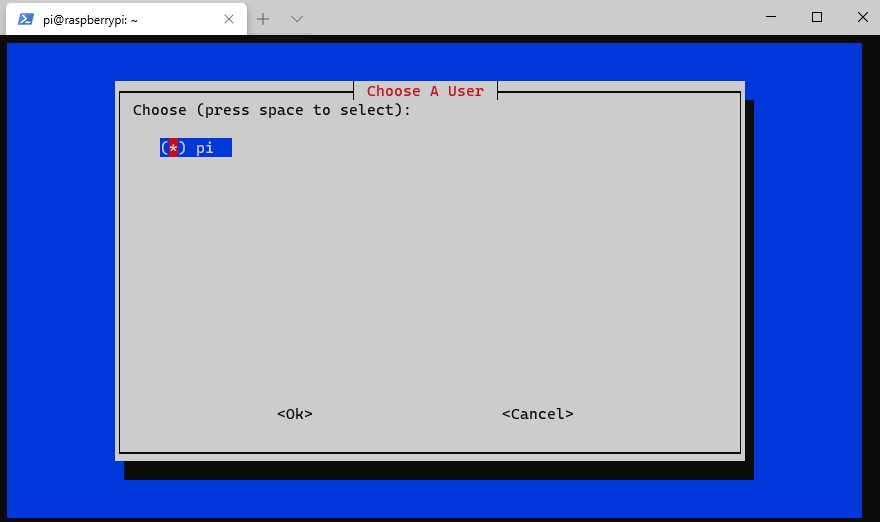
4. You will now need to select a local user. If you’ve created a different user (outside of the default pi user), you will have the option here.
5. You will be asked to select a VPN type. Select WireGuard.
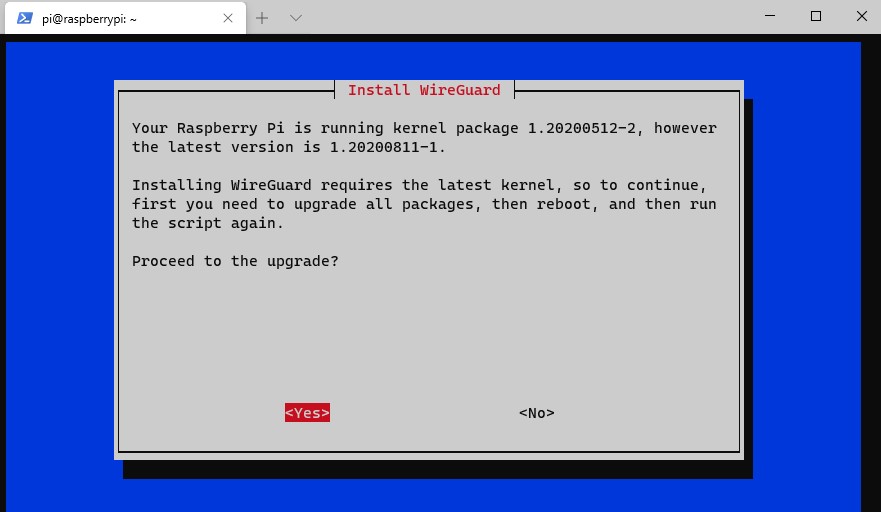
6. You might be prompted to install the latest kernel update. If you are, select Yes to proceed. If it doesn’t, skip to the next step to proceed.
NOTE: If you need to update the kernel, you will be required to restart this process after your Raspberry Pi reboots (start from step 1).
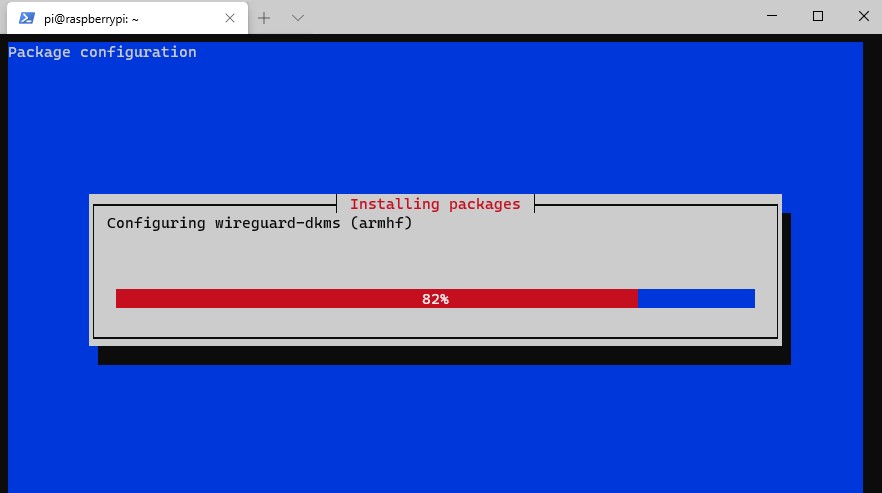
7. WireGuard will now install.
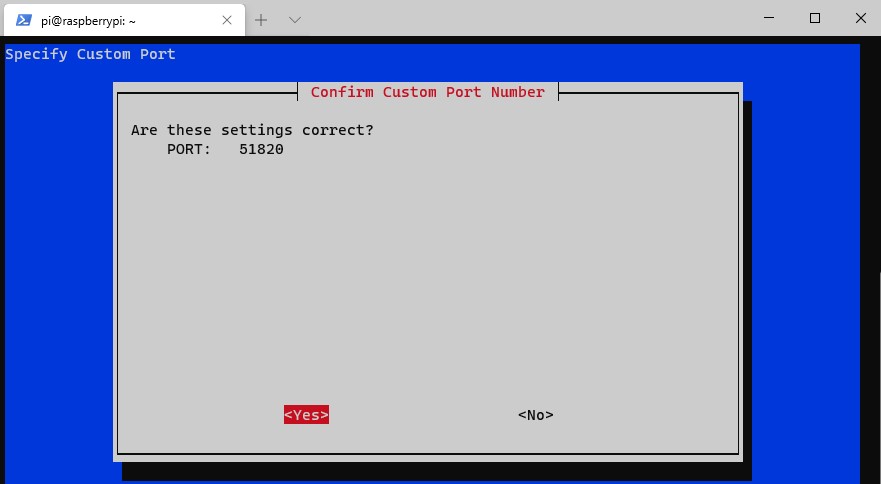
8. You will be asked to enter the port you’d like to use (default is 51820). It’s probably best to keep it as the default, but if you have a reason to change it, you can do that here.
NOTE: This is UDP port 51820.

9. Select Yes.
10. You now need to select the DNS provider you’d like to use. Select Custom if you’d like to use your own DNS server, or any of the public DNS providers if you don’t want to use a local DNS server.
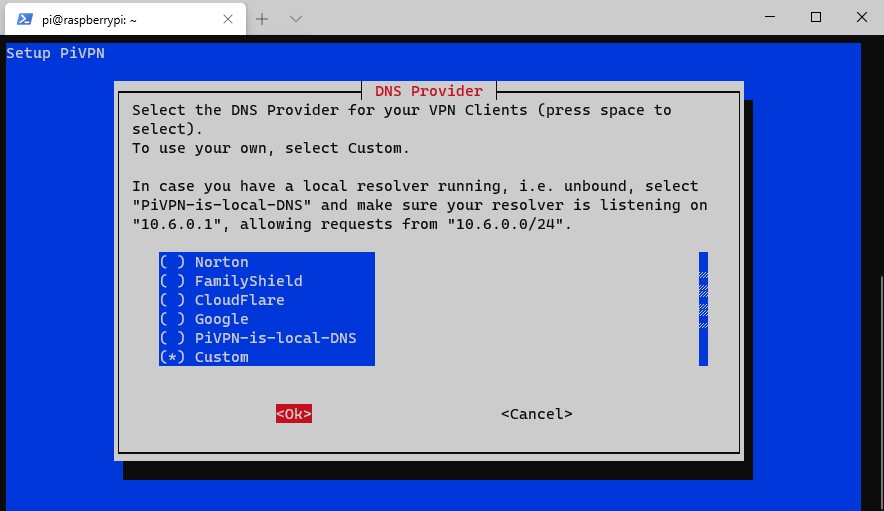
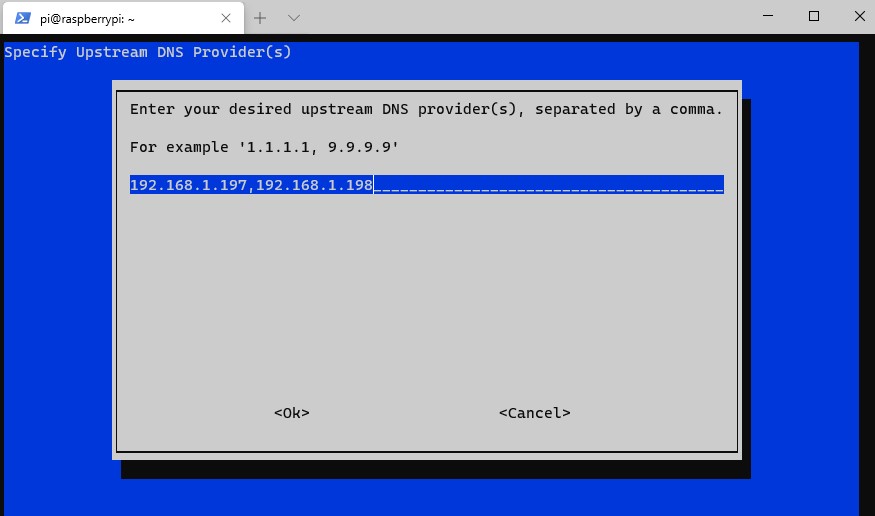
11. I am using a local Pi-hole DNS server that I already have configured, so I added the IP address there. If you are using a public DNS provider, you can skip this step.
NOTE: The IP addresses (192.168.1.197,192.168.1.198) are my local DNS servers. This will not work for you so ensure you use your local DNS servers or a public DNS provider!
12. The DNS servers that you select will now be listed. Select Yes.

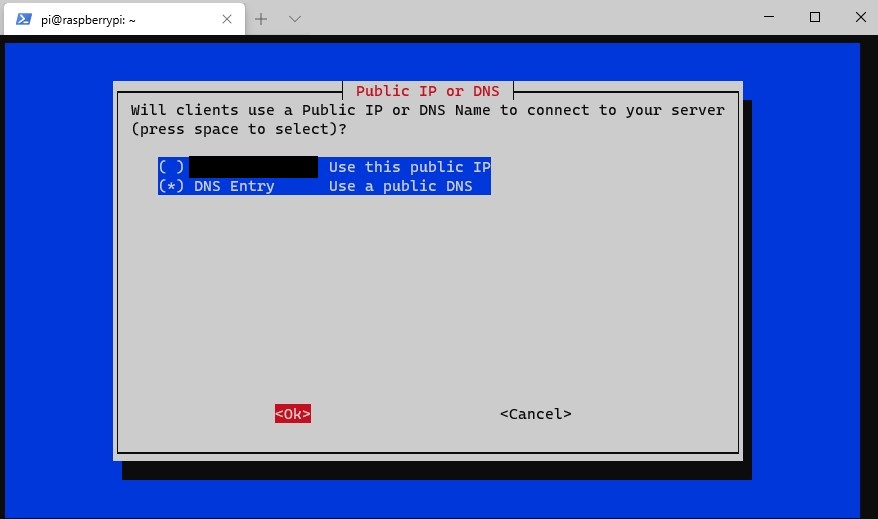
13. You will now be prompted to use your public IP address or public DNS entry. If you have a static IP address, you are free to use this address.
However, if you have a dynamic external IP address, you will need to set up DDNS. You can learn how to do that here.
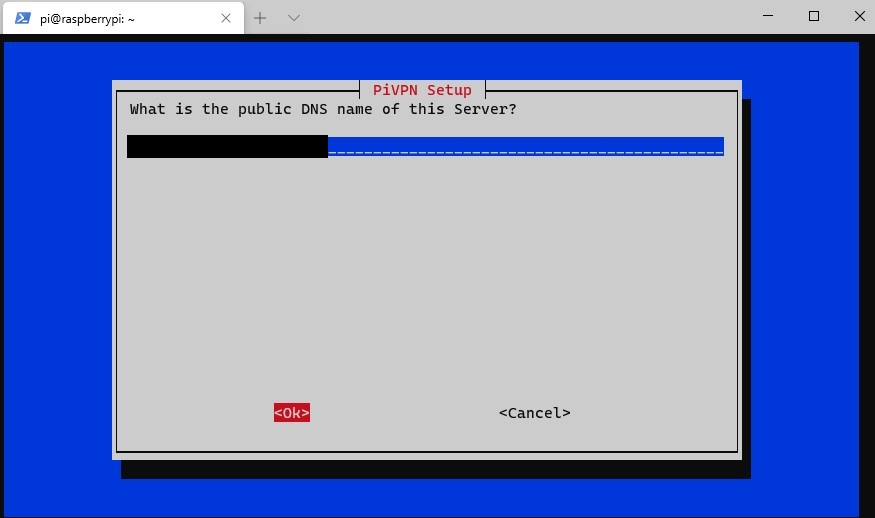
14. If you selected to use a dynamic DNS address, you can enter that information here. At the next screen, select Yes to confirm that it is correct.
15. You will now be prompted that the server keys will be generated. Select OK. The next step will tell you that the VPN Server will check for unattended-upgrades, and a periodic reboot will be required.
This is a great option. Enable unattended-upgrades (unless you have a good reason not to) and proceed. The packages will now install.

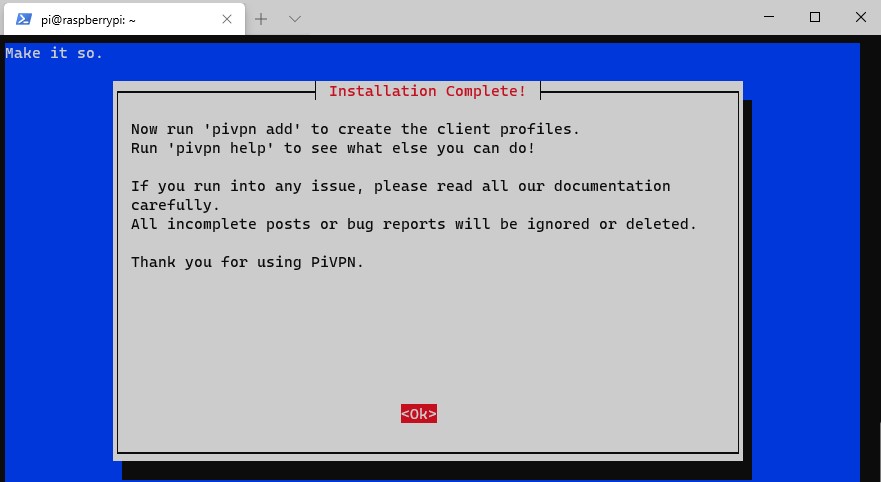
16. The installation is now complete! Reboot your system. If you’re using the Raspberry Pi Firewall, make sure you create a rule for UDP port 51820.
1.1 VPN Connection Types for WireGuard on a Raspberry Pi
This section is important for future steps (so you know what kind of profiles you’d like to create). We will be creating either a split-tunnel VPN, a full tunnel VPN, or both in later steps.
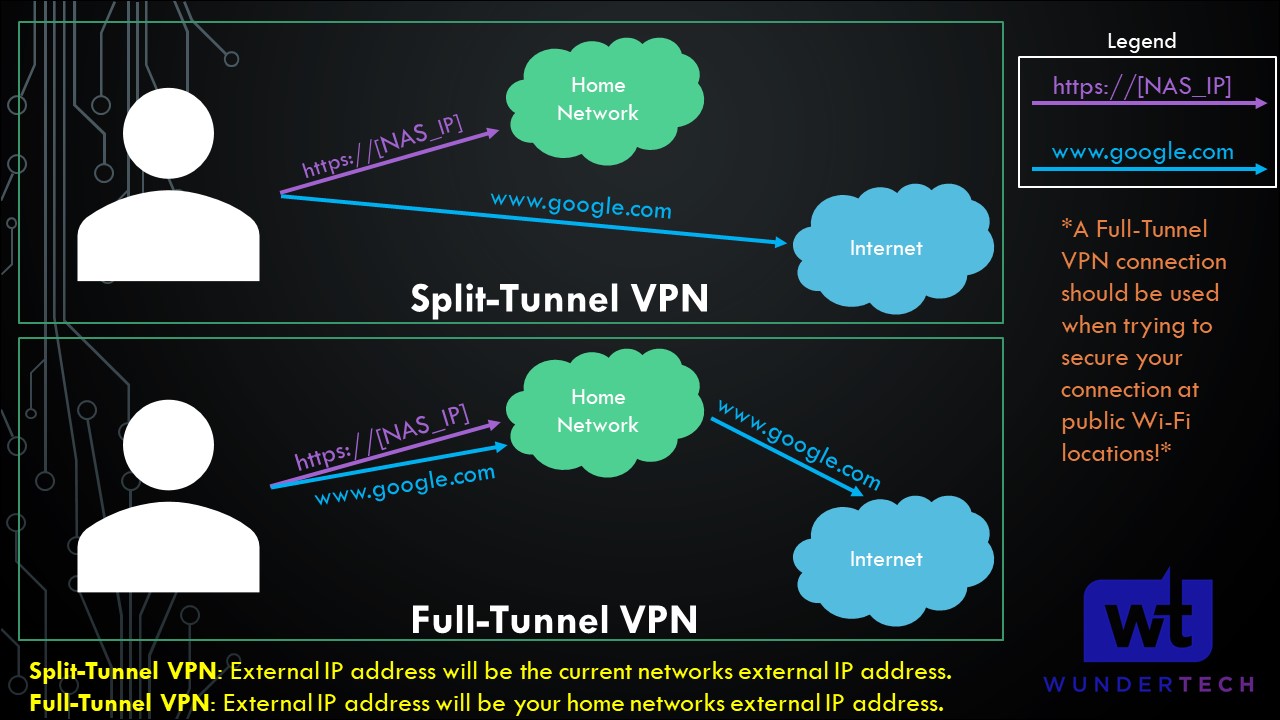
Split-Tunnel VPN: Traffic is only sent through your network if it is attempting to access an internal resource. Your IP address when navigating to a site outside of your network will be the IP address of the network that you are currently on.
Full-Tunnel VPN: All traffic is sent through your home network. Your IP address for internal and external requests will be your home network.
I created a very basic image below that explains this, but we will look at how to configure both in later steps. It’s important to note that both connection types will allow you to access your local network. This only shows how traffic is routed differently to external networks.
NOTE: This is not the exact network flow. I am simplifying the process as much as I can.
1.2 Configuration File Changes for WireGuard on a Raspberry Pi
The two changes that we will make below are in the wg0 config file. Run these commands to open the config file:
sudo su
nano /etc/wireguard/wg0.conf
With the file open, proceed to the next steps.
1.2.1 PostUp & PostDown Rules
This section is a little tricky because these lines will be mandatory if you’re interested in using a split-tunnel VPN profile. If you are using full-tunnel only, there’s a chance that everything will work without adding the PostUp and PostDown lines to the config file. So in summary, add these lines if you intend on using a split-tunnel VPN profile.
If you only intend on using full-tunnel, you might not need to add these lines as all traffic will be routed through your Raspberry Pi. If you don’t add them and you can’t access local resources or connect to the internet when you’re connected to your VPN, come back to this section and add these two lines.
I will do my best to break down everything in these commands so there’s some sort of explanation as to what these changes do.
- PostUp: command that is executed when you connect to your WireGuard VPN.
- IPTables: What the system should do with certain packets. A table is created with these rules so the system knows what to do when it receives a packet. These are what the different command-line parameters mean.
- Masquerade: IP address will be rewritten from source (wg0) to destination (eth0). In layman’s terms, the traffic appears as if it originates from the Raspberry Pi as opposed to the source device. When traffic comes in and is sent to your client device (where you are connected to the VPN), the traffic will have the destination IP rewritten from eth0 (Raspberry Pi) to wg0 (WireGuard network). You still need a static route if you’d like to access your VPN clients!
- PostDown: command that is executed when you disconnect from your WireGuard VPN to undo everything that we did in the “PostUp” command.
Add these lines to the config file to create an IP table when you connect to WireGuard and masquerade your IP address. NOTE: You might need to change eth0 to be the network interface of your device. However, since you’re using a Raspberry Pi, it’s most likely eth0.
PostUp = iptables -A FORWARD -i wg0 -j ACCEPT; iptables -A FORWARD -o wg0 -j ACCEPT; iptables -t nat -A POSTROUTING -o eth0 -j MASQUERADE
PostDown = iptables -D FORWARD -i wg0 -j ACCEPT; iptables -D FORWARD -o wg0 -j ACCEPT; iptables -t nat -D POSTROUTING -o eth0 -j MASQUERADE
Save the file and exit!

1.3 VPN Profile Creation for WireGuard
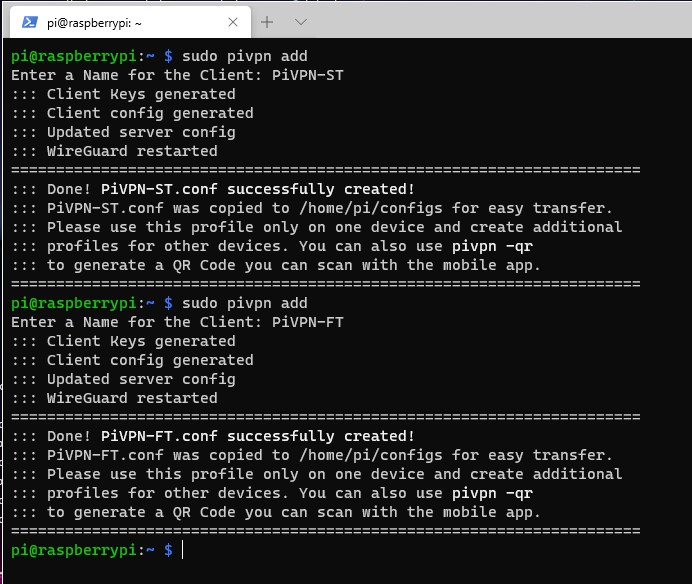
This is the section where we will create our VPN profiles. I will be creating both, a split-tunnel VPN and a full-tunnel VPN, but feel free to only create profiles for the VPN types you’d like.
1. Run the command below to add a profile.
sudo pivpn add
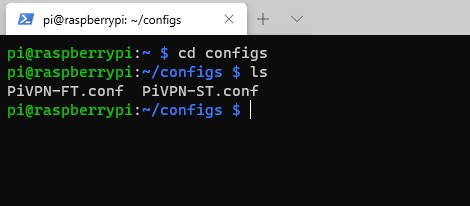
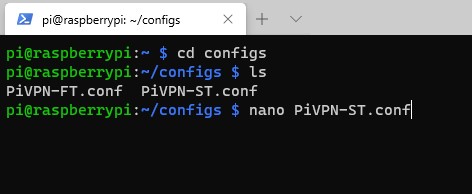
2. Navigate to the configs folder. There will be two config files, one for our split-tunnel profile and one for our full-tunnel.
cd configs
3. By default, WireGuard is configured as full-tunnel. For this reason, we can leave the full-tunnel file alone and edit the split-tunnel file.
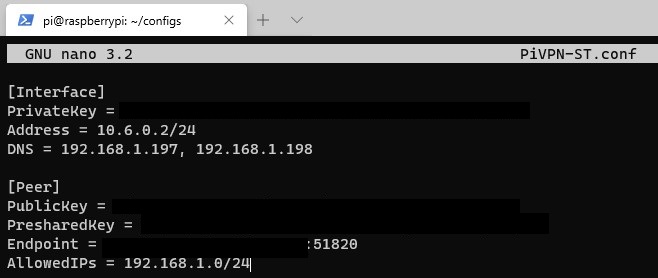
nano PiVPN-ST.conf
4. The only change that we have to make here is the AllowedIPs line. By default, AllowedIPs is set as 0.0.0.0/0 which means that all traffic will go through your home network (full-tunnel VPN). To change this so that only local traffic is sent through WireGuard, we need to change this line to our local IP range.
For most people, it will be 192.168.1.0/24 or 192.168.0.0/24. If you aren’t sure what your IP range is, you can look in your router’s configuration under LAN Setup.
If you’d like to have VPN clients talk to each other, you need to add the VPN subnet as well (10.6.0.0/24). Change this file to have your local IP range and save it.
5. The configuration file setup process is now complete!
1.4 Persistent Keep-Alive
WireGuard on a Raspberry Pi attempts to be as quiet as possible, meaning that it only sends and receives packets when it needs to. For this reason, clients behind a NAT or firewall might be required to keep the connection alive even when it’s not in use. To do this, you need to make a change in the configuration file.
A scenario where this is normally needed is when you have an off-site server that always needs to stay connected to your VPN server. This line will ensure the connection will not close.
1. Run these commands to open the configuration file.
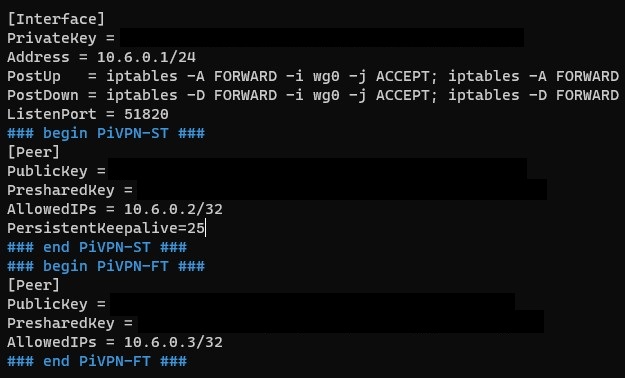
sudo su
nano /etc/wireguard/wg0.conf
2. You will see the VPN profiles that you configured. Add the line below to the profiles where you would like the connection to stay active.
PersistentKeepalive=25
1.5 Port Forwarding for WireGuard on a Raspberry Pi
We now need to port forward UDP port 51820 on our router to our Raspberry Pi. Port forwarding will be completely different on every brand’s router settings page.
This is a great guide that shows how to port forward on a few different brands of routers, but the best thing to do is try and google the name of your router and port forwarding. Example: Netgear port forwarding
- Create a port forwarding rule for UDP port 51820 to your Raspberry Pi’s IP address. In the example below, 192.168.1.30 is the IP address of my Raspberry Pi.

1.6 Static Route Configuration
This step is not required unless you need to access VPN devices from your home network. This is an old screenshot, so ignore the IP addresses listed and ensure you are putting the correct info into yours.
Your home network and VPN network will be on different subnets which means that your local devices will only be able to talk to the machines on its subnet (VPN network will see both).
In order to have your local network talk to your VPN network (in my case, 192.168.1.X and 10.5.0.X), a static route will need to be configured in your router.
I cannot go over the setup steps for this as each router is different, but below is a screenshot of the static route that I configured. The Gateway IP Address will be the IP address of your Raspberry Pi (since that’s where your VPN is running). The 10.5.0.0/24 subnet is where you will need to enter the IP range you are using (as defined in the WireGuard).

1.7 Accessing/Testing WireGuard VPN Config Files
WireGuard offers applications for almost all devices that you can use. They are fairly basic, but ultimately, you only need to use them to connect to your VPN so there’s no need for them to be complex! We will look at how to set up WireGuard on a Raspberry Pi for mobile and computer applications below!
1.7.1 WireGuard Mobile Application
One of my favorite WireGuard features is the ability to generate a QR code and scan that code with your phone. It makes everything so much easier. Not that dealing with config files is particularly hard (and there are situations where you will still need to use config files), but taking out your phone and quickly scanning a QR code is awesome.
If you’d like to generate a QR code to scan, it’s pretty easy. First, ensure that you have the WireGuard application installed on your phone or tablet.
1. Run this command to generate a QR code.
pivpn -qr [PROFILE_NAME]

2. A QR code will be generated. Scan this code with your phone, import the profile and you’re done!
NOTE: This QR holds all information to connect to your WireGuard Raspberry Pi VPN. Do not share this image with anyone unless you’d like them to get your VPN profile.
There are situations where the QR code does not pass the correct information to the mobile client. Ensure that the information in the mobile client is correct before proceeding.
3. Scan the QR code with the WireGuard smartphone application. Add the new entry and connect using an outside network. You should be able to connect to all of your local resources!
NOTE: If you test the split-tunnel config file, your external IP address should be your cell phone providers and if you test the full-tunnel, it should be your home ISP’s IP address.
1.7.2 WireGuard PC/Mac Application
The process we just went over is how to set up a WireGuard VPN Server on a Raspberry Pi using a mobile device, but if you are setting it up on a PC, you will need to copy the config files over to your device and add them to the application. You can download the application for your device here.
NOTE: You don’t need to physically copy the file, you can simply copy the contents of the file and create your own [VPN_PROFILE].conf file if it’s easier.
1.8 WireGuard Performance
After you install the WireGuard VPN Server on a Raspberry Pi 4 or 3B+, you might feel that the performance isn’t as “fast” as you expected. The reason is that you’re limited by the upload speed of your local network and there is a loss in performance from the traffic encryption of the WireGuard VPN server on a Raspberry Pi.
For example, if your ISP provides 25Mbps upload speeds, your download speeds through the Raspberry Pi VPN tunnel will be capped at a maximum of 25Mbps (real-world usage will be less).
This doesn’t mean that the performance will be bad, but you will certainly have slower speeds than you would if you were sitting at home on your local network.
Conclusion & Final Thoughts: WireGuard on a Raspberry Pi
This tutorial showed how to set up a WireGuard VPN Server on a Raspberry Pi. If you have an old Raspberry Pi laying around or you’re comfortable buying an additional device, this is a great way to use an awesome VPN product with amazing performance. Installing WIreGuard on a Raspberry Pi is also a great location to run it as Raspberry Pi devices are extremely energy efficient. You can also connect a second Raspberry Pi to this WireGuard VPN server if you’d like.
Thanks for checking out the tutorial on how to set up a WireGuard VPN Server on a Raspberry Pi. If you have any questions on how to set up a WireGuard VPN Server on a Raspberry Pi, please leave them in the comments!


I want to implement this but my Pi is currently running Pi-Hole natively. Am I correct in assuming that my DNS and my Wireguard VPN can’t have the same IP address?
You can! You will connect to your VPN using the DDNS hostname (explained in the instructions) and your DNS server using your internal IP address. When you configure WireGuard, the automatic installer will even ask if you want to use Pi-hole as your DNS server. I’ve been using it as both, my Pi-hole DNS server and my WireGuard VPN server for a while and everything works well. Let me know if you have any questions!
Ah, ok. I wasn’t sure if there would be some conflict. This is my weekend task, I’ll report back once I’m done!
Sounds good, let me know if you need help!
Ok, so I’ve followed these steps as closely as I can but there are two or three items that I think are making me stumble:
1.) Step 1-11. On my instance it saw that I was using PiHole and asked if I wanted it to automatically take that into account. So I said yes and it skipped the IP address of the DNS part. Then I noticed in the client conf files it didn’t have the correct IP address of my pi-hole but rather one that is on the same VPN subnet (a 10.6.X.X number) so I think that may be one issue… I should change that to the internal IP address, right?
2.) I’m not sure if I’m referencing my DuckDNS domain properly. In step 1-14 I put in http://[DOMAINNAME].duckdns.org but it said it was invalid. I then put in [DOMAINNAME].duckdns.org (left off the http://) and it accepted it. Is this the accepted behavior or did I put something in wrong? Also, is there a way to verify my domain name and that it’s set up properly? I keep REALLY checking for spelling errors lol but I think I’m doing it correctly.
1. The address that it added is correct. That is the address that it specified for the internal Pi-hole connection so that should stay as-is (if you want to use Pi-hole, that is). Don’t add the internal IP address there. The only thing to add (if you haven’t already) is the 10.6.X.X/24 subnet to the “AllowedIPs” list (if you’re using the split-tunnel VPN connection).
2. You are correct that you should exclude the “http://”. The best way to check this is to pull up a terminal/command prompt window and type “nslookup [DOMAIN_NAME].duckdns.org”. You should get your external IP address as the IP address (you can validate this by typing into google “what is my IP”). If you don’t get it back, then something isn’t working on the DuckDNS side.
Hopefully this makes sense, but let me know how it goes and if you have any questions!
What’s the best way to test that this is working? I think I might have it all right but since COVID I don’t leave as much as I used to. I guess I’m going to have to wait until the next time I go to the grocery store and try it from there lol
The best way to test this is by using an external network and trying to connect to your home network. The easiest way for most is by installing the WireGuard application on your phone, using your data (as opposed to Wi-Fi) and then trying to connect to the VPN. If you connect successfully, you should be able to access your local resources (you can try and connect to a PC, file share, etc). If you can’t use a phone, the only other way is to try and connect from an outside network (public Wi-Fi).
Let me know if you have any questions!
Just wanted to thank you for all your help and apologize for rapid firing questions out there before you even got a chance to answer the previous ones! One of those things where I was working on it and the questions kept flowing! Thanks to your help, last time I went out I was able to verify that this was working using my cell phone and it all seems to be working perfectly. Thanks so much again! I love your guides/videos!
No need to apologize! I do this in my spare time, so I’m sorry for the often delayed responses, but I always try and get back as quickly as I can.
I’m glad to hear that everything is working!! Thank you for the kind words!
Been fighting this for a long time. This tutorial is by far the best and I have a fully working Full and Split Tunnel VPN running in one try. THANK YOU!
Very good guide, thanks for that. I was able to setup to setup wireguard on top of a pihole/unbound pie in a breeze. Seems to work just fine. Only thing which caught my eye was that the split tunnel profile delivers my home isps ip adress, which contradicts point 8.1.3 What might have gone wrong here? I set my home networks ip range ending with zero in the config under allowed ips.
You are correct – this is kind of a band-aid solution, but you can change Pi-hole’s admin port using the instructions below:
Edit the lighttpd file (change the server.port to something other than 80) and restart the service. This will break after updates to Pi-hole, but it’s a good short-term fix to get to the admin portal.
sudo nano /etc/lighttpd/lighttpd.conf
sudo service lighttpd restart
Then, you can navigate to the address http://[RASPBERRYPI_IP]:[PORT]/admin
Let me know if you have any questions! Thanks for checking out the tutorial!
That’s definitely strange, because only local IP addresses should be sent through WireGuard. Just to confirm, you have in the “AllowedIPs” section, “X.X.X.0/24”? Also, you’re connecting from an external network, right?
Ok just a quick heads-up, i might figured out what happened. After setting up another mobile client i saw that the allowed ip of the ST was not correctly put through the qr code and was set back to 0.0.0.0 same as FT. I localy changed that an now its working as intended, say it gives me the external ip. That also explains the disrepancy to the windows client where i used the config files directly and no problem.
So i guess the qr-code is to blame here and the tunnel setup should be checked on client side, to be safe.
Another point worth mentioning: i had to add my local pihole ip to the dns= in the interfaces section for working internet acces via ST.
Thanks again and keep up the good work.
That’s definitely interesting – I didn’t run into that, but I really appreciate you sharing. I am going to update the tutorial to let people know that they should check the settings when scanning the QR code to ensure they’re correct.
Glad it’s fixed, but if I can answer any other questions, please let me know!
Hi, thank you for the tutorial, but it doesn’t work for me… I hope you can help me fixing the problem 🙂
First I want to apologize for my english, I’m not a native speaker 😉
My configuration looks like that: 1 Raspberry-Pi with Pi-Hole (192.168.178.51) and 1 Raspberry-Pi with Nextcloud and PiVPN. I only have a Dual Stack lite internet connection. During the installation process I gave the PiVPN-Pi a DHCP reservation, at the DNS-Provider setup I tried the options “PiVPN-is-local-DNS” and “Custom” with the internal IP (192.168.178.51) .
I want to use a full-tunnel vpn, I tested it with the PostUp/PostDown options on/off but it doesn’t work.
I can access the UDP-Port via UDP-Port scanner. When I use tcpdump on my Pi, it only creates output when I use the Portscanner. When I connect to the VPN, there is no output added. So I think, that the client configuration is broken.
But I don’t know where to look. In my Pi with Pi-Hole I also tried the option “Listen on all interfaces” and on the client I deleted the “::/0” in the allowed ip tab.
I hope you can help me. Thank you in advance 🙂
No need to apologize, your English is very good!
I believe that your problem is the “PiVPN-is-local-DNS”. Technically, your PiVPN is NOT the local DNS since the second Pi (192.168.178.51) is the DNS server you’d like to use. Uncheck “PiVPN-is-local-DNS”, keep the “custom” checked off and then proceed.
When you try and connect, are you trying to connect from an outside network? Also, check to make sure that the settings on the WireGuard client device (where you’re trying to connect FROM) are listed properly. There have been reports that the QR code generated doesn’t always work properly.
Let me know how this goes and then we can continue troubleshooting!
curl -L https://install.pivpn.io | bash
% Total % Received % Xferd Average Speed Time Time Time Current
Dload Upload Total Spent Left Speed
100 162 100 162 0 0 955 0 –:–:– –:–:– –:–:– 952
curl: (6) Could not resolve host: raw.githubusercontent.com
This generally means that you’re running into DNS issues and your Raspberry Pi can’t resolve the domain name. Do you know what DNS server you’re using and is DNS resolution working for other services?
Let me know and we can continue troubleshooting!
Jim
And now suddely it works!
🙂
Glad to hear it fixed itself!
hello, thanks for your tutorial, I thought I could manage with yours, because you indicate some settings on the router, but for me it doesn’t work! I’ve been trying for several days to get out of it, but without success! if you could help me please?
– wireguard is installed on the raspberry, I recovered its conf file on Macos.
– but I don’t understand “nothing” at the router level, which I have to enter, because the fields are a bit distinct on mine, not being a network specialist.
– here is a picture of my config to tell me what to put in my case: https://image.noelshack.com/fichiers/2020/47/3/1605734995-descriptif-routeur.jpg
– looking forward to your help, cordially
It looks like you might be using an ISP provided router, is that correct? If so, do you have a model name and number for the router?
My suspicion is that you are behind a CGNAT, which means that your internet service provider has assigned you a private IPv4 address which it translates into a public address. For this reason, setting up a VPN isn’t as straight forward as this guide shows. Assuming you are behind a CGNAT, hopefully this link will help: https://www.reddit.com/r/WireGuard/comments/blcxb2/bypass_cgnat_public_access_to_home_services/
Is there any way that you can try and find out if you’re behind a CGNAT? If you’re not, can you try and find the model name and number of your router? Let me know and we can continue troubleshooting!
hello, it’s a Router Askey RTF8115VW. cordially
If you follow the instructions on this page, can you see if the port forwarding works? https://portforward.com/askey/rtv1907vw/
Let me know how it goes!
hello frank,
I didn’t quite understand why show me where the port mapping is, since I know where it is, what I need is what to indicate in it please. (sorry I understand very little English, I have to google it to translate).
– it’s true, that all this is complicated (i bought a raspberry only to create this VPN, i didn’t know anything about this system before too). so all this information at once !! is not easy to absorb mentally.
– i’ll take this up with you later!
– (moreover my macos keyboard and trackpad doesn’t work with the raspberry (I tried “barrier” to share them, but no !), so I have to ask my fiancée to lend me hers when it’s available, it’s complicated).
– so I’ve ordered a keyboard and mouse, and will pick that up when my package arrives.
– in the meantime I’ll continue to read about it, and will come back to you at that time.
cordially.
Sounds good! The link that I sent has instructions on how you can open port 51820 on your router (which is needed for WireGuard). The instructions I have, supplemented with those instructions on how to open the port should allow you to set up the VPN server. After you get your mouse and keyboard, if there’s any questions I can answer, please let me know!
hello frank,
I was able to make progress in my configuration: my particular router has its address, as well as my computer that was connected to it (which was not the case before even though I had reserved an IP for them on my router, they always had an IP given by the router modem! I didn’t understand why?) Anyway, this was solved by connecting a second Ethernet cable from my particular router to my modem router.
– I reinstalled all of Wireguard on the Raspberry
– I did a port forwarding on my router (internal port external: 51820 UDP, By indicating the IP address reserved by my router 192.168.10.29 for my raspberry in wifi). Didn’t I make a mistake?
– before when I activated Wireguard on macos, it cut my Internet connection.
– Now there is a progress, the Internet connection is not cut.
– but! The question is this: While doing a test to know what is my mi IP, I find that my IP does not change, what is the problem please?
(In the Macos client configuration, I have indicated my current dynamic IP.
Nb: In this regard I have registered on the No-IP service, have I understood the purpose of this service, I have to replace my current dynamic IP by the domain name I have chosen on No-IP?)
thanks
Here is my client configuration
[Interface]
PrivateKey = xxxxxxxx
Address = 10.6.0.2/24
DNS = 1.1.1.1, 1.0.0.1
[Peer]
PublicKey = zzzzzzzzz
PresharedKey = yyyyyyyyy
AllowedIPs = 10.6.0.2/32
Endpoint = 190.x.x.x:51820
PersistentKeepalive = 25
When you say that you do a test and the IP doesn’t change, where are you testing? If you are testing from your cell phone network (for example), you should be able to do the test before the VPN and after. If the IP address doesn’t change to your home networks IP address (and you’re using the full-tunnel VPN), then something isn’t working. If you’re using the split-tunnel VPN and can access your local resources but the IP address doesn’t change, then it’s working as expected!
Hi Woundertech,
excellent blog , good job!
I did mistake on step 13 (You will now be prompted to use your public IP address or public DNS entry).
I mistakenly choose Public IP instead of DDnS hostname . How I can fix this , where to go and change this information from public IP to my public DDNS name.
Thank you
Boris
Hi Boris,
That is used when you create new peers (clients). As long as you update the client record to use the DDNS hostname as opposed to the IP address (you will see it in the client config file), there’s no where else that you’ll need to update it.
Please let me know if you have any other questions or if I can help in any way!
If I have 2 laptops at my home network and I wanted one to route oubound via the VPN, I need to use the Full Tunnel option but I wanted to use the other bypassing the VPN I use the Split Tunnel option.
How do I configure it so that this happens at the same time without any reconfiguration?
I get confused between clients and servers in connection with this.
Thanks
You can create two separate profiles – one for split-tunnel and one for full-tunnel. The YouTube video I created does a better job of explaining that portion, so I suggest watching that if you can.
However, I do want to confirm that you are trying to connect to an outside server, right?
Let me know how else I can help!
Hi Wundertech. Thanks for your article. I am not sure if I understand it right, but are other applications running on the Wireguard serving RaspPi also accessible through the VPN? E.g. I have a Zabbix server running on the RaspPi which I would like to access remotely to view managed elements in my house. So can I setup Wireguard on the same RasbPi? Thanks!
Yes! You should be able to access everything on the Raspberry Pi. If you need help with anything, please let me know!
Thanks for checking out the tutorial!
Hi Wundertech,
I have WireGuard installed on my RaspPi and it appears to work when I activate it on my Windows10 system.
The problem I have is that I also have OpenMediaVault installed on the Pi, but it’s not accessable when WireGuard is active.
If I deactivate WG, then OMV works again. I assume there’s some conflict, but I don’t know where to start. Can you help?
When you say that you can’t access it, do you mean from an outside network? Meaning you connect to WireGuard from an outside network and cannot access your OpenMediaVault sever?
Let me know and we can continue troubleshooting!
In the Oracle Cloud Infrastructure, I have a fully functional Wireguard PiVPN implementation (with the latest versions – just installed yesterday) that I want to use for a secure connection to public WIFI connections, BUT… I cannot for the life of me get the full-tunnel to function correctly! I’ve made sure my AllowedIPs = 0.0.0.0/0, ::0/0, but for some reason, I can still browse (even do a full TCP scan) of my local home network while connected to the VPN. While connected to the VPN and via a DuckDuckGo “what’s my IP” search, I’ve verified that my public IP address is the gateway of the VPN (and not my local ISP home gateway/router), so I know all web traffic is being tunneled to the VPN, but I don’t understand why ALL traffic isn’t being tunned, rendering traffic to my local network dead when the VPN’s enabled (e.g. printing to my local home printer, seeing AirPlay devices and othe UPnP-type devices as well). Any/all thoughts, input or help would GREATLY be appreciated!
What client device are you connecting with? As far as I know, the only way to do what you’re requesting is to use the “Block untunneled traffic (kill-switch)” option. On windows, if you right-click and edit the WireGuard configuration, you will see the checkbox at the bottom. On other devices, it should exist somewhere. I believe that this will do what you’re looking for.
If it doesn’t or I can answer any other questions, please let me know!
I am using the iPhone Wireguard app (v1.0.12) on an iPhone 12 Pro running iOS 14.2 as well as the MacOS Catalina (10.15.7) Wireguard app (v1.0.12(22)). I don’t see this kill-switch toggle in either of these.
I’m super confused, as what I feel I am trying to do is native VPN functionality found in most other VPN solutions when doing full tunneling. Based on this hidden kill-switch, the lack of anyone else doing this that I can find online, but your mention of why you’d use “full tunnel” to secure your comms on public WiFi, what am I missing? Is what I’m experiencing with being able to access my local devices, even when fully tunneled, the way it’s supposed to work? If so, then isn’t my device accessible (obviously to an extent) to other random devices on the same public WiFi since I’m not 100% isolated in my established tunnel?
When you are on to an external network and connect to a WireGuard VPN (I can’t comment on other VPN protocols) your traffic is routed based on the “AllowedIPs” parameter. However, local traffic is NOT limited. The only way it IS limited is if the local subnet and remote subnet share the same addresses. For example, if you are on a 192.168.1 subnet and use a full tunnel connection TO a 192.168.1 subnet, when you navigate to an IP address (192.168.1.5 for example), you will navigate to the VPN Server’s device. If the local subnet is different (192.168.2 for example), traffic will NOT be limited.
What you’re looking for is the VPN kill switch. At least on Android, when you edit the connection, there is an “exclude private IPs” checkbox on the bottom. In the Windows client, it’s called the “kill switch”. This stops ANY traffic from being sent outside of the tunnel. You cannot access the local network using this option.
This isn’t a major concern when you’re on an external network trying to secure your connection because all external traffic is routed through the VPN tunnel. Your external IP address being the VPN server’s IP address is proof of that.
It’s somewhat confusing because WireGuard handles it differently than other VPN providers. Basically, if you don’t want ANY traffic locally (your device to other devices), you need to enable that checkbox. Whether you should do it or not is up to you. External networks can see that you’re on their network whether you have the VPN enabled or not. You’re trying to secure your traffic and your traffic only when you’re on an external network.
Thank you for your persistence in troubleshooting this with me! My local WIFI LAN IP is 10.0.0.57 and my external VPN IP is 10.6.0.1. I found the “exclude private IPs” toggle on the iPhone WireGuard app (didn’t check my Mac yet, turned it on, but still no luck… When I toggled that on, it changed my AllowedIPs=0.0.0.0/0, ::/0 to AllowedIPs= 1.0.0.0/8, 2.0.0.0/8, 3.0.0.0/8, 4.0.0.0/6, 8.0.0.0/7, 10.6.0.1/32, 11.0.0.0/8, 12.0.0.0/6, 16.0.0.0/4, 32.0.0.0/3, 64.0.0.0/2, 128.0.0.0/3, 160.0.0.0/5, 168.0.0.0/6, 172.0.0.0/12, 172.32.0.0/11, 172.64.0.0/10, 172.128.0.0/9, 173.0.0.0/8, 174.0.0.0/7, 176.0.0.0/4, 192.0.0.0/9, 192.128.0.0/11, 192.160.0.0/13, 192.169.0.0/16, 192.170.0.0/15, 192.172.0.0/14, 192.176.0.0/12, 192.192.0.0/10, 193.0.0.0/8, 194.0.0.0/7, 196.0.0.0/6, 200.0.0.0/5, 208.0.0.0/4, ::/0. I even ran a trace route to 10.0.0.102 (my printer) on my local LAN from my phone and the first hop was it. Not that it mattered, but then did the same to my 10.6.0.1 within my VPN and it was also the first hop. Any other thoughts? Is this a bug that I need to report?
No problem!
That’s a little strange that it switched to those IP’s, but I guess it depends on how it functions. I would say that on mobile, it’s slightly harder to troubleshoot than on Windows/Mac. If you set it up on your Mac and try and ping a local resource, does it reply? Mine does NOT. I return a “general failure”, which shows that it’s working.
Hopefully you can try that out when you get some time. Let me know how it goes!
Hi Frank! I made a post in Spanish about the same topic on my blog using yours as a reference, I have also used your images. I hope you don’t mind. Obviously I have given you the credits you deserve. I hope that this way we can help the community in both languages. If you want me to remove the images let me know, I thought it appropriate to let you know.
Thanks for letting me know, always happy to help other communities! You have an awesome blog, you are more than welcome to use the screenshots!
How to Configure wireguarde with ipv6
I unfortunately haven’t looked into this yet, but I will hopefully have a tutorial for it in the future!
Hi! Brilliantly detailed tutorial! I was able to set up my VPN on my Pi with Pihole. I scanned the QR code on my phone and my up and download speeds have decreased to around 6-8 MBps, although I have gig speed internet. What am I doing wrong?
What Raspberry Pi Device are you using? Technically, all traffic will flow through that, so it could be a bottleneck, but that generally only happens with Pi Zero/older Pi devices.
Hi there, first of all: I really like what you are doing here. Great step-by-step tutorial. I appreciate that you dedicate your free time to this and all the questions. Thanks a lot!
I’m trying to get Wireguard to run for several days now. But unfortunately it won’t work.
My setup: Raspberry Pi 4 with Pihole and unbound as DNS Server. My internet provider is connecting me with a DS-Lite tunnel (not quiet sure what this means), I’m using DuckDNS to resolve my dynamic IP.
I wanted to be ad-free on the go. So that’s my use case for Wireguard (full tunnel). Or at least that’s what I’d like to accomplish. I’m following your step-by-step tutorial, there are no problems with the installation process. The problem starts when I try to connect my phone (iOS) with my Pi over the Wireguard tunnel. The log of the client app shows that DuckDNS is working and it is resolving the right IP address. It even sends some data (says the client app). But than it runs into the error loop “Handshake did not complete after 5 seconds, retrying”. This happens in my local network and on a LTE connection. It also happens with my tablet and laptop.
Do you have any suggestions? What could be the cause of this “handshake loop”? Since my provider uses a DS-Lite Tunnel to connect me, I even tried to do the hole configuration with IP6 addresses. But if I’m honest, I don’t really know what I’m doing here 😉 … I’m just trying things…
It would be awesome, if you could help me!
Thanks for checking out the tutorial! At first glance, it sounds like what you’re trying to do is fairly straight forward (in the grand scheme of things). Just connect to WireGuard and use Pi-hole as your DNS provider to block ads. Few questions:
1. Did you install Pi-hole first, and if so, did you point PiVPN to use Pi-hole as the DNS provider during installation?
2. Is this a fresh install, or are you trying to install it on top of the existing applications?
One thing I found online from a quick google search was this response – “It might be stupid, but did you try to create new server keys, client keys, and retry? Wireguard can act exactly like this when the profiles are wrong.”. Might not hurt to try!
Hi there, thanks a lot for your quick reply!
1. Yes, Pihole first, then unbound and last Wireguard (using PiVPN).
2. I’m not sure what you mean with “fresh install”. The initial Pi setup is running for over a year. Mainly to run Homebridge. Pihole is running on the initial setup for a month now. I did not install the hole system from scratch. On this existing setup I installed Wireguard. I also found the mentioned google result. An reinstalled Wireguard several times with PiVPN and used the option to reconfigure. “Reinstall PiVPN with new settings” I did this countless times.. It always ends with this same handshake-loop.
I’m not sure if it is the port forwarding on my router. If I use any online port forwarding test, it sometimes says it closed and some specific udp port tests are saying it is “open or filtered”. But then again the log on the client app says that it
received data. So I guess the port is not the issue here.
Can you recommend a online port forwarding test for udp ports? Is the result “open or filtered” the one I’m looking for?
Maybe I should just setup the hole pi from scratch…
Sorry, by “fresh install” I meant trying to install everything from scratch. “Open or filtered” is expected for the UDP port, so it looks like that’s all working as expected. You have a somewhat non-standard setup, so it might be worth installing from scratch and checking along the way to see what exactly is stopping WireGuard from connecting.
Thanks again for your input!
So, in the meantime I actually did start from scratch. New install of Raspberry OS, Pihole + Unbound. Then Wireguard. Still the same error messages. I found some tutorials for integrating IP6, put some specific rules with iptables/ ip6tables for the interfaces, IPs and the port (also tried different ports) into the config of the peer acting as server (the Pi). I even changed the value of the MTU for both peers (Some post suggested that the DSL Connection uses 8 Bits of the MTU, so the default value 1420 wouldn’t work). Still no success.
Next I’ll try to begin with wireguard after doing a fresh install of Raspberry OS and see whether this will work.
Who knows maybe on the weekend I’ll try OpenVPN and see if at least this works.
I’ll keep you posted. And again: Thanks a lot for your help!
That was going to be my suggestion. If you can try with WireGuard first, you should be able to get WireGuard working. If you can’t, then there’s a problem with WireGuard (outside of Pi-hole) that we have to figure out. Let me know how it goes!
Hi Frank, hope you had a nice weekend.
I tried some stuff. Spoiler: no success.
I bought a new Pi 4, so I’m able to work with a test system (and when I’m done it is gonna get a Retro Pi 😉).
What I did: fresh install of Raspberry OS, changed the password of the user Pi, deactivated WiFi (it is connected by wire) with rfkill, installed WireGuard (exactly like your tutorial suggests), put my other Pi (with Pihole) as DNS Server, changed the port forwarding in the config of my router to the IP of the new Pi, added a client, added the config of that client to my Phone (iOS) via QR code, took my phone off my WiFi … same handshake loop
Just “for fun” I tried OpenVPN. Used your tutorial on that. OpenVPN runs into a time-out.
I’m still suspecting my router or ISP. I’m not sure, if the port forwarding works like it should.(WireGuard is running into the same handshake loop, when I deactivate all ports on purpose.) 🤔 Unfortunately I have no idea how to test this properly. Do you have any ideas?
I’m starting to think that it might be your ISP. One thing that you can try is using OpenVPN and TCP port 443 (if you’d like). This will mask all of the traffic without using a “known” VPN port. It might be a pain, but it could be worth it to try and isolate if the ISP is at fault.
Hi Frank, just a quick update.
I tried something knew. I did a fresh install of ubuntu server 20.10 on the test system (Raspberry Pi 4). Then I installed Wireguard without the comfort of PiVPN. Which is But in the end the result is the same handshake loop on my peer log (iOS) on WiFi and LTE.
I’ll try your suggestion with the TCP port 443 and OpenVPN tomorrow.
If this still doesn’t work, I’ll call my ISP.
Ugh, sorry to hear that. Sounds like the ISP might be causing some issues. I am hoping that using TCP port 443 fixes that!
Frank, finally some good news.
So, as last resort I tried your suggestion with OpenVPN and TCP port 443 on a freshly installed Raspberry OS on my test system. But still no luck. Again timeout messages.
Then I started researching once more, because it didn’t seem to be the port forwarding. All the time I was not sure about the DS-Lite connection from my ISP. But I ignored that, because of my ignorance of that topic.
Turns out, that DS (Dual Stack) Lite is not a native IP4/IP6 connection. It is a pure IP6 connection, which is turned locally into a IP4 & IP6 network. Unfortunately there is no way to connect from a native IP4 network (like my mobile ISP is using) to a native IP6 network (DS-Lite at home) without some server between the both to forward packages. There are inexpensive ways to rent a small server for this purpose, BUT I called my ISP and they turned my DS-Lite connection into a DS Connection without any extra costs.
Problem solved! My phone immediately connects to the Wireguard server on my Pi now. Using Pihole + Unbound this way is surprisingly fast.
Thanks so much for your help and suggestions!
Stay safe & healthy
Daniel
That’s awesome! I honestly would have never guessed that, so it’s great that you were able to figure it out.
Not a problem at all. Sorry for not being much help, but I’m glad you were able to resolve it!
Thank You for the tutorial. Everything works fine, except Spotify app on my IOS device shows offline(while using Cellular Data). I have tried both Split Tunnel and Full Tunnel Configs. No issues while on WIFI or On Cellular Data (With Wireguard VPN Off).
Running PiHole on Raspberry Pi.
Thanks again!
If you’re on cellular data with WireGuard VPN off, it shouldn’t be routing any traffic through the VPN. I would look at the device to see if you’re running into any other network issues.
Adding to my Question above:
A couple of more things I have tested which is making me think it has something to do with IPv6. Have a look at the link below for screenshots.
https://imgur.com/a/gKRma5N
Any suggestions?
Thanks!
Is the primary DNS set as a local network server? If it is, you will have to be connected to the VPN to access the DNS server. Without the VPN, you will have to use a public DNS server to resolve domain names.
First, thanks for your tutorials and write-ups. I stumbled upon one of your videos a few months back and now you’re my go-to source whenever I’m about to embark on another COVID tinkering adventure. Many thanks! Second, I would really like to run Wireguard on my Synology NAS, which is otherwise restricted to OpenVPN and a few other older protocols (at least through Synology’s VPN Server package), and was wondering whether it was possible and if so, whether you might make such a tutorial. Many thanks and stay well!
Thank you for watching! I’m glad to hear they help!
As of right now, running WireGuard on the NAS is not supported. There are some alternative ways of doing it, but none that seem to be particularly easy or straightforward. If you really want to run it, the best way is most likely by installing a virtual machine with Ubuntu and installing it through there.
If Synology ever updates and allows it, I will certainly create a tutorial on it!
Hi Frank,
first of all I would like to thank you for your great tutorial.
I have implemented this step by step, however I still cannot connect to my local resources such as my NAS.
In the connection details of Wireguard packets are also only sent successfully but not received.
Do you have any idea what the problem is?
My configuration looks like this:
Home-Network:
192.168.50.0/24
VPN-Network:
10.6.0.0/24
Static Route has been set up:
10.6.0.0
255.255.255.0
192.168.50.3 (Raspberry Pi – Home IP)
Peer Client config
Interface]
PrivateKey = xxxxxxxx
Address = 10.6.0.2/24
DNS = 10.6.0.1 (Raspberry Pi – VPN IP – Pi-hole)
[Peer]
PublicKey = xxxxxxxx
PresharedKey = xxxxxxxx
Endpoint = vpn.example.com:51820
AllowedIPs = 192.168.50.0/24, 10.6.0.0/24
Server config
[Interface]
PrivateKey = xxxxxx
Address = 10.6.0.1/24
PostUp = iptables -A FORWARD -i wg0 -j ACCEPT; iptables -A FORWARD -o wg0 -j ACCEPT; iptables -t nat -A POSTROUTING -o $PostDown = iptables -D FORWARD -i wg0 -j ACCEPT; iptables -D FORWARD -o wg0 -j ACCEPT; iptables -t nat -D POSTROUTING -$ListenPort = 51820
### begin TestVPN ###
Peer]
PublicKey = xxxxx
PresharedKey = xxxxxx
AllowedIPs = 10.6.0.2/32
PersistentKeepalive = 25
### end TestVPN ###
External IP is implemented via DynDNS.
I really appreciate any tips you can give me.
Ok nvm….Problem is solved!
The problem was with my DynDNS provider, which has not synchronized reasonably.
Nevertheless, thanks again for the great tutorial!
Very happy that you were able to get it resolved! Thanks for the update and sorry for not getting to your message in time!
Hi WunderTech,
First, thank your for your good tutorial. So I have a question. I will extend this solution with a further vpn. Means, I want to connect to two different vpn at the same time. How I can achieve that? Do I have to setup a second interface, like wg1? But how it works with the routing? Or can I use the same wg0 interface for both?
Thanks a lot in advance.
When you say that, do you mean two different locations, so that each location can access the other locations resources? If so, check out site-to-site VPN’s (I believe you can do it using WireGuard, though I don’t have a tutorial for it). That should do exactly what you want!
Hi, very good article.
Thanks so much!
Yes, two different locations (in future 3 or 4). I was aware of using different subnets in each location. In detail, I will do some maintaining of NASes, Computer and some other equipment. Means, my “homebas” is site A and I want connections to the supported sites B,C (D and E in future) at the same time. For my understanding, it would be enough to setup a correct routing on site A, because it’s “one way” means no member from supported sites need to access ressources in site A.
I believe that using WireGuard for this is a great option, but you are correct in saying that you would have to do some IP routing. I suspect that it might take a little trial and error, but there are a ton of tutorials online that should be able to help you along the way.
I apologize for not having anything right now that could help, but I will keep it in mind for a future tutorial!
Thank you very much for your comprehensive guide – I’ve been working at this for over a week (*sigh*) and I’m starting to wonder if this doesnt play well with the Eero Pro. I think my issue is port forwarding on number 6. Do you have any experience with Eero? Do you happen to have any resources?
Any insight is welcome – thank you again!
I unfortunately have no experience with Eero, but it should be very similar to other devices. I assume you have a Raspberry Pi with WireGuard running – are you able to open the UDP port on the Eero to the Raspberry Pi?
hey wundertech, first off all thank you for the great tutorial. I installed WireGuard just like you have shown it in the video and the instalation always works perfect and I am also able insert the tunnel into my android application. But somehow I can´t load any website even though it shows in- and outgoing packages with pivpn -c. Whats irritating is the fact that I can use the amazon app but fonts and the text are displayed in a weird format. I have tried it with a local dns as well as cloudflace and also tested post up & post down but nothing worked.
Hmm, that’s definitely a strange issue. So you’re able to confirm that it’s not a DNS issue (because ultimately, that’s kind of what it sounds like)? How about accessing local resources? Can you ping local devices by IP address?
Also just to confirm, you’re using your mobile network for this testing, right?
I use LTE to simulate a connection from outside my connection. I can´t ping local devices like my computer at 192.168.178.32 but somehow I am able to ping my raspi on 192.168.178.118. My config files look like this:
[Interface]
PrivateKey = xxx
Address = 10.6.0.2/24
MTU = 1420
DNS = 192.168.178.1
[Peer]
PublicKey = xxx
PresharedKey = xxx
Endpoint = xxx:51820
AllowedIPs = 0.0.0.0/0, ::0/0
My /etc/wireguard/wg0.conf:
[Interface]
PrivateKey = xxx
Address = 10.6.0.1/24
PostUp = iptables -A FORWARD -i wg0 -j ACCEPT; iptables -A FORWARD -o wg0 -j AC$
PostDown = iptables -D FORWARD -i wg0 -j ACCEPT; iptables -D FORWARD -o wg0 -j $
MTU = 1420
ListenPort = 51820
### begin home ###
[Peer]
PublicKey = xxx
PresharedKey = xxx
AllowedIPs = 10.6.0.2/32
### end home ###
I have tried to configure wireguard with my local dns,google and cloudflare. Nothing worked
If you can’t access any of the local services, then the VPN isn’t working properly. Unfortunately, WireGuard shows “connected” even when it’s not necessarily connected (not ideal, I know). If you’re able to ping the RPi, that’s a good sign, but you’re going to need to try and isolate why the rest of the network isn’t accessible. There’s a good chance that it’s your PostUp/PostDown lines.
Can you look over this step again and make sure you’re using the correct network interface names? https://www.wundertech.net/setup-wireguard-on-a-raspberry-pi-vpn-setup-tutorial/#pup-pdo
I am using eth0 so this shouldn´t be the problem
The PostUp/PostDown rules you entered are different than the ones I have on the site. Can you try using the ones I have?
*outside my network
I think I accidentally forget to copy the full line, sry for that.
No worries!
They are correct but Its still not working 🙁
It is still not working and I have no Idea why 🙁
Just looking over your setup again – can you try and change the DNS from 192.168.178.1 to 8.8.8.8? That is Google’s DNS and since you’re running into DNS issues, I am hoping that we can test to ensure everything is working this way.
Ok now Im getting really confused. I used google as dns as wall as another dyndns provider (noip.com) and now I can ping all my local devices (router at 192.168.178.1, raspi at 192.168.178.118 etc.) as well as websites like google, twitter, youtube, wundertech.net … , but not access my router settings in the browser at 192.168.178.1. I can also open your website in the browser but not YoutTube or Twitter like wtf!
Forgot to add this: I also configured a static route like it is shown in the written instructions
So you’re able to access the sites but can’t access YouTube or Twitter? You’re not on your local network when testing, right? You should be able to access everything or nothing. Also, the static route will only be necessary for communicating with the connected device from your local network, so that shouldn’t impact this.
I am using Mobile Data from my phone to simulate an outside Access. At the moment there ist no other way for me to simulate this cause im in Lockdown and working from home.
The mobile network is fine, but it doesn’t make sense that you’re connecting to some websites and not others. Can you confirm if you can access devices using their IP address on your local network?
I tested it out and I am not able to connect to my raspi vis ssh (I used Putty). It says “Permission denied” I also can´t ping any local device but I can ping any website. What I found out is that I can somehow connect to any .net Website in my browser (i have tried multible) but not .com which explains why I could connect to your WebSite. I dont know why. Here´s some info on my current settings: https://pastebin.com/wtG5D5Md
I don’t think that you’re successfully connecting to the VPN. Can you connect to the VPN on your mobile device and on your Raspberry Pi, run the command “wg show” to confirm that the peer is properly connected?
This is the result of “wh show”:
interface: wg0
public key: xxx
private key: (hidden)
listening port: 51820
peer: xxx
preshared key: (hidden)
endpoint: (my public Ip):48495
allowed ips: 10.6.0.2/32
latest handshake: 31 seconds ago
transfer: 12.54 MiB received, 302.47 MiB sent
It looks like you’re successfully connected. Unfortunately, I’m not entirely sure what it can be since it looks like you’re connected and with the proper DNS server, can access outside network resources. It could be worth it to start over and just take it step by step and ensure that everything is successful after each step.
Is there anything additional I need to do if deploying Wireguard as a docker container? I have deployed it and I have added my iPhone as a peer and I was able to make the VPN connection over 4G/local wifi networks.
When connecting to VPN on local wifi:
– everything seems to be working just fine ( i can connect to all local hosted services as well as the Internet)
When connecting to VPN from 4G network:
– I can browse and access the Internet.
– I cannot access any local services 🙁
Kindly find below my config files:
wg0.conf:
[Interface]
Address = 10.13.13.1
ListenPort = 51820
PrivateKey = (hidden)
PostUp = iptables -A FORWARD -i %i -j ACCEPT; iptables -A FORWARD -o %i -j ACCEPT; iptables -t nat -A POSTROUTING -o eth0 -j MASQUERADE
PostDown = iptables -D FORWARD -i %i -j ACCEPT; iptables -D FORWARD -o %i -j ACCEPT; iptables -t nat -D POSTROUTING -o eth0 -j MASQUERADE
[Peer]
# peer1
PublicKey = (hidden)
AllowedIPs = 10.13.13.2/24, 192.168.2.0/24
peer1.conf
[Interface]
Address = 10.13.13.2/24
PrivateKey = (hidden)
ListenPort = 51820
DNS = 10.13.13.1
[Peer]
PublicKey =
Endpoint = EXTERNAL_IP:51820
AllowedIPs = 0.0.0.0/0
I have tried to add AllowedIPs = 192.168.2.0/24 – but I still wasn’t able to connect to local services.
I also added a port forward rule to my router to point to my raspberry pi’s IP on the LAN.
Anything I am missing?
Unfortunately, there’s no way to test a VPN locally (since you can normally access all of your local resources). If it’s not working on your 4G network, it’s not working. I haven’t personally used Docker and WireGuard, but are you able to see inside of Docker than the 4G device is connected to WireGuard?
> but are you able to see inside of Docker than the 4G device is connected to WireGuard?
When I added my iPhone as a peer using QR Code and activated it, my iphone’s IP address was within the IP range specified (10.13.13.2). Is there any other way to test if my iphone is connected to the WireGuard?
You can generally run a few different commands (“wg” or “wg show” is what’s normally used on Linux) to check to make sure the peer is successfully connected. If it’s not, you will need to get the connection working first.
So I have deleted everything (containers, folders, config files..etc) and did a fresh deployment and now everything seems to be working just fine!
this is wg output:
interface: wg0
public key: (hidden)
private key: (hidden)
listening port: 51820
peer: (hidden)
endpoint: 5.156.49.xx:2702 (4G ip)
allowed ips: 10.13.13.2/32
latest handshake: 22 seconds ago
transfer: 182.78 KiB received, 1.31 MiB sent
Next, I’ll try to deploy AdGuard Home and see if I can get both work together..
Much appreciated!
Glad that you got it working!
@WunderTech,
I have set up everything exactly as in the manual (my port is different and my IP is static, no DDNS), full tunnel is working pretty fast, but split tunnel doesn’t want to work. Official PiVPN guide tells me that you will block internet access if you add local subnet to AllowedIPs and mine is blocked. Do you know where I can start troubleshooting?
I gave more details on Reddit: reddit.com/r/pihole/comments/nymp14/wireguard_vpn_split_tunnel/
When you say that it’s not working on split-tunnel, what exactly isn’t working? Are you able to access the external internet and not the local network, or access the local network and not the outside internet?
I can access only local network, but not the outside internet
That would make me feel like it’s a DNS issue. Do you know what DNS server you specified?
@WunderTech,
Exactly, I am able to access the internal LAN resources, but not the external internet.
So what are these 10.xx.xx.xx IP adresses used in the example??? Should this be altered to 192.168.xxx.xxx for your own homerange?
Those are the IP addresses that are assigned to the VPN clients. The 192.168.X IP subnet is used for your local subnet, and the 10.X subnet is used for the VPN.
Hello Wundertech, Thank you for this tutorial. Now here is my problem: I followed the tutorial and it went well up-to the point where i asked the program to generate a QR code. Something looking like ASCII-code appears, no QR code. I am using a RasPi 3B, fresh installed with the latest Raspian and all updates. I have tested ALL screen resolutions either using VNC or a (high end) monitor on the Pi’s HDMI port with same result, no QR-code. I see a kind of ladder consisting of capital and small letters A with a tilde (wave form) above the letter. Is there a solution and if not, how do i get the data (and what data) on my phone?
I haven’t seen that error in specific, but googling it quickly, it appears like a lot of people have experienced this. Are you able to manually enter in the config settings into whatever app you’re using to try and connect? The QR code technically just transfers that information to the app (which makes it significantly easier, but not the only way to do it).
Hi Wundertech, thanks for your kind reply. I have an Iphone so i can enter every bit of data for a VPN. I did use openVPN for a while and this was just a case of transferring a small file to the phone, click on it and you are done but as Wireguard got great reviews i wanted to try that. So yes, i can enter data in the VPN settings on the Iphone and i do have the WireGuard app also (but this only seems to work with the QR-code and won’t let you go any further without it). Yesterday i tryed installing on a brandnew Raspi-4 with the same results. Hope you have a fix.
Got it, glad that you at least have a workaround. I will have to do some testing on my side when I get some time. There’s a chance that PiVPN was updated and it accidently broke this functionality. I’m not sure when I will have a chance to test it, but I will do my best to see if it’s PiVPN related!
Hi WunderTech, I am almost sure its a bug in PiVPN but no idea where to report it so will leave it with you. Thank you for you comments.
Hi! Great stuff in this thread! Quick question for anyone who can answer- So, I have successfully setup the PiVPn WG server along with PiHole and it’s working great. What would happen if I used a USB to ethernet adapter and manually plugged another device (ie. a Synology NAS) directly into the pi? Would it go through the VPN?
The VPN is a tunnel back to your local network. Since your Synology NAS is on your local network, the VPN will not have any impact on it. Think of the VPN as a way to access your local network when you’re outside of your house.
Thanks for the reply. So, with what you said considered, could I close any ports that are open for the NAS and if so, how could I still use the services (Syno Photos, webdav call, etc)? If a client was connected to the VPN, could it access them directly since they’re essentially on the same network? Thanks
You are correct. The client will connect via VPN, and then to the NAS’s internal IP address. This is potentially different than how you’re connecting now, but you’ll only be allowing people to access the services through VPN (which is the safest route).
Struggling to get an internet connection with WireGuard when this is installed on the same Pi as is running my DNS via AdGuardHome.
I’m suspecting AdGuard at home is somehow blocking the connection with WireGuard, I’ve varied the WireGuard DNS settings from Google DNS, the Pi IP itself (which is the DSN IP), and using the “pivpn-is-local-dns” (whatever that does).
Any suggestions for me, or is it not possible to use the same Pi for both DNS filtering and WireGuard?
Are you sure that the connection isn’t working, or is DNS just not working? Meaning can you ping servers/devices by IP address? Can you check to see if any devices are connected to WireGuard?
Dear WunderTech,
I have done anything you said until the split-tunnel which i do not desire. I have a Pihole which serves as an unbound DNS and DHCP server, and my other raspberry serves as a VPN. Everything seems to be working besides the fact that the port is not visible from outside my network. I can ping the port 22 because it uses a service, but eventhought i have opened the 51820 from ufw it doesn’t seem to be accessable to the public web. Do i have to install the piVPN as a service? Here are the ufw status that the VPN created:
To Action From
— —— —-
51820/udp ALLOW Anywhere # allow-wireguard
22 ALLOW Anywhere # SSH
51820/udp (v6) ALLOW Anywhere (v6) # allow-wireguard
Anywhere on eth0 ALLOW FWD 10.6.0.0/24 on wg0
Thank you for your time
Do you want port 22 (SSH) to be visible to the world? That is generally a riskier thing to do. As for the UDP port, it appears like you allowed it in UFW properly. I am assuming that you port forwarded it on your router as well? Did you complete the PiVPN setup? PiVPN should set everything up properly as far as the service goes.
Dear WunderTech,
The port 22 was allowed locally to check if the port forward function worked well for the modem and for the RasPi and i had a success. But for the 51820 port it didn’t work, i have read that the port must be opened by the server/RasPi in order to connect (The SSH runs the service all the time), so what should i do? Reinstall the piVPN again or check if the services are running for the WireGuard? I don’t know much about the linux world, i am new!
Thank you very much!!
Got it – if we take a step back, can you confirm that everyone on the router side is set up properly? Since you opened the port on the RPi’s firewall, I would check to see if the router is properly port forwarded.
Dear WunderTech,
The router setup is proper, because i used the same config for SSH at port 22 and it got probed by the port scanners. I have selected for the wireguard the 51820 UDP port, but it doesn’t get the open sign, if there any tool to check if the PiVPN is running properly? Can you give me a guide to open another port like 443, to check if there isn’t any problem with the RasPi? My ISP isn’t blocking any port, nor does is have CGNAT enabled!
Thank you very much!!
Dear WunderTech,
I have made this experiment:
A) I have selected the port 443 for the WireGuard, opened both UDP and TCP ports from modem. They seem closed from internet.
B) The roules of UFW that i have made are:
To Action From
— —— —-
443/udp ALLOW Anywhere # allow-wireguard
22 ALLOW 192.168.2.0/24 # SSH
443/tcp ALLOW Anywhere # HTTPS
443/tcp (v6) ALLOW Anywhere (v6) # HTTPS
443/udp (v6) ALLOW Anywhere (v6) # allow-wireguard
Anywhere on eth0 ALLOW FWD 10.6.0.0/24 on wg0
I can’t ping nothing from the internet 443 TCP or UDP. But the port 22 seems to be pingable every time i disable the firewall, but 443 in always closed with or without firewall.
C) If the port 22 is open from the internet then the port forward is working right?
D) When the Firewall is closed i am running those commands:
sudo nmap -sT -p 443 localhost
PORT STATE SERVICE
443/tcp closed https
sudo nmap -sU -p 443 localhost
PORT STATE SERVICE
443/udp open|filtered https
With the Firewall enabled i got the commands:
sudo nmap -sT -p 443 localhost
PORT STATE SERVICE
443/tcp closed https
sudo nmap -sU -p 443 localhost
PORT STATE SERVICE
443/udp open|filtered https
Please tell me what am i doing wrong??
Thank you for your patience and time!!!!!
Can you run the command “sudo ufw status verbose” and respond with the output? It’s very difficult to troubleshoot network issues remotely unfortunately, but if the router is opened properly and PiVPN was configured properly, there’s a chance it’s the firewall.
Dear WunderTech,
The output is:
Status: active
Logging: on (low)
Default: deny (incoming), allow (outgoing), disabled (routed)
New profiles: skip
Is it wrong to use 443 for PiVPN? I am just doing it in case the ISP is blocking ports above a certain range, are there any others ports you suggest to test the whole forwarding/open ports issue? I am so grateful for your time and knowledge you give to me!!
Thank you very much!!!
It’s not wrong to use 443, but it isn’t normally necessary either (as long as your ISP doesn’t block specific ports). The firewall rules are interesting, because I was expecting specific ports, but it looks like it’s denying all incoming traffic.
As a final effort, can you disable the firewall entirely and see if you’re able to get the VPN working?
Dear WunderTech,
I copy the verbosed firewall output:
To Action From
— —— —-
5555/udp ALLOW IN Anywhere # allow-wireguard
22 ALLOW IN 192.168.2.0/24 # SSH
5555/tcp ALLOW IN Anywhere # Wire
5555/udp (v6) ALLOW IN Anywhere (v6) # allow-wireguard
Anywhere on eth0 ALLOW FWD 10.6.0.0/24 on wg0
I have tried to setup WireGuard with 5555 and still nothing. Can’t ping UDP or TCP with or without the firewall. I have DNS my Pihole @ 192.168.2.2 and unbound is enabled, do you thing that this has something to do or because i use the no-ip.com *.zapto.org ? I don’t know i am quitting this madness if nothing is working..
Thank you very much!!
If you completely disable the firewall (and the port is opened on your router) and the port still doesn’t show as open outside of your local network, then it is in fact the PiVPN setup. It’s hard for me to say exactly what is wrong, but it would have to be something. It shouldn’t be the no-ip as that’s just a dynamic DNS name.
In its simplest form, I would install PiVPN (Wireguard) and use UDP port 51820. Port forward UDP 51820 to your Raspberry Pi on your router. Disable the firewall on the Raspberry Pi and see if you can connect from outside of your local network.
Hi, thank you so much for the wonderful detailed tutorial! But unfortunately it isn’t working for me.
I have followed your steps but chose my public ip during installation as I have a static ip. I also used the custom dns that’s used by my isp. I created a full tunnel vpn & even added the Postup & Postdown lines.
Then I transferred the config file to my phone to connect using the app, but no packets are being transferred.
I tried re-installing everything by creating a static ip using duckdns & choosing Google’s dns but it still doesn’t transfer packets.
My phone doesn’t even show up as a client in “pivpn -c”.
I also checked if port forwarding & ip forwarding was enabled and it was.
Hello and thank you! I know this is a basic question, but are you testing from outside of your local network (on your mobile network, for example)?
Yes I’m using mobile data on my smartphone to test it
Got it – can you now confirm that port 51820 is properly opened on your router? You can use a port checker to ensure that it’s open from the outside if you aren’t sure.
Hello!
Followed this tutorial and its working fine. Have one question i did two config files one for FT and one for ST.
When i add clients it seams to use FT file by default, how to create a client with ST file?
When you say that you add clients, do you mean on the actual configuration side? If so, I’m not sure if you can change those values unfortunately. I will try and test it out as soon as I get some time!
Hello!
Thanks for quick replay.
I mean when i do pivpn add
Can i do two clients and just change allowed ips manuell after.
Yes, that’s exactly what you can do!
Hello!
Im sorry for the first comment, i did not pay enugh attention watching th video, you do explain how to do.
I did as you said in the youtube video and changed the allowed ip in the config file for my ST file from 0.0.0.0/0, ::0/0 till
192.168.10.0/24, 10.6.0.0/24.
Then i scanned the file to my phone but when i checked the settings in the wireguard app the allowed ips are 0.0.0.0/0,
::0/0 does it matter?
It does – there seems to be a bug in this version of PiVPN that doesn’t actually transfer over the AllowedIPs to the phone. If you change it to 192.168.10.0/24, 10.6.0.0/24 on your phone, it should be split-tunnel.
Hello!
Changed it and now i works, confirmed with whatsmyip.
My next task is to try to connect my laptop with Manjaro xfce with kernel 5.10.53-1 thru
networkmanager.
This time i have to import file and copy and paste in to networkmanager.
I hope this works.
Thanks for your answers to my questions.
Glad you got it working!
Great guide thanks.
How would you change the DDNS name after install?
Thanks! In the client configuration file, you will see an “endpoint” where you can change the DDNS hostname.
What a great step by step procedure, THANK YOU! I am somewhat of a novice in the the vpn world and your tutorial was just what I needed.
The results of my installation are as stated in Section 8 Item 3 and I can access my files remotely on my phone. So it appears everything is working. I do have a couple questions though.
1. I was surprised to see the home ip address does not change when going to whatismyip.com. After thinking about it though, I believe this is because the duckdns.org ddns is not the vpn server so the home ip would remain unchanged. Am I understanding this correctly?
2. With Split Tunnel and Full Tunnel profiles created, does the PiVPN with Wireguard default to the Full Tunnel mode? If the full tunnel mode throttles my streaming TV, is it possible to switch it to split tunnel and how would I do that?
Glad that it helped!
1. Yes, these are home VPN’s, which means that you use them to access local resources and for that reason, it will appear like you’re home (home IP address) when you’re not actually home.
2. Yes, it will default to full tunnel, but it should be as easy as disconnecting from the full tunnel VPN and connecting to the split tunnel VPN.
Hey WunderTech,
Thanks for the tutorial!
I have followed your tutorial to the letter, but I seem to be having trouble getting a connection through the VPN.
I have setup wireguard, created a profile (FT), copied it across to my android using a QR code. I can activate the connection using the app, and I can see the connection using the -c command, but I am unable to navigate to any websites from my phone while the connection is active.
What could I have done wrong?
Just to confirm, you are on an external network right? Also, have you specified a valid DNS server to use?
Yes and yes, but I think you can ignore me completely. It looks like data transfer is broken on android 12 beta when using a VPN. Explains why it just suddenly stopped working.
Thanks for replying anyway!
Got it – not a problem!
Hi, I have gone through your tutorials, I have set up split tunnel Wireguard pi VPN with free ddns domain and google dns server and not added any route in router. I have created couple of clients and tested the connections. Everything works fine however my VPN client public IP address and location does not change after connecting to VPN. Do you have any idea if I am missing anything?
Thanks in advance!
Hi again, I have read above comments and learn that i need to set up full tunnel connection for that. I can confirm VPN client’s Public IP address and location does change in full tunnel connection. Nice tutorial! thank you very much!
Glad you got it working!
Thank you so much.
Additionally, i go to pihole (on my rasp pi) and edit the settings, specifically the Upstream DNS server, i choose: “Listen to all interfaces, allow all origings”.
This is to keep a second router with a DHCP function working properly. Wireguard installation changes this setting without notice.
Is the second router giving out IP addresses to a different subnet?
I have two questions (preface: I am a complete newbie)
-I would like to use this setup as my VPN server instead of Synology+OpenVPN. The Synology NAS and the Raspberry Pi will be on the same local network. If I understood right, I would need to install a client only if I am trying to enter the VPN remotely, correct? So I don’t need to setup anything on the NAS. Is this right?
-Is it possible to use the same raspberry as the DNS server and VPN server?
1. That is correct. You will set up the VPN server on the Pi, connect to it whenever you’re outside of your local network, and then you’ll be able to access all local resources (including your NAS).
2. You can, though I believe that the setup is slightly different. There are a few tutorials online I believe, but following the two tutorials I have for them might not work properly (since they’re both occupying the same Raspberry Pi).
Thank you very much! I really appreciate the work you do, you saved me a lot of time!
Thanks for the kind words, glad that the information helps!
I’m using Adguard on my Raspberry Pi, and I want to set up wireguard by PiVPN.
Adguard Home works if I set the DNS up.
For PiVPN, I set it up with mostly the default setting by clicking OK to the next step.
I’ve forward my port (should be correctly set up but not so sure), and added those two lines you mentioned. Though once I connected the VPN, I couldn’t connect to the Internet.
Anything I could do to resolve this problem?
Also, where could I send my debug message privately?
When you set up WireGuard, what are you using as the DNS server? Are you sure that it’s an internet issue and not a DNS issue? I haven’t run WireGuard + AdGuard Home, but a bunch of people run WireGuard + Pi-hole so I don’t think that would be the problem.
Hi WunderTech,
Thanks for replying. I tried your tutorial on port forwarding, though found out that seems not working on my router. Here is how I set it:
Local External
IP Address Start Port End Port IP Address Start Port End Port Prot Description Enabled
192.168.0.18 51820 51820 192.168.0.18 51820 51820 BOTH Yes
I used http://www.portchecktool.com and put in 192.168.0.18. Seems not a valid port.
I tried a few DNS servers: Google, my home IP address, 192.168.0.18. Though none of those worked out.
Any suggestions?
Best,
Zhenyu
The port that you’ll have to check is 51820 – the 192.168.0.18 is the IP address. However, you sent me a TCP port checker and WireGuard uses UDP. So I would use this site instead: https://www.ipvoid.com/udp-port-scan/
Google “what is my IP”, and put your external IP address in the first line of “IPv4 Address”, then put 51820 in as the second. Agree to the terms and you can see if it’s open.
It says:
Port Type Status Service
51820 UDP Open|filtered unknown
PLAT=Raspbian
OSCN=buster
USING_UFW=0
IPv4dev=eth0
dhcpReserv=1
IPv4addr=192.168.0.18/24
IPv4gw=192.168.0.1
install_user=pi
install_home=/home/pi
VPN=wireguard
pivpnPORT=51820
pivpnDNS1=192.168.0.18
pivpnDNS2=
pivpnHOST=my external IP address here.
Am I setting up correct?
Also, here is one of my wireguard profile for my computer:
[Interface]
PrivateKey =
Address = 10.6.0.2/24
DNS = 192.168.0.18
[Peer]
PublicKey =
PresharedKey =
Endpoint = MyExternalIPAddress:51820
AllowedIPs = 0.0.0.0/0, ::0/0
From this info, it looks correct – other than DNS. Are you running a DNS server at 192.168.0.18? If not, change that to something public (like 8.8.8.8 or 1.1.1.1) and test again.
Is there a way to troubleshoot the following issue. On a raspberry piW with pihole and unbound, decided to follow the full tutorial and it went well. But, when I activated wireguard from my mobile device and scaned the qr code it could not reach anything on the internet. And i could not connect to my pc with duckdns. I sudo -u pivpn and I will try installing it again in case i missed a step but I am not sure i know where the fault lies. Is there a chance to be a router issue?
WireGuard has a bug (some versions of it, at least) where the QR code doesn’t always work. Can you open your mobile app and ensure that the correct information was properly passed to the application?
Well, I did and after i changed dns to 1.1.1.1, i was able to reach the internet but still i am anable to connect from the outside to my ddns. And i checking through putty the sudo wg situation, there isn’t a handshake as it should. I am rather troubled by all of this….
I am a little confused on what you mean by “connect from the outside to my DDNS”? DDNS ensures that the domain name being used is always updated with your external IP address. Typing that into a web browser won’t necessarily do anything unless you’re exposing something on your local network (via port forwarding).
Well yes, for that reason I have opened a port. So in theory it should give me the ability to connect to my system/server with wireguard at least for pihole on the go. It doesnt though and i am perplexed.
What is your goal for using WireGuard? You want a full-tunnel VPN connection that will use Pi-hole as DNS? This shouldn’t be too difficult to get working, but if 1.1.1.1 worked as your DNS server, then it’s a Pi-hole issue. What are you setting as the DNS server when you try and get Pi-hole working?
Hi WunderTech,
Thanks for your help above. Though when I changed my DNS server as Google, when I created a PiVPN profile, and added to my device. My device could not connect to the Internet as before.
Here is my PiVPN debug report:
::: Generating Debug Output
:::: PiVPN debug ::::
=============================================
:::: Latest commit ::::
Branch: master
Commit:
Author: Orazio
Date: Wed Sep 15 17:52:17 2021 +0200
Summary: Important change to custom MTU handling (mainly to fix issue #1357)
=============================================
:::: Installation settings ::::
PLAT=Raspbian
OSCN=buster
USING_UFW=0
IPv4dev=eth0
IPv4addr=192.168.0.18/24
IPv4gw=192.168.0.1
install_user=pi
install_home=/home/pi
VPN=wireguard
pivpnPORT=51820
pivpnDNS1=8.8.8.8
pivpnDNS2=8.8.4.4
pivpnHOST=REDACTED
INPUT_CHAIN_EDITED=0
FORWARD_CHAIN_EDITED=0
pivpnPROTO=udp
pivpnMTU=1420
pivpnDEV=wg0
pivpnNET=10.6.0.0
subnetClass=24
ALLOWED_IPS=”0.0.0.0/0, ::0/0″
UNATTUPG=1
INSTALLED_PACKAGES=()
=============================================
:::: Server configuration shown below ::::
[Interface]
PrivateKey = server_priv
Address = 10.6.0.1/24
MTU = 1420
ListenPort = 51820
### begin zwu-sam ###
[Peer]
PublicKey = zwu-sam_pub
PresharedKey = zwu-sam_psk
AllowedIPs = 10.6.0.2/32
### end zwu-sam ###
=============================================
:::: Client configuration shown below ::::
[Interface]
PrivateKey = zwu-sam_priv
Address = 10.6.0.2/24
DNS = 8.8.8.8, 8.8.4.4
[Peer]
PublicKey = server_pub
PresharedKey = zwu-sam_psk
Endpoint = REDACTED:51820
AllowedIPs = 0.0.0.0/0, ::0/0
=============================================
:::: Recursive list of files in ::::
::::[4m/etc/wireguard shown below ::::
/etc/wireguard:
configs
keys
wg0.conf
/etc/wireguard/configs:
clients.txt
zwu-sam.conf
/etc/wireguard/keys:
server_priv
server_pub
zwu-sam_priv
zwu-sam_psk
zwu-sam_pub
=============================================
:::: Self check ::::
:: [OK] IP forwarding is enabled
:: [OK] Iptables MASQUERADE rule set
:: [OK] WireGuard is running
:: [OK] WireGuard is enabled (it will automatically start on reboot)
:: [OK] WireGuard is listening on port 51820/udp
=============================================
:::: Having trouble connecting? Take a look at the FAQ:
:::: https://docs.pivpn.io/faq
=============================================
:::: WARNING: This script should have automatically masked sensitivity ::::
:::: information, however, still make sure that PrivateKey, PublicKey ::::
:::: and PresharedKey are masked before reporting an issue. An example key ::::
:::: that you should NOT see in this log looks like this: ::::
:::: YIAoJVsdIeyvXfGGDDadHh6AxsMRymZTnnzZoAb9cxRe ::::
=============================================
:::: Debug complete ::::
:::
::: Debug output completed above.
::: Copy saved to /tmp/debug.log
:::
There’s nothing that I see that’s out of the ordinary. When you connect to WireGuard (even if it doesn’t work), can you check to see if the client is connected through the terminal?
Hi WunderTech,
Appreciate again for your help.
After connecting to the wireguard VPN on my laptop, I could still not connect to the Internet.
Here is the VPN profile on my laptop:
[Interface]
PrivateKey =
Address = 10.6.0.3/24
DNS = 8.8.8.8, 8.8.4.4
[Peer]
PublicKey =
PresharedKey =
Endpoint = My_IP_Address:51820
AllowedIPs = 0.0.0.0/0, ::0/0
I figured when I connect the VPN, the listening port is 54851.
And data only shows sent out, not receiving.
Anything I did wrong over these setups?
When you say that the listening port is 54851, did you change that? Generally, that should be 51820 which matches what the client is connecting to.
No, I didn’t change the listening port. And I realized it changed every time I connect the WireGuard VPN.
That is most likely the issue, however, I am not sure why it keeps changing. The listening port and server port should both be the same (51820).
First of all thanks for all the time you are taking to troobleshoot. Well, a full or split tunnel vpn with wireguard using pi-hole/unbound as dns and have the ability of remote access. My setting is a custom 127.0.0.1#5335 and i think pi-hole is working.
Glad to try and help! Is Unbound working without WireGuard connected? If it is, what do you have set as the DNS address for the WireGuard client?
Yes it does work without it cause i had set it about a month prior. You don’t mean the duckdns adress or i understand something wrong? A lot of steps were done by pivpn and maybe i have missed something!
From what I’ve read (haven’t tried it myself), the process is not as simple as just setting up WireGuard and Unbound separately. Have you searched Google to see how to implement it? I’m afraid that following both of my tutorials would mean that one or the other would work, but not both at the same time.
Ahh this then poses an entire different set of issues i hadn’t realise they exist. Thank you i’ll try and find a solution for that and come back with my findings or pihole and wireguard alone 😛
Hi there,
I have been trying to setup Wireguard VPN on Raspberry pi 4GB using PiVPN. The process is successful when using LAN (my raspberry LAN ip is different from eth0 ip). But when I used the eth0 to set it up (meaning I connect the raspberry pi to my router with a cable) I can’t get the VPN to work. I have also changed the Port forwarding IP on my router according to LAN/eth0 IP. Am I doing anything wrong? I just want to do this thinking that it would improve the internet speed!
Thank you for your help!
When you say that the Eth0 IP is different than the LAN IP address, what exactly do you mean? Are you using Wi-Fi or anything? Generally, the LAN IP address and the Eth0 IP address should be the same.
Great tutorial I was able to set up WireGuard in an evening. I initially set up full tunneling. My goal was to be able to access my devices on my local network while out of the house. I can connect to the vpn while on an outside wifi but I cannot access devices on my local network. However if I switch my phone to cellular and connect to the vpn and I can access devices on my locale network . I added split tunnel with the same results.
Sorry about that, I have to moderate the posts due to tons of spam that I receive.
So when you say that it works on the mobile network, it does everything that you expect? Is it only a single external Wi-Fi network that isn’t working, or is all of them?
It’s any Wi-Fi network, I tried it on two different networks. One is our network at work it’s not part of our corporate network we call it the dirty feed. It’s a Spectrum business network and I control the router. I’ve tried it on my mother-in-laws network Spectrum residential account netgear wireless router. As I’m writing this the one at work is double NAT only because the router is in my office and we have not moved it yet at which time I will configure the modem as pass through. My mother-in-laws was configured for pass through but they replaced it a month ago and I don’t remember if I reconfigure it.
I just tried it on another Wi-Fi net that I know is not double NAT and still no luck. I’m going to do a clean install.
Yes, a clean install is best, but is your network double NAT? That could be the problem.
Hi,
I followed your tutorial and everything works fiine. But I have one problem. I tried to set up a split tunnel and a full tunnel, did everything as stated. After a bit of try and error it seems as if the qr code is generated when the client is generated. If I change a config of a user, the qr code does not get updated. Only way for me to solve this was to edit /etc/pivpn/wireguard/setupVars.conf to set allowed IPs for a split tunnel and generate a client. Is there a way to renew the created QR code?
I believe that that’s a bug with WireGuard unfortunately. One of the easier methods (that I’ve found) is to manually edit the config in the WireGuard client, though your option is probably better if you’re using that client multiple times.