In this tutorial, we’re going to look at how to set up WireGuard in OPNsense. WireGuard is a fairly new VPN protocol that is fast, simple, and lean when compared to something like OpenVPN.
OpenVPN has the benefit of longevity, but WireGuard is the newer and faster protocol that many people are interested in using. I’ve been using WireGuard for a few years now (on various devices) and have been very happy with how it performs.
I also want to point out that if you’re running OPNsense, it makes sense to run WireGuard there. There are plenty of devices where you can run it, but generally, I find it best to run WireGuard in OPNsense (or any router, for that matter).
How to Set Up WireGuard in OPNsense
The step-by-step guide below will show how to configure WireGuard in OPNsense following best practices.
Step 1: Installing the WireGuard Plugin
1. Select System, then Firmware, and finally, Plugins.
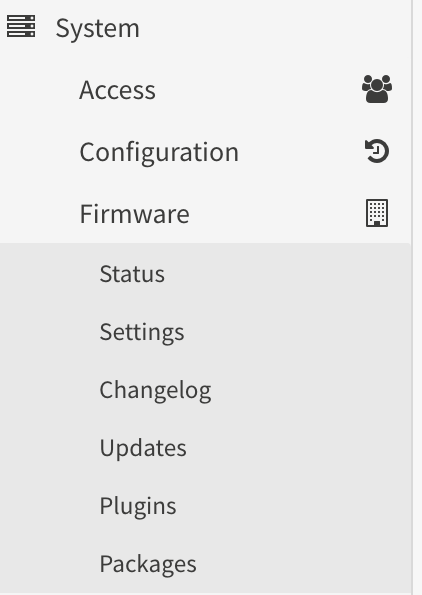
2. Search for WireGuard, then install WireGuard by selecting the + icon next to os-wireguard the plugin.

3. After the WireGuard package finishes installing, refresh your web browser, select VPN, then WireGuard.

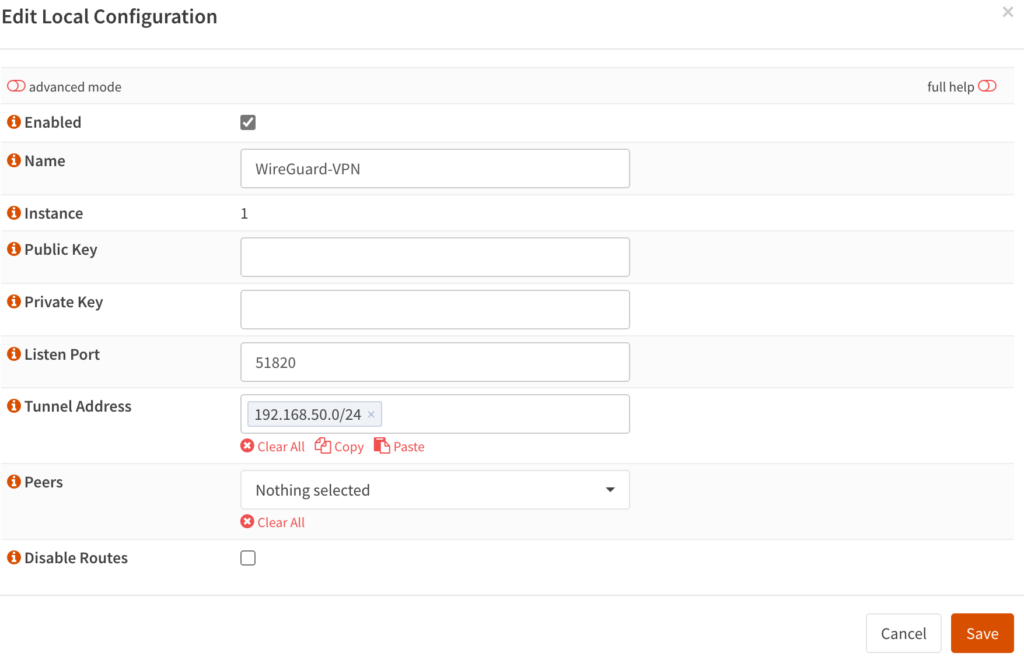
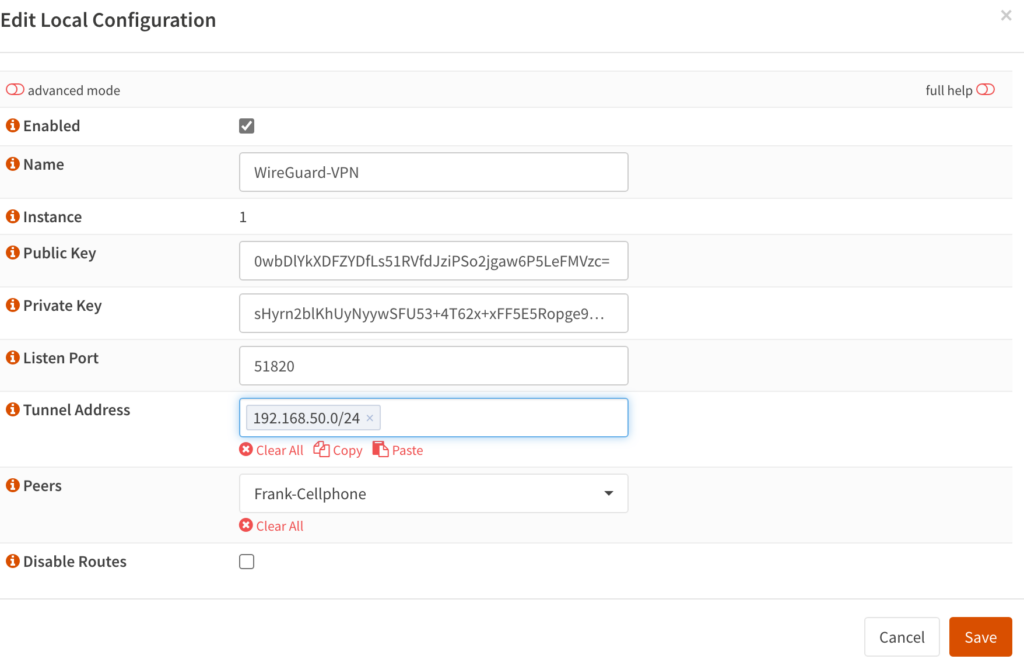
4. Select Local, then select the + icon to create a new local tunnel.

5. Enter the name as WireGuard VPN, set the Listen Port as 51820 (UDP), then enter a tunnel address. This can be whatever you want it to be, but make sure you set it as something that’s not currently in use, then save.
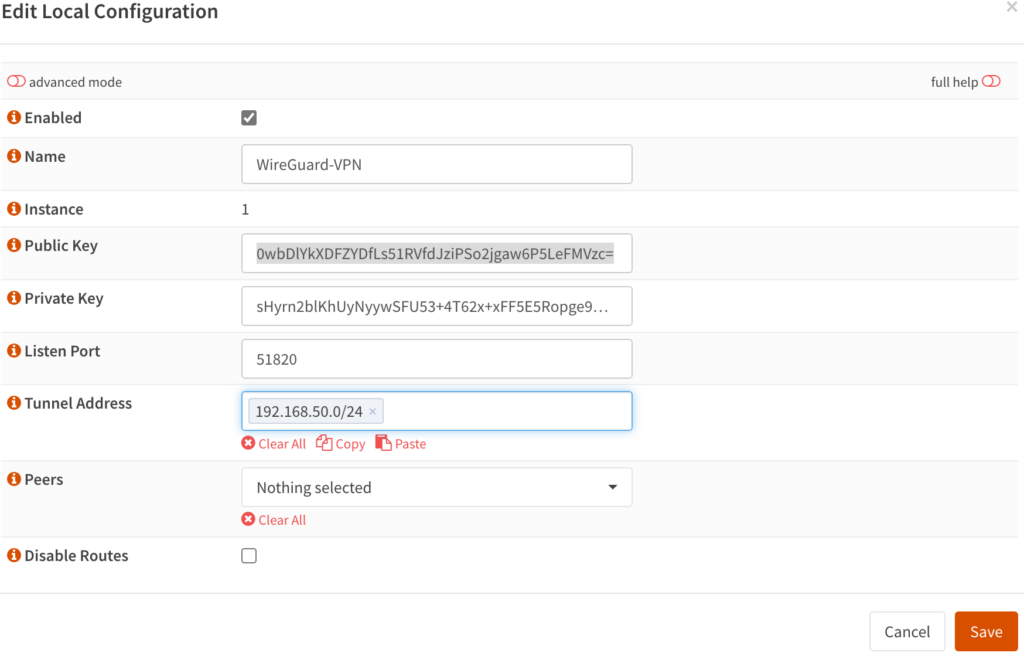
6. Now that the local tunnel has been created, edit it and you will see that the public key and private key will be populated. Copy the public key as we will need it for our client configuration.
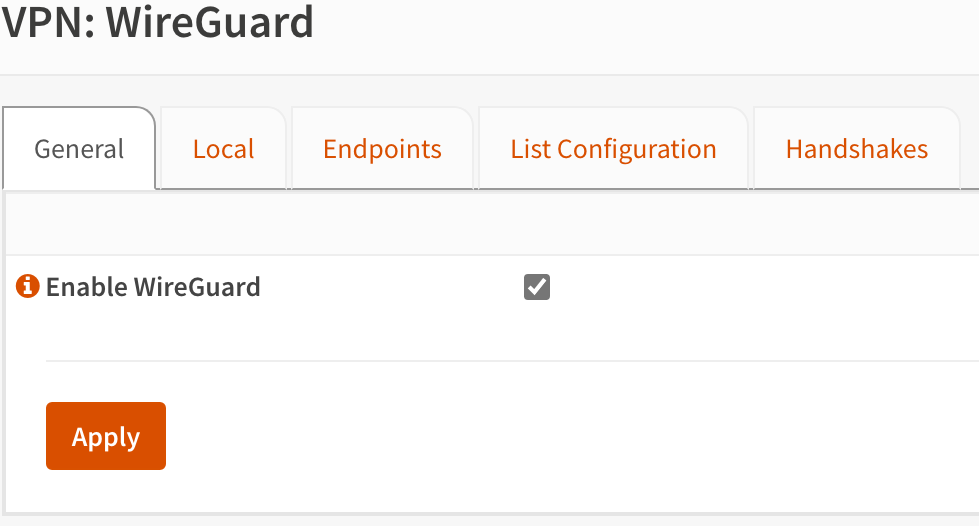
7. For this last step, we will enable WireGuard by selecting General, checking off Enable WireGuard, then selecting Apply.
Step 2: Configuring the OPNsense WireGuard Interface & Firewall
Now that the WireGuard tunnel has been configured, we need to shift our focus to the interface and firewall.
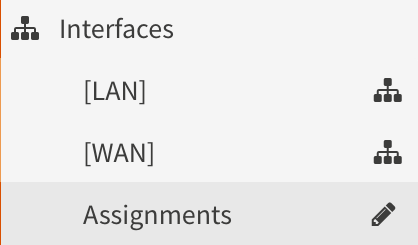
1. Select Interfaces, then Assignments.
2. Select + next to the wg1 interface to add the new interface.

3. Select the interface name (in the example below, OPT1).

4. Select the checkmark next to Enable and Lock to enable the interface and ensure it isn’t removed. Modify the description if you’d like. You can then save this interface, then apply the changes.

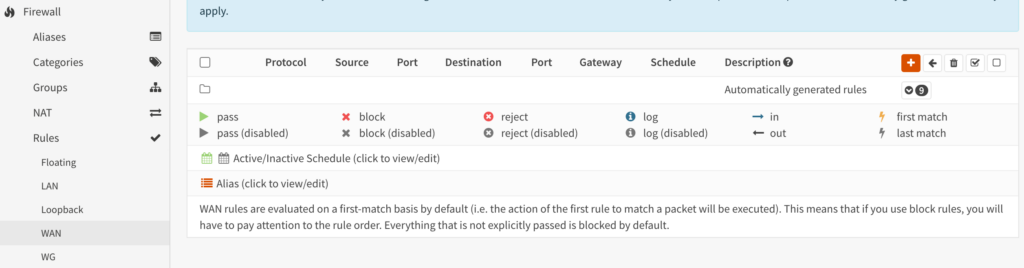
5. After the interface has been enabled, we’re going to create our WAN and WG firewall rule. Select Firewall, then Rules, and finally, WAN. Select the + symbol to create a new firewall rule.
6. Everything can stay as default other than these settings.
Protocol: UDP

Destination: WAN Address

Destination Port Range: Other (51820)

Description: WireGuard VPN

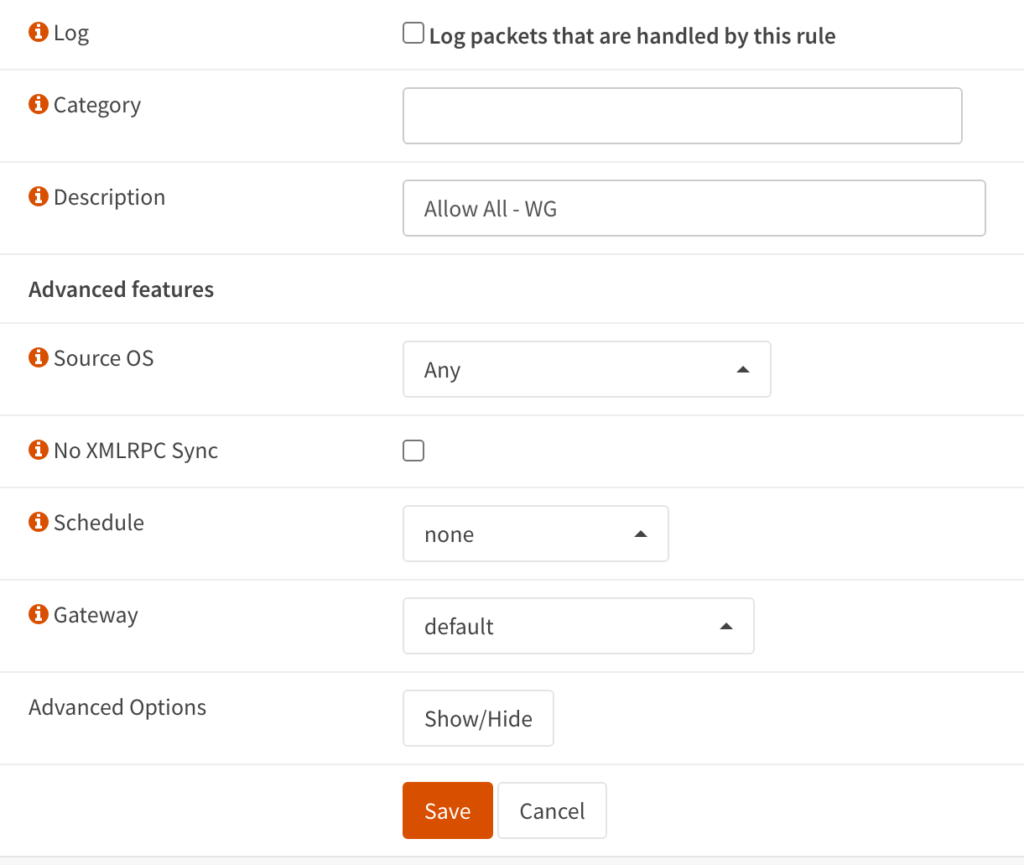
7. We have to create one more firewall rule which will allow traffic on the WG interface that we created above. Select WG under Rules (you may have named it something different), then the + icon to create a new rule.

8. Set the description as Allow All – WG, and everything can stay as default (we are allowing all traffic to everything).
NOTE: If you do want to limit traffic, you can modify this firewall rule in any way that you’d like.

After making the changes above, you can save and apply the changes. The WireGuard server has been configured and all settings have been properly adjusted. At this point, you can move on to the peer configuration.
Step 3: Peer Configuration for WireGuard
The WireGuard peer configuration is the final step that we need to perform before our VPN server will be accessible. Peers are devices that you will be connecting from, meaning that you should create one for each device or user.
We will take a look at how to create one below, but you might have to follow this step multiple times. In my opinion, it’s easiest to set this up using a WireGuard application (to generate the keys), so I’ll be using the Windows version of WireGuard below, but all of the applications should be very similar.
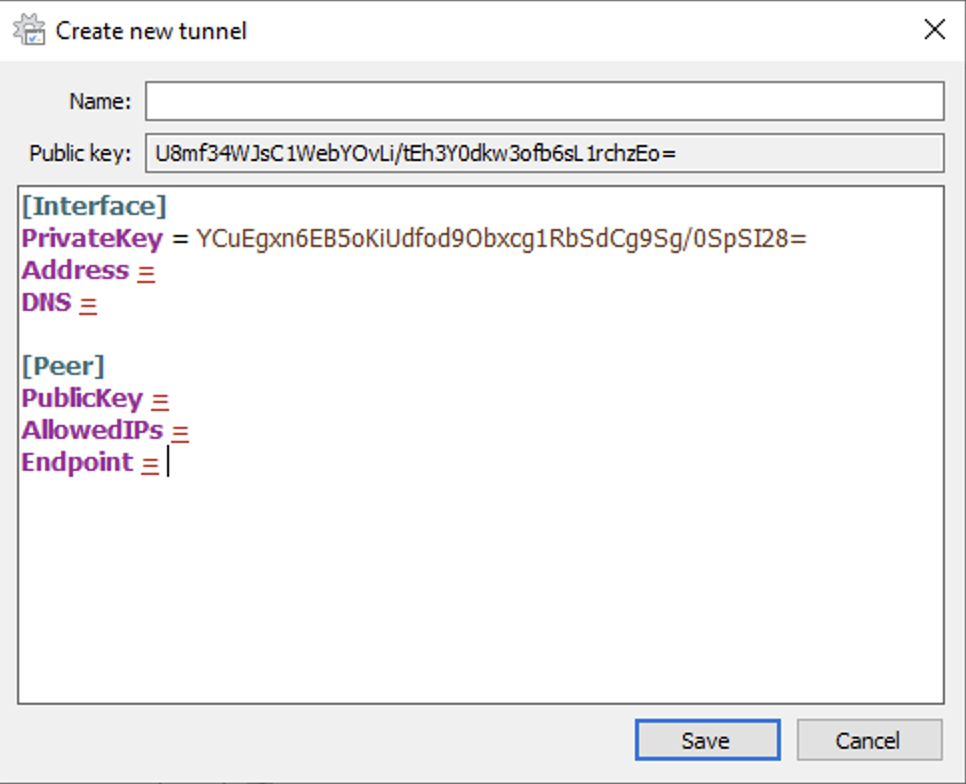
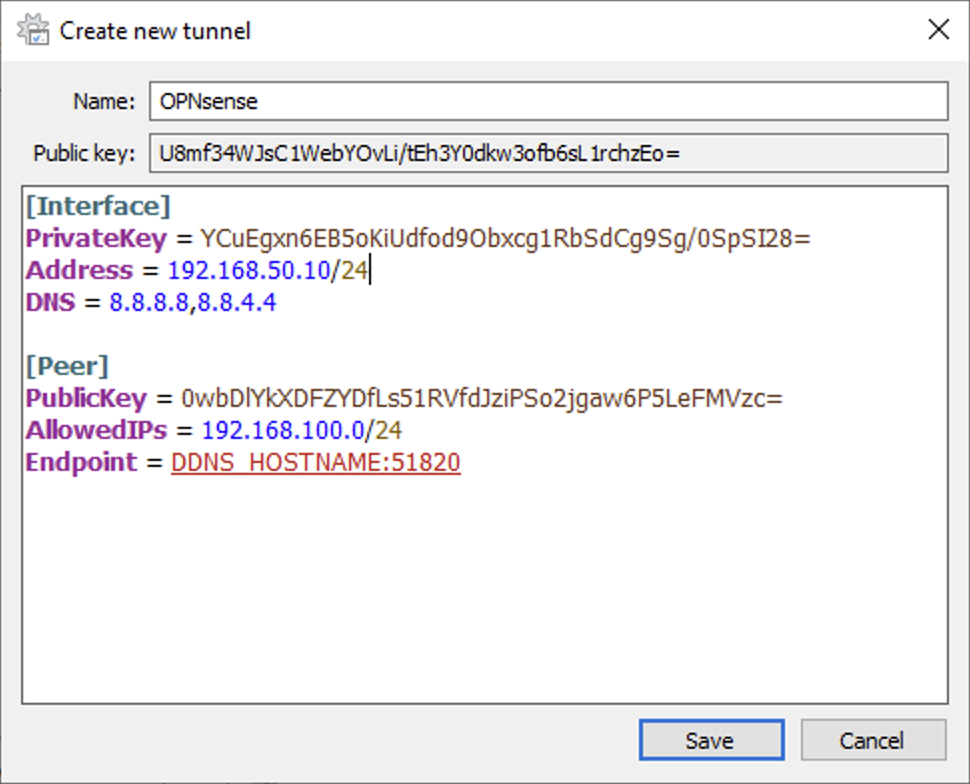
1. After creating a new tunnel on the Windows WireGuard application, you’ll see that a Public and Private Key were automatically created. We will need to fill out all of the options below, but we will first focus on the public and private keys. Copy the Public Key, then head back to OPNsense.
2. Select Endpoints, then select the + symbol to create a new endpoint.
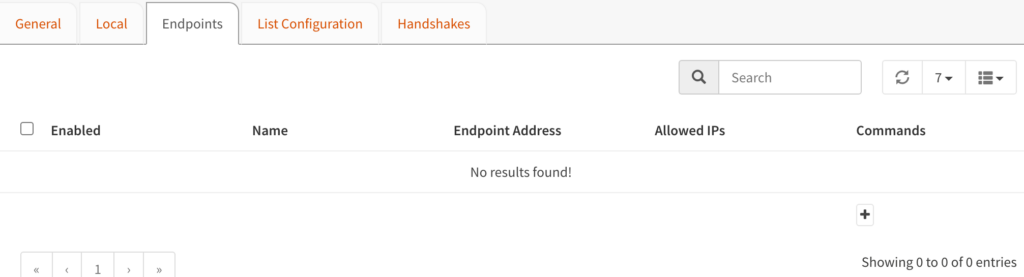
3. Enter the information below:
- Name: Name for peer.
- Public Key: Public Key from the Peer (our Windows Public Key above)
- Allowed IPs: Individual IP address this peer will use on the subnet we defined above. This will be the IP address that will be assigned to this peer.
After editing all of the settings, you can save the endpoint.
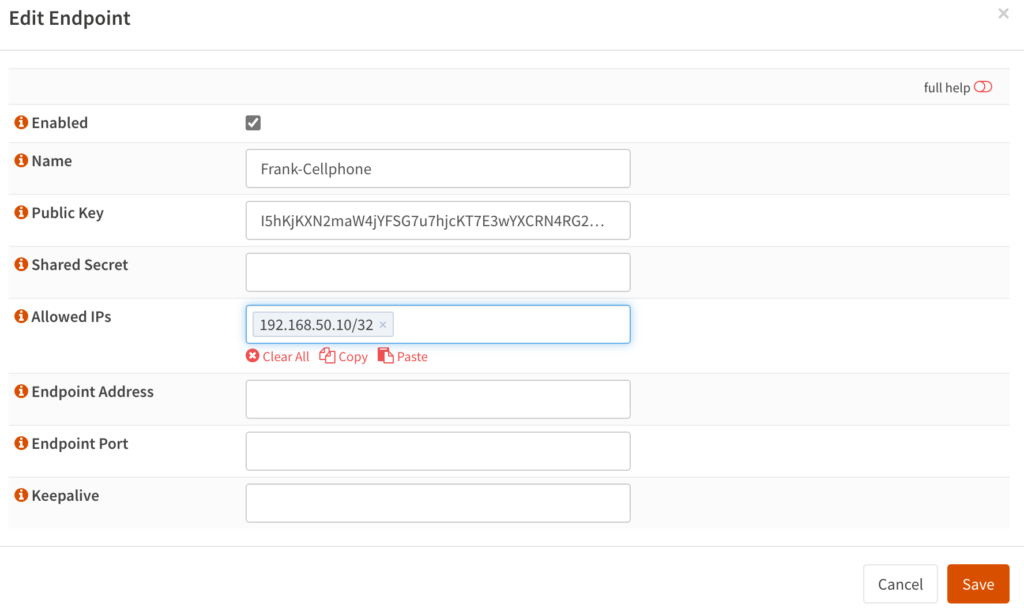
4. After the configuration has been saved, edit the local configuration and add the peer we just created. Also, copy the Public Key as we will need it at the next step. When you’re done, save.
5. Switch back to the peer to finish configuring the rest.
Interface Settings
- Address: This is the address we defined in the OPNsense endpoint, but with /24 instead of /32.
- DNS: The DNS server(s) you’d like to use (I am using Google in this example).
Peer Settings
- PublicKey: The public key of our WireGuard Tunnel (Local > Public Key).
- AllowedIPs: The IP Addresses you want to access on this tunnel (0.0.0.0/0 for full tunnel). Please refer to the split-tunnel vs. full-tunnel information below to modify the AllowedIPs if desired.
- Endpoint: Your external IP address or DDNS hostname and port 51820.
If you save this new tunnel and connect to the VPN using an external network (cell phone is perfect), you should be able to connect and access your local network! Please refer to the next step to understand the difference between a full tunnel and split tunnel VPN in the AllowedIPs section (as you might want to set up both) .
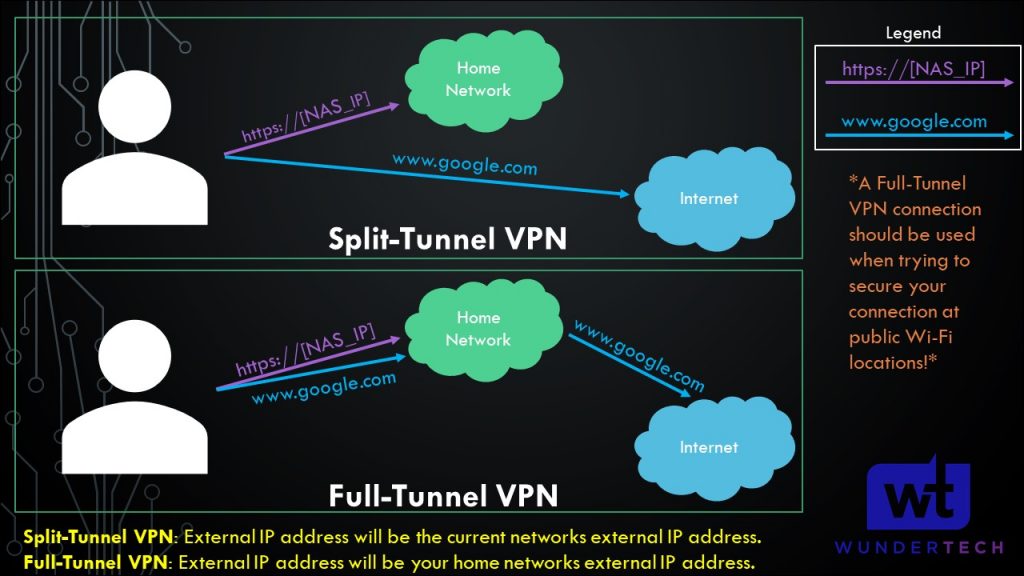
Full Tunnel & Split Tunnel VPNs
The example above is for a split tunnel VPN, meaning that only traffic for the 192.168.100.0/24 subnet will be routed over the VPN tunnel. You can add multiple subnets here, or you can use 0.0.0.0/0 for a full tunnel VPN.
- Split-Tunnel VPN: Traffic is only sent through your network if it is attempting to access an internal resource (192.168.100.0/24 in my example). Your IP address when navigating to a site outside of your network will be the IP address of the network that you are currently on.
- Full-Tunnel VPN: All traffic is sent through your VPN tunnel. Your IP address for internal and external requests will be the network that WireGuard is set up on. I created a very basic image below that explains this.
It’s important to understand that both VPN types will allow you to access your local network. This only shows how traffic is routed differently to external networks.
NOTE: This is not the exact network flow. I am simplifying the process as much as I can.
Conclusion & Final Thoughts
This tutorial looked at how to set up WireGuard in OPNsense. As someone who uses WireGuard in pfSense, it was significantly easier to set up WireGuard in OPNsense. Overall, the process is extremely straightforward and the settings all make sense. I am a huge fan of WireGuard and this is one of the easiest devices that you can set it up on.
Thanks for checking out the tutorial on how to set up WireGuard in OPNsense. If you have any questions, please leave them in the comments!