Today we are going to install AdGuard Home on OpenMediaVault using Docker and Portainer.
AdGuard Home is fairly straight forward to set up on OpenMediaVault and we will be using Portainer to configure it. Portainer is a web interface that manages docker containers, so it’s a powerful tool to get accustomed to using!
Before we get started, it is incredibly important to note that having redundant DNS servers is very important. I highly suggest that you purchase a cheap Raspberry Pi Zero and configure AdGuard Home on it so that you have two Pi-hole DNS servers. This will ensure that when your NAS is rebooted, your clients do not lose DNS resolution services.
Instructions – AdGuard Home OpenMediaVault
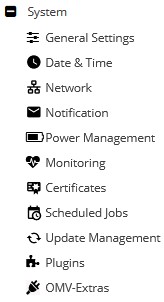
1. Login to OpenMediaVault and select OMV-Extras on the left-hand side. If you don’t have OMV-Extras, you will need to install it from the Plugins section.
2. Select the Docker tab, then click the Docker drop-down and select Install. Docker will now install.
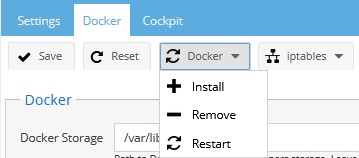
3. Select the Portainer drop-down and select Install. We will be using Portainer to install AdGuard Home.
4. When Portainer finishes, restart your Raspberry Pi and when it comes back up, Open Portainer.

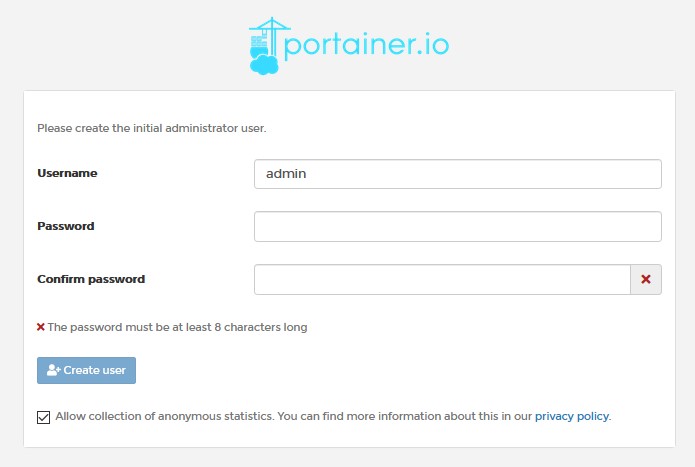
5. Set up your username and password for Portainer.
6. Select Docker and then Connect.
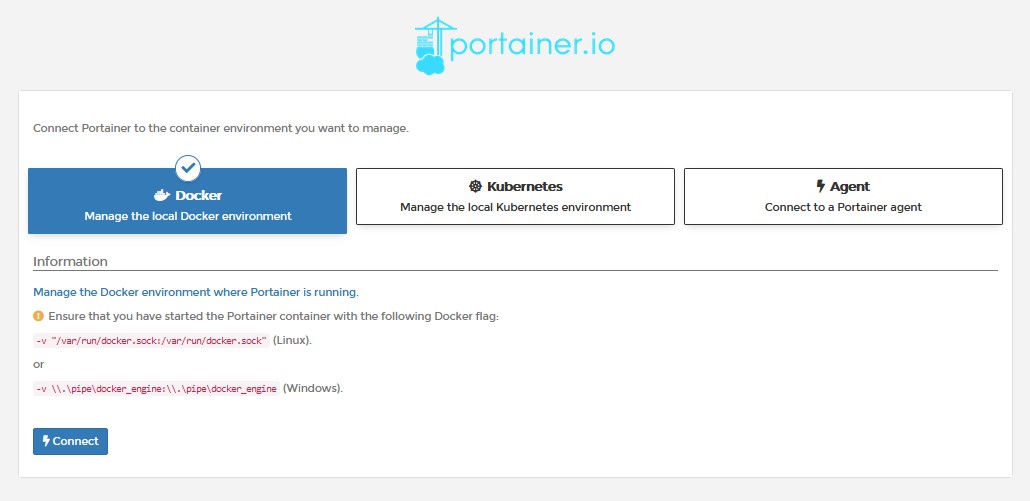
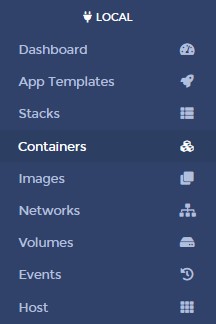
7. Select Local. Leave this up in the background and we will get back to it in a few steps.

8. Now that Portainer is set up, we need to create a docker macvlan network interface. SSH into your OpenMediaVault server. We need to determine what network interfaces currently exist and note down the adapter name. To do this, run the command below and note down the network interface name that has your Raspberry Pi’s IP address (in this example, mine is enxb827eb03ae0e).
ifconfig

9. Next, you need to run the command below while substituting the correct subnet (most are 192.168.1.0/24 by default) and network interface ID (mine is enxb827eb03ae0e). You also need to pick an IP address that you’d like to use that’s not currently in use. I will be using 192.168.1.195. NOTE: ag_network will be the name of the network (you can substitute this as you’d like). The items listed below in pink might need to be updated when you run this command.
sudo docker network create -d macvlan -o parent=enxb827eb03ae0e --subnet=192.168.1.0/24 --gateway=192.168.1.1 --ip-range=192.168.1.195/32 ag_network
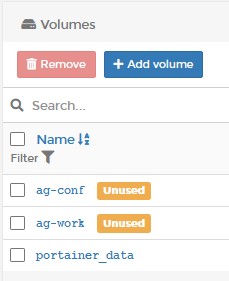
10. The network interface is now setup. Go back to Portainer and select Volumes.
11. Select Add Volume and add two total volumes. One with the name ag-work and one with the name ag-conf.
12. Select Containers and then Add Container.

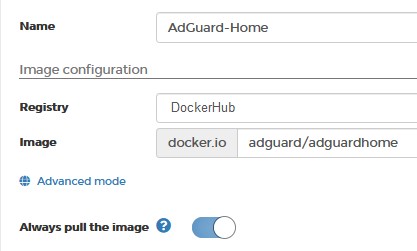
13. Give the container a Name and then in the Image section, enter adguard/adguardhome.
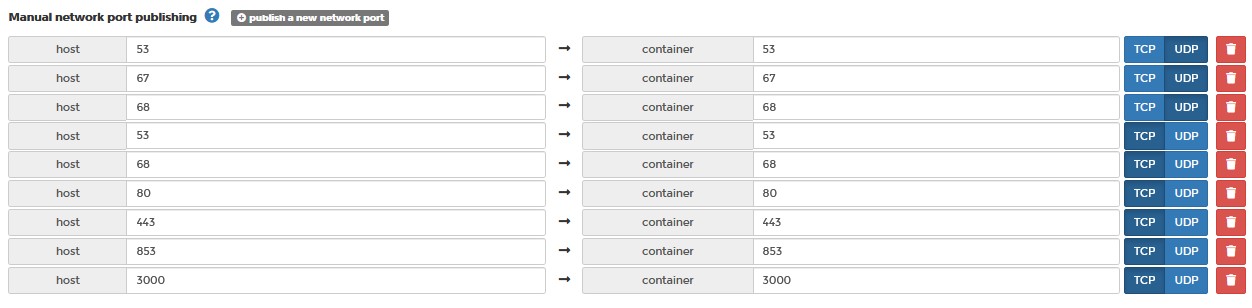
14. Select Publish a new network port nine total times and match the ports as the screenshot below shows. NOTE: Ensure that you have the three top ports (53, 67, 68) set as UDP ports and the rest (53, 68, 80, 443, 853, 3000) are set as TCP.
15. Select Volumes and select map additional volume twice. Enter the first container as /opt/adguardhome/conf and select the ag-conf volume. Enter the second container as /opt/adguardhome/work and select the ag-work volume.

16. In the Network tab, select the macvlan network we created earlier.

17. In the Restart Policy, change this to Always. This will force AdGuard Home to always start when Docker starts.

18. Select Deploy the container. The container will take a few minutes to fully download and install, but when it’s done and reporting running, you will be able to access the AdGuard Home web admin interface using the macvlan IP address you assigned and port 3000!
http://[macvlan_IP]:3000
19. Select Get Started to start the configuration process.
20. Change the listen interface to the IP address of OpenMediaVault.

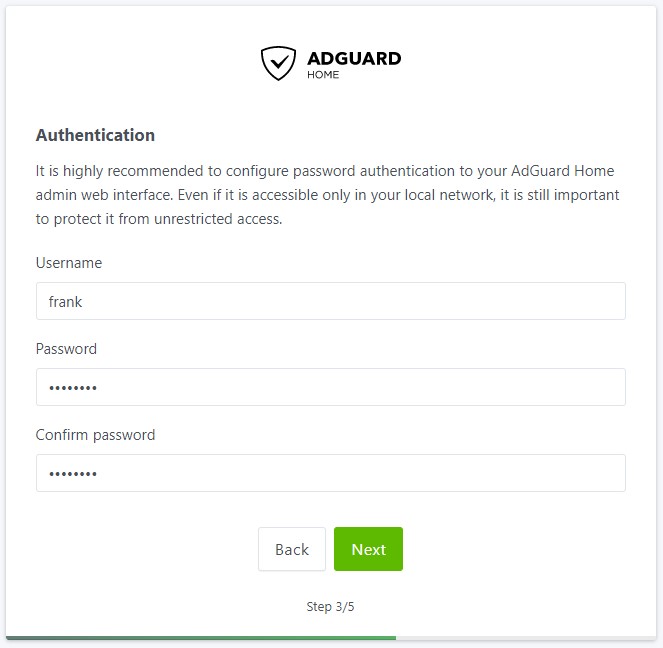
21. Specify a username and password.
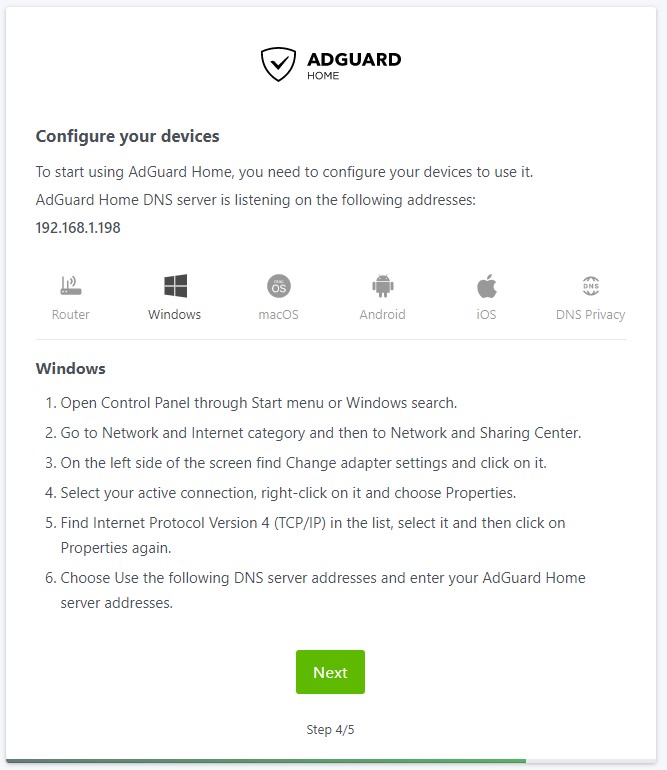
22. The next screen will show you how to configure different devices. My preferred approach is setting AdGuard Home to be my router’s DNS server. If you aren’t interested in doing that, this is a great section to learn how to set up the DNS server on your local device (Windows, Mac, etc.).
23. Select Next and then Open Dashboard. Sign in when prompted.
24. AdGuard Home is now set up and installed. Please note that you will no longer use port 3000 when navigating to the web portal. After the setup process is complete, you will be able to access the management portal using the IP address only (as it uses port 80).
http://[macvlan_network]
Conclusion
Setting up AdGuard Home on OpenMediaVault is fairly straight forward and is a great alternative to Pi-Hole. Once again, I recommend that you set up a second instance of AdGuard Home so that you have redundant DNS servers.
Thank you for reading the tutorial! As always, if you have any questions, please leave them in the comments!


Which blocking lists do you prefer for adguard home?
I generally use the default AdGuard Home blocking lists as I’ve had a lot of luck with them. They tend to block 90-95% of the ads that my customized Pi-Hole configuration blocked, so I was happy with that.
I did experiment with this block list and didn’t notice a huge difference, but it didn’t hurt anything so it can’t hurt to try! https://abp.oisd.nl/
Thanks a lot for checking out the tutorial!
I just want to thank you for this great tutorial. There are many on the internet I tried, but this is really straightforward. Thanks again and keep up the good work.
Thanks so much, I’m glad to hear that it helped!
I got a problem
sudo docker network create -d macvlan -o parent=veth456456d@if4 –subnet=192.168.1.0/24 –gateway=192.168.1.1 –ip-range=192.168.1.150/32 bha_network
gives me this message:
Error response from daemon: invalid subinterface vlan name veth456456d@if4, example formatting is eth0.10
Been searching on the net for some with same problem, but can’t find any.
I’m running on a pc with linux
Any idea what I’m doing wrong. I’ve done all steps and double checked them too, but can’t see anything I’ve done wrong-
That network interface name seems a little off. It should only be characters (no @). Have you tried just “veth456456d”?
That worked, thanks a lot.
My network name is eth0, is that normal?
Yes, that’s normal!
Also, what would you recommend between adguard and pihole, considering that I’m a complete noob at this and would have to look up tutorials for everything?
If you want to set it up and forget about it, definitely AdGuard Home. If you want to tinker and have a little more customization, then Pi-Hole.
Ok, Adguard Home it is 🙂
Just a few notes, since I’m following the tutorial:
Step 3 says “We will be using Portainer to install Pi-hole”, I assume that’s a copy/paste from an older, different guide.
Step 9 says ” The items listed below in pink might need to be updated when you run this command.” – but there’s nothing in pink below.
Also, the recommended subnet is 192.168.1.0/24, but I already have some devices with reserved IPs in that range, including the Rpi and the router. What to do? 🙂
1. You are correct, my apologies for the mistake and thanks for highlighting that! I just updated it.
2. Hmm, the items were pink on my screen. I just made an update and I’m hoping that fixed it. If it didn’t, I am talking in specific about the parent ethernet adapter name and the subnet (192.168.1).
3. That is the entire subnet range, so that should stay as-is.
Thanks for the feedback and let me know if you have any other questions!
I managed to get it working, but I’m wondering about a few things:
– the macvlan network only worked initialized when I pasted that string into command line, not when I tried to create it from Portainer, and I’d like to know why 🙂 It said something about the Portainer one being configuration only, but I don’t have an option to put it live in Portainer.
– still reading about subnets, and I’m not sure how many IP’s are in the 192.168.1.195/32 range, and which are they exactly. And if I can use them for other containers or I should create another one.
Glad to hear you got it working!
1. Ironically, this has never worked in Portainer. Not entirely sure why to be honest, but I know that it needs to be done through the command line.
2. The /32 subnet is that IP address ONLY. So 192.168.1.195 is the only “range” when using /32, in essence, making it a static IP address. This will only work for one container.
Yeah, figured out that about subnets finally, still seems very arcane and hard to grok. Is it worth it to create a vlan for just one IP, though?
You’re mostly doing it so that you have your own port configuration which can avoid issues down the road. If you don’t anticipate any problems (or expansion), you can feel free to use the host network interface!
Very Nice tutorial mate thanks for the easy deploy
Thanks for checking out the tutorial!
I still don’t quite understand the full Docker mentality, so I’m just mashing keys following your steps blindly — and so far so good. I’ve got Pi-Hole up and running, and wanted to try out AdGuard — but when I try to create a secondary “static” network, I get the following:
Error response from daemon: failed to allocate gateway (172.16.1.1): Address already in use
A quick google-foo shows me that this is not possible?
Thanks!
Are you using the same IP address? If you already created a network for Pi-hole, you can use that once (since you probably want to run AdGuard OR Pi-hole and not both). You might be able to create a secondary macvlan network, but since both are DNS servers, I’d probably just use the ph_network instead of creating a new one.
Thanks for the response. I did want to have Pi-Hole and Adguard running side by side, with their own unique IP addresses.
I don’t think you can create multiple macvlan networks.
And iirc, I the ph_network that was configured has a specific /32 address assigned (which would be consumed by Pi-Hole… so not sure how to approach that. Maybe VLSM?
If you have one network port on your device, you are probably better off leaving it as one macvlan network. From what I’ve read, there are ways to do it, but none are particularly straight forward. Are you using this device as primary/secondary DNS servers or are you using Pi-hole for certain devices and AGH for others? If it’s primary/secondary, you probably would be better off buying a cheap Raspberry Pi (RPi Zero is fine for $10), so you have redundancy. Without redundancy, when your OMV server is restarted, you will lose domain resolution.
Sorry, I know I’ve responded twice now. My theory is something like the following. I did something like this as per your guide:
docker network create -d macvlan -o parent=enx001e0632bf0c –subnet=172.16.1.0/24 –gateway=172.16.1.1 –ip-range=172.16.1.31/32 pihole_network
Which was great, for a single docker image. But — by specifying –ip-range=172.16.1.31/32, and then also specifying it within the docker container itself, I’m duplicating myself and also painting myself into a corner.
After some quick Google-foo (https://corcoran.medium.com/docker-with-macvlan-networking-on-synology-dsm6-741285a0297d) and some subnetting spreadsheets (because who honestly remembers how to do VLSM in their head anymore, I think the following might make more sense:
docker network create -d macvlan -o parent=enx001e0632bf0c –subnet=172.16.1.0/24 –gateway=172.16.1.1 –ip-range=172.16.1.200/29 macvlan_network
In theory, I’ve now sliced up the network to give me (5) usable docker IP’s — 172.16.1.201-206.
I *should* just be able to delete the previous pihole_network, create the new, and re-attach the Pi-Hole docker image to the new network and everything should work… I hope. (I will likely need to fix some IP’s/subnets on the Pi-Hole container)
But, in theory, I should be able to have Pi-Hole running on 172.16.1.201/29, and AdGuard running on 172.16.1.202/29… with room for more if need be.
Why /29? Because OCD and I use a /24 for everything else… and my DHCP range is .100-.199, so, I’ve got that going for me.
The issue with using anything other than /32 is that you can’t be 100% certain that the IP address will always be what you think it will be (or even what it is right now). For a DNS server, this is critical because if it ever changes, you will lose DNS resolution. You are correct in saying that deleting the network and recreating it (then reattaching it) is an easy option to test with and definitely something that you should do, but I do what to give that disclaimer.
This is also something I was wondering and investigating.
You say you are not entirely sure what ip address, but in adguard or pihole in this case, both are assigned static ip addresses in the docker images.
Then that should work?
I’m also fairly new to this.
Or should we just make /32 macvlans for each docker (so one for pihole and one for adguard?)
The /32 makes it a static IP address, but it can only be assigned to one container. Technically, you can use that one macvlan network interface for both containers, but only one of them can be started at a time. If you want to run both at the same time, creating a second macvlan network interface might be your best bet, but you’ll need a second NIC potentially.
Found a way to use the macvlan with a subnet and add multiple docker containers with each their own ip:
First create macvlan: (I have a bond setup, you chould choose eth0 or …)
docker network create -d macvlan -o parent=bond0 –subnet=192.168.1.0/24 –gateway=192.168.1.1 –ip-range=192.168.1.192/28 Local-LAN
Then create a NEW container with an assigned ip:
docker run –name adguardhome –ip 192.168.1.198 –network Local-LAN -v /volume1/docker/adguard/work:/opt/adguardhome/work -v /volume1/docker/adguard/conf:/opt/adguardhome/conf -p 53:53/tcp -p 53:53/udp -p 3000:3000/tcp -p 3001:3001/tcp -p 80:80/tcp -p 443:443/tcp -p 67:67/udp -p 68:68/tcp -p 68:68/udp -p 853:853/tcp -d adguard/adguardhome
This works for me
Thanks for sharing!
How excatly are you doing it? For me port 53 68, 67, 80, 443 etc. are already used by the OMV configuration webpage and i dont know what 53, 68 and 67 are used, but I cant start the stack because it says those ports are in use.
Did you create the macvlan network interface? That avoids all port conflicts.
I tried to follow your instructions. But when click ‘Deploy’ I get this error:
“failed to create the macvlan port. device or resource busy”
I used this command for Network creation:
sudo docker network create -d macvlan -o parent=vethd542ccb –subnet=172.16.1.0/24 –gateway=172.16.1.1 –ip-range=172.16.1.195/32 ag_network
Note: 172.16.1.* is my local network and 172.16.1.195 is not in use otherwise DHCP range for my router ends at *.190)
Any ideas what I could have done wrong?
Have you created any other macvlan network interfaces? If so, that could be the problem.
I did not.
However, I got it to work by using ‘parent=eth0’ instead of ‘parent=vethd542ccb’.
(No idea why – I just tried….)
Thanks for the great tutorial. works great!
Thank you for for your quick feedback!
But no, this is the only macvlan I have created.
However, I got it finally running by not using ‘parent=vethd542ccb’´ when creating the Network (the name ‘vethd542ccb’ I got as per your instructions via ifconfig), but using ‘parent=eth0’. As I am not so deep in the IT trenches, I am following your instrucions pretty much blindly (and tried eth0 as per some information here in the comment section), so I have no idea why it works this way and if it might have some negative side effects (?).
Othe than that: Thank you for this great turorial.
Glad you got it working!